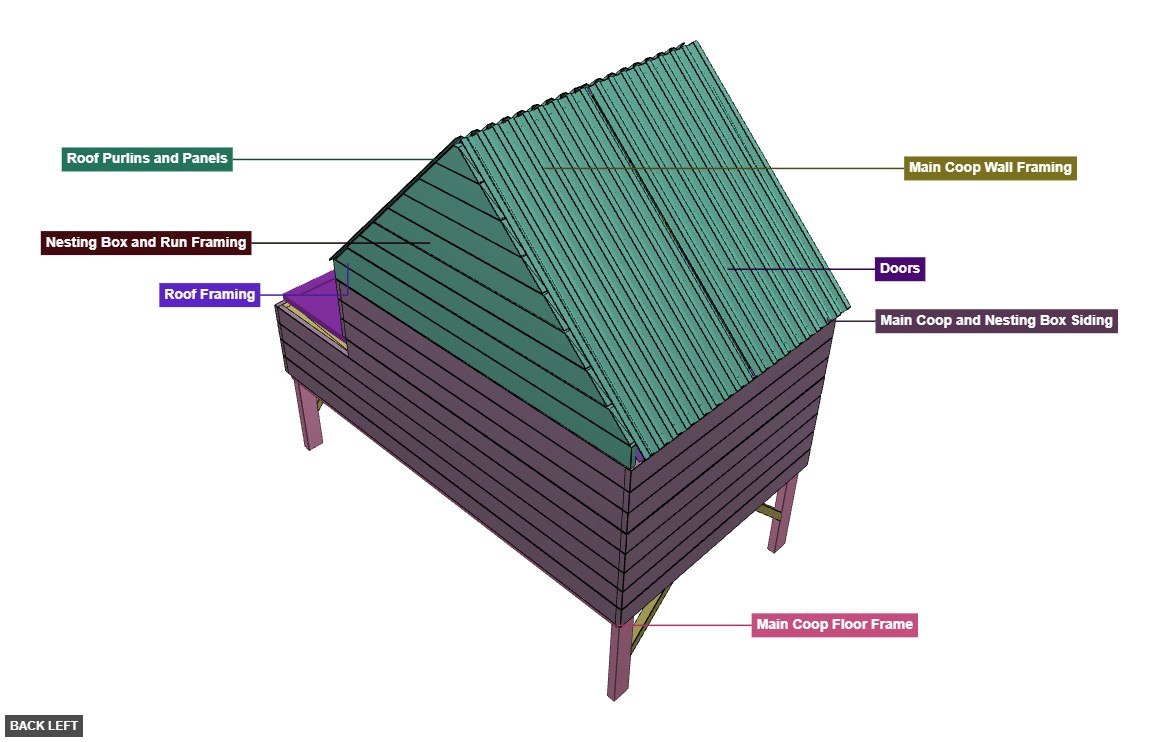
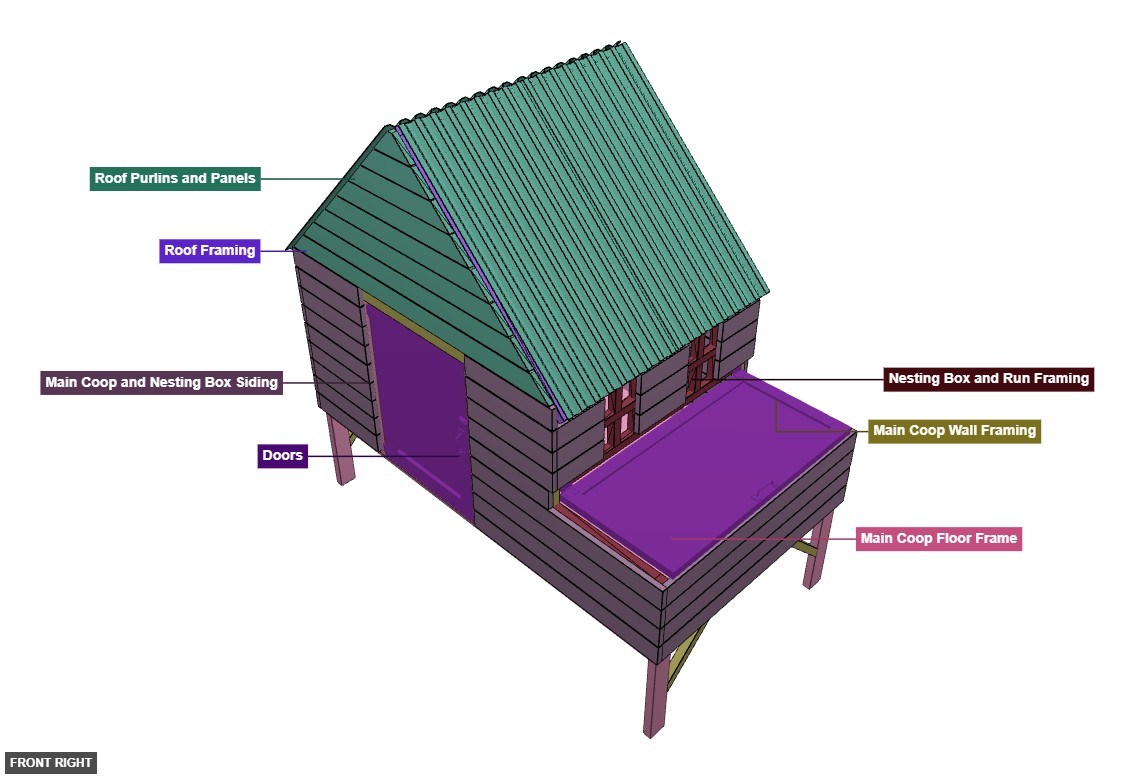
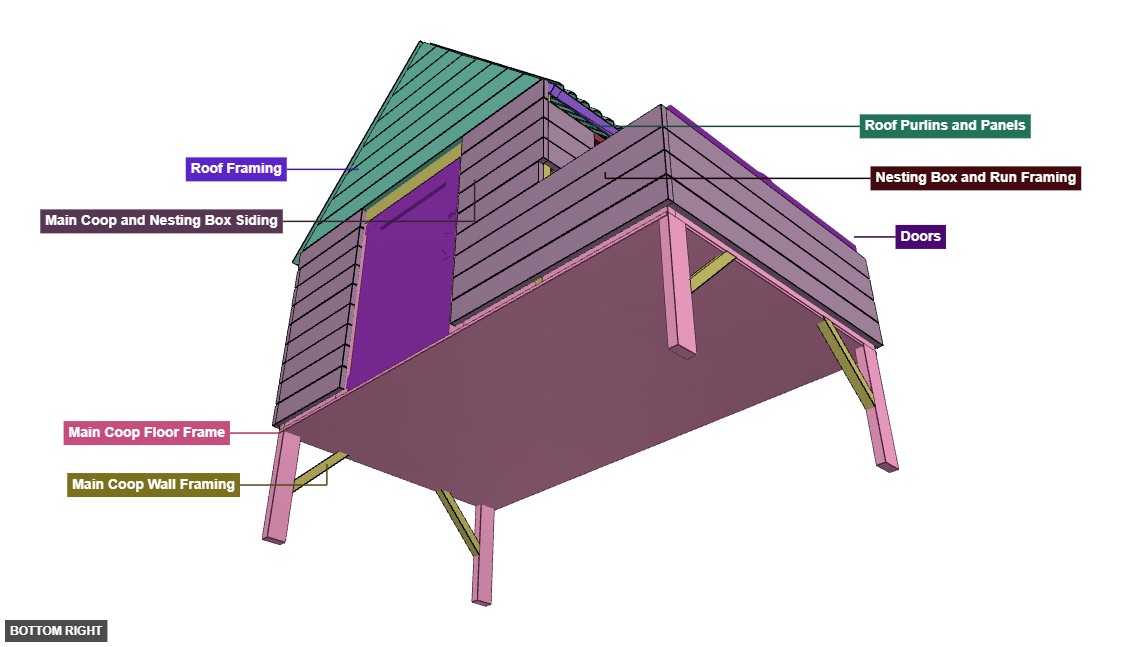
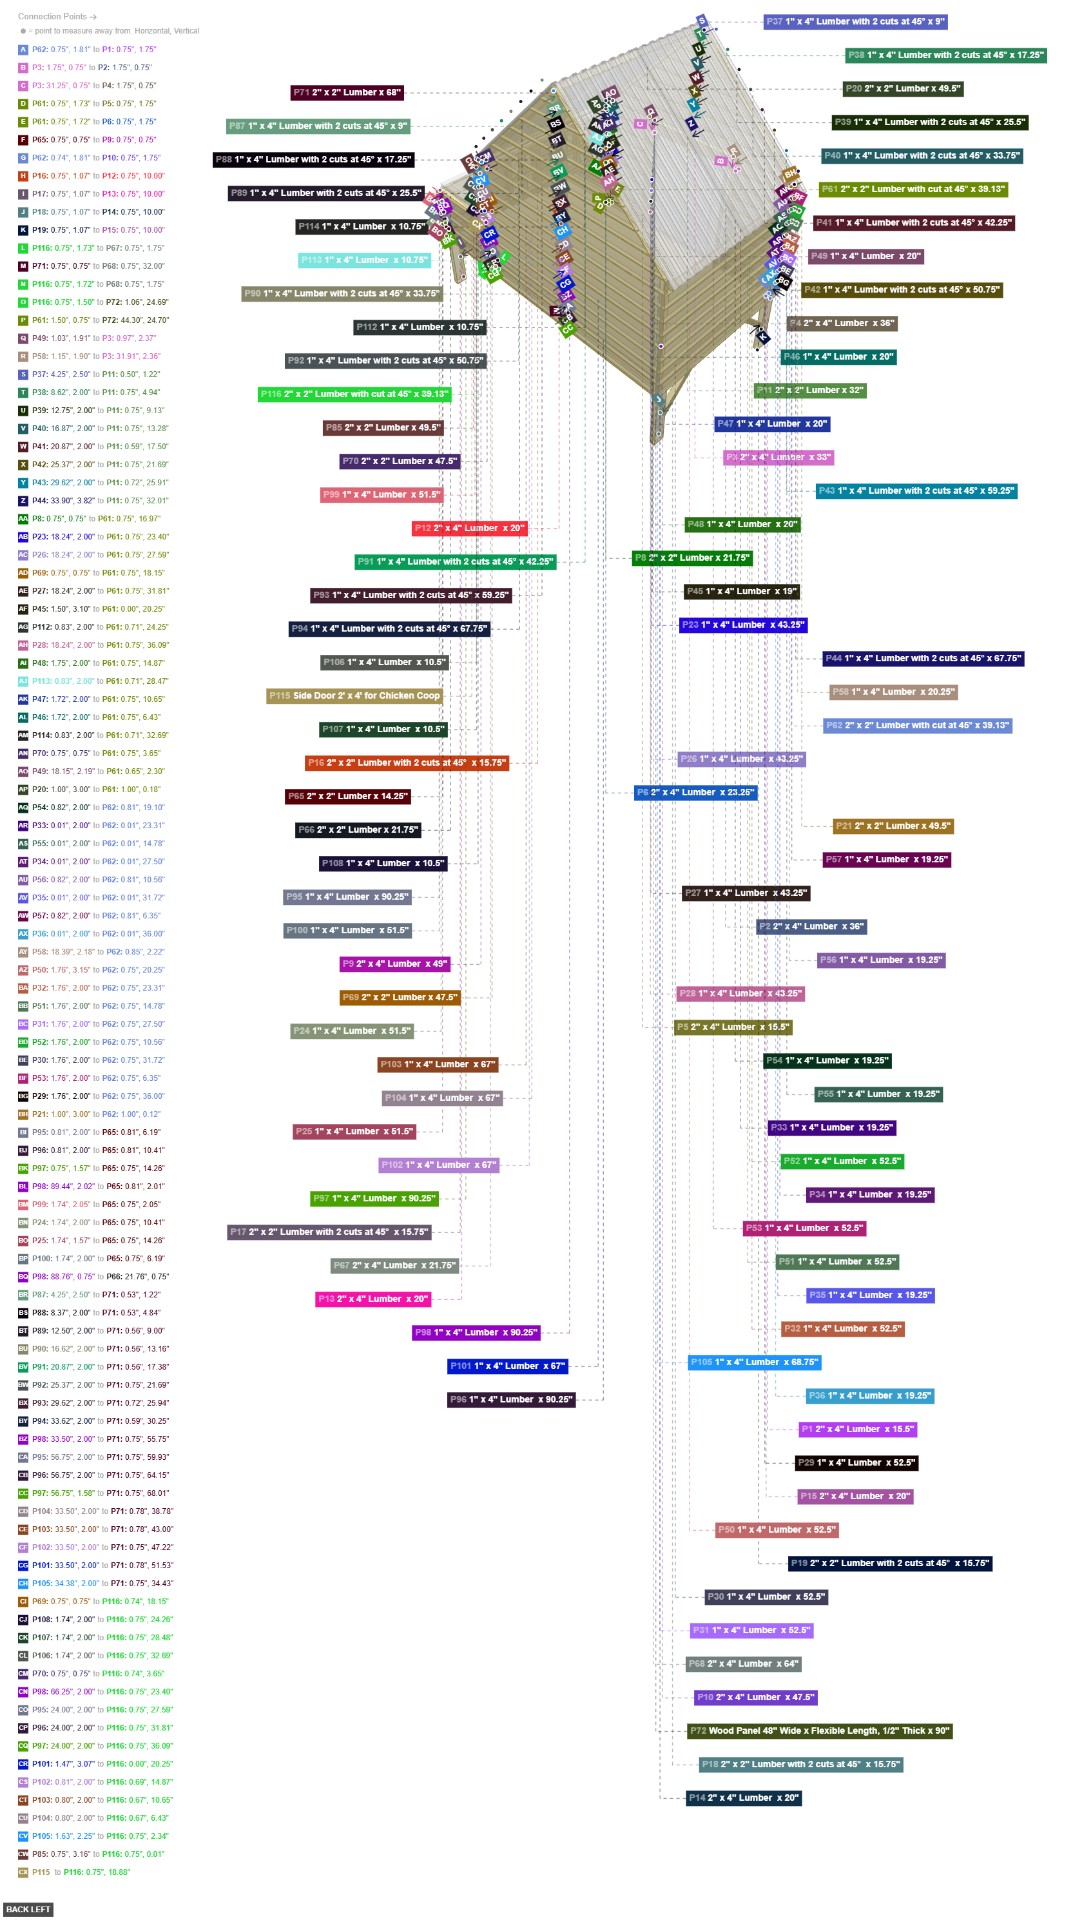
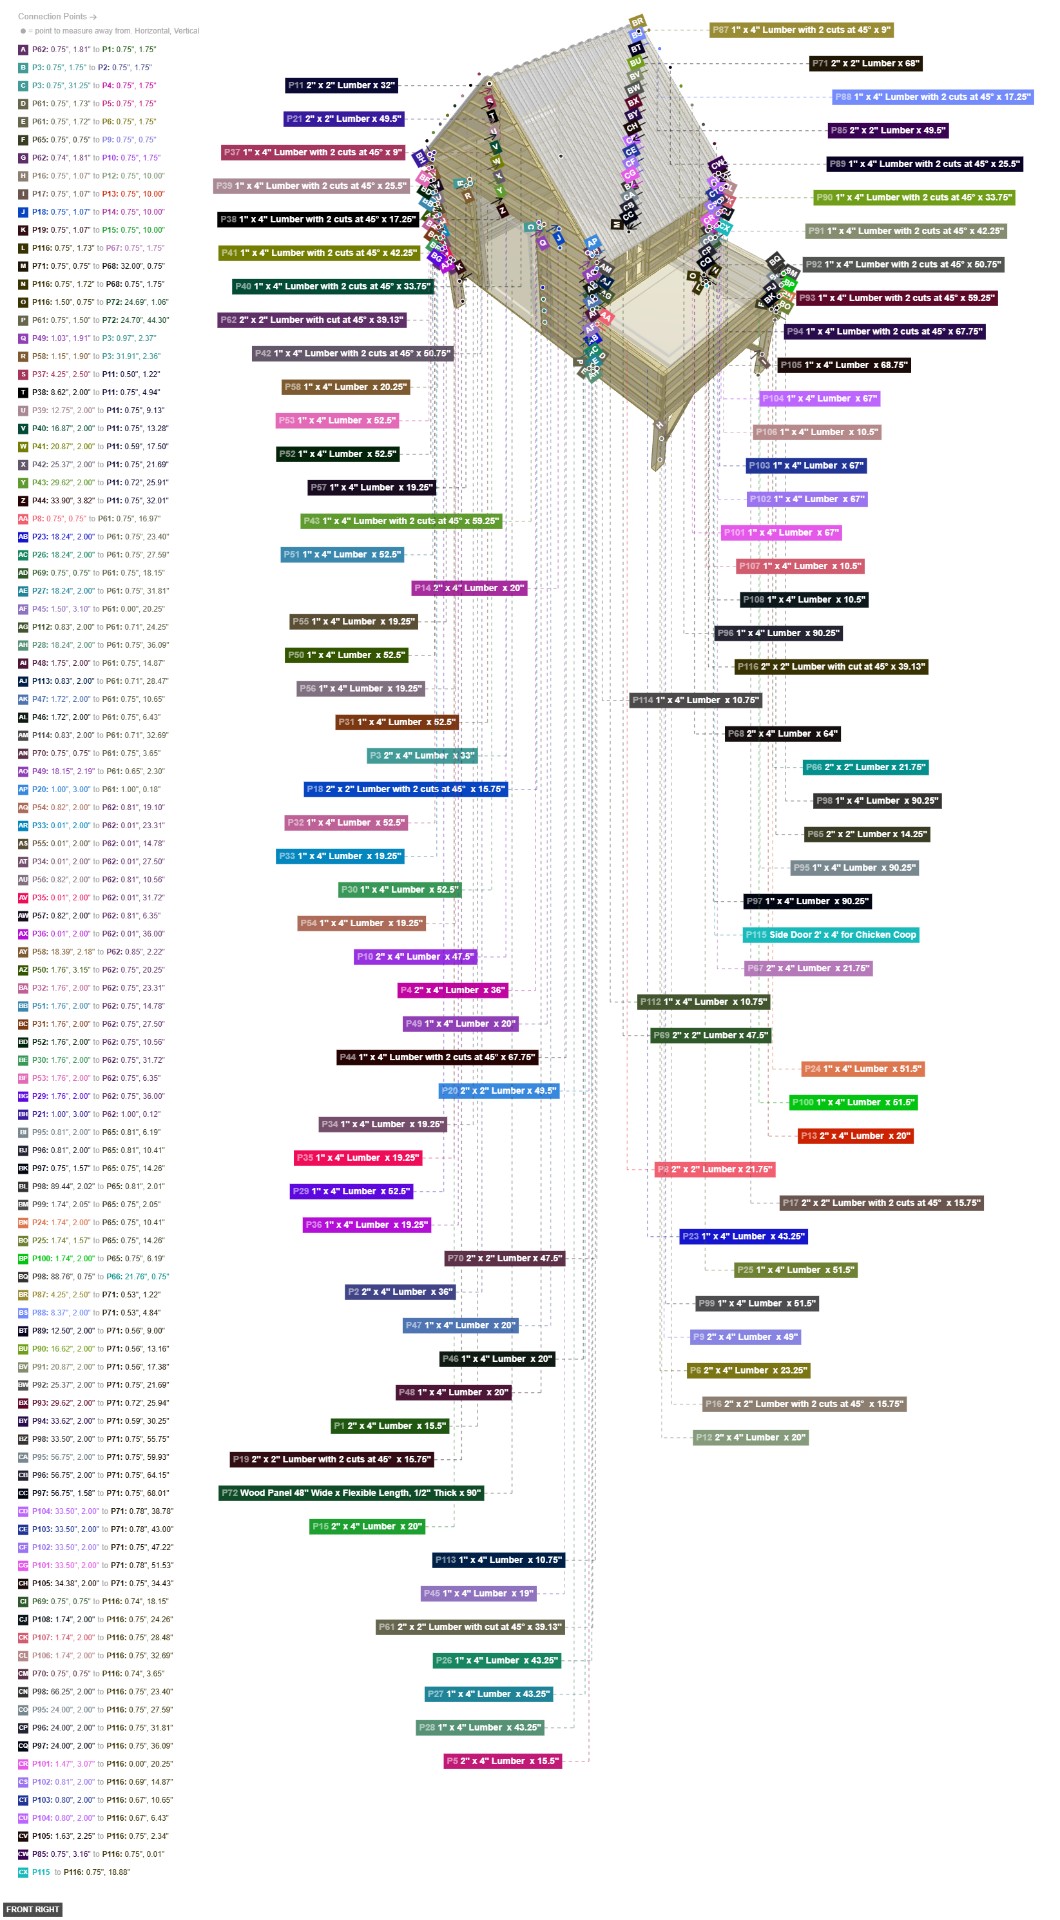
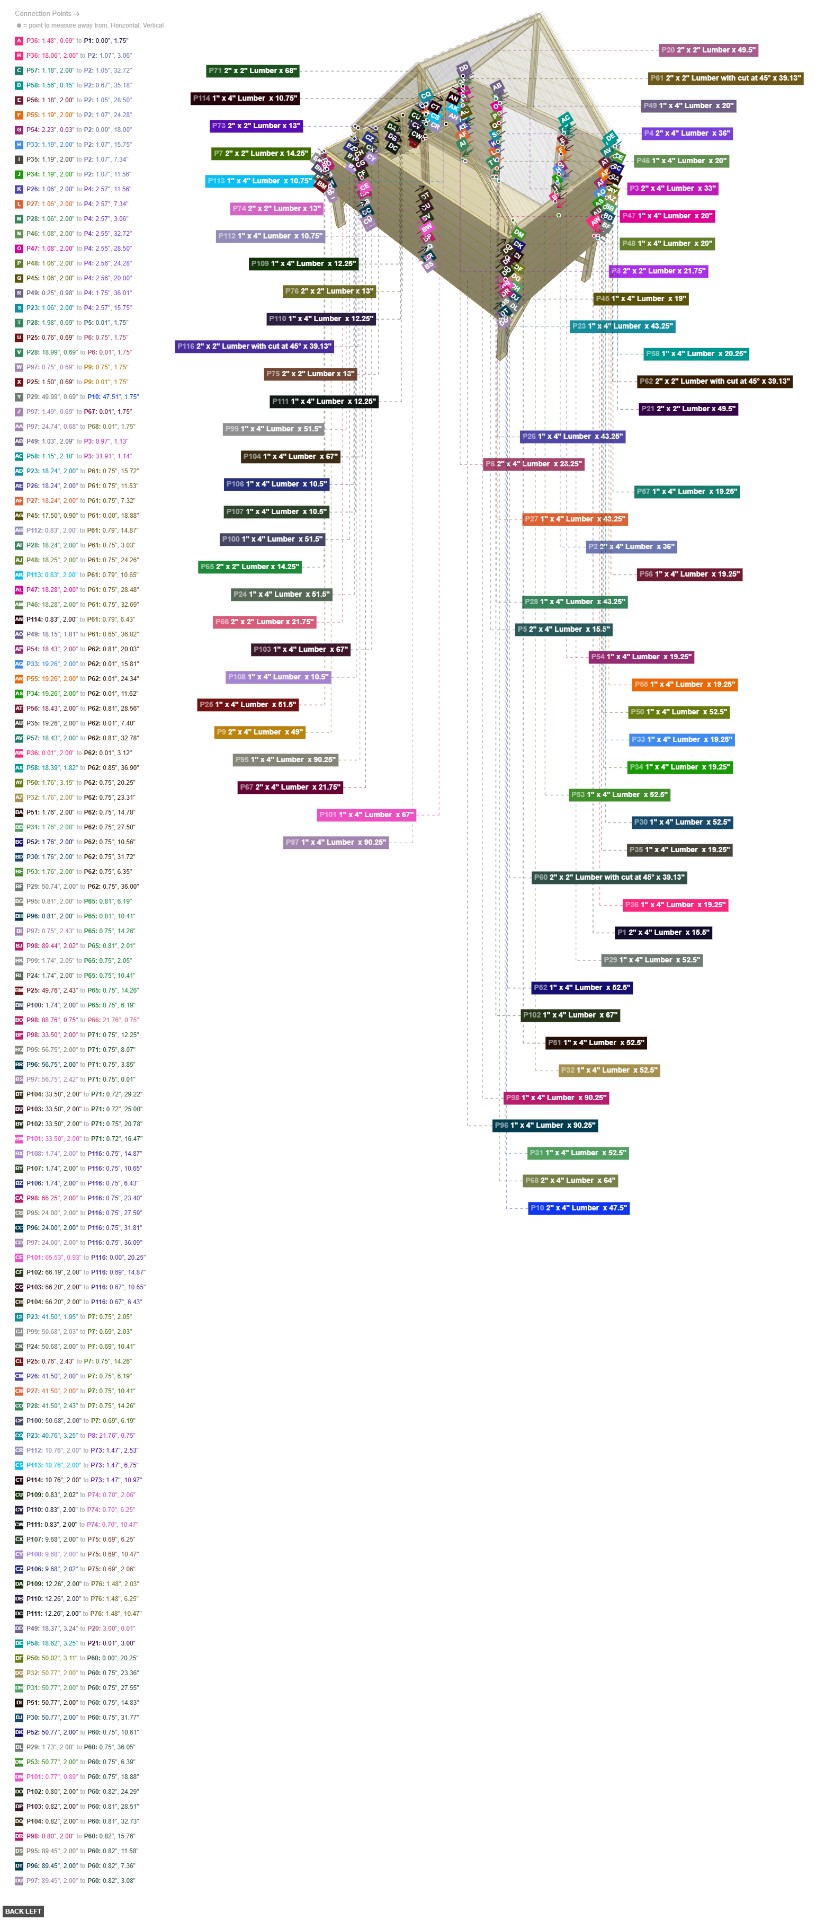
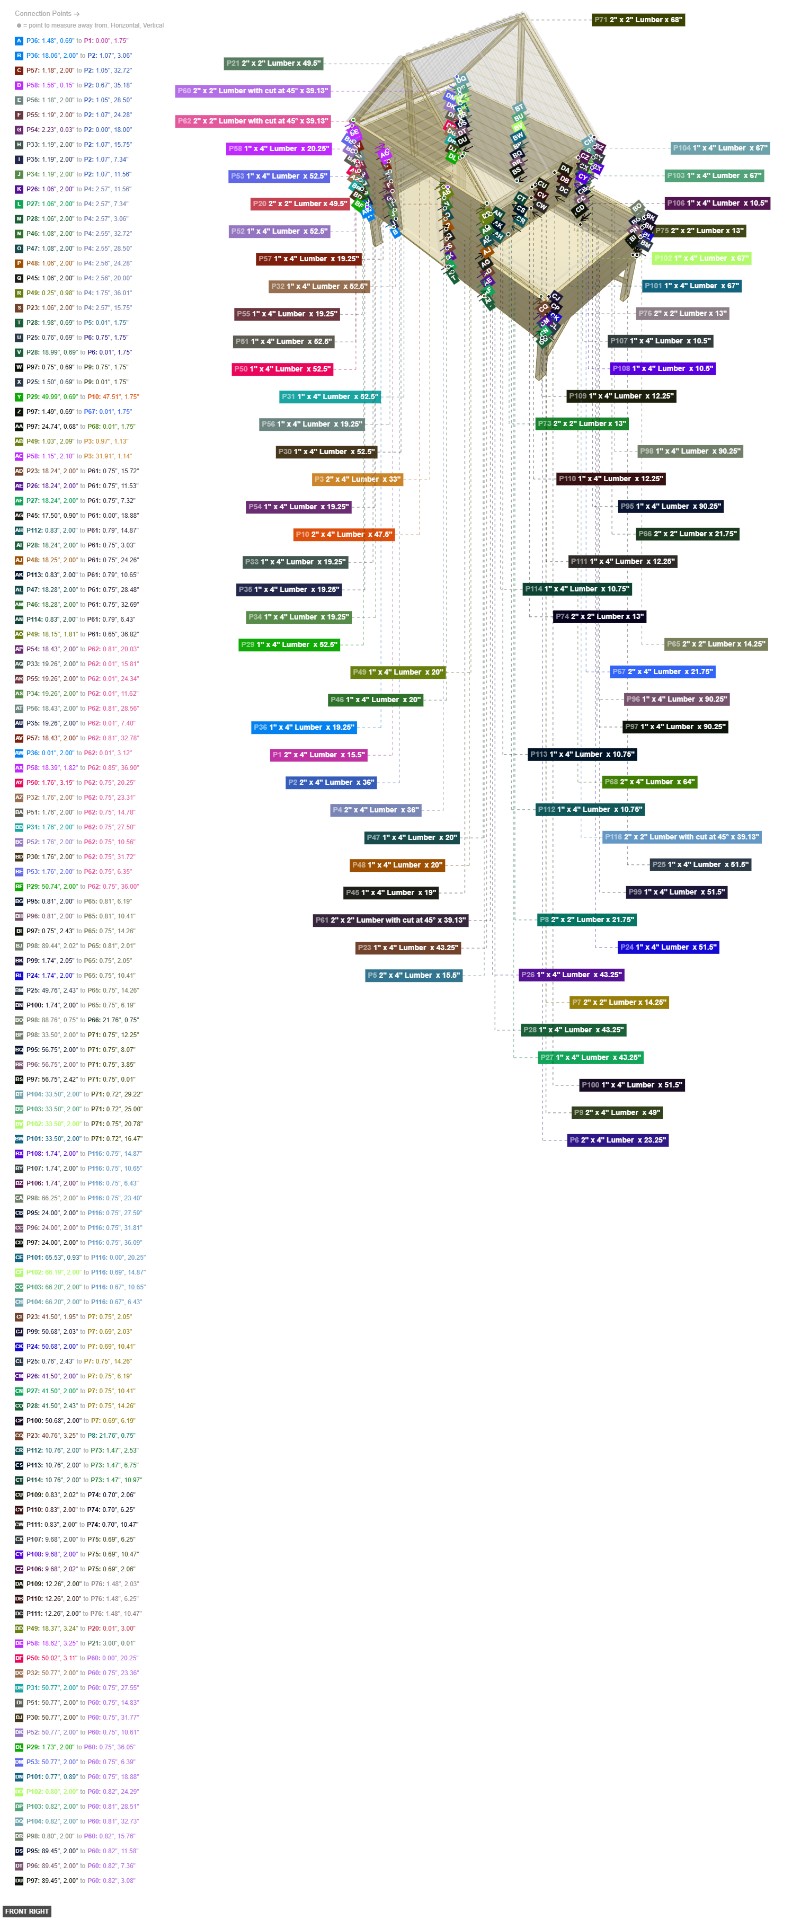
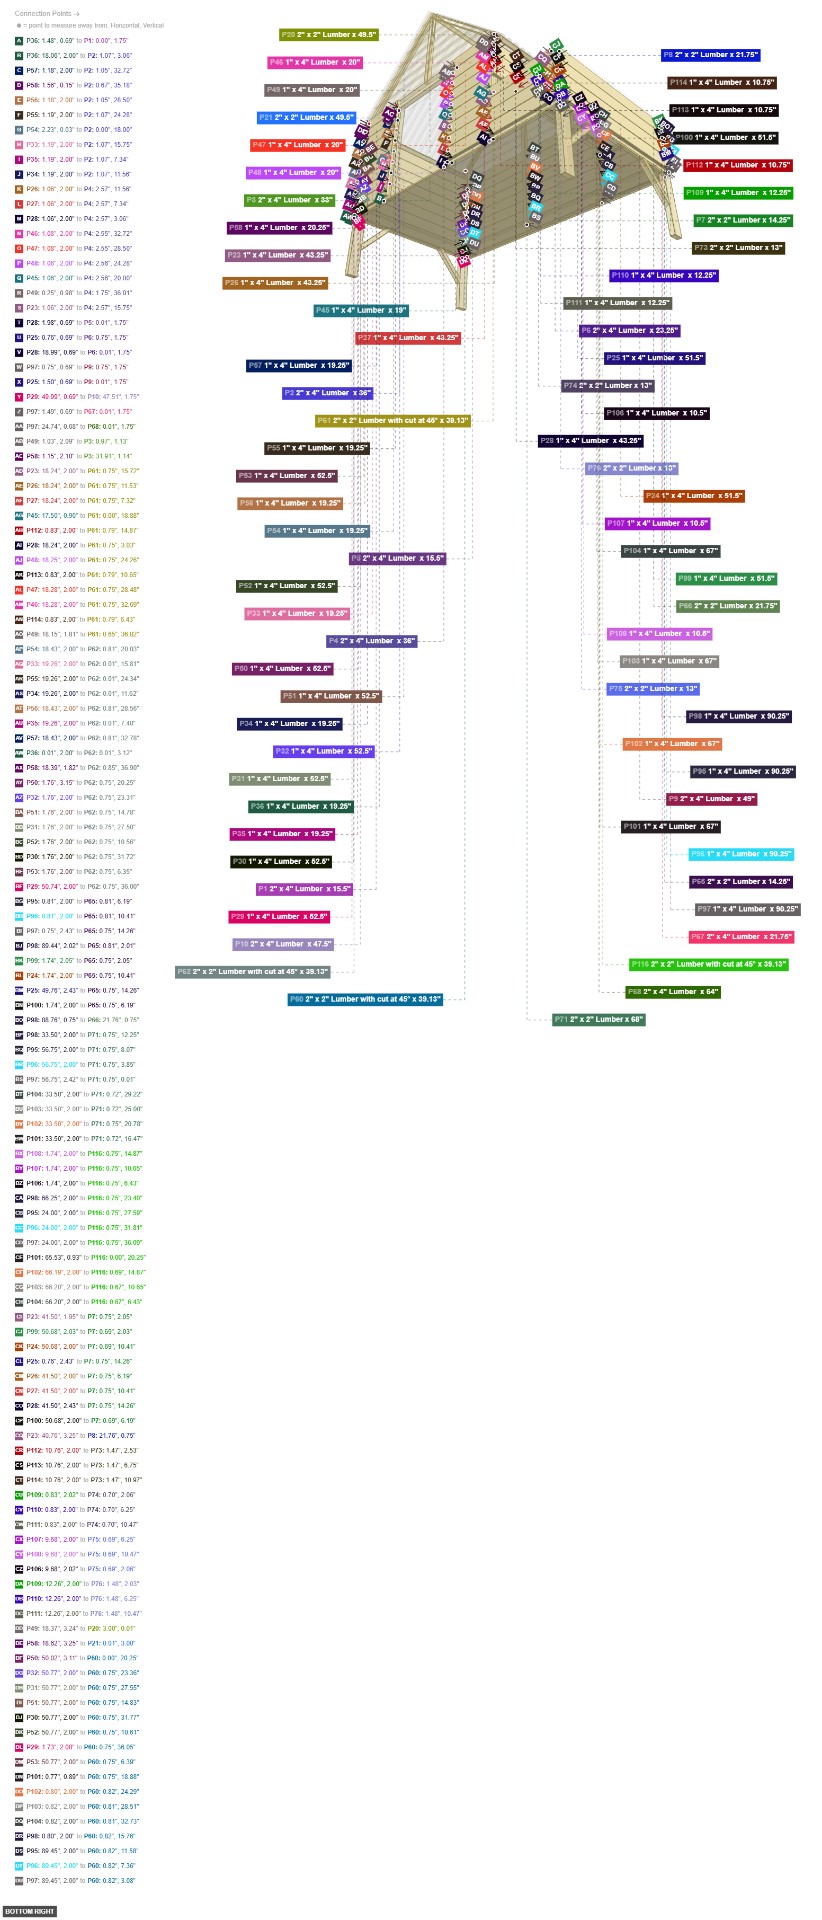
A wooden chicken coop structure featuring a main house area, an attached run (implied by the framing), a nesting box section, and a sloped roof covered with corrugated panels. It includes multiple doors for access. - Chicken Coop -A wooden chicken coop with a raised house section, an attached lower run area, a side nesting box, and a sloped roof covered with corrugated panels. It features multiple access doors. - Chicken Coop -A wooden chicken coop with a framed structure, wood siding, a slanted corrugated roof, a side access door, and a smaller front door. - Chicken Coop -A wooden chicken coop featuring a raised house section with a slanted roof, an attached nesting box on one side, and an open run area underneath the main house. It includes multiple doors for access. - Chicken Coop -A wooden chicken coop with a raised main house, an external nesting box on the left, a ramp/door area on the front, and a slanted roof covered with corrugated panels. It features multiple frame components and cladding boards. - Chicken Coop -A wooden chicken coop with a raised house section featuring a main side door and a small front door, an integrated nesting box area, and likely an open run area underneath (implied by raised structure). The coop has a sloped roof covered with corrugated panels. The structure is primarily built from 2x4, 2x2, and 1x4 lumber with some panel components and pre-fabricated doors. - Chicken CoopA wooden chicken coop featuring an elevated main house, an attached side structure with nesting boxes, and a corrugated metal roof. The entire structure is built on a sturdy frame. - Chicken Coop

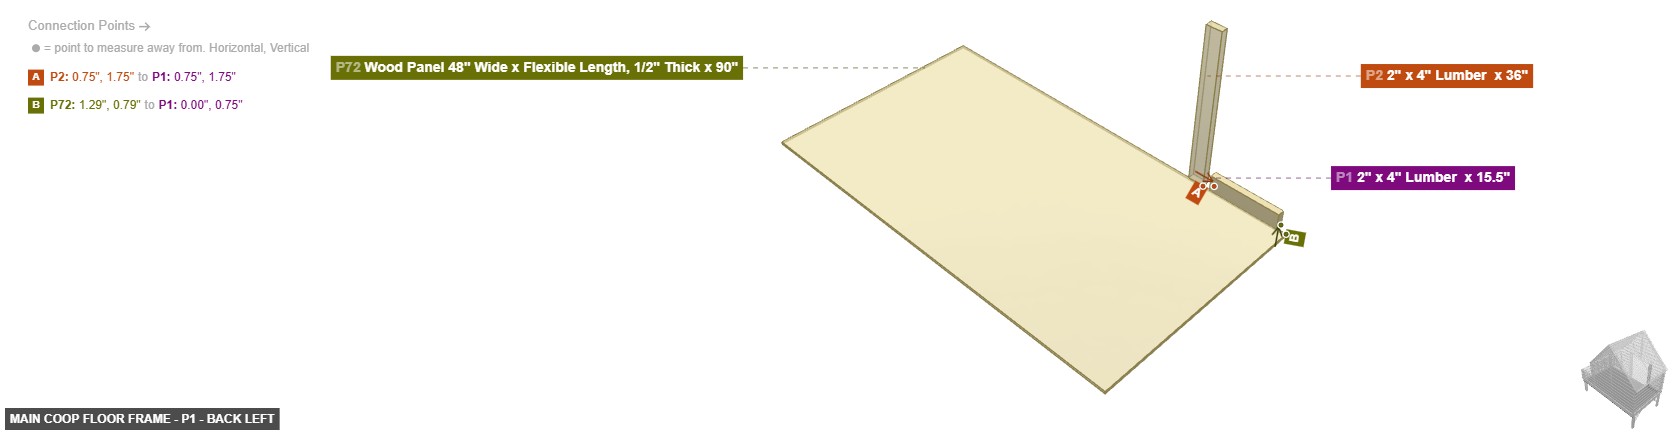
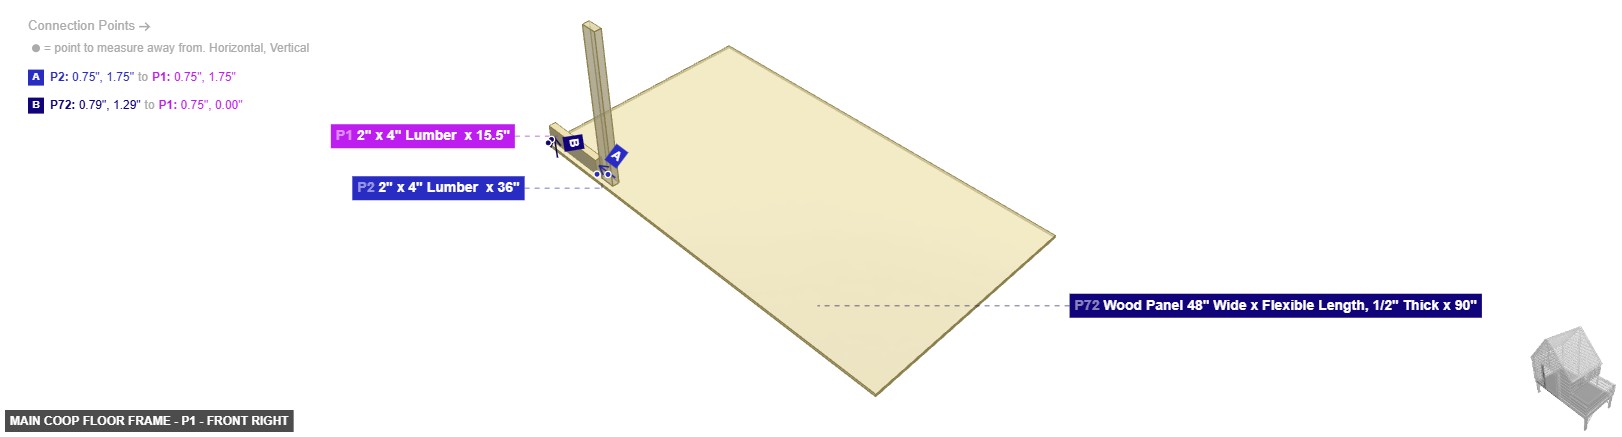
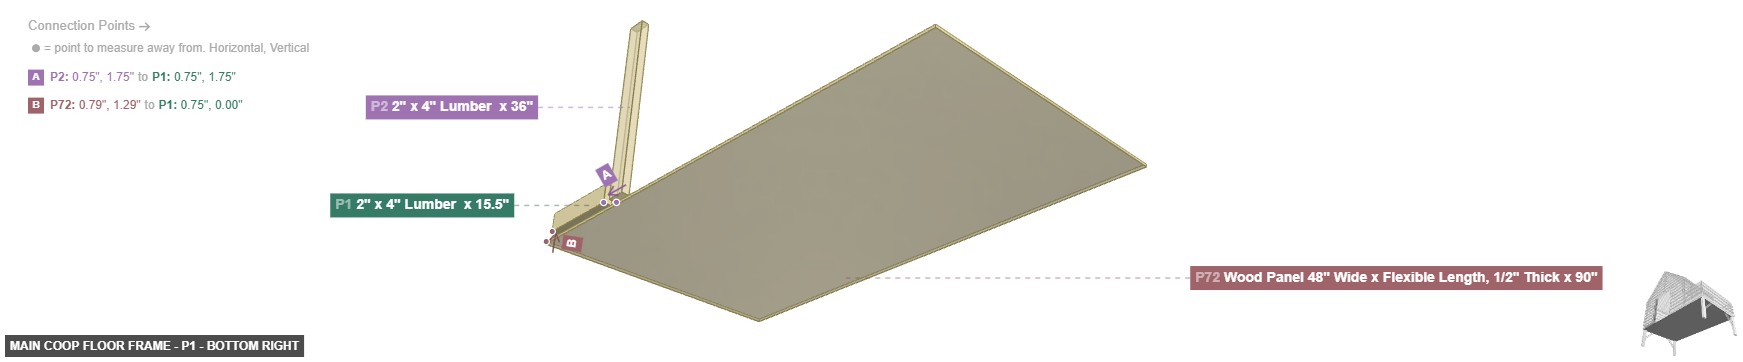
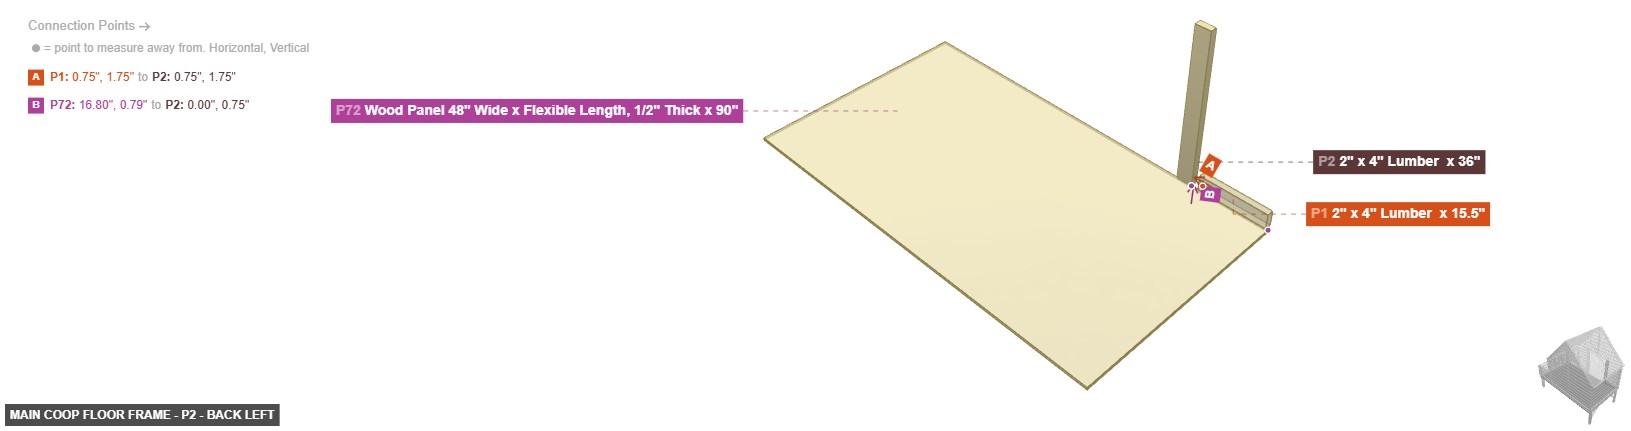
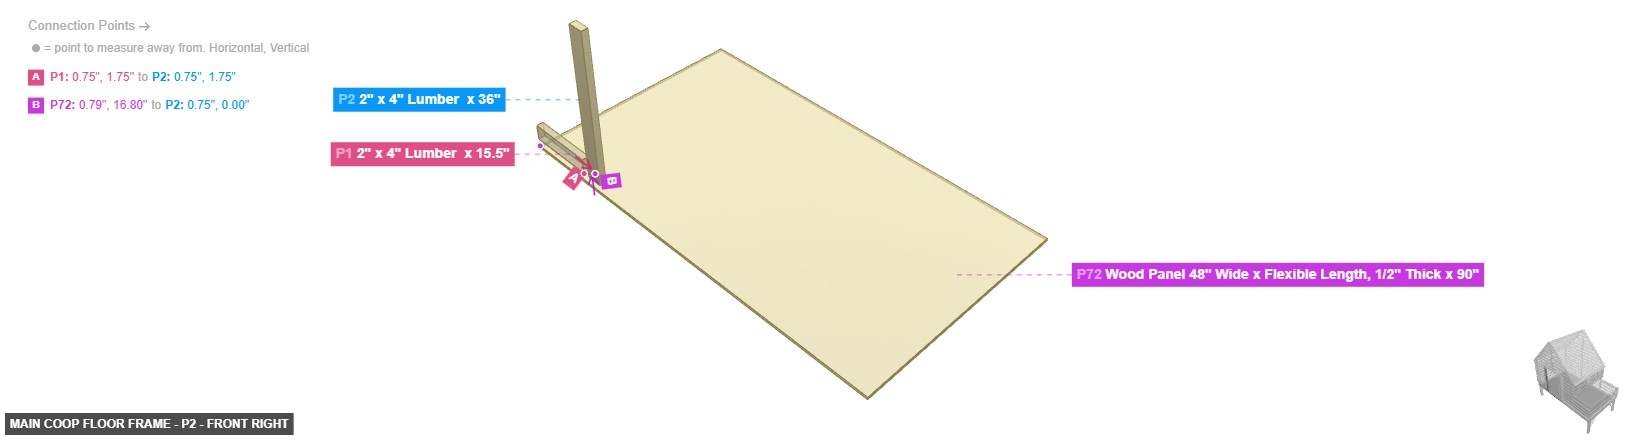
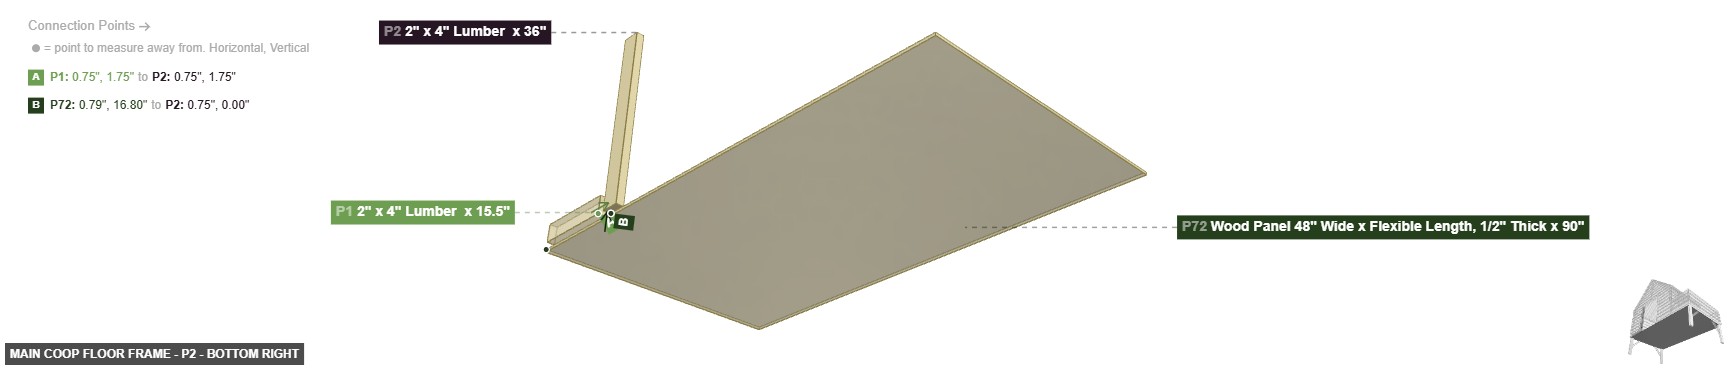
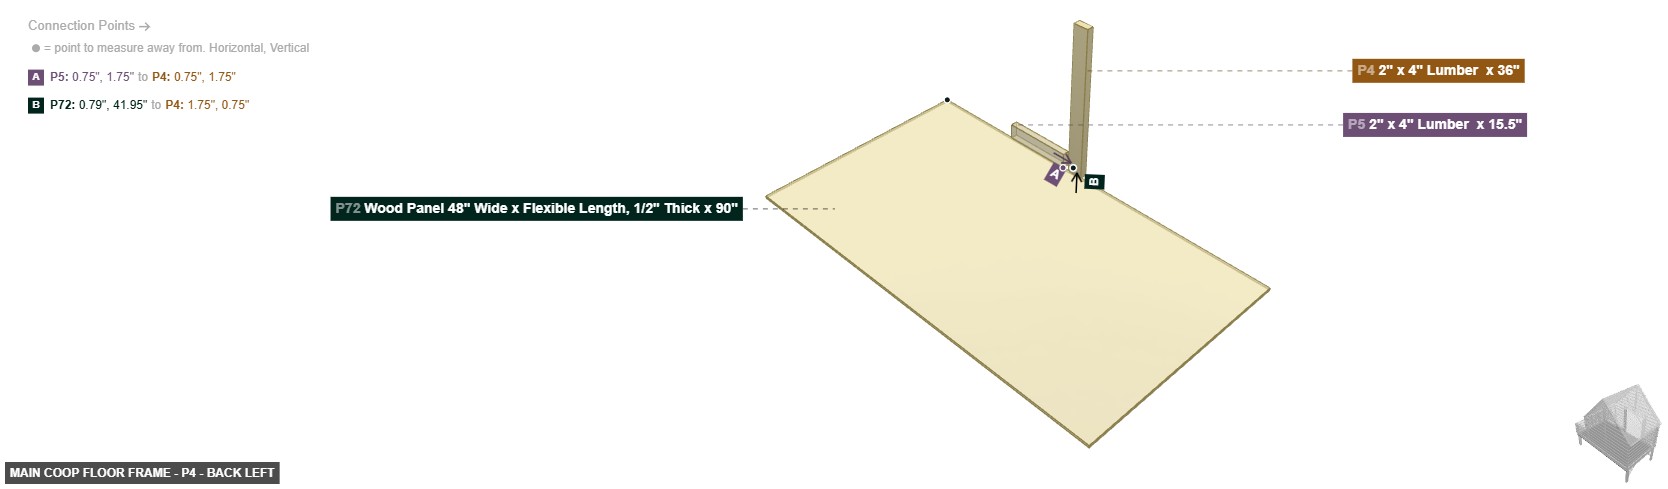
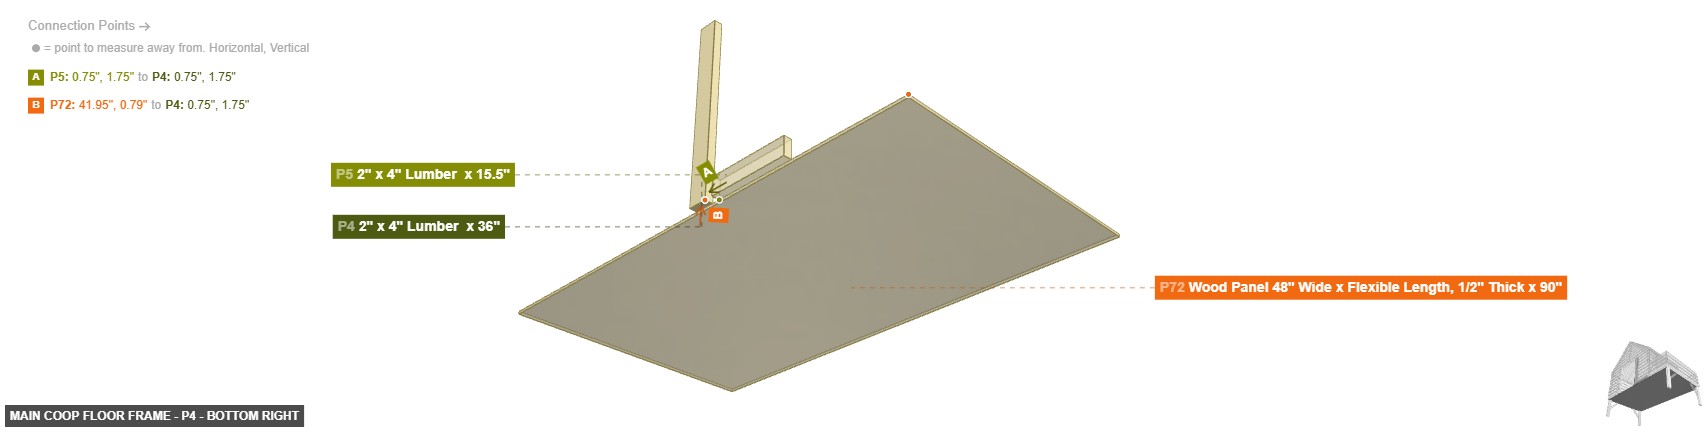
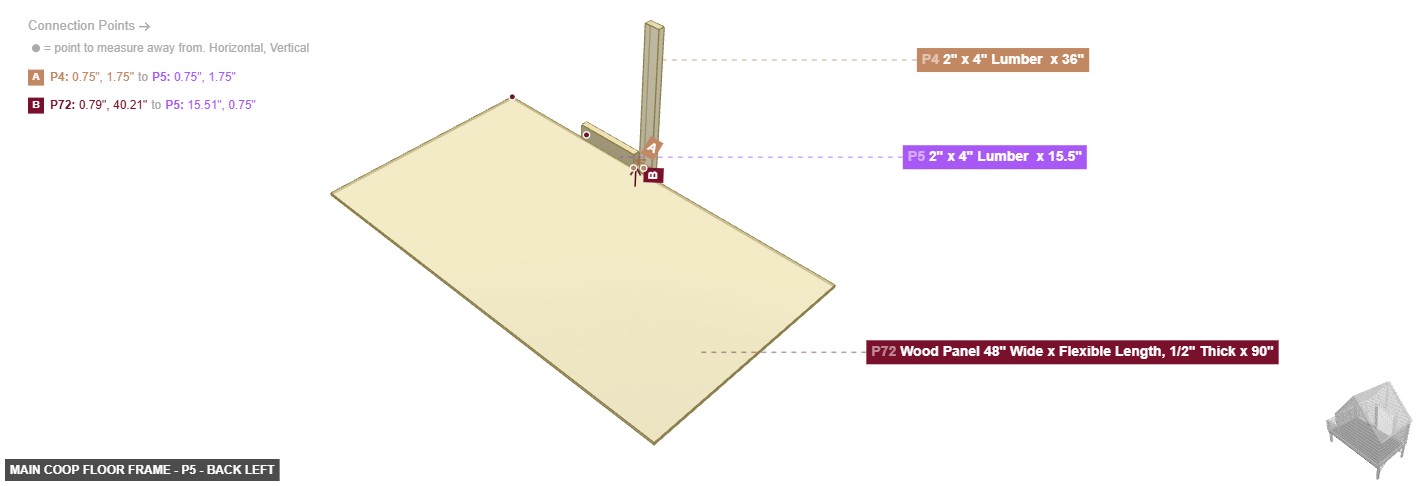
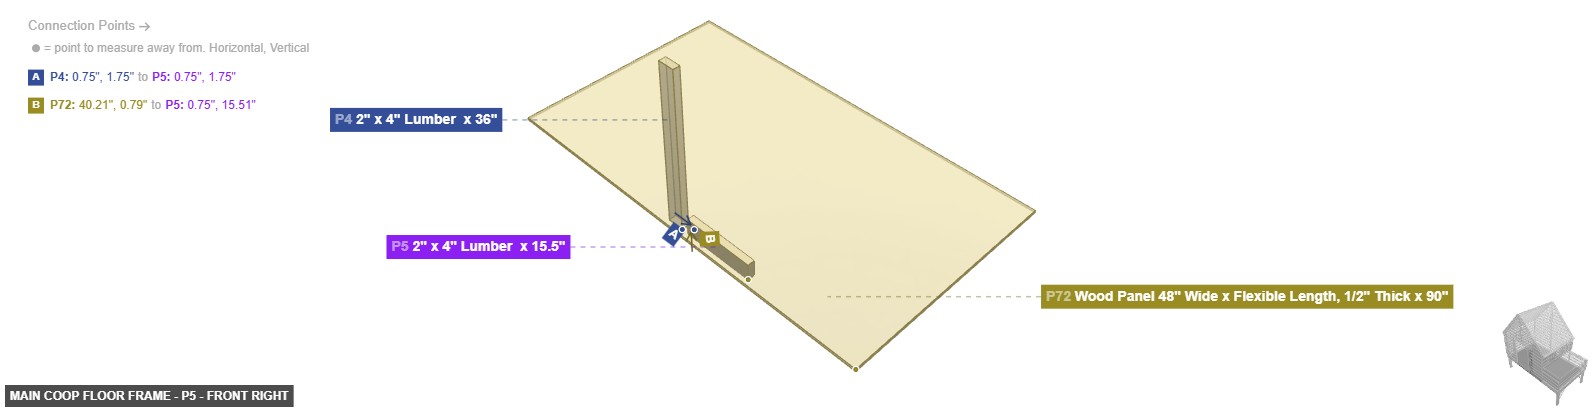
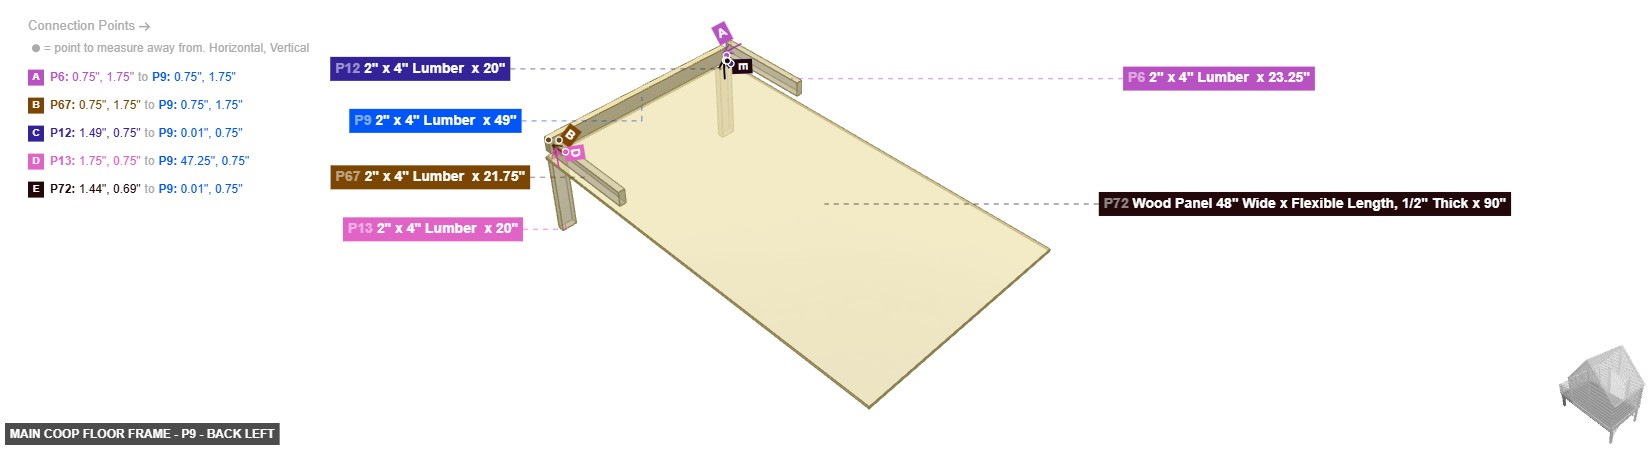
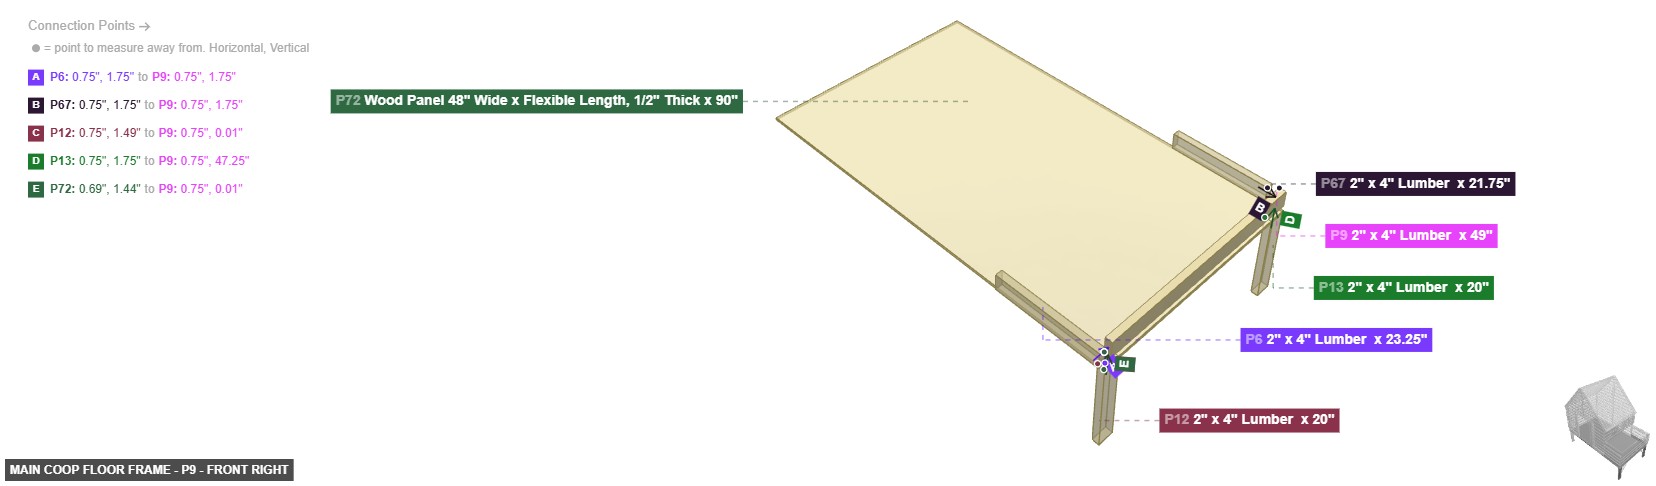
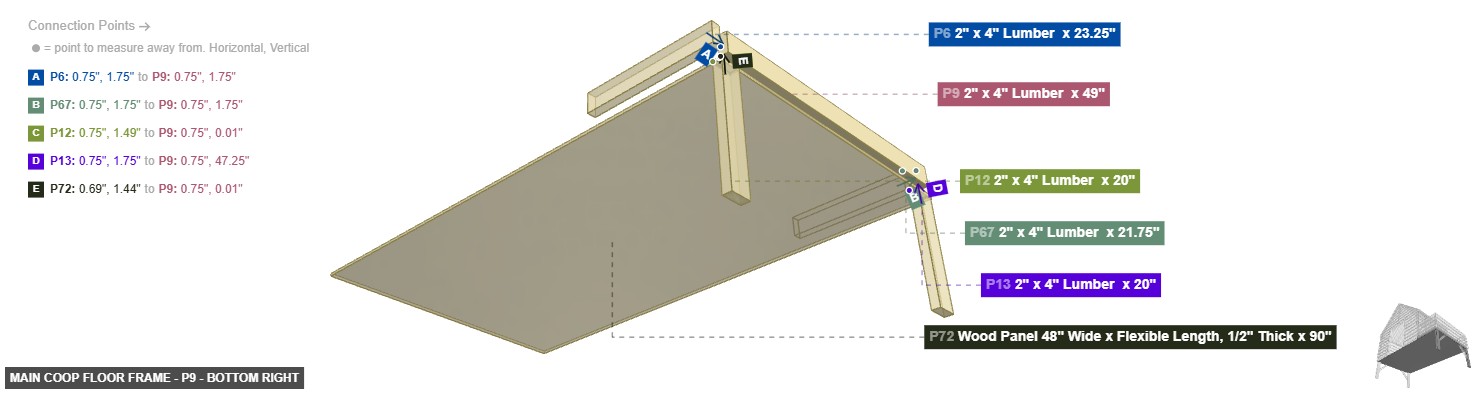
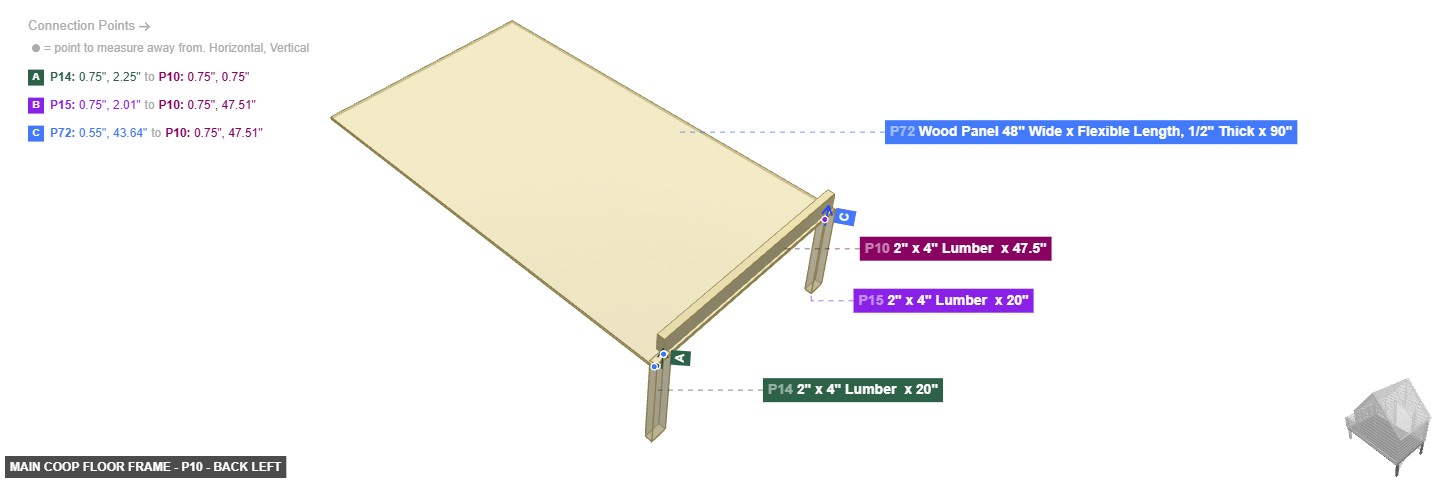
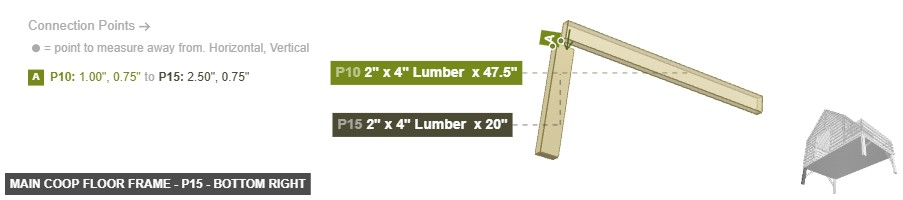
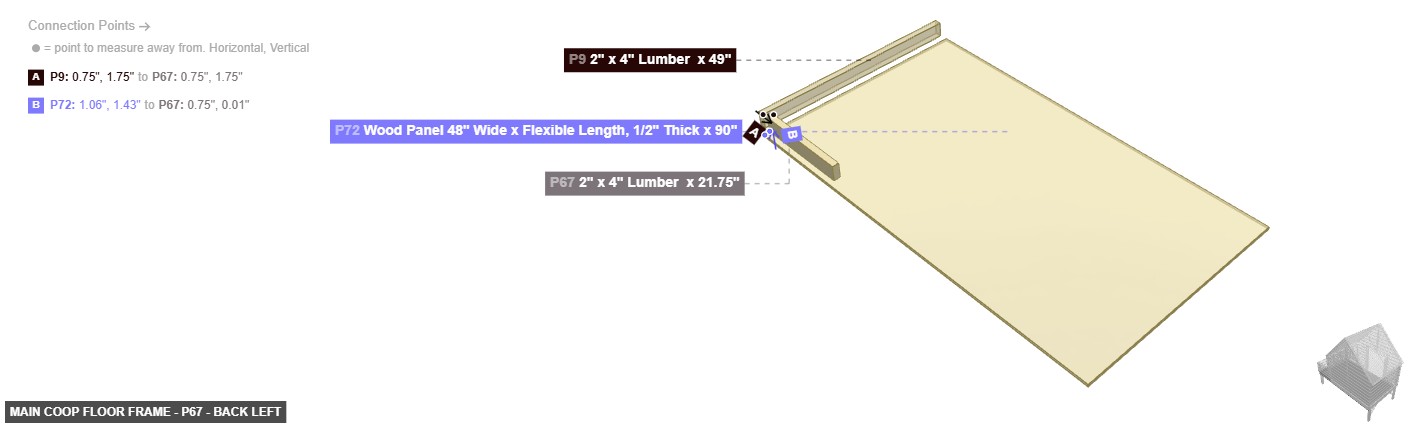
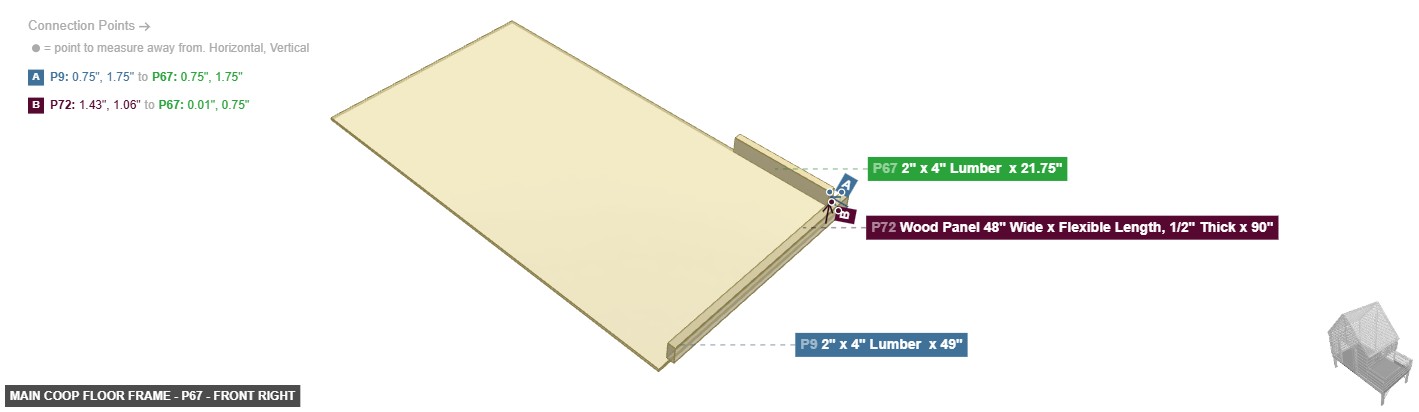
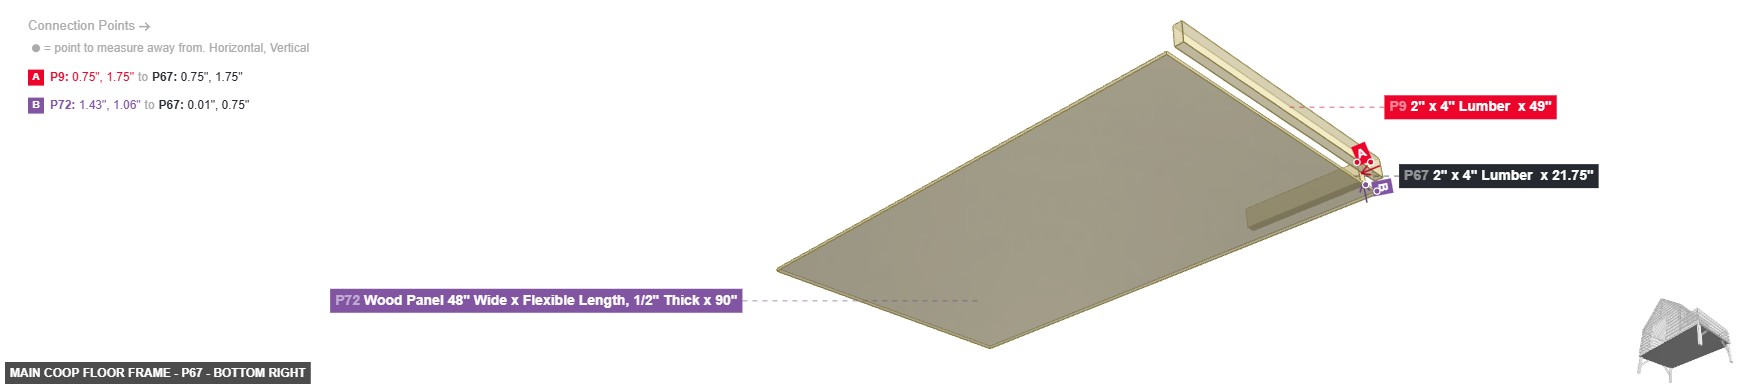
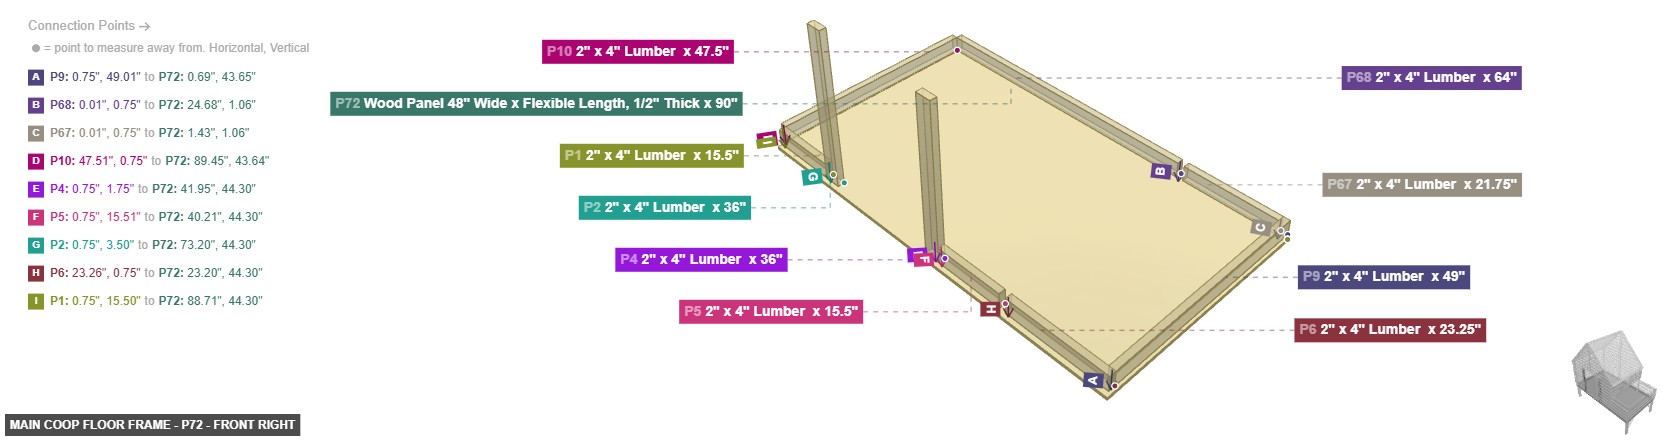
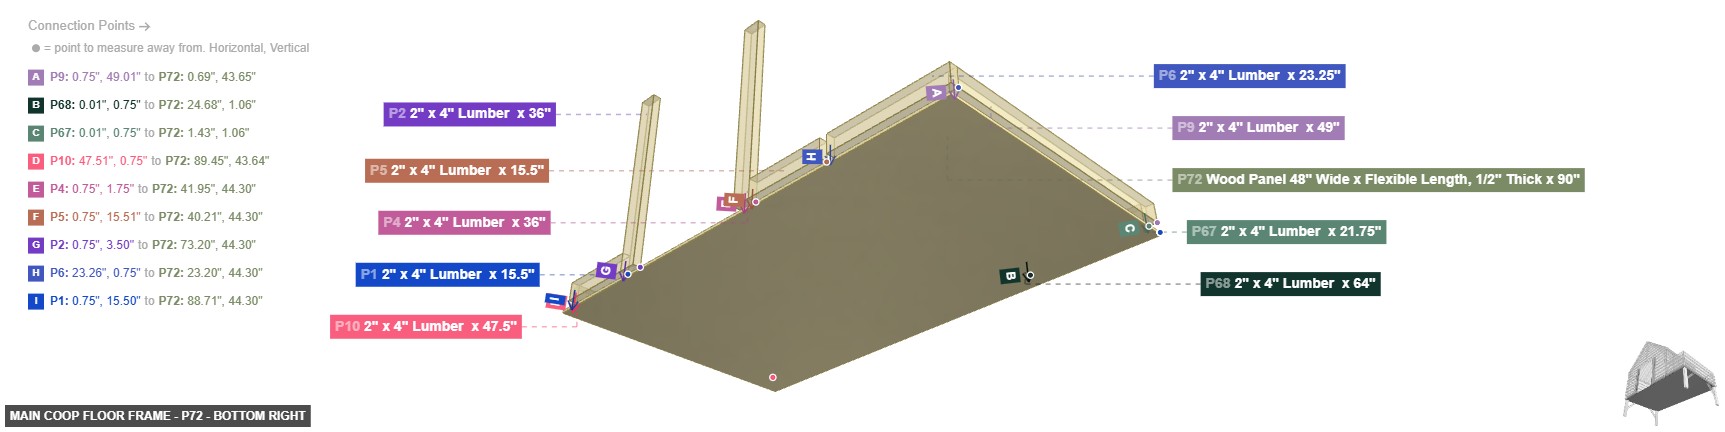
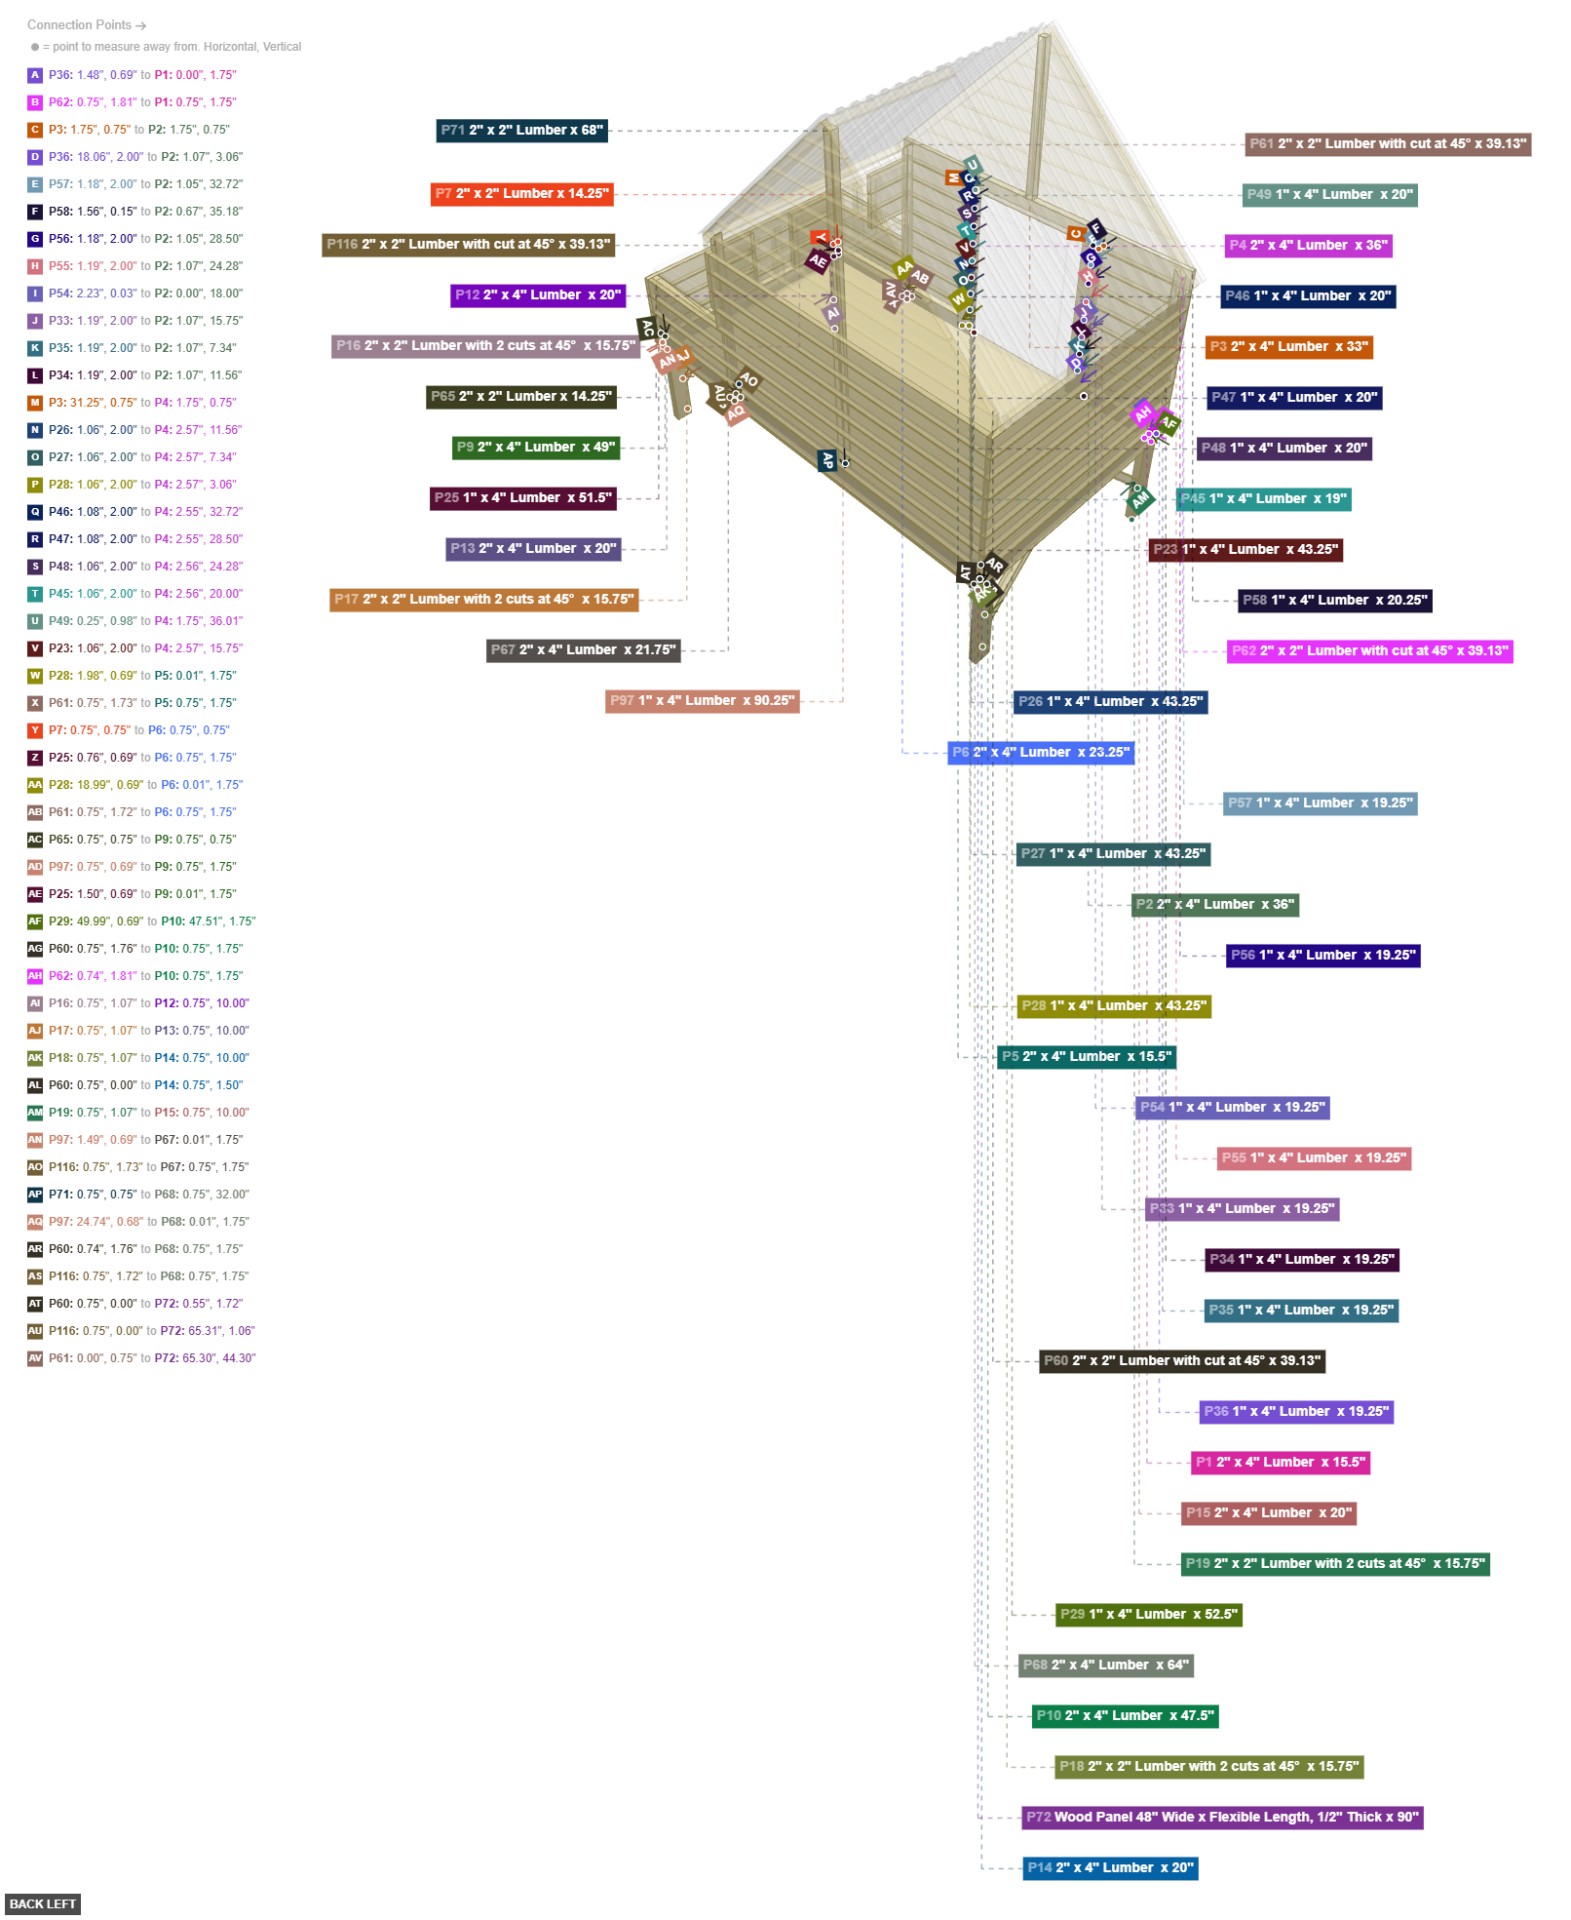
Creates the elevated base and floor for the main coop area, providing a solid foundation for the rest of the structure.
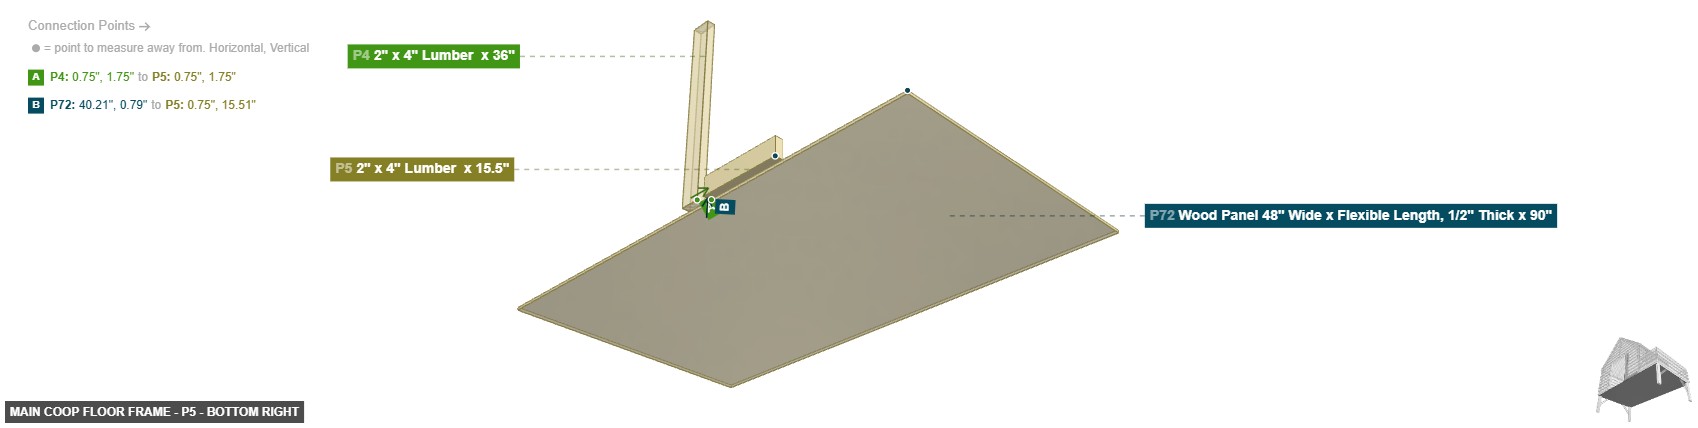
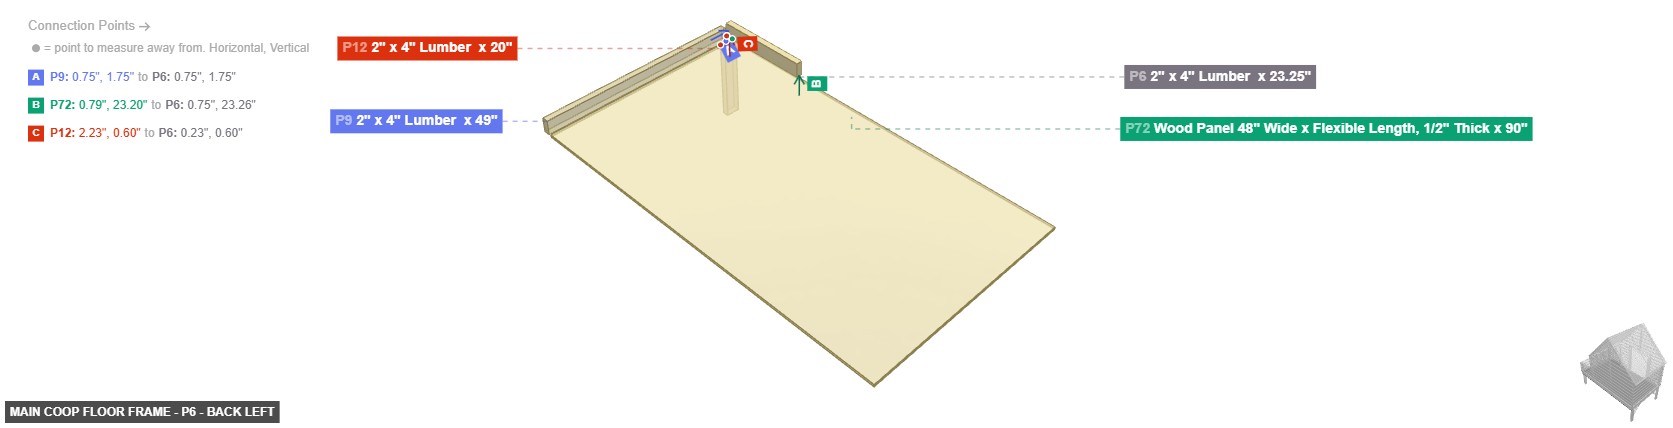
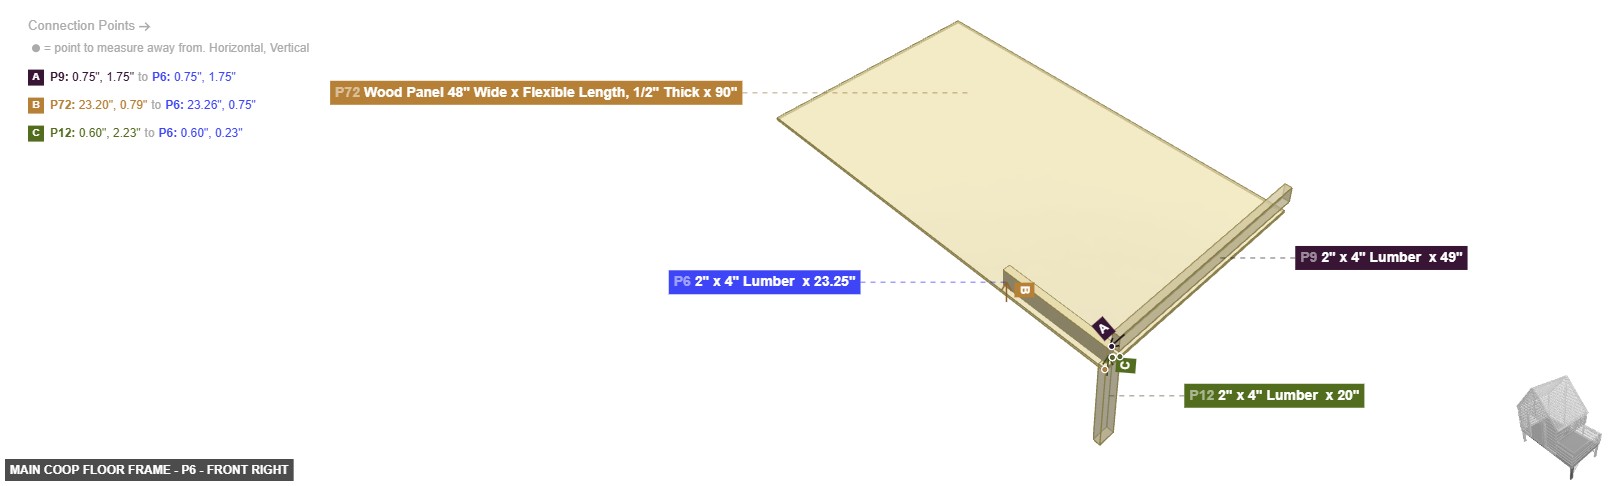
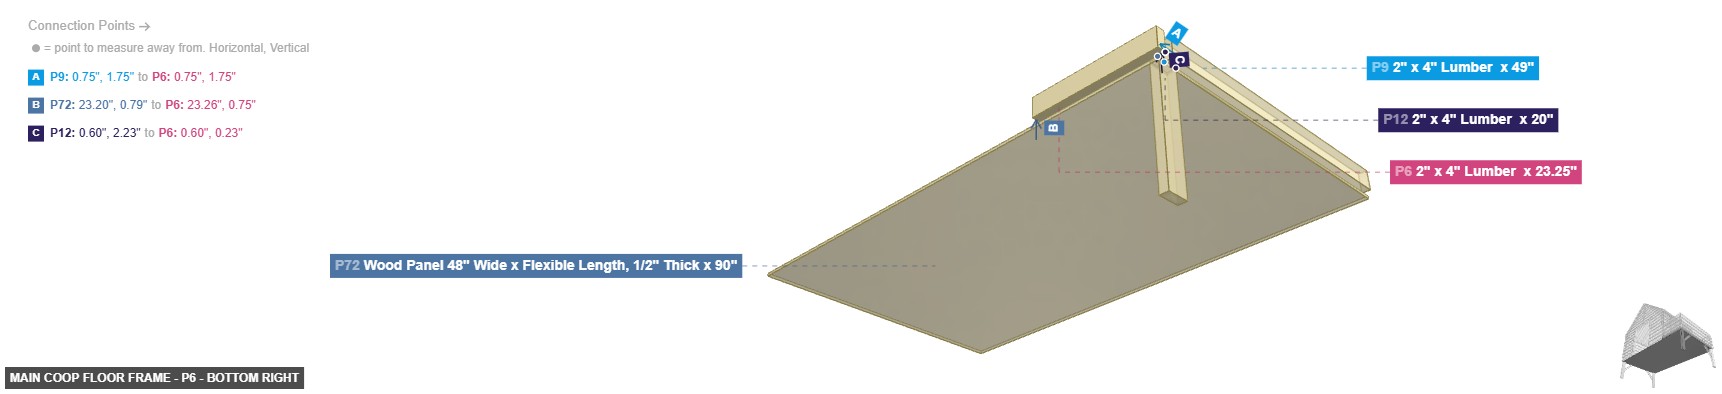
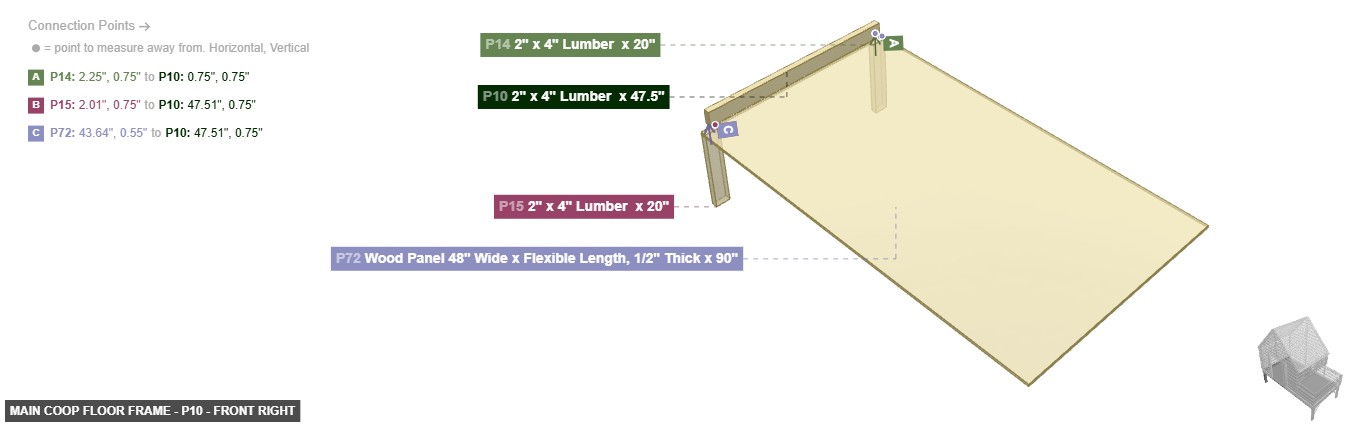
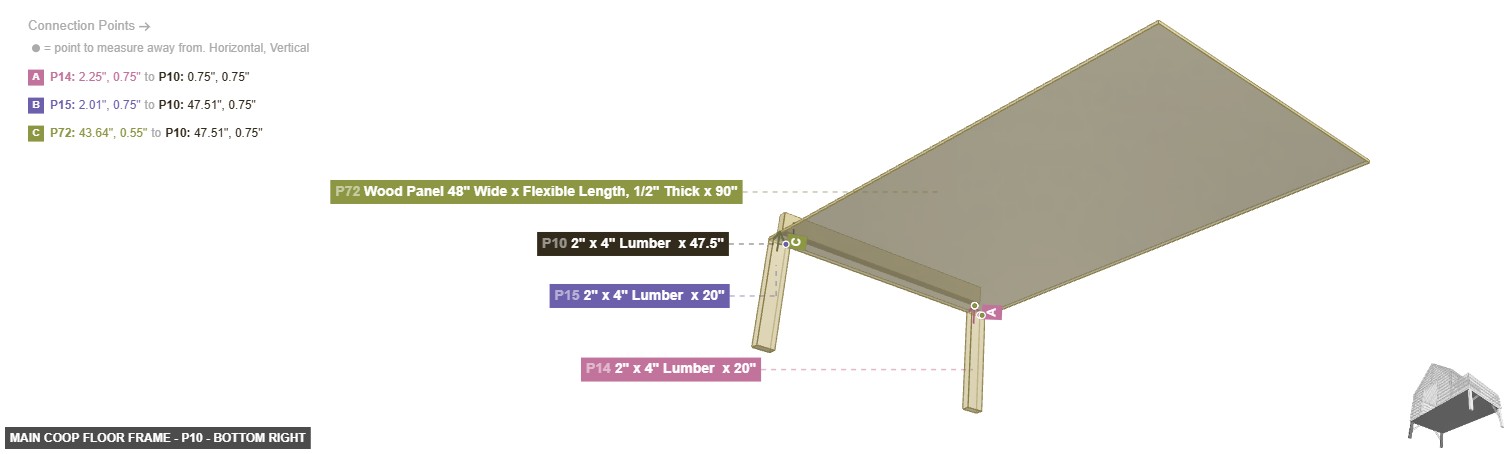
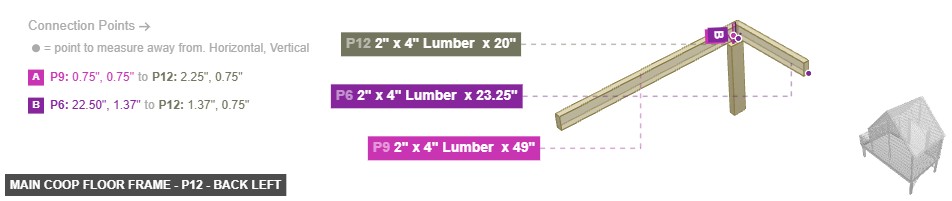
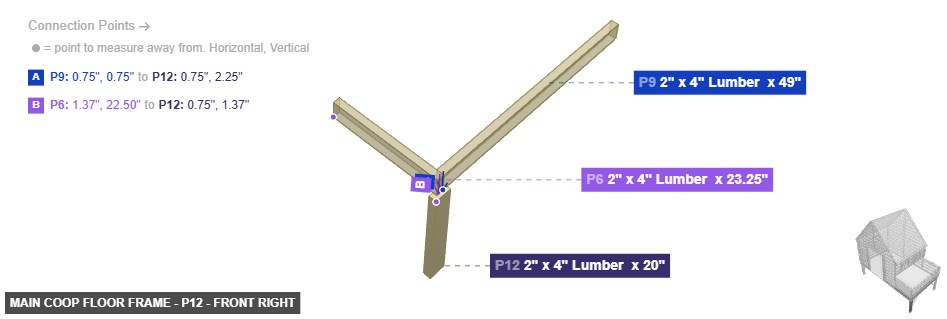
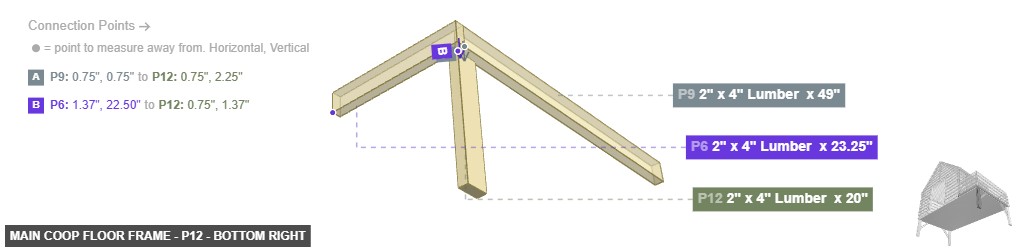
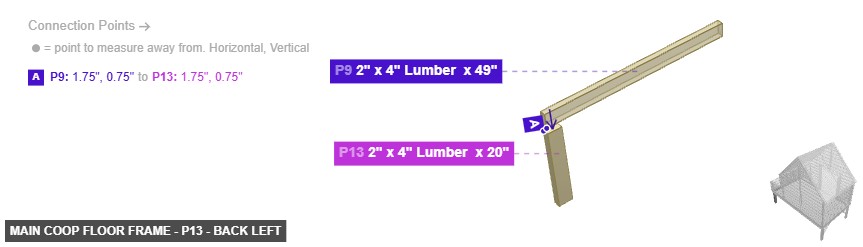
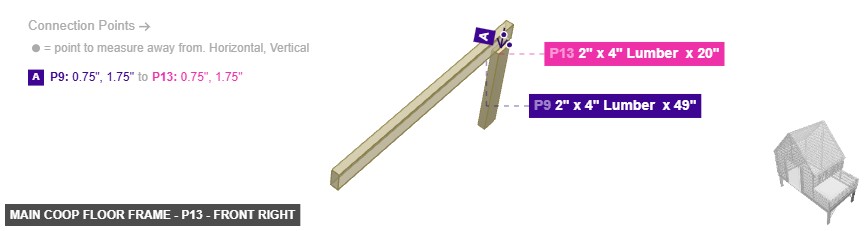
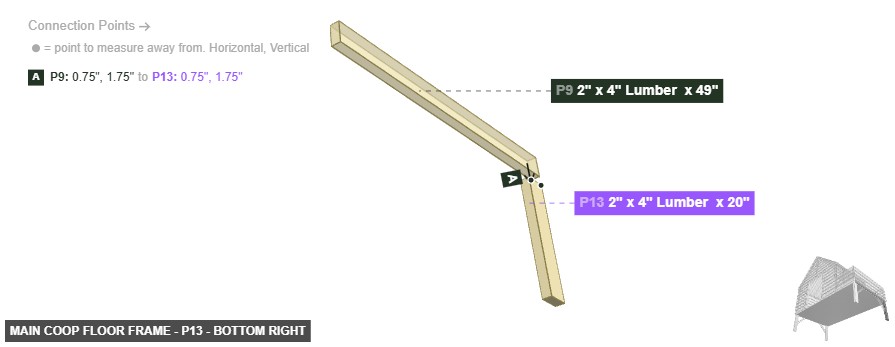
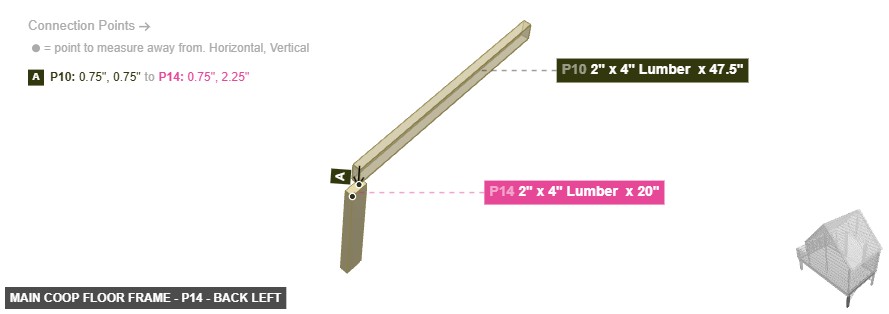
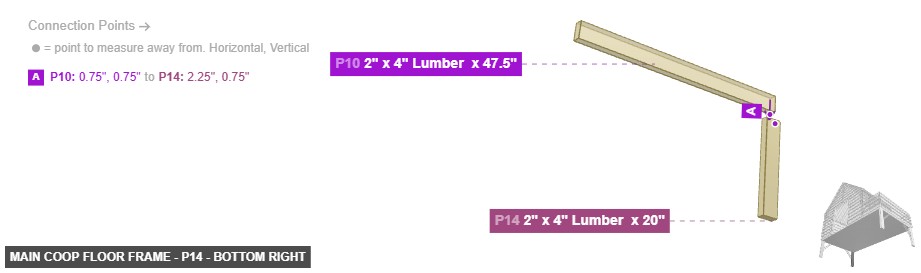
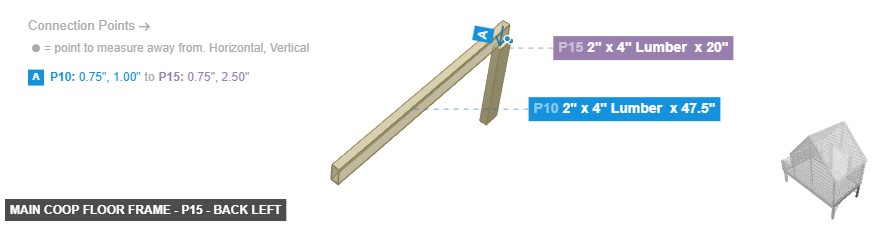
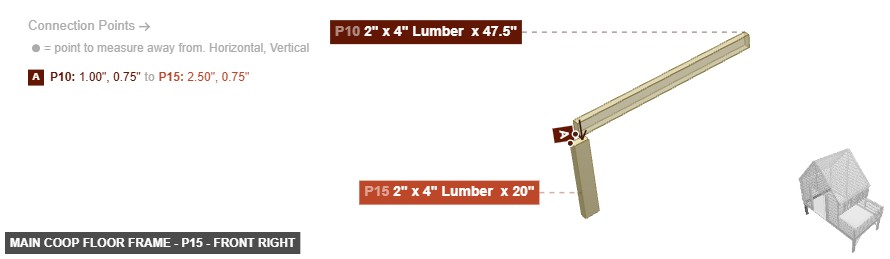
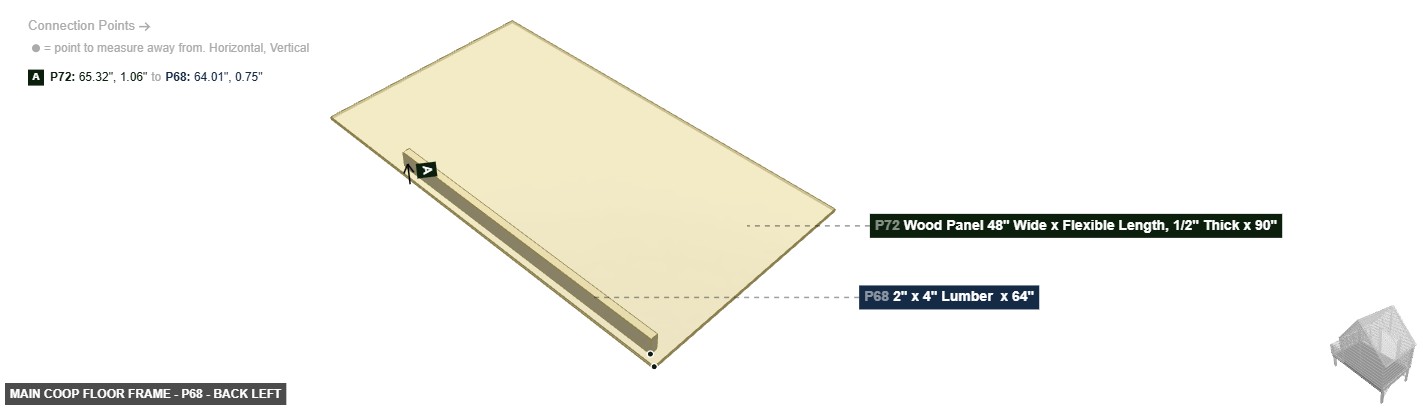
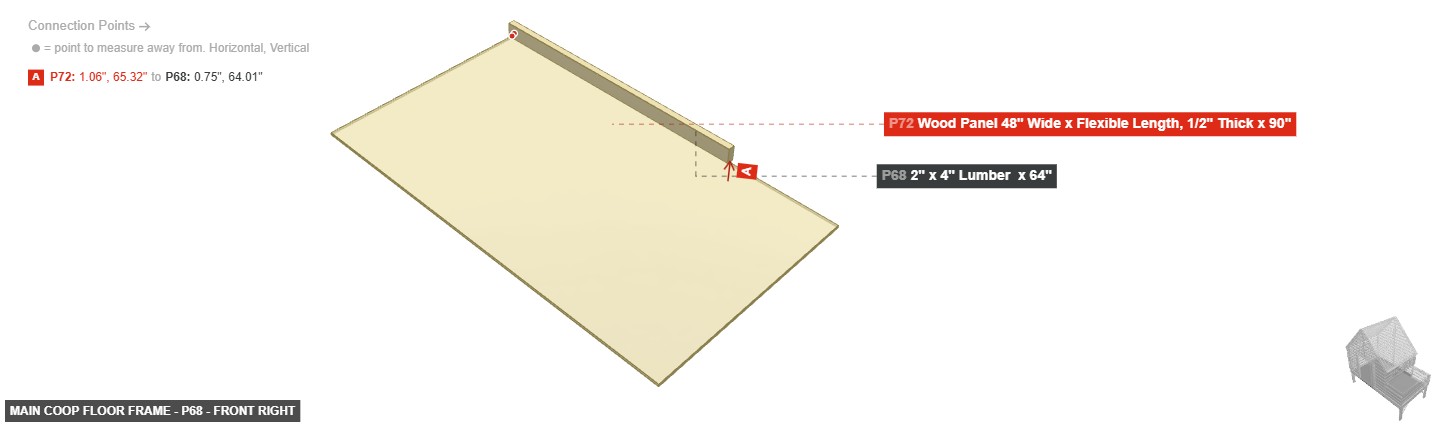
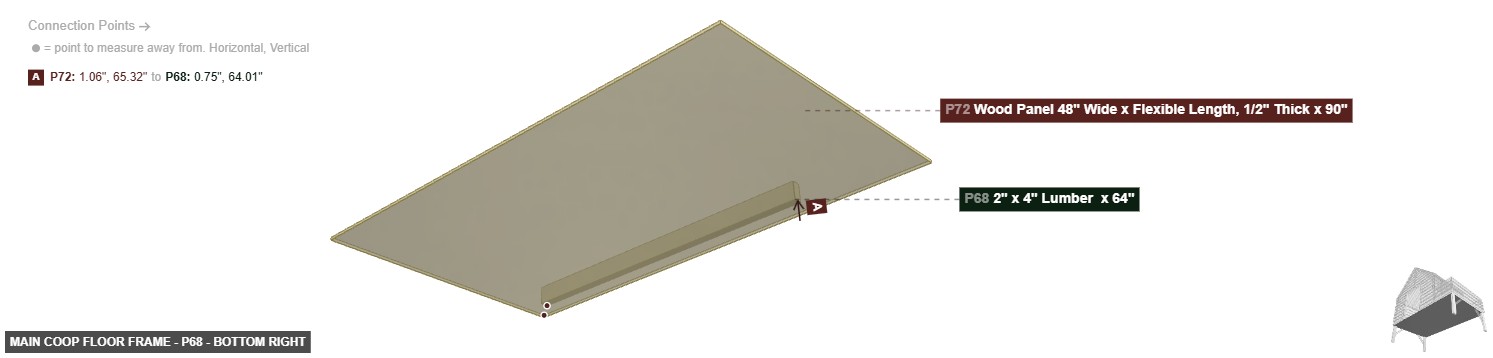
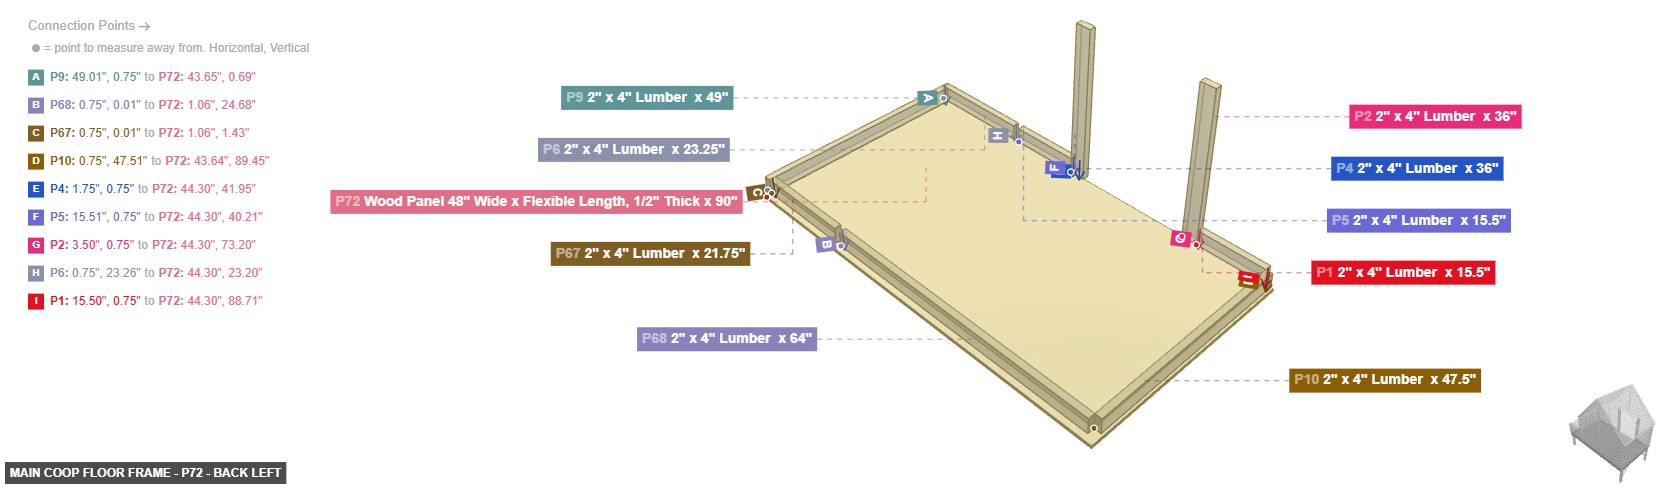
Assemble the main rectangular frame using 2"x4" lumber parts P1, P2, P4, P5, P6, P9, P10, P67, and P68. Install the shorter inner floor joists P12, P13, P14, and P15 for support. Secure the large wood panel P72 on top to complete the floor.


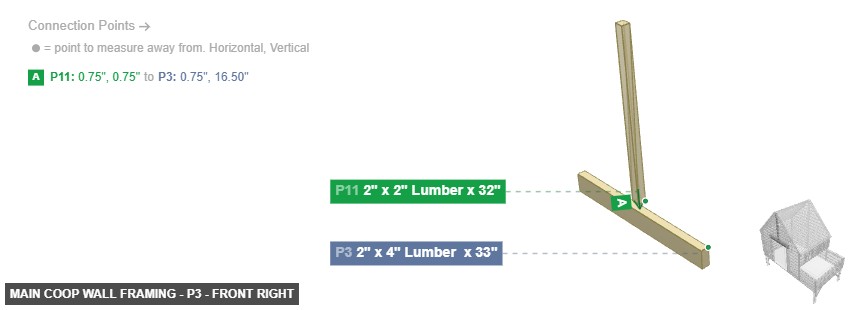
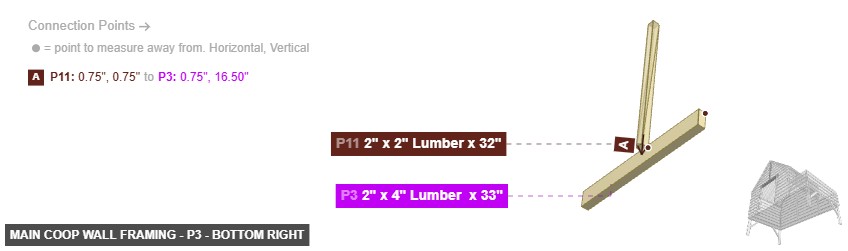
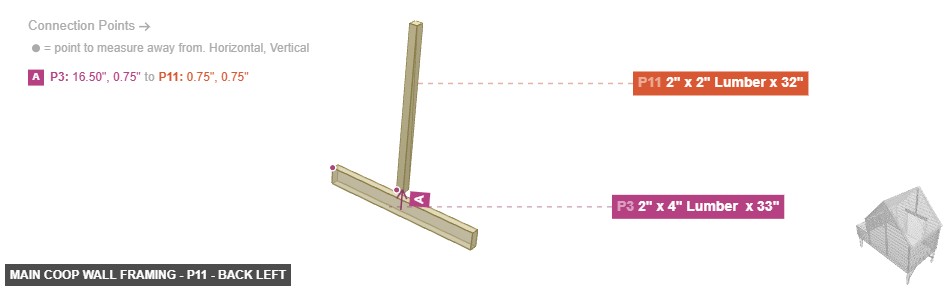
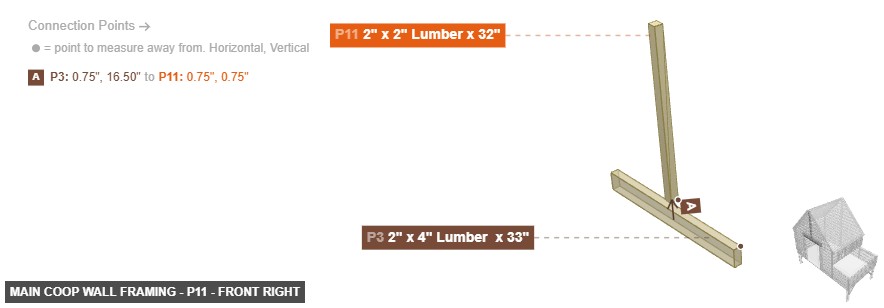
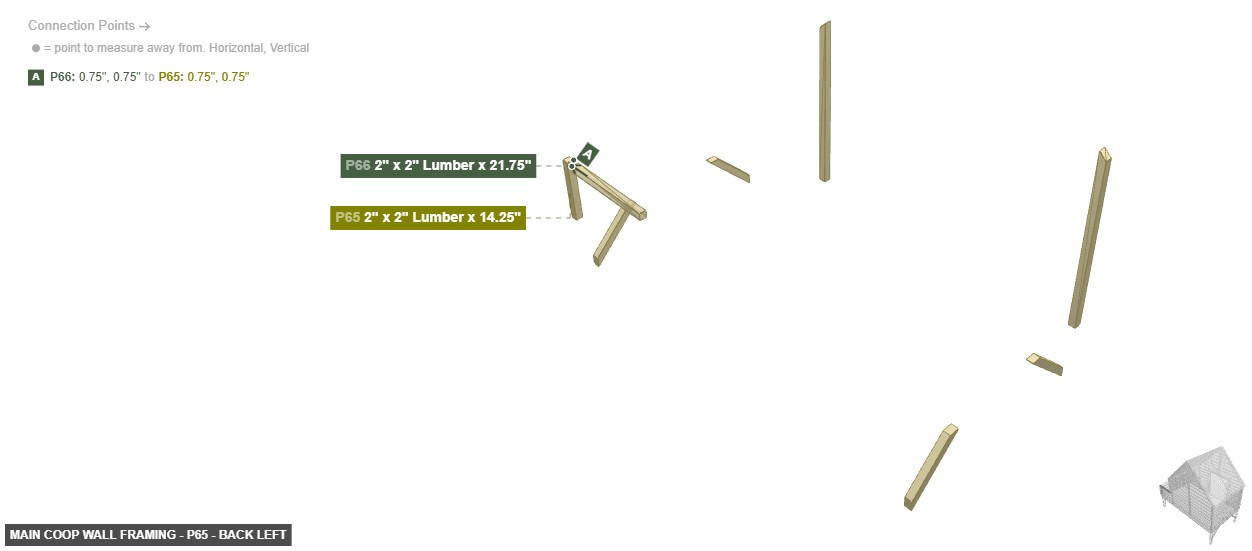
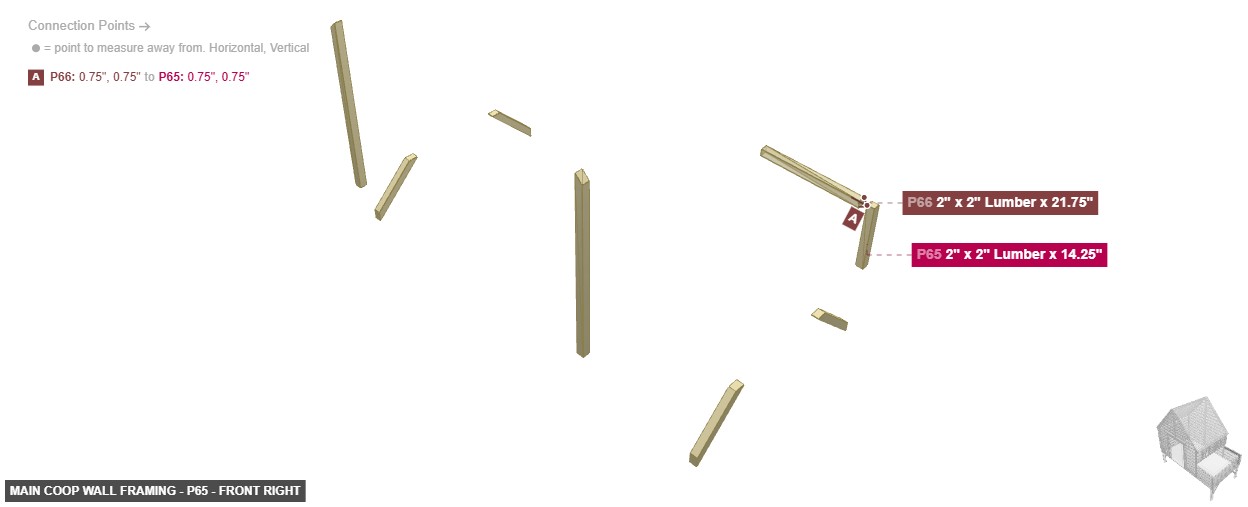
Builds the vertical walls and upper frame of the main coop house, which will support the roof.
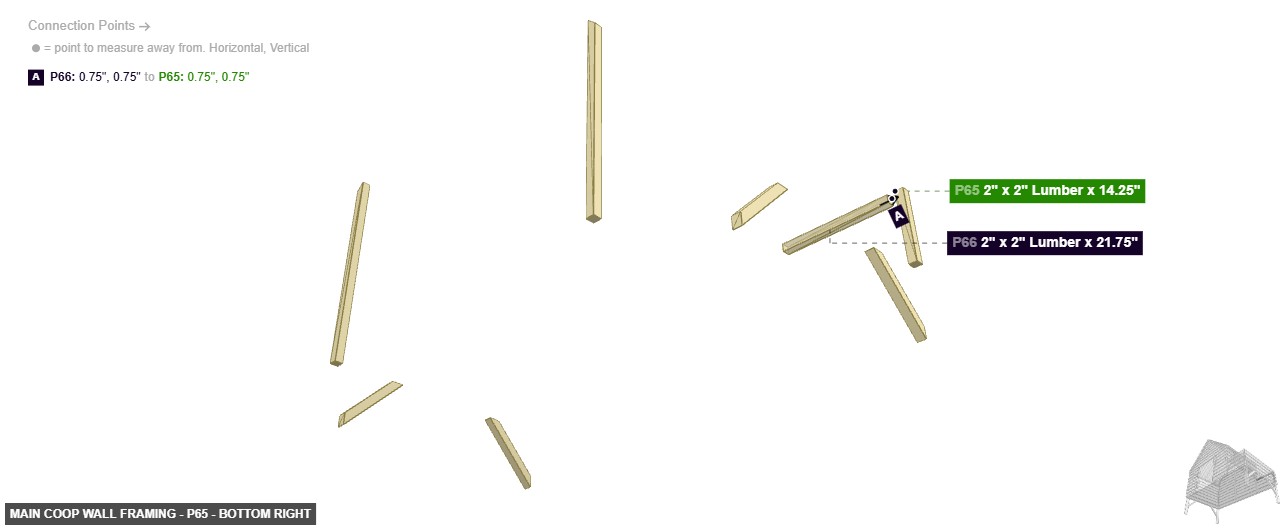
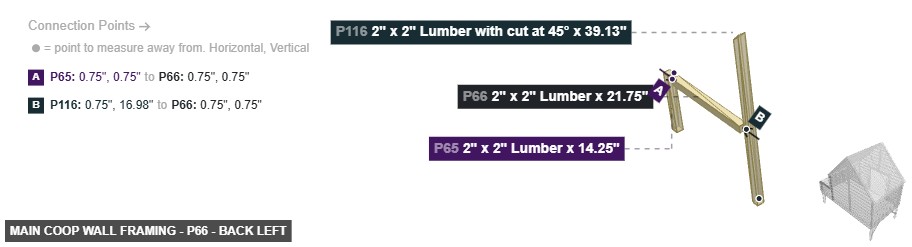
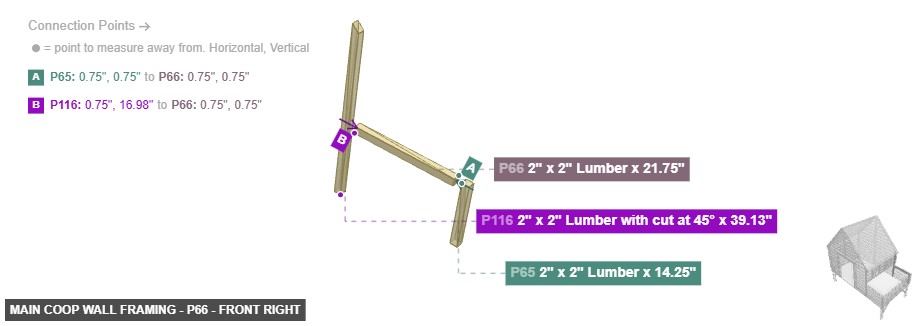
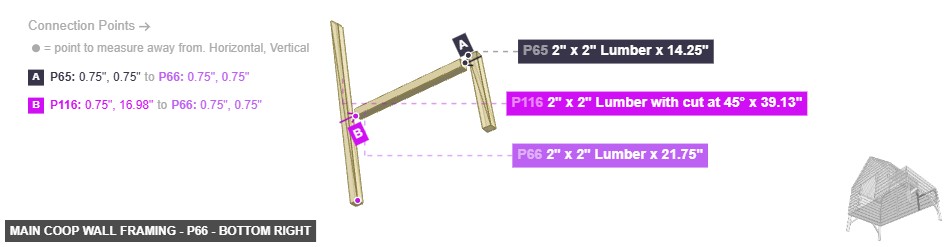
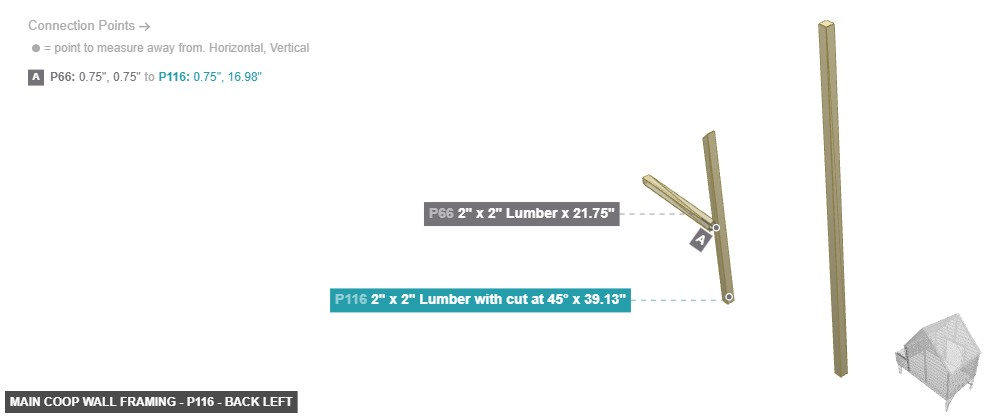
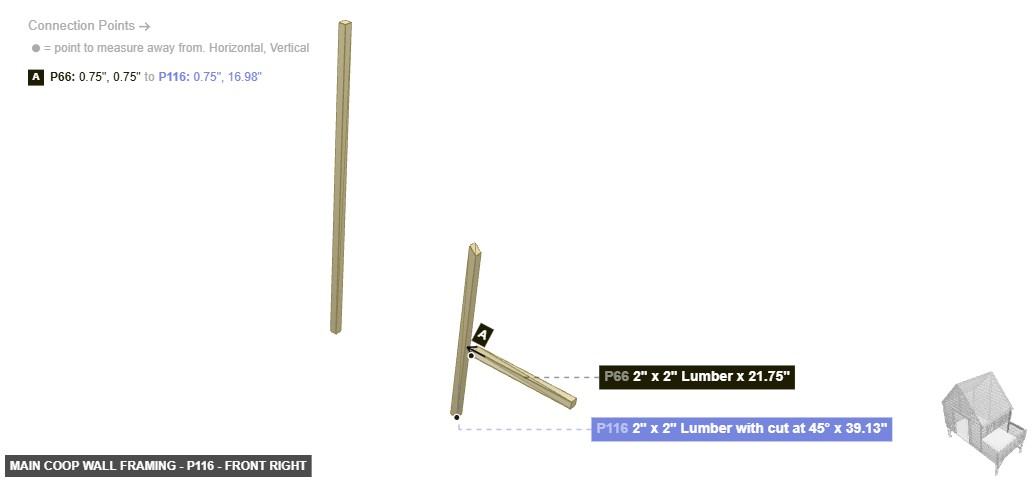
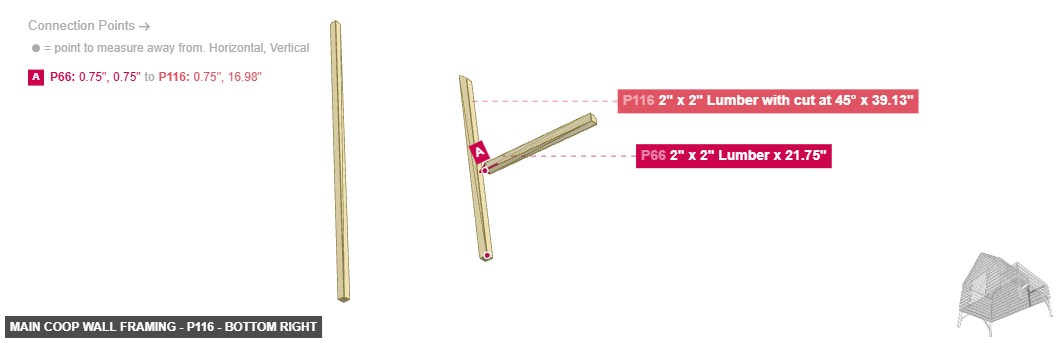
Attach the main corner posts P61, P62, and P116 to the floor frame. Connect them at the top with beams P11 and P71. Install the central post P3 and the upper frame pieces P65 and P66. Add the angled braces P16, P17, P18, and P19 for stability between the floor and wall frames.


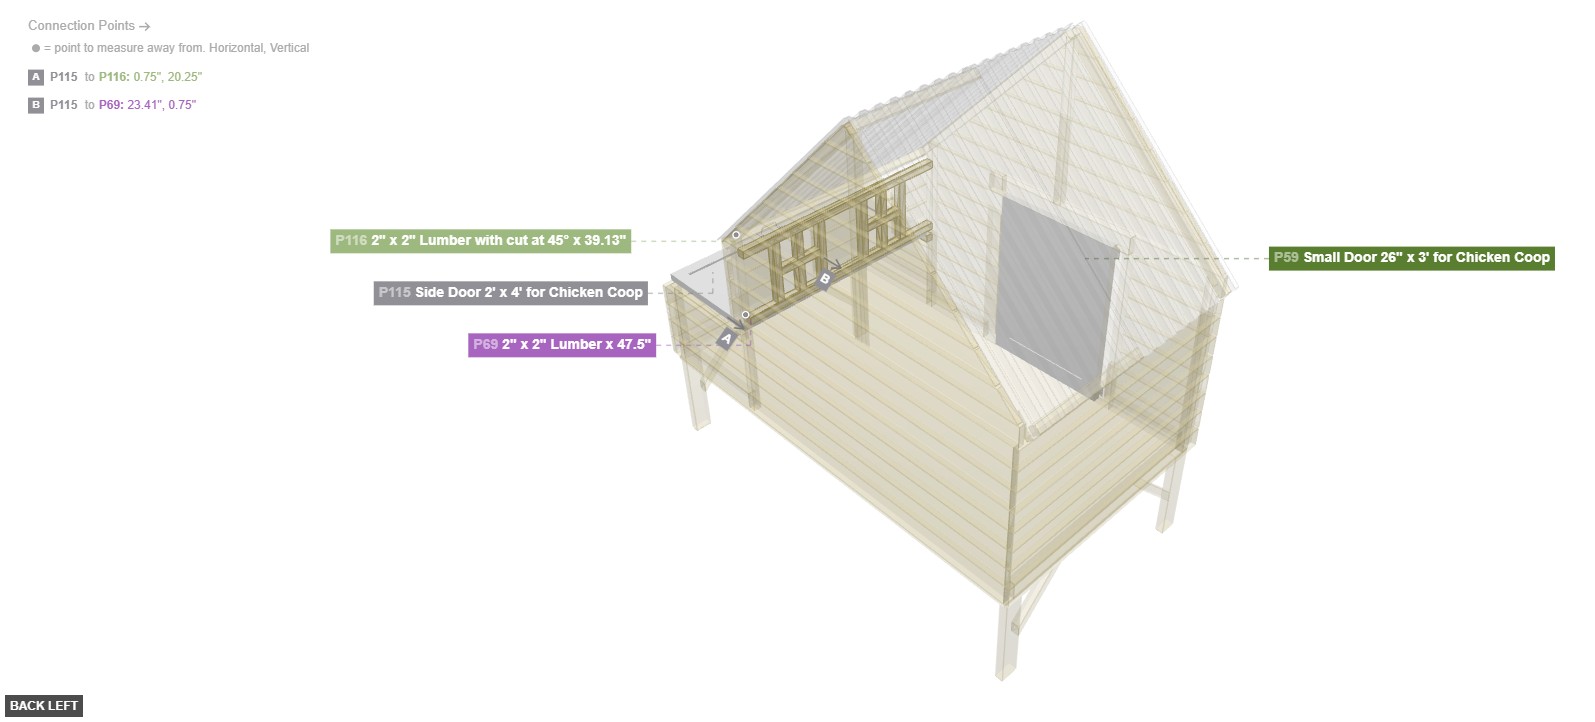
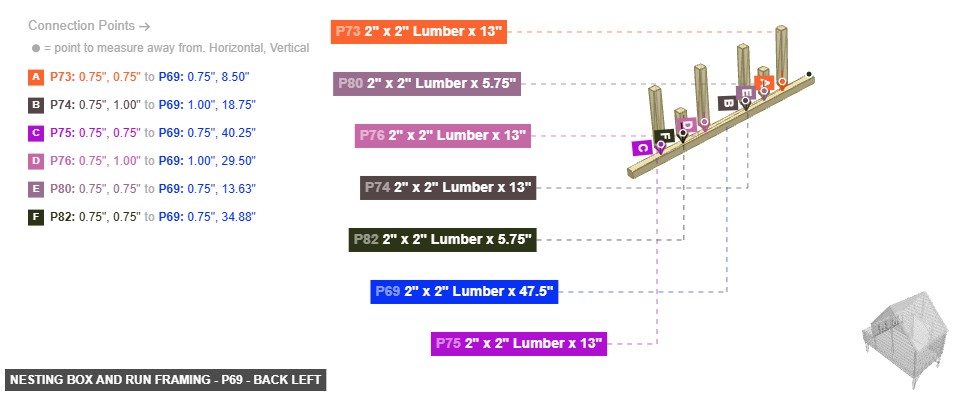
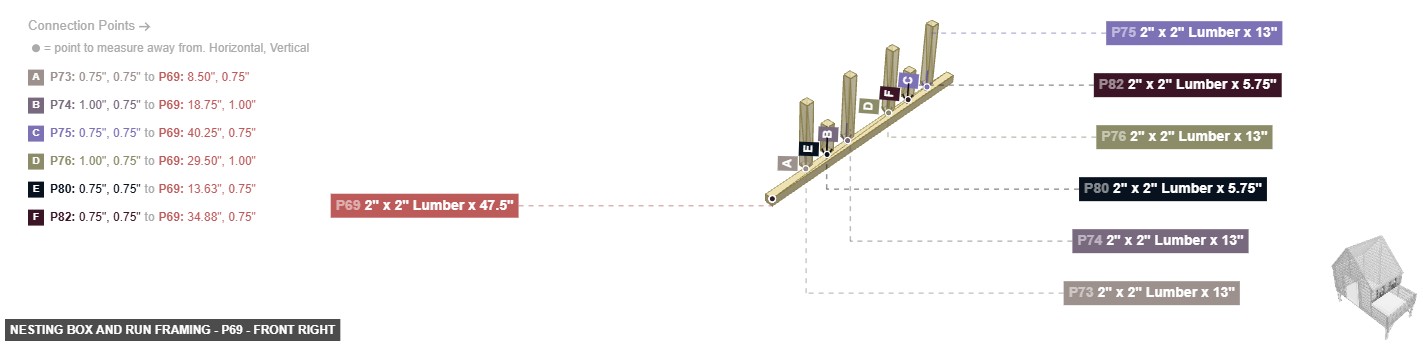
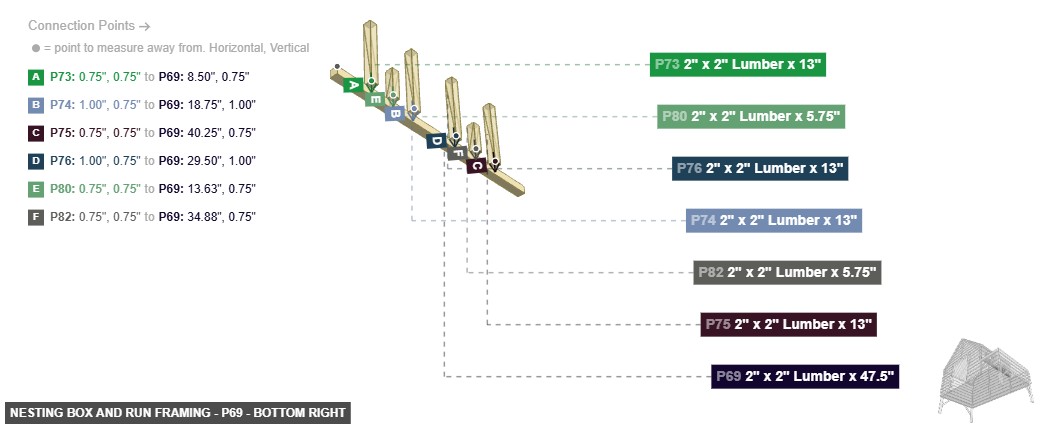
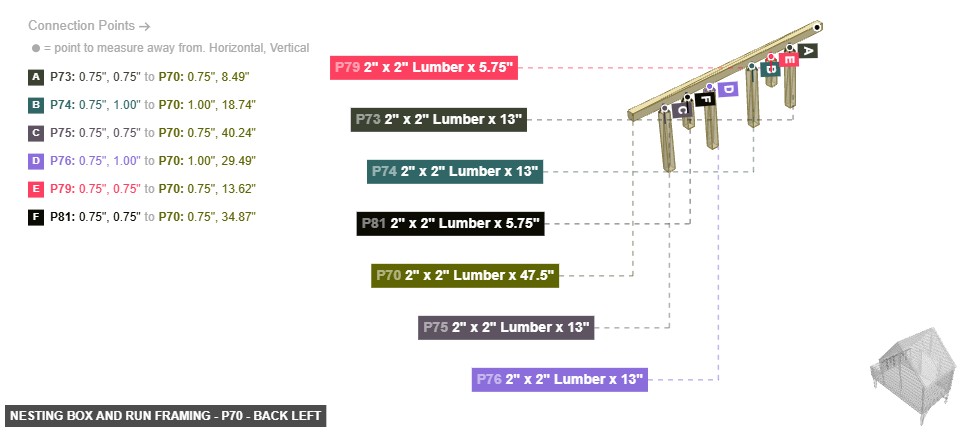
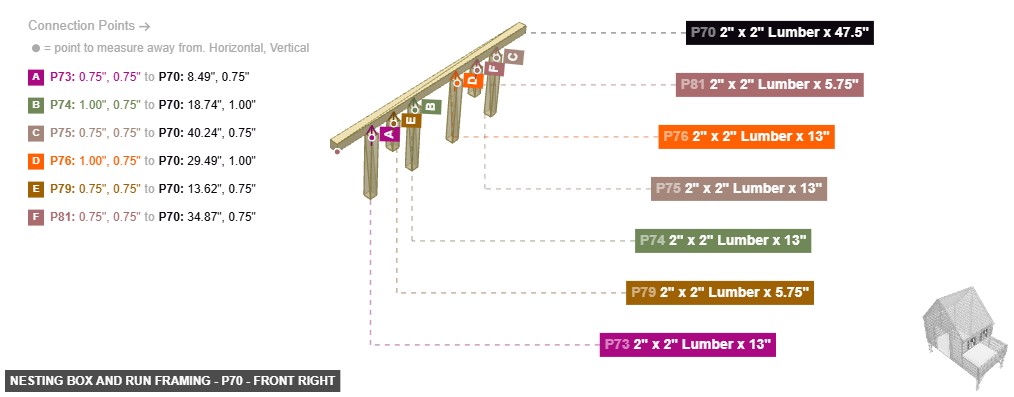
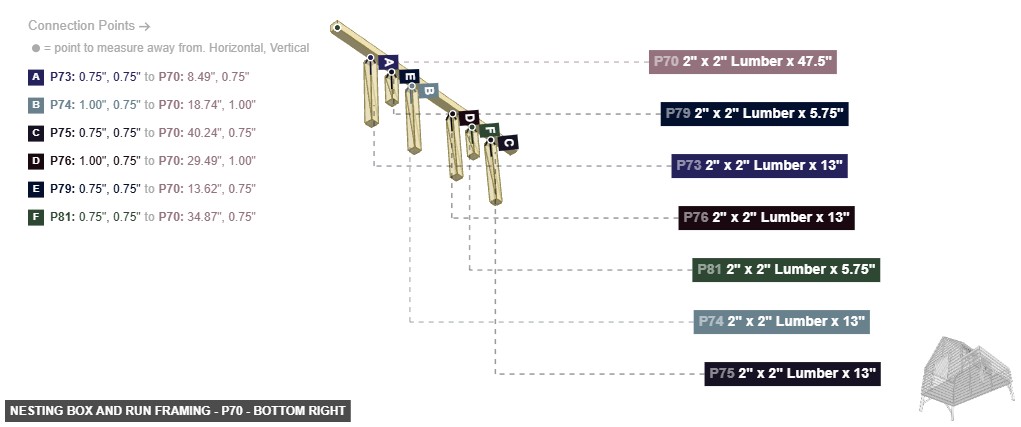
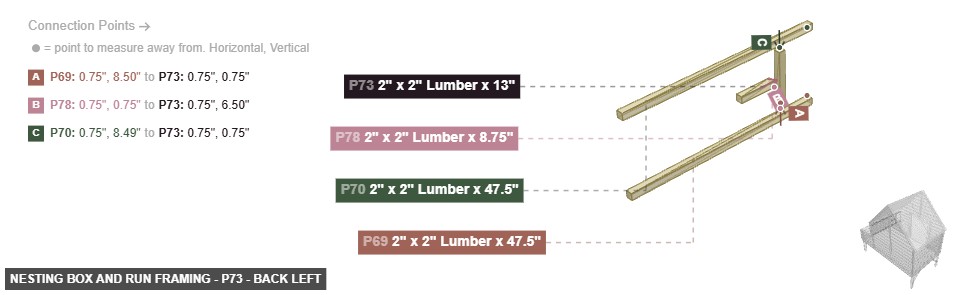
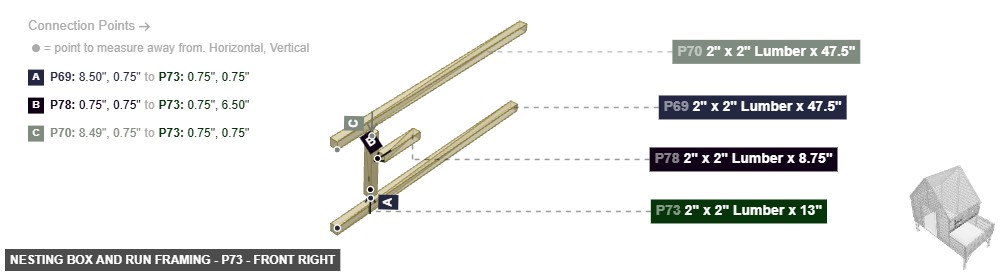
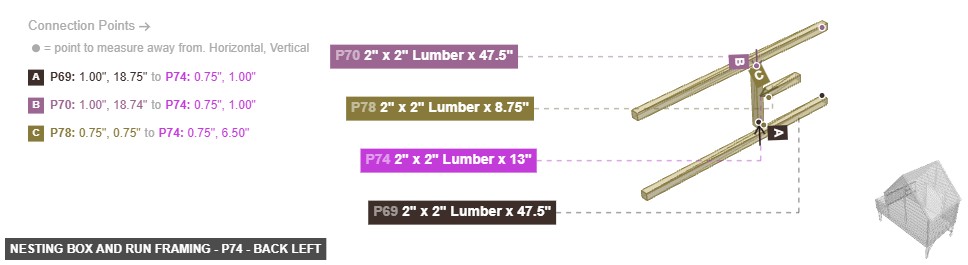
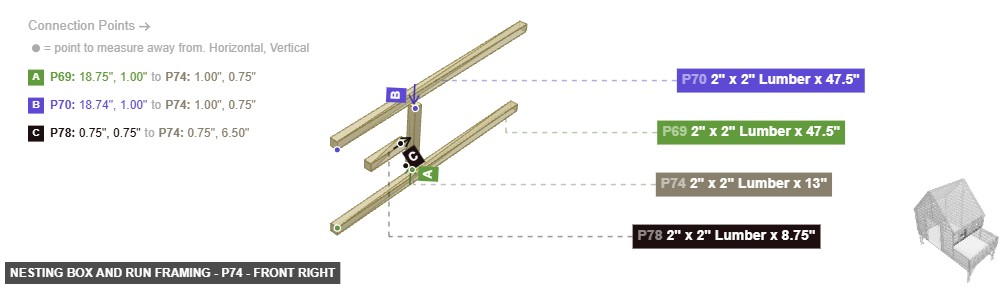
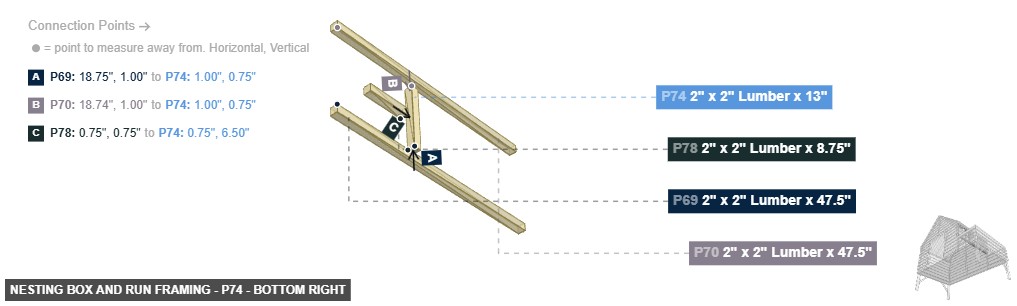
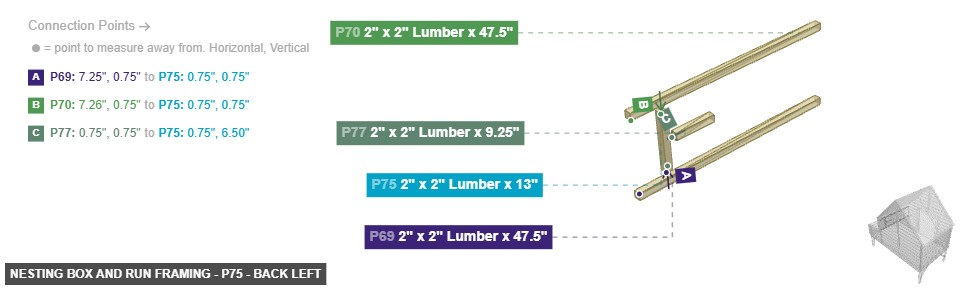
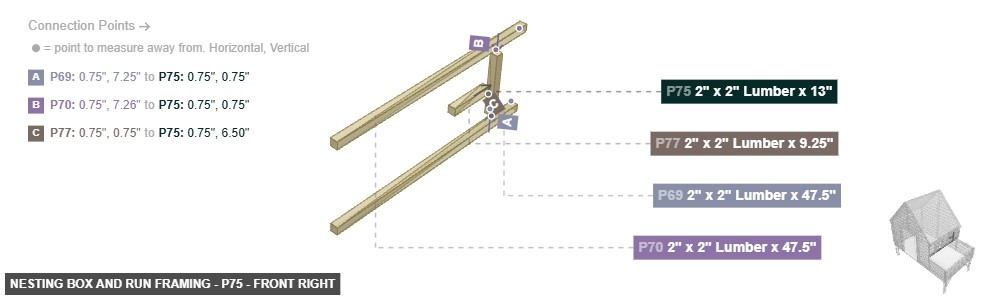
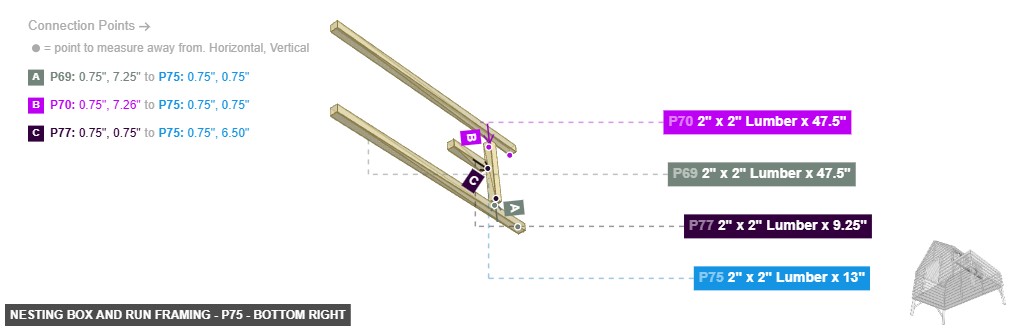
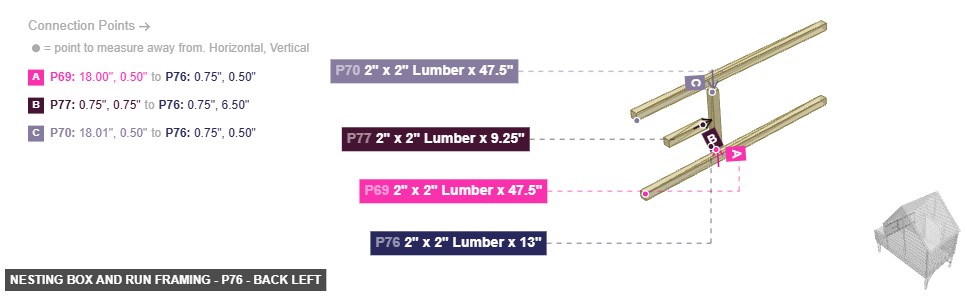
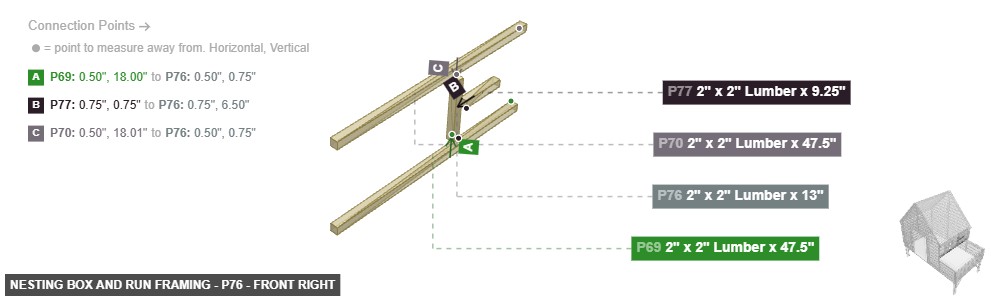
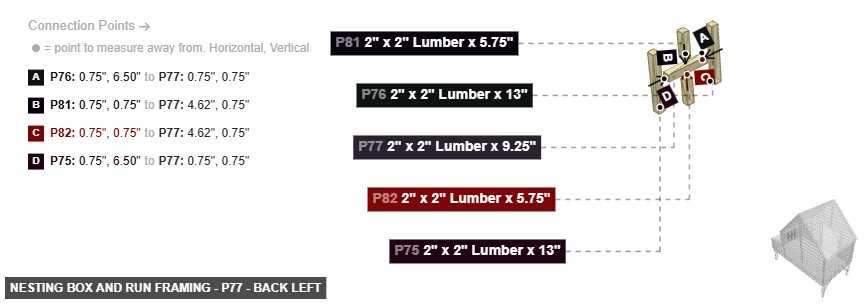
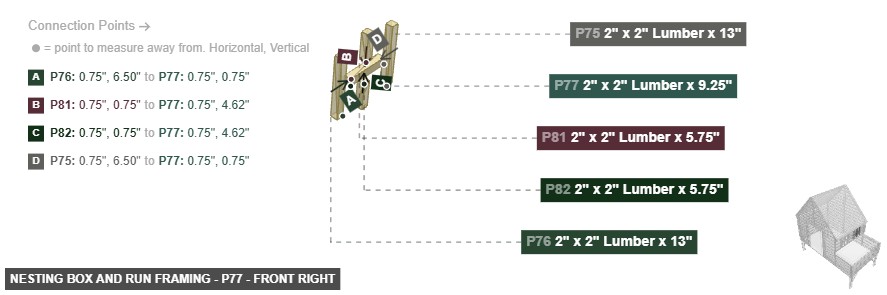
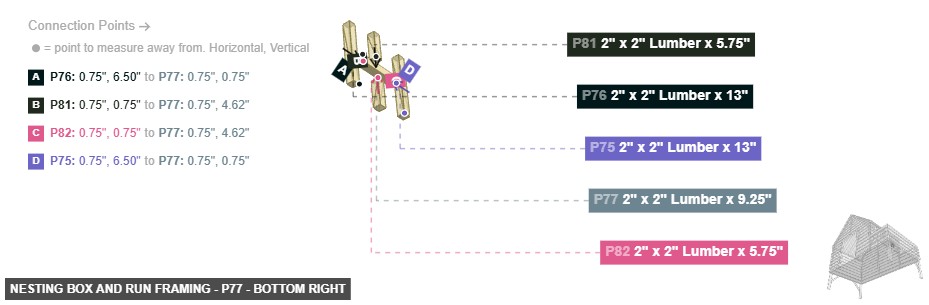
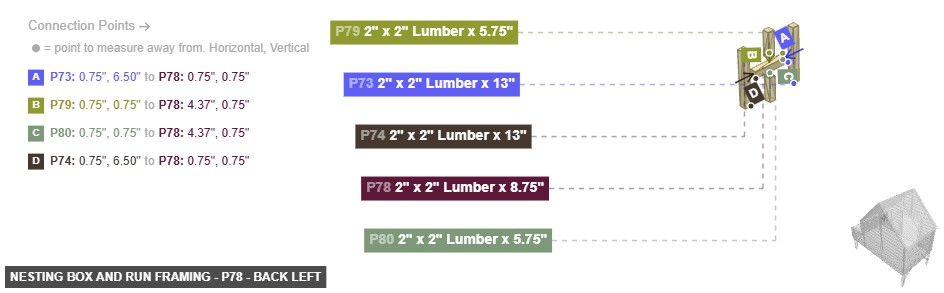
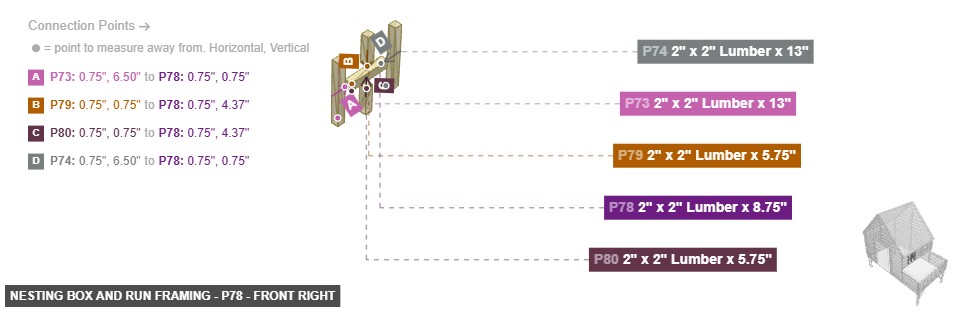
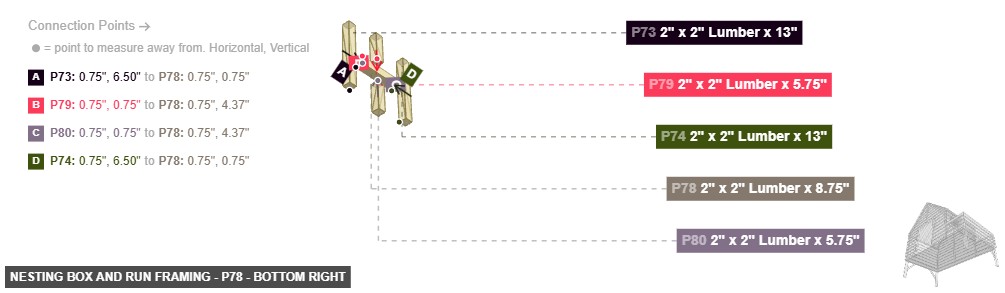
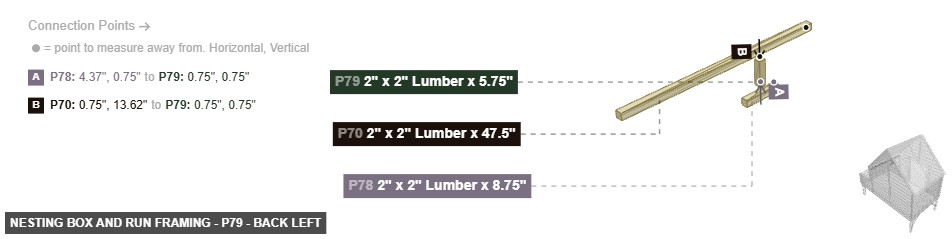
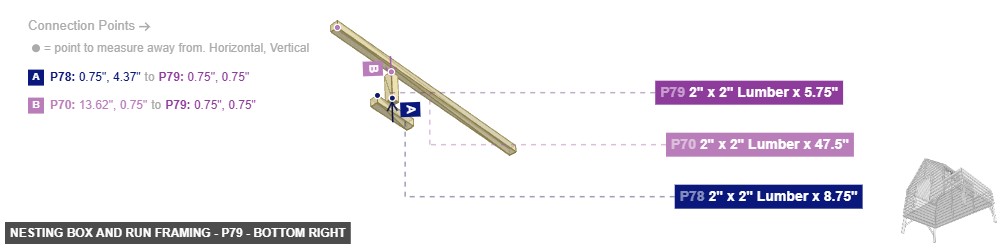
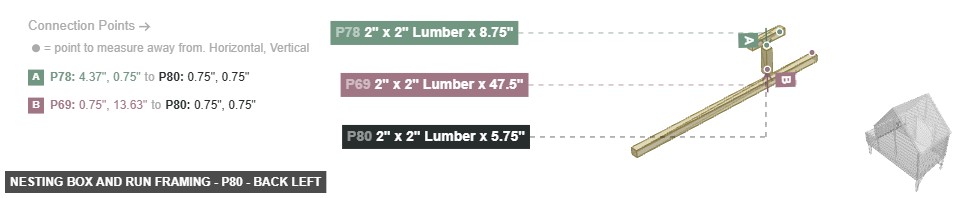
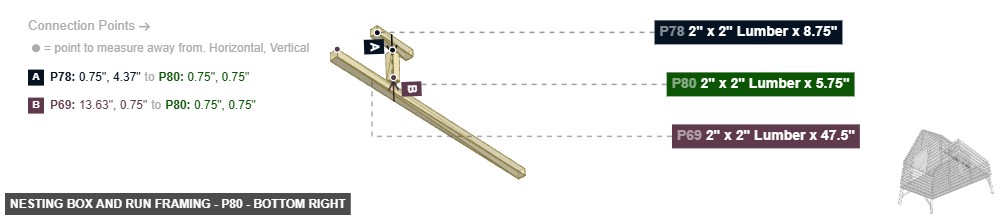
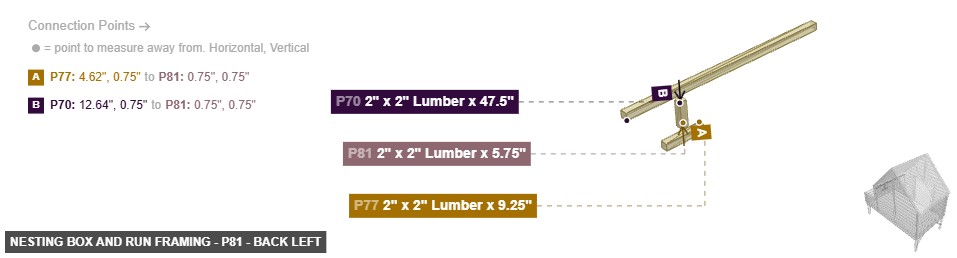
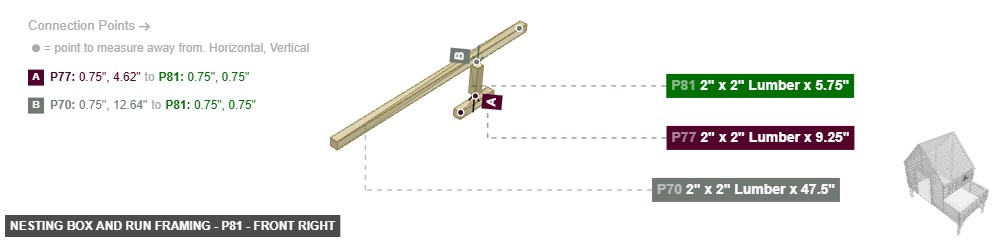
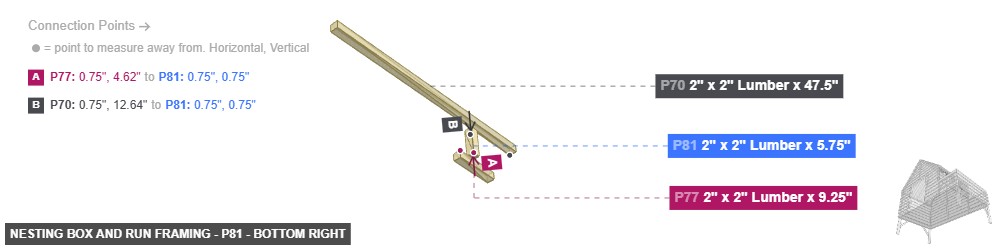
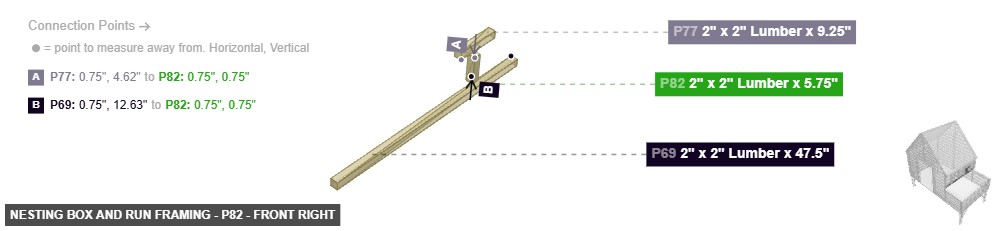
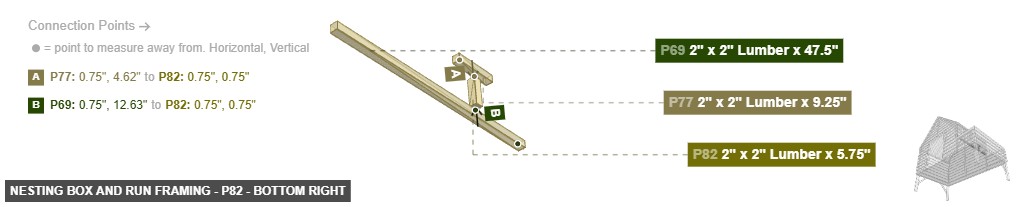
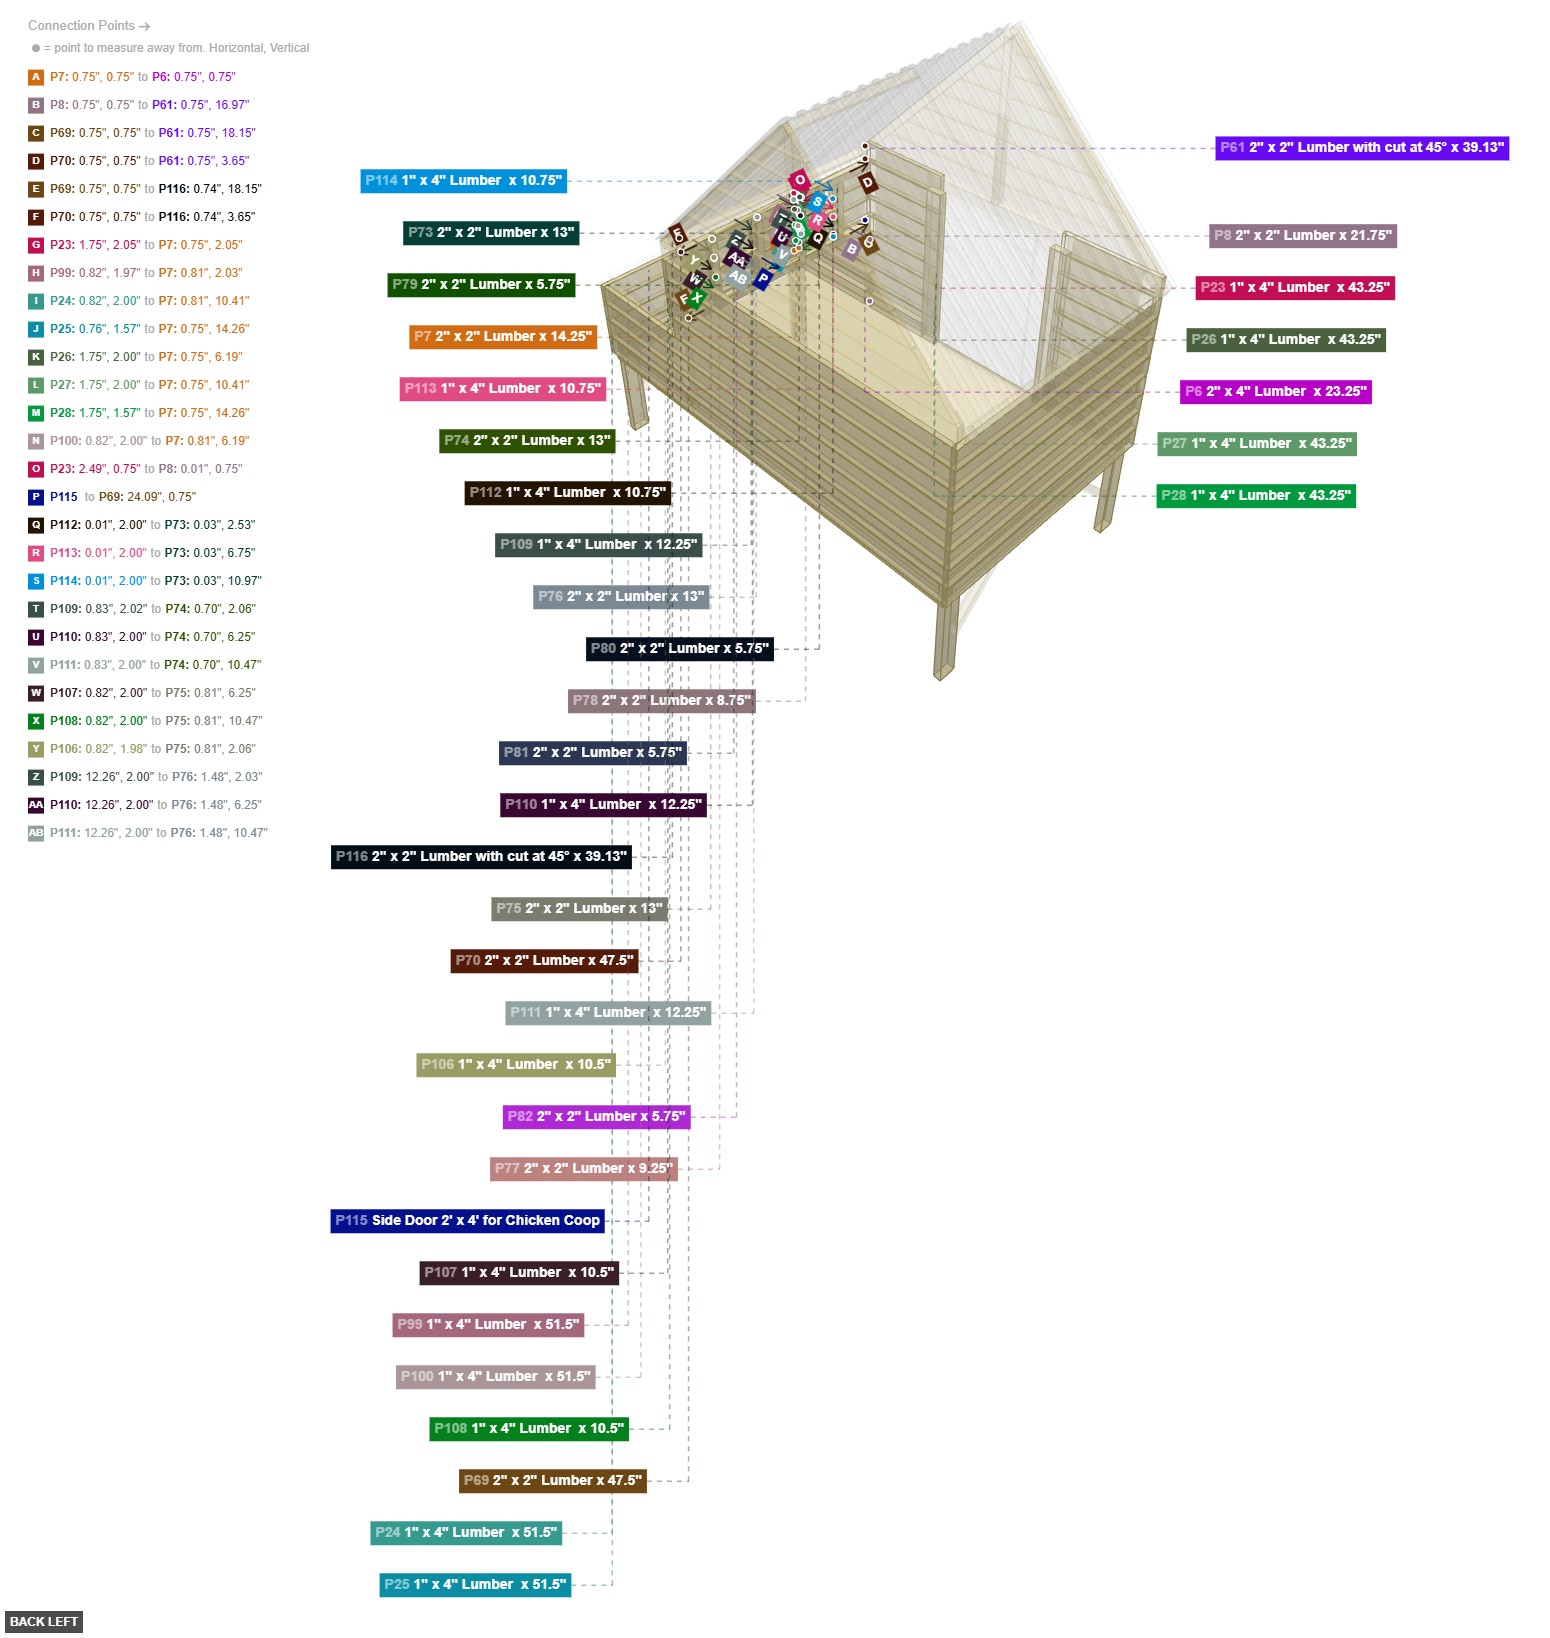
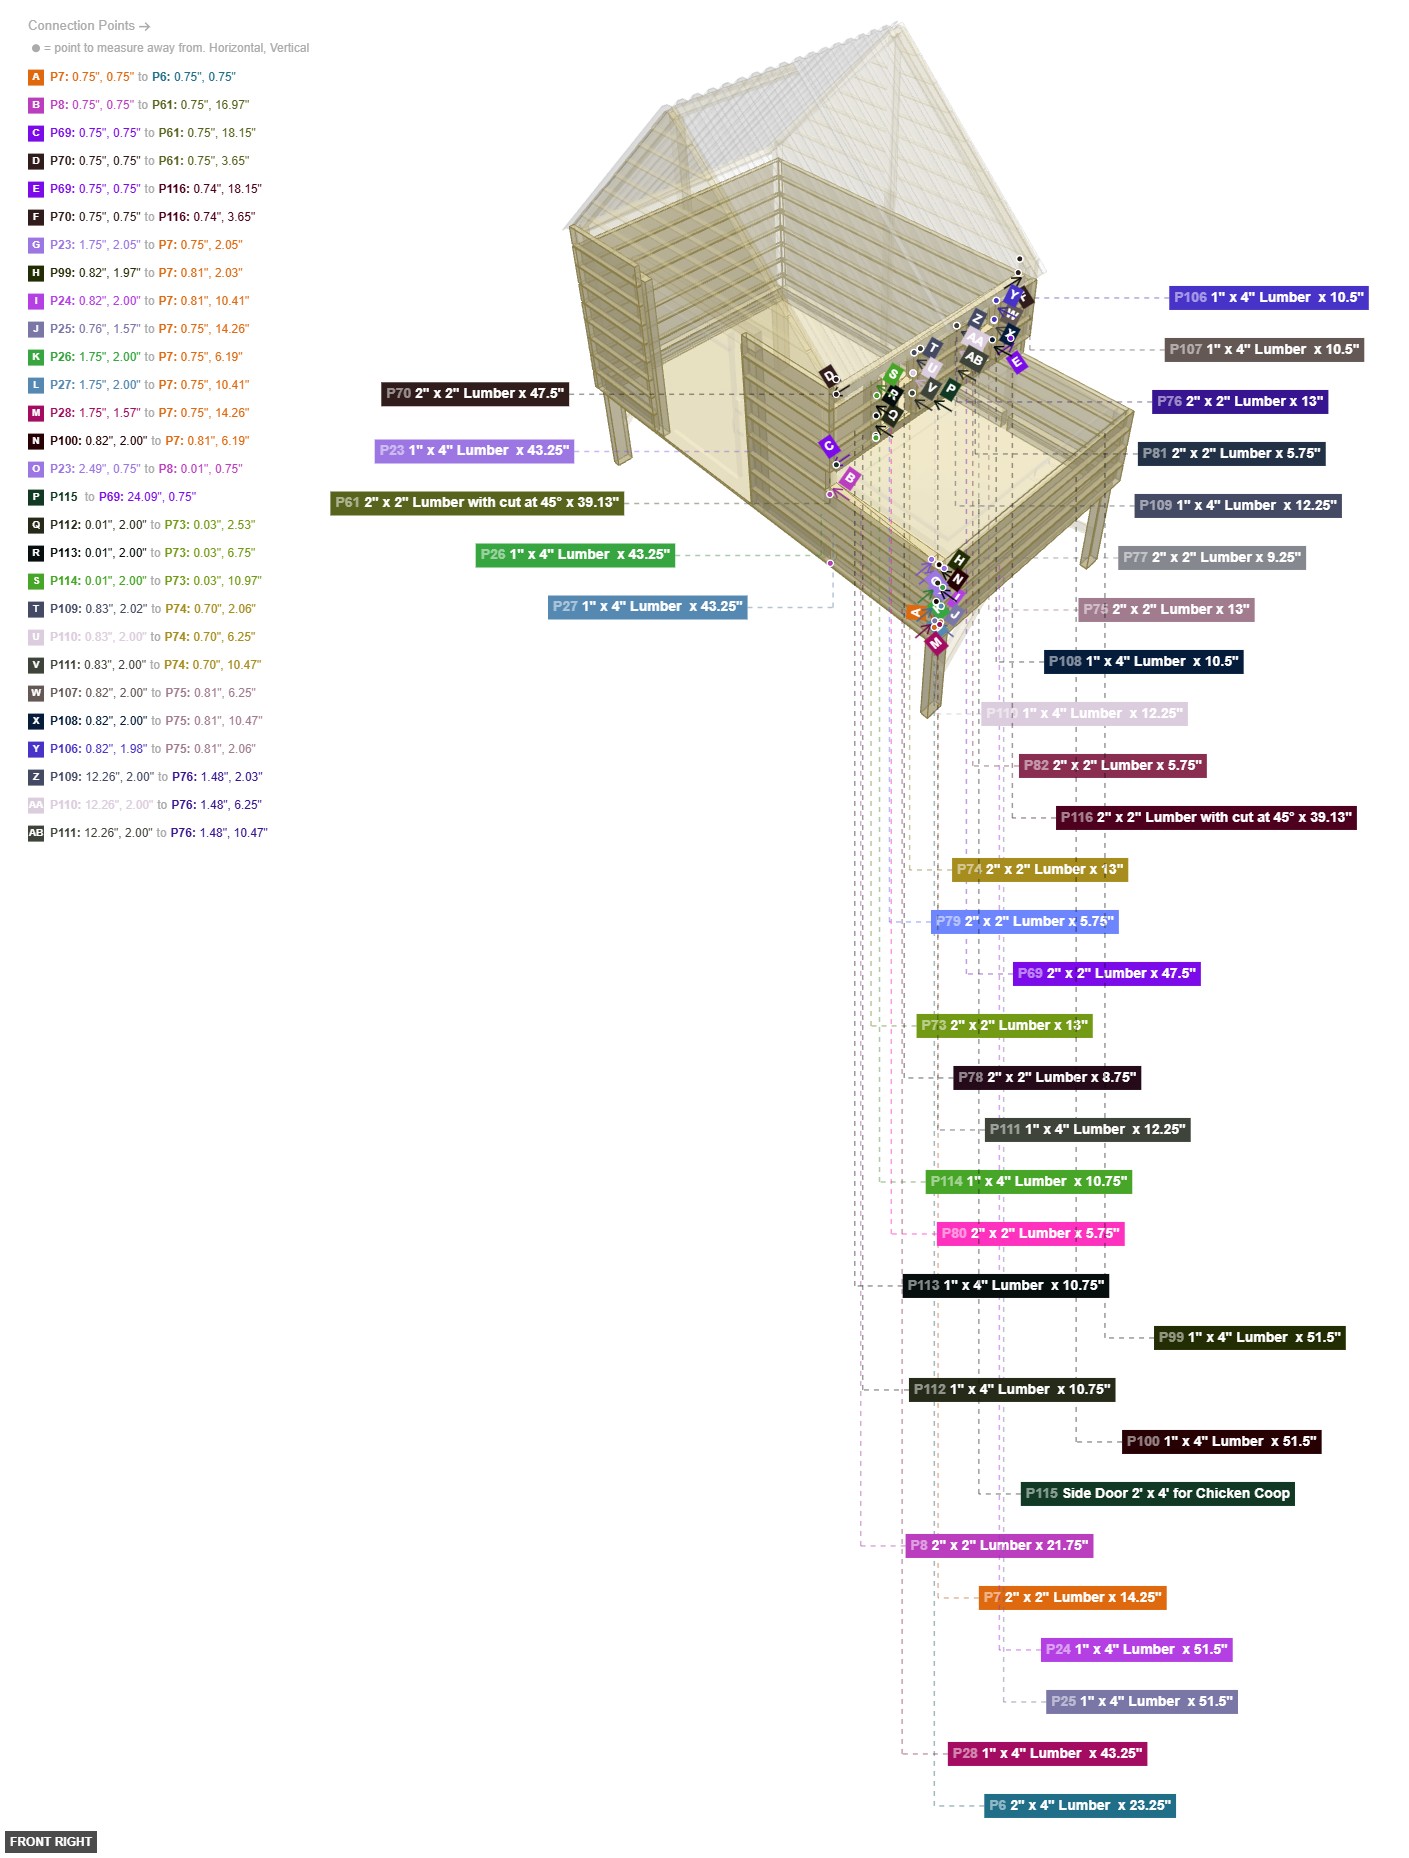
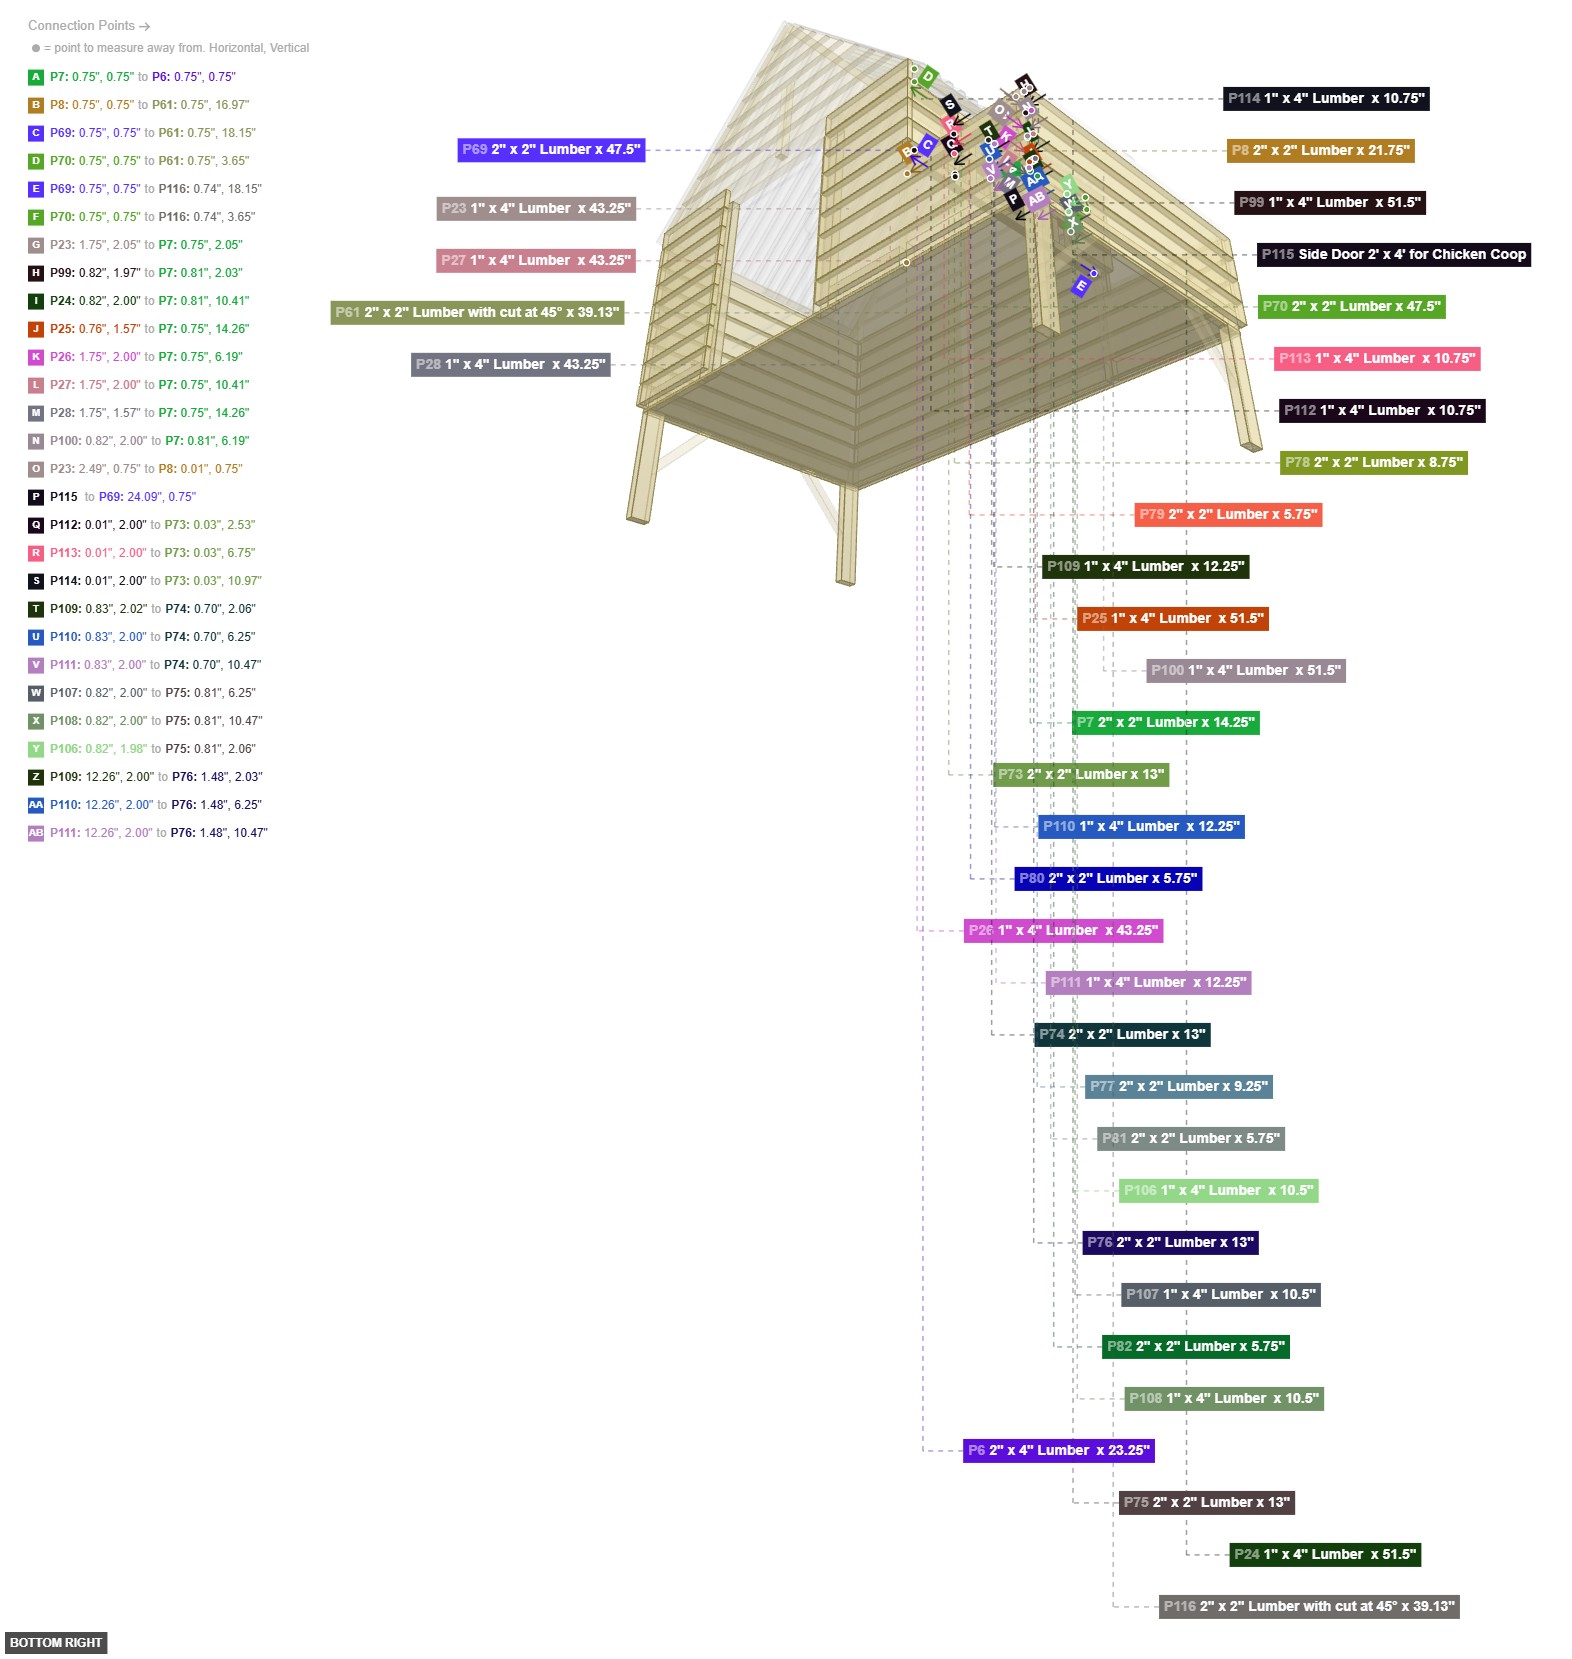
Constructs the frame for the side run and the integrated nesting boxes.
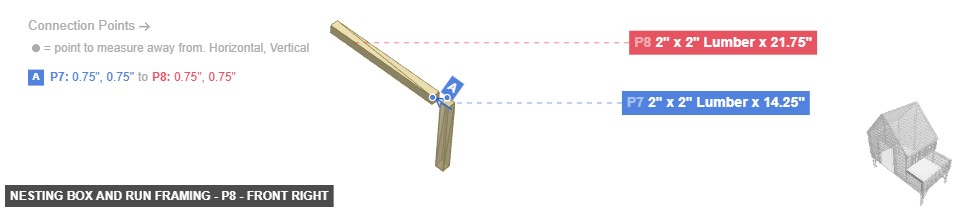
Assemble the outer frame for the run using parts P7, P8, P69, and P70. Build the internal structure for the nesting boxes by creating small cubbies using the vertical dividers (P73, P74, P75, P76), horizontal dividers (P77, P78), and small supports (P79, P80, P81, P82).


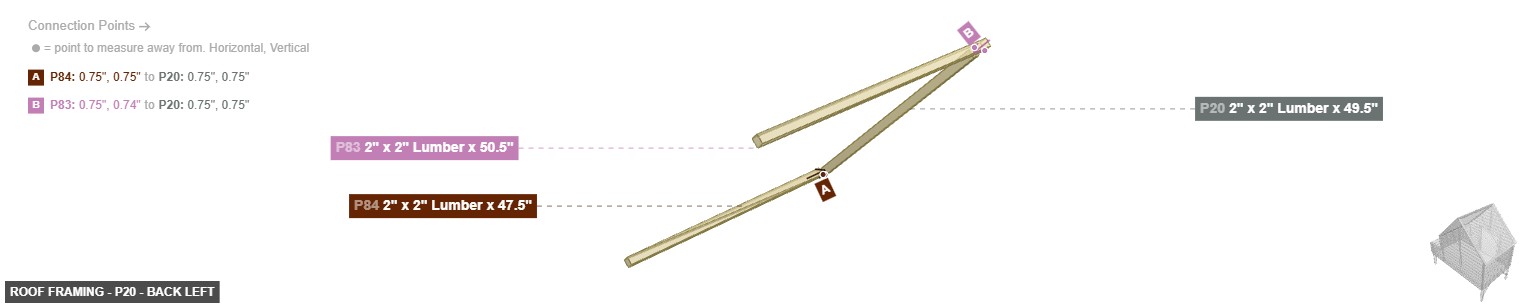
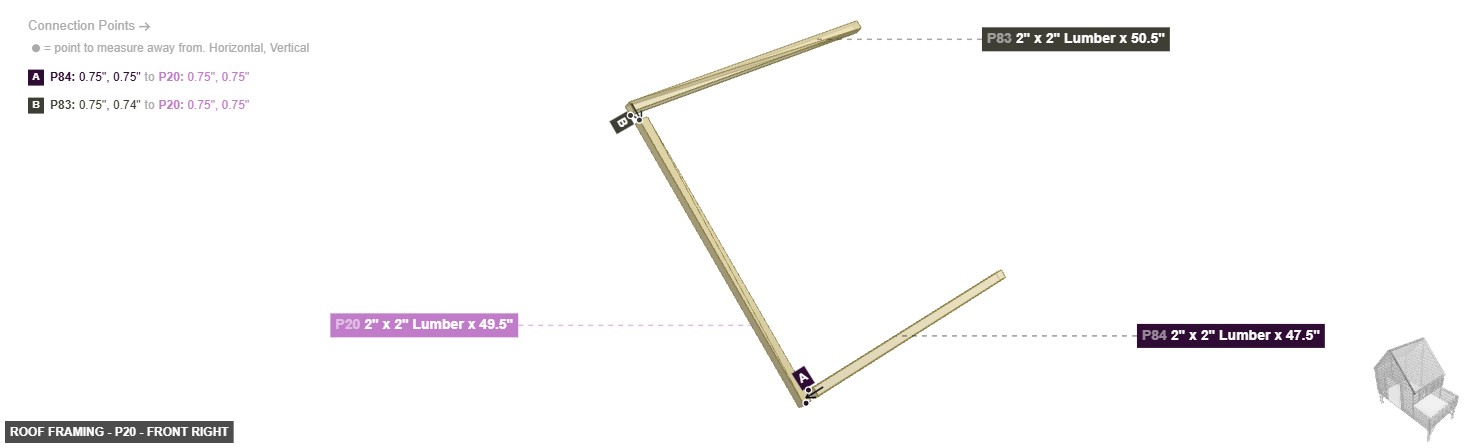
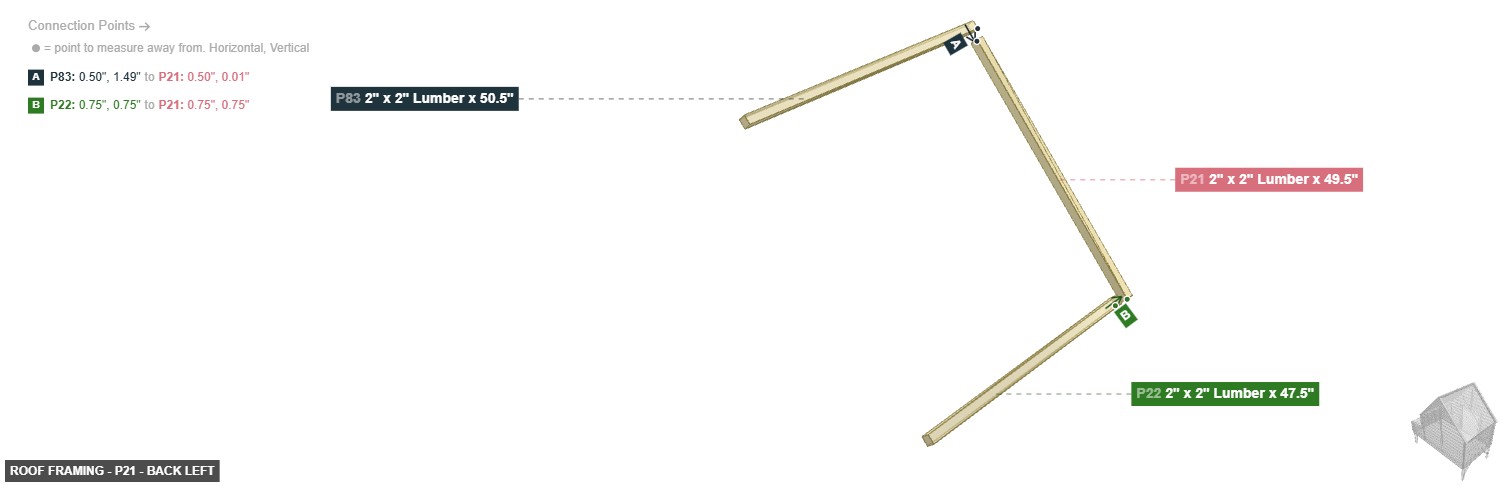
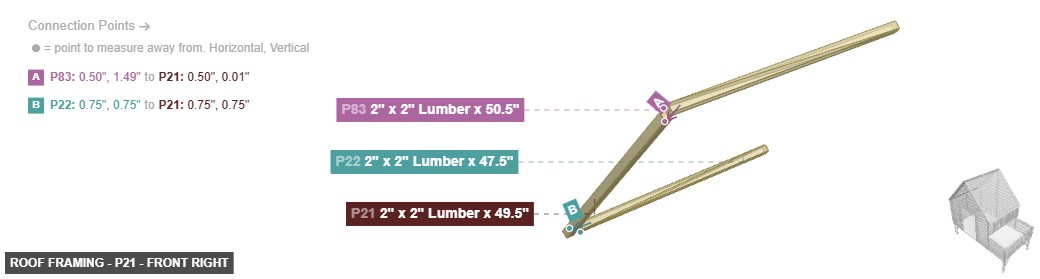
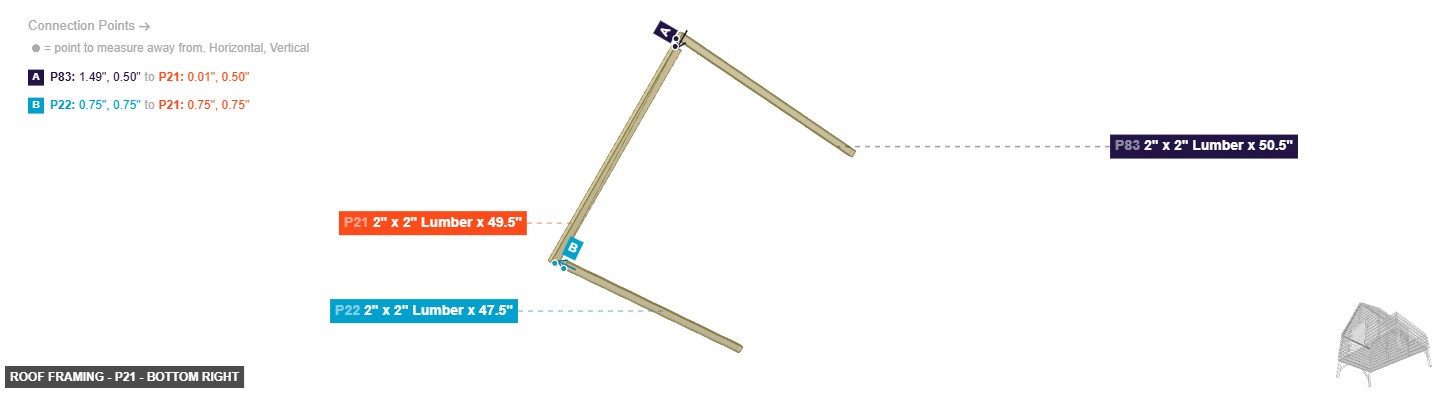
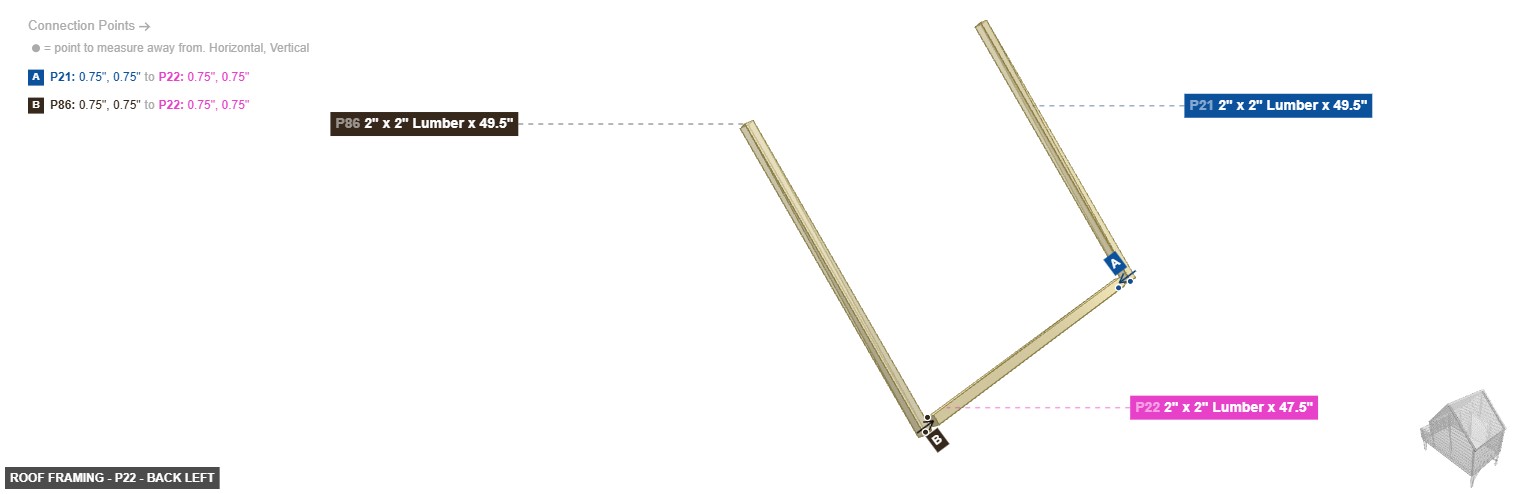
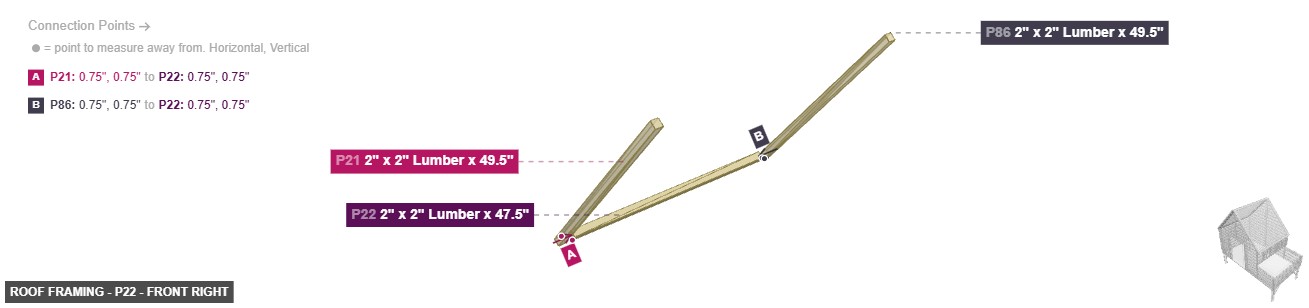
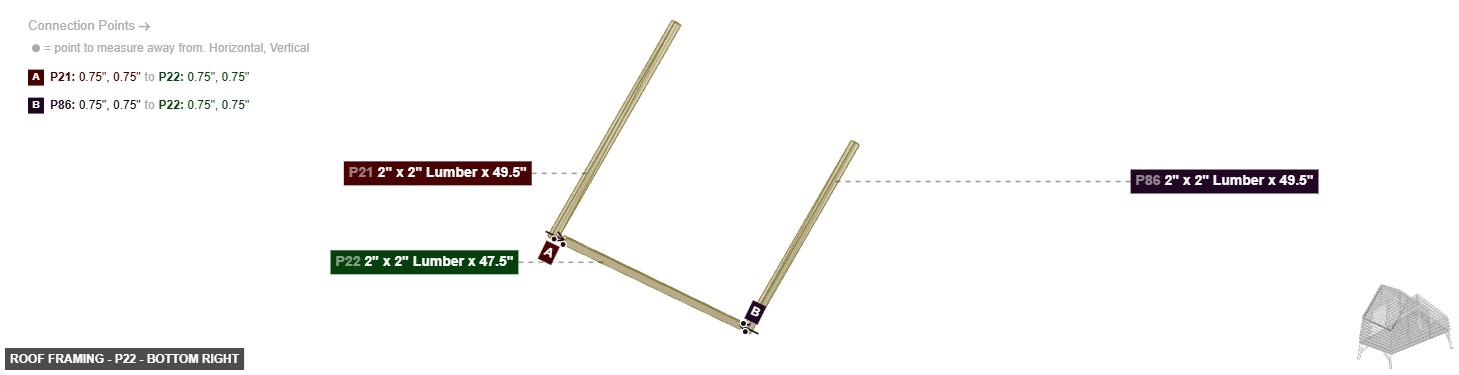
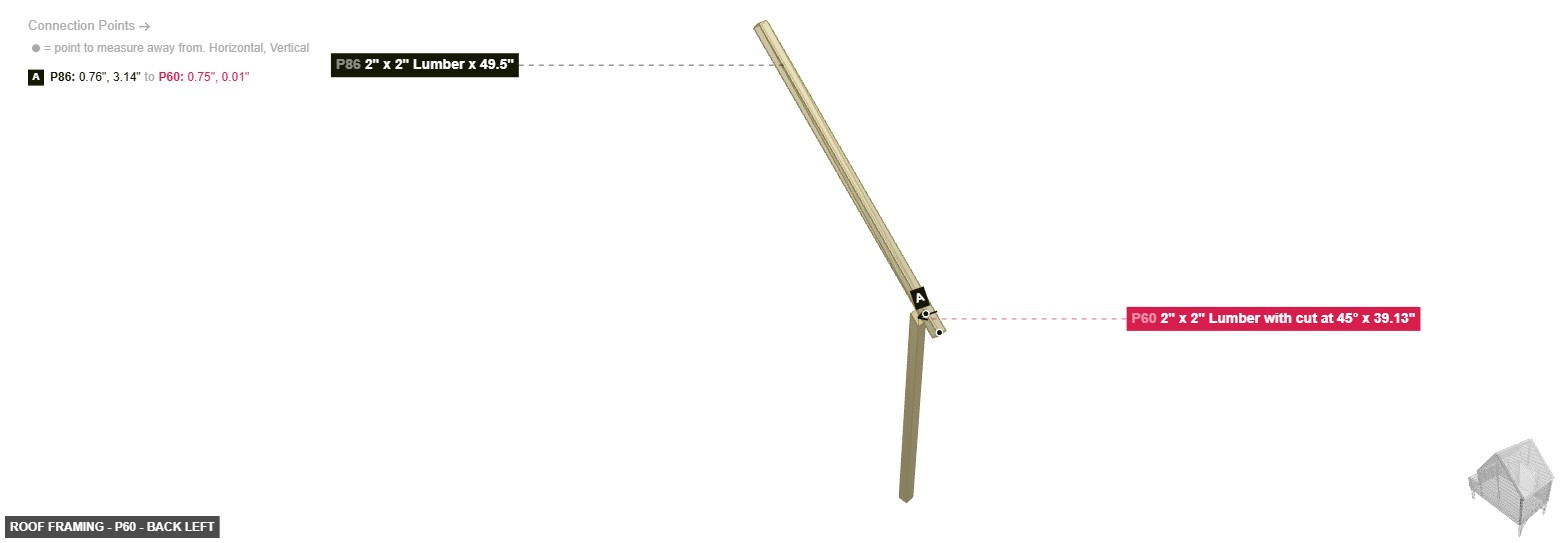
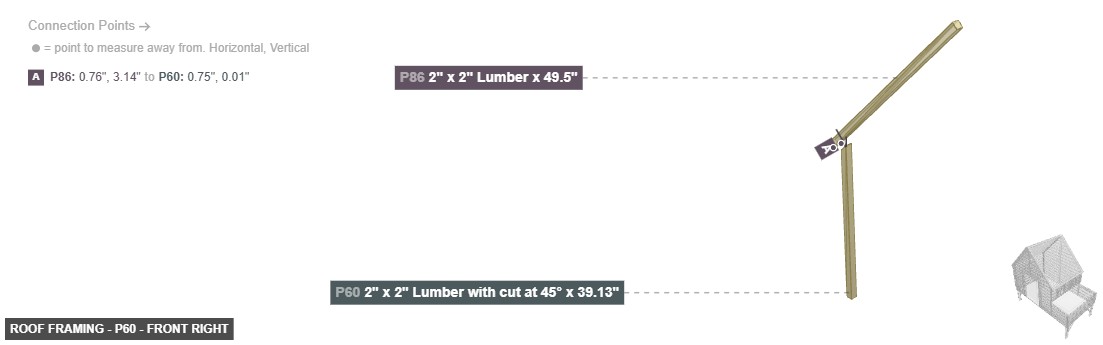
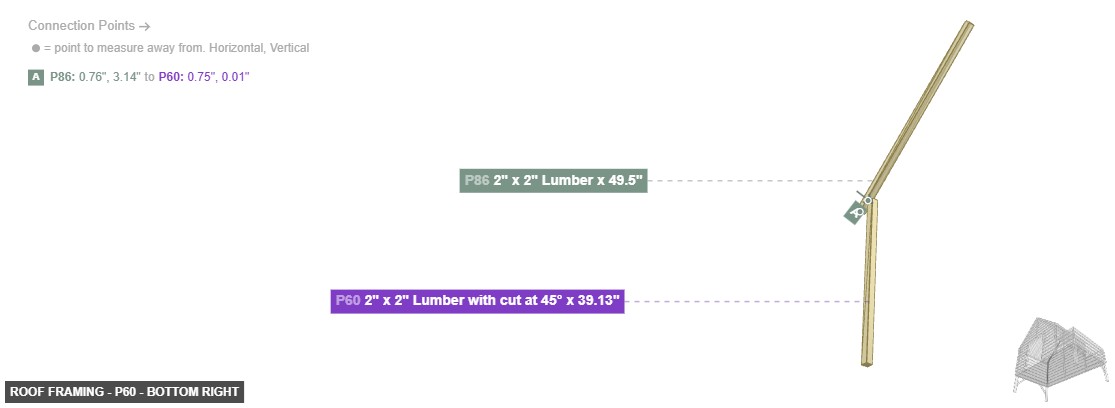
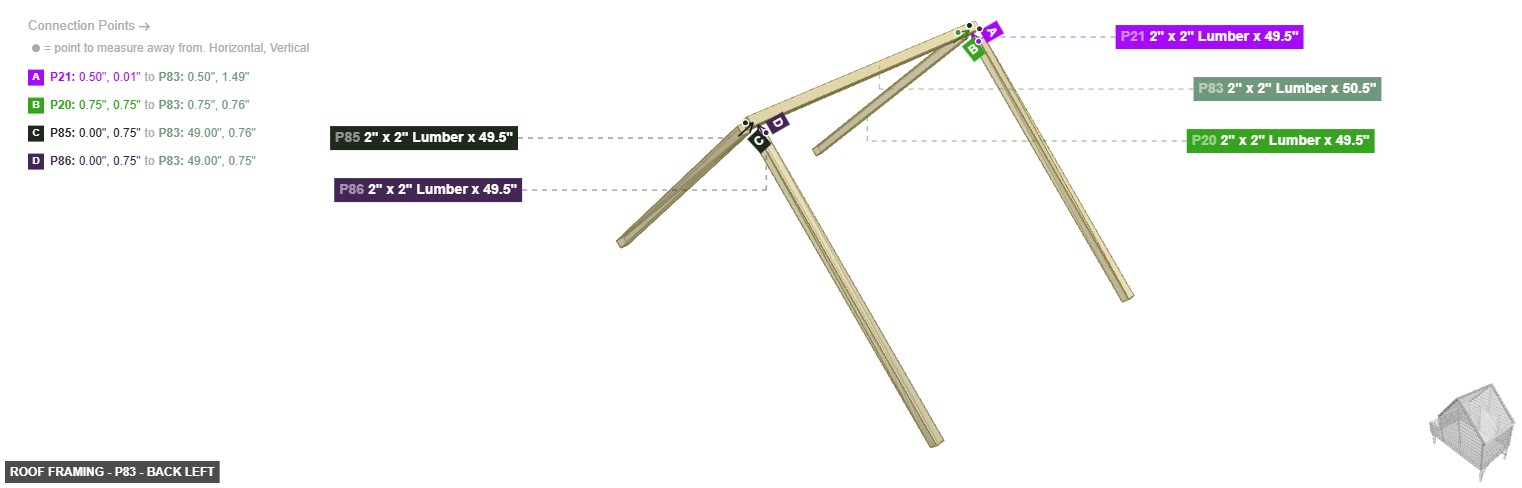
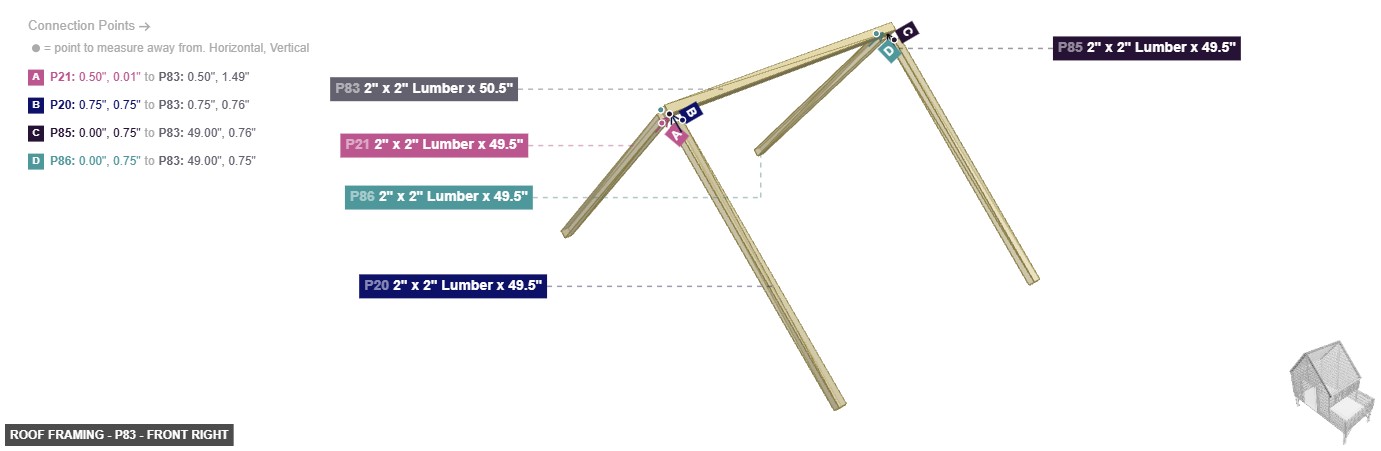
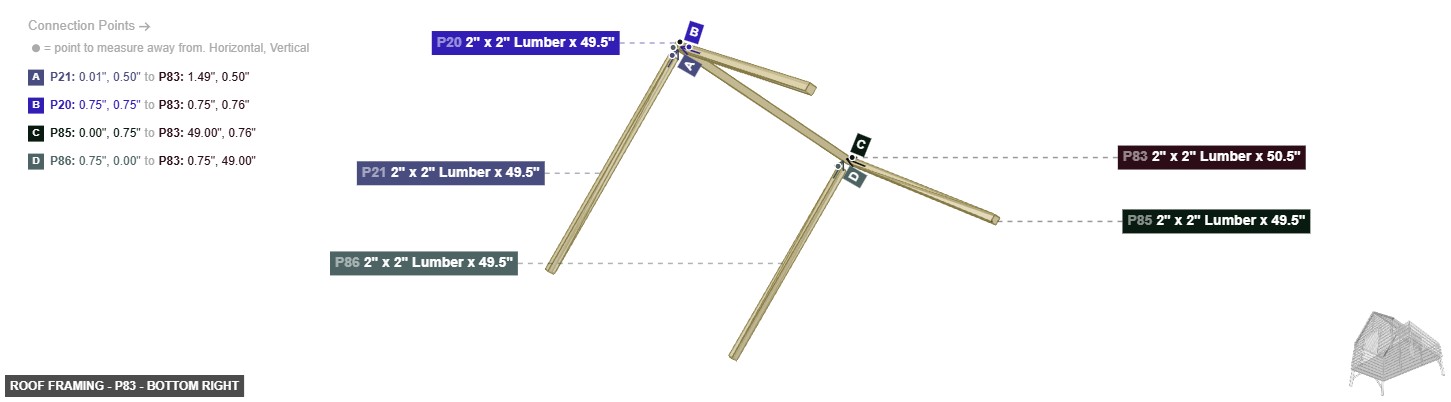
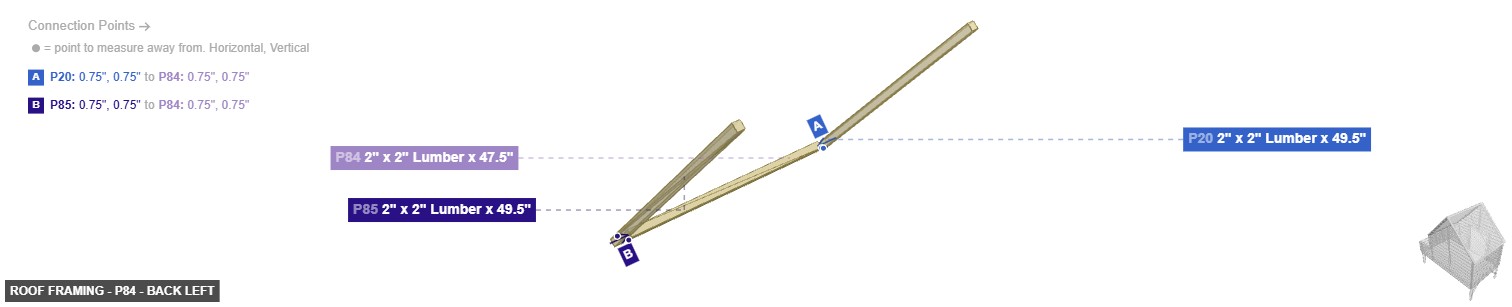
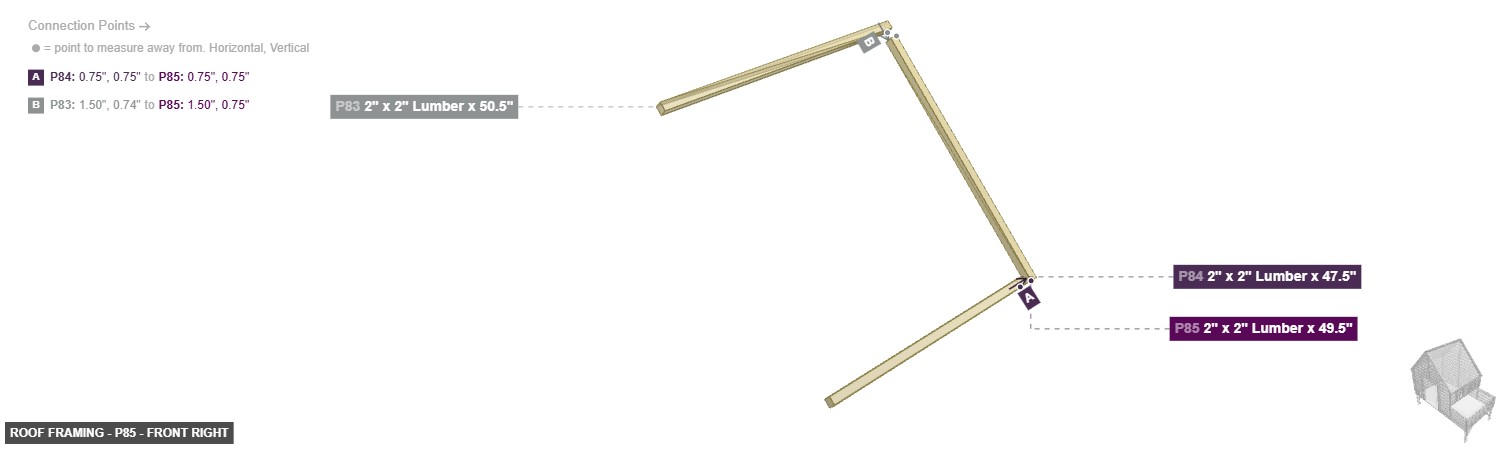
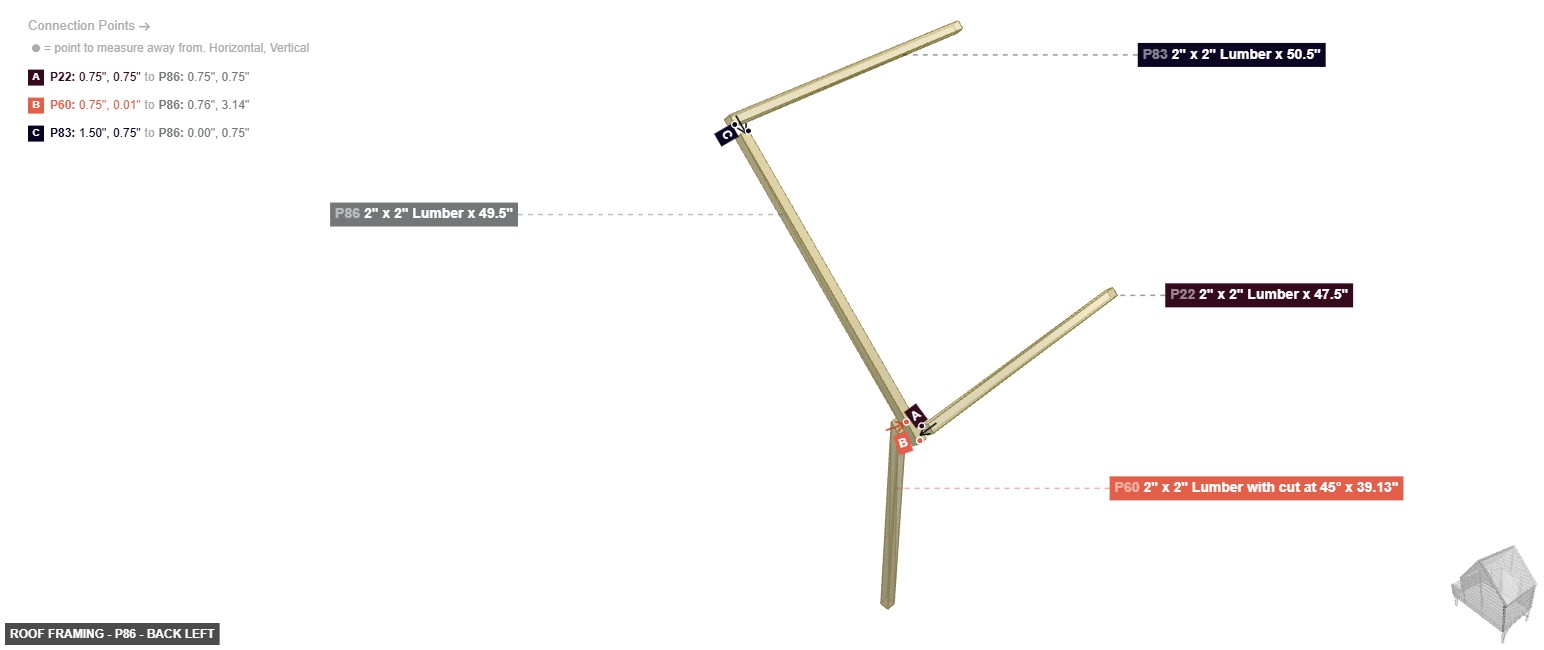
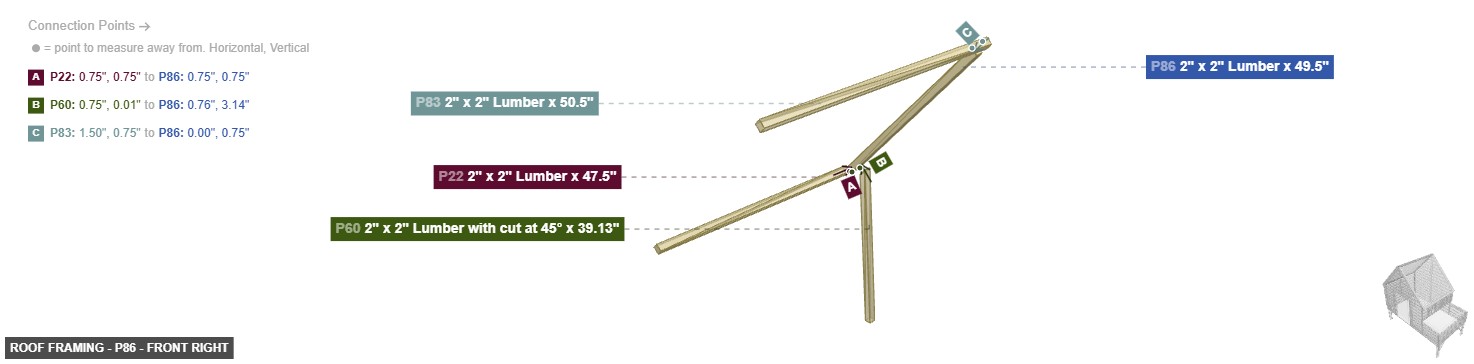
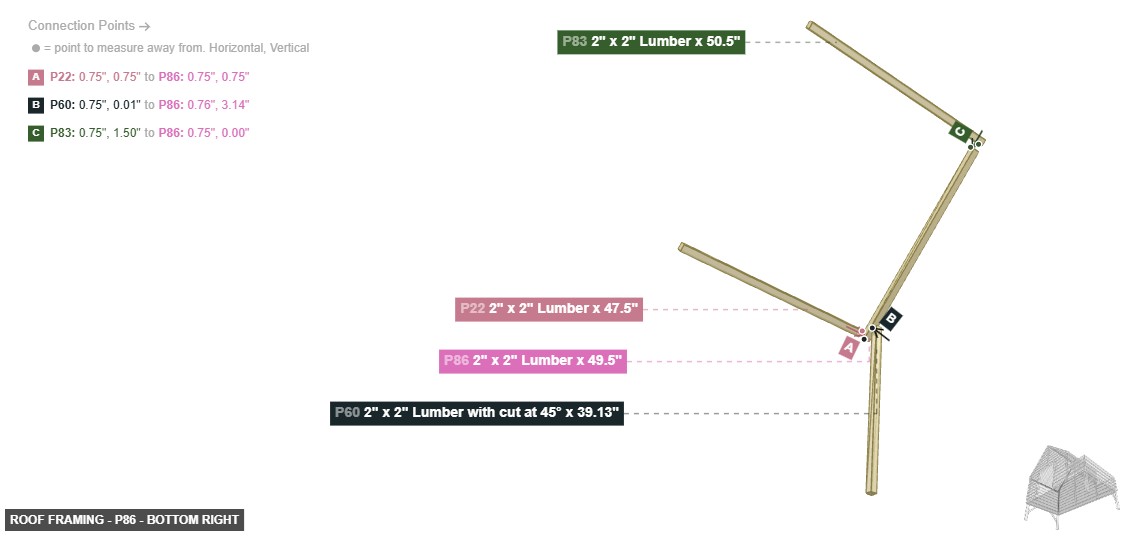
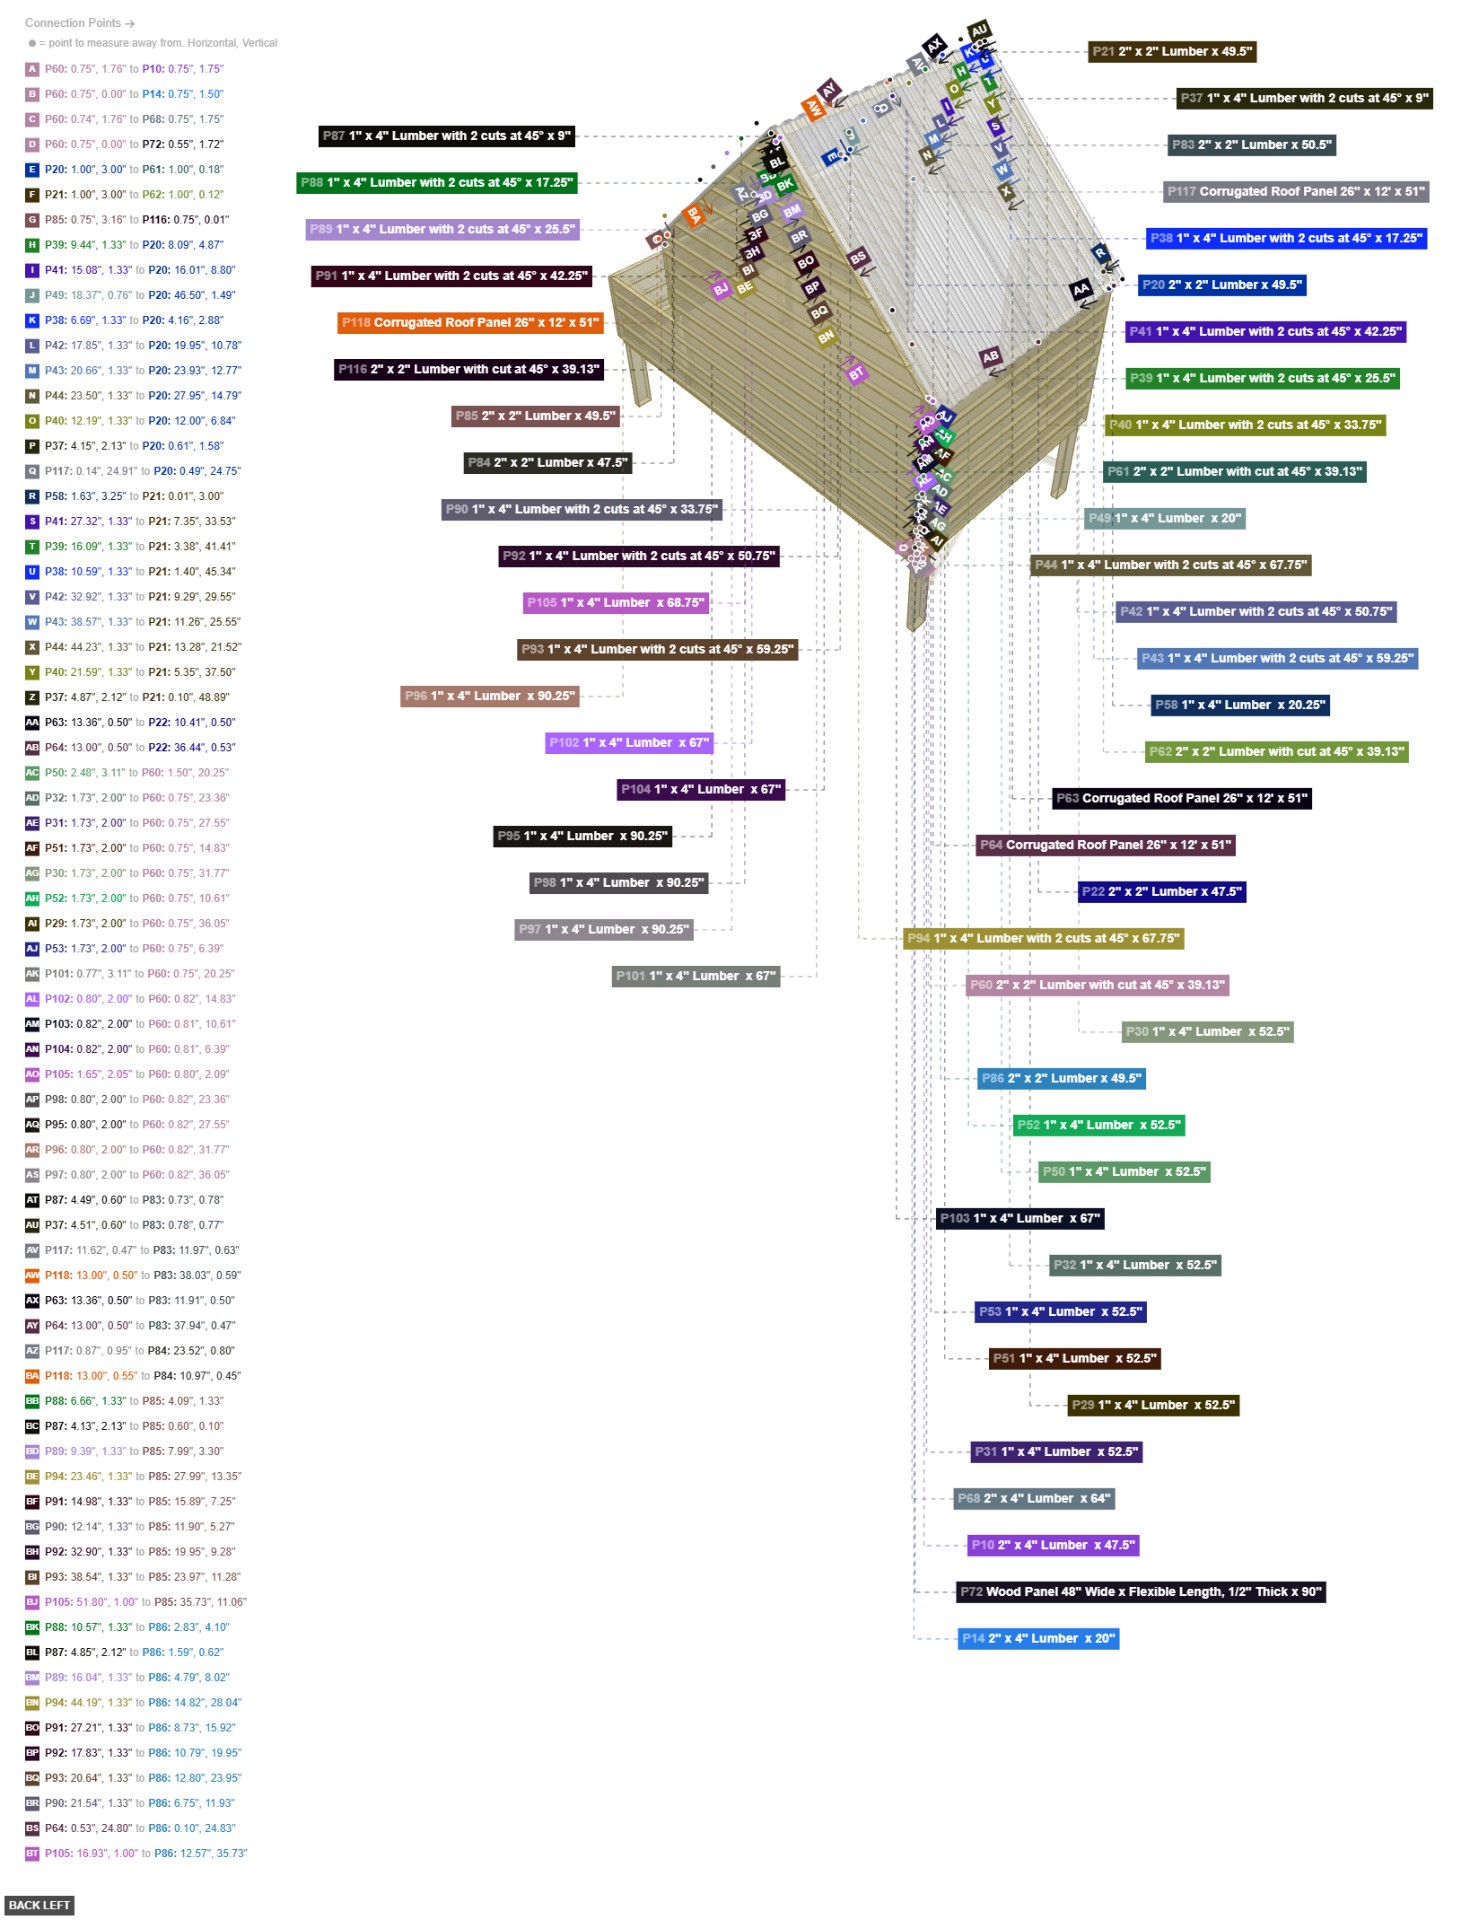
Creates the main A-frame support structure for the roof.
Install the main roof rafters P20, P21, P22, and P84 onto the top of the wall framing. Connect them at the peak with the ridge beams P83, P85, and P86. Add the front roof support P60.


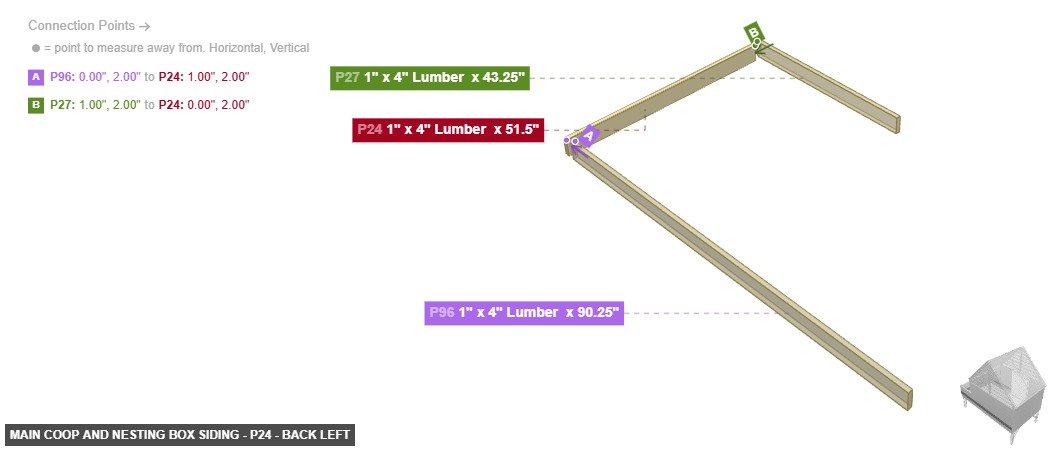
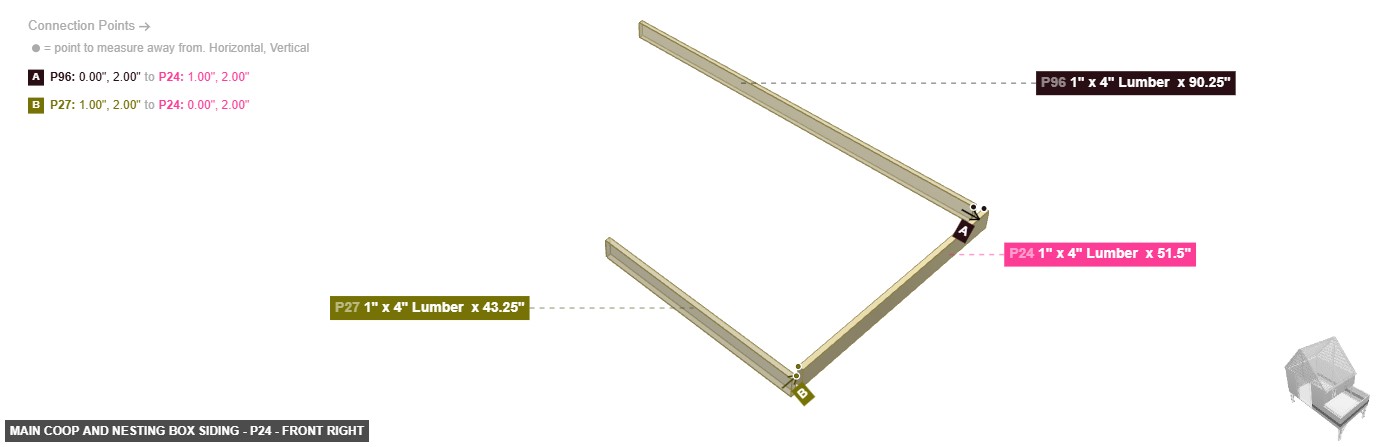
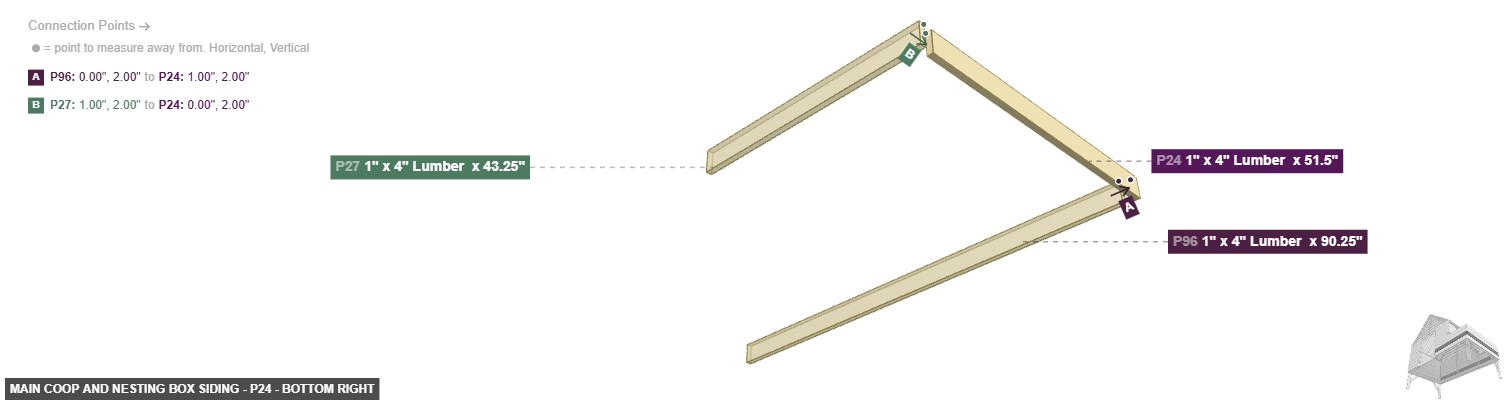
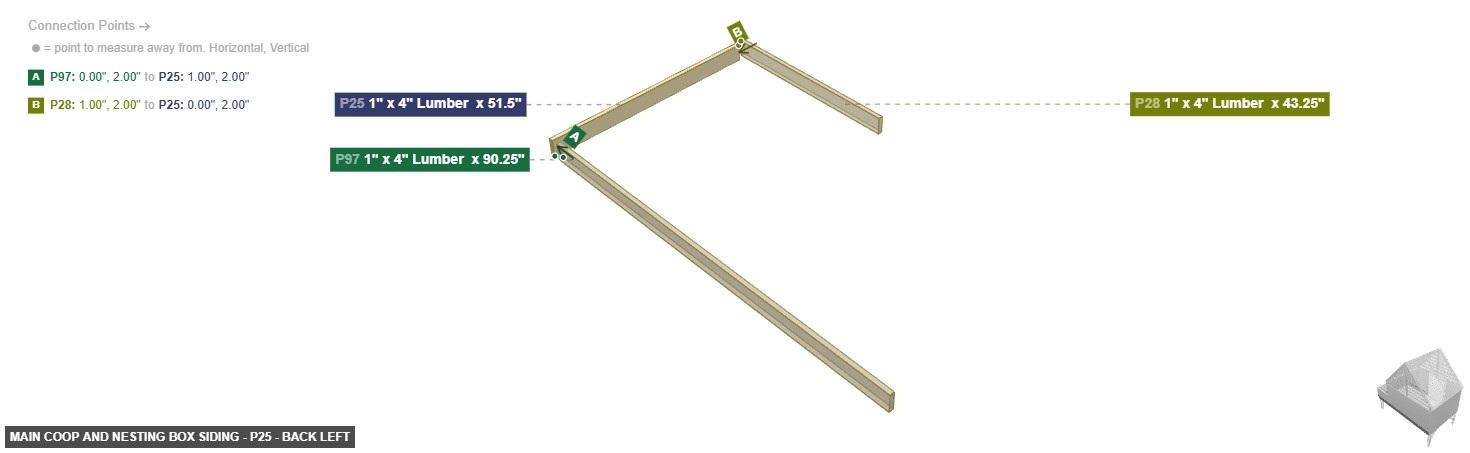
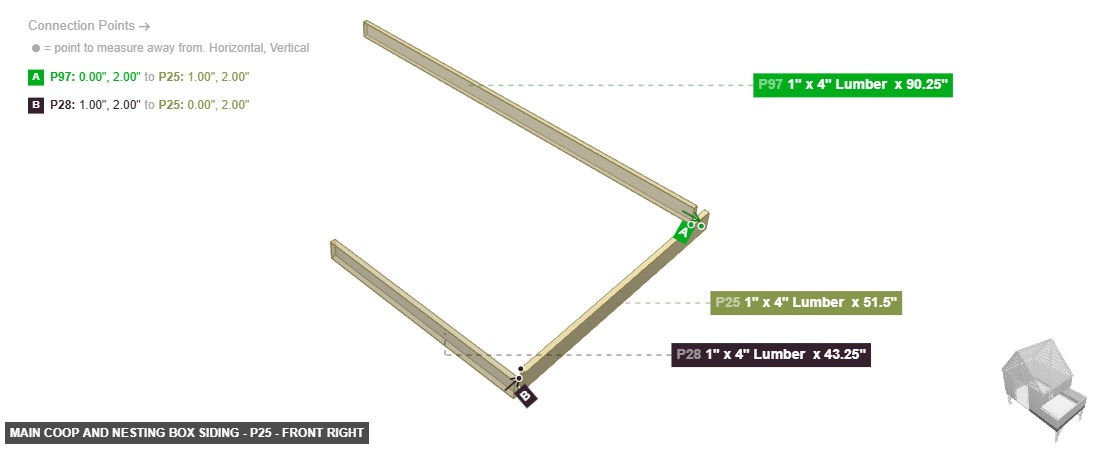
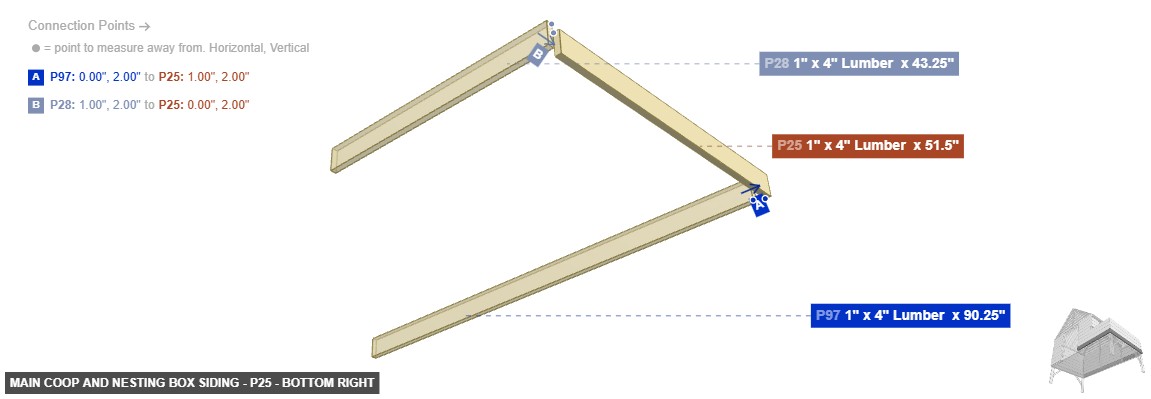
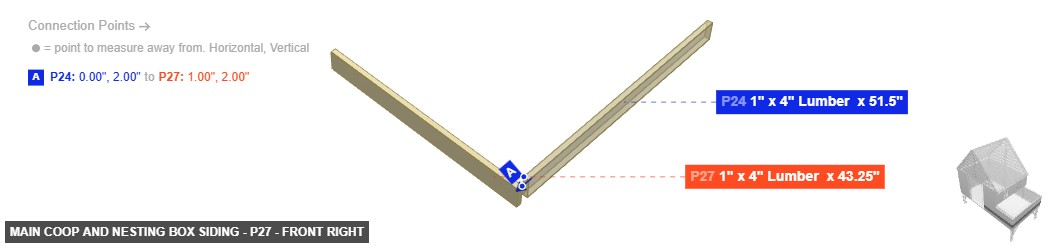
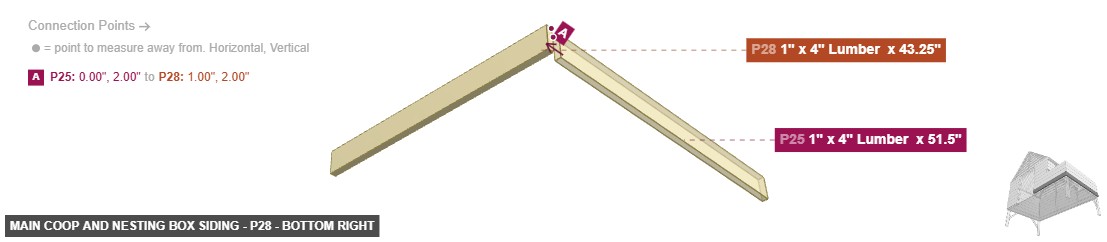
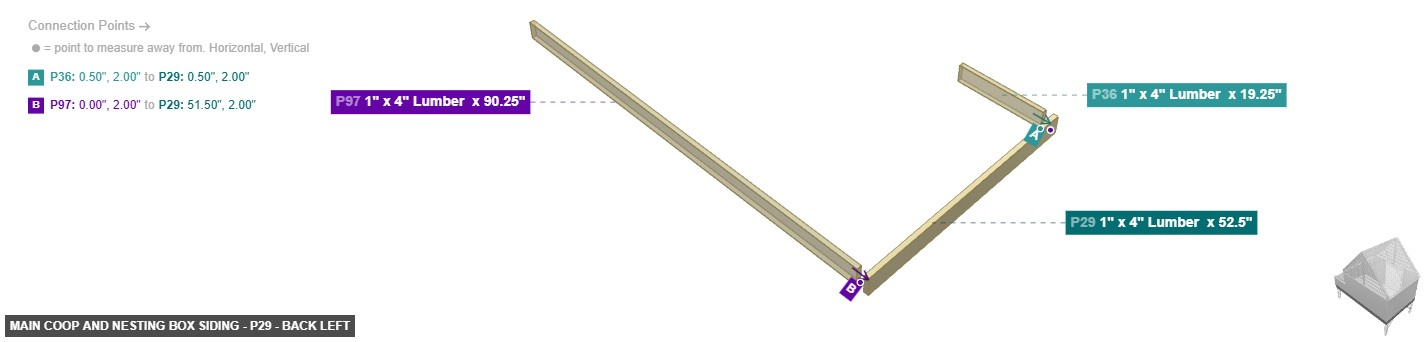
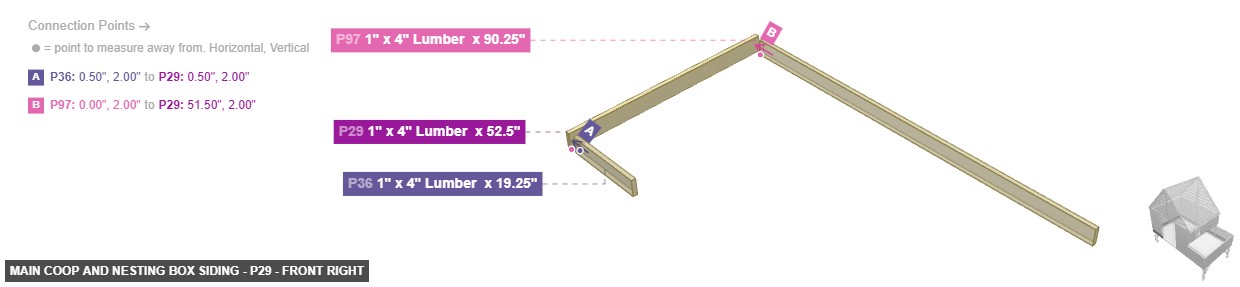
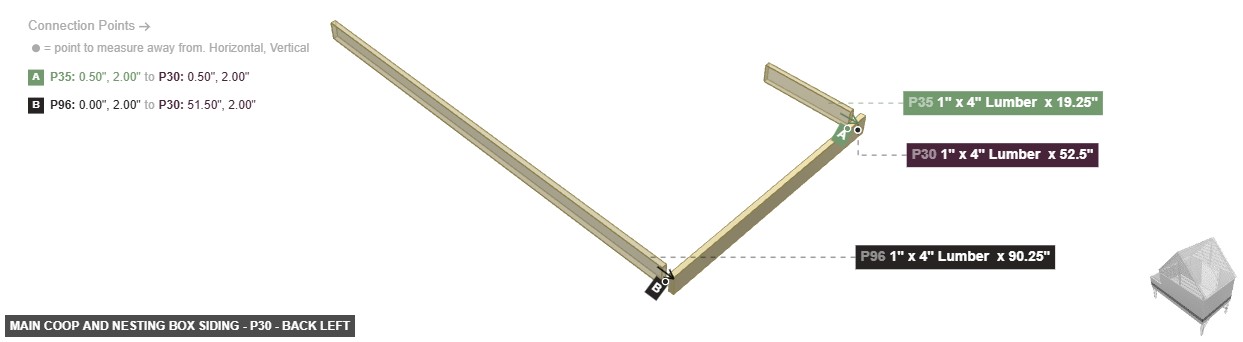
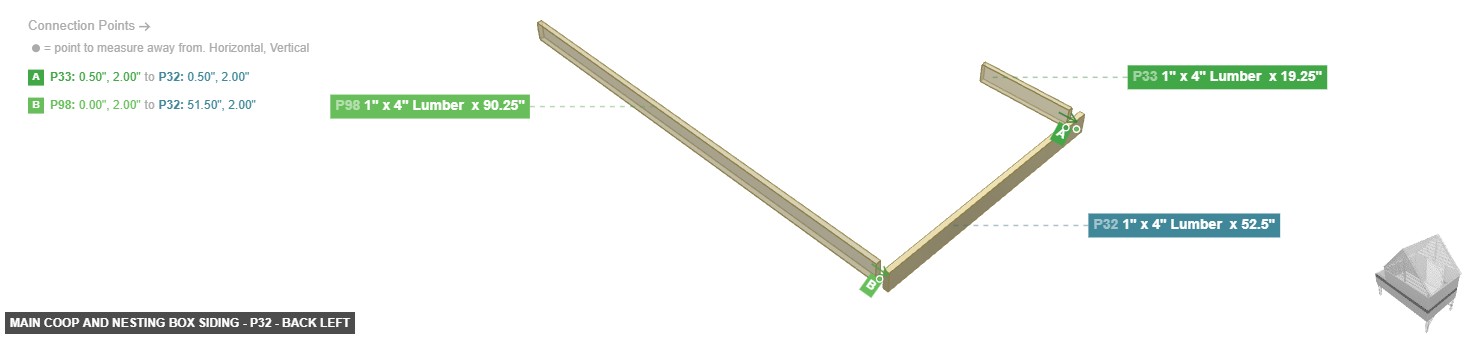
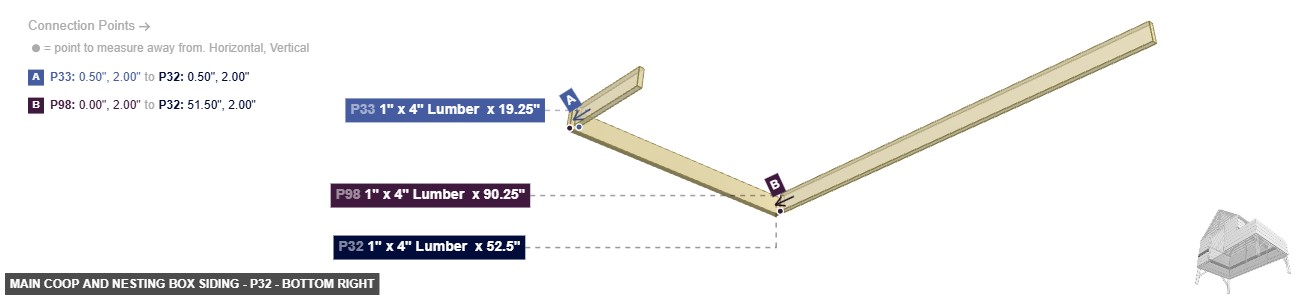
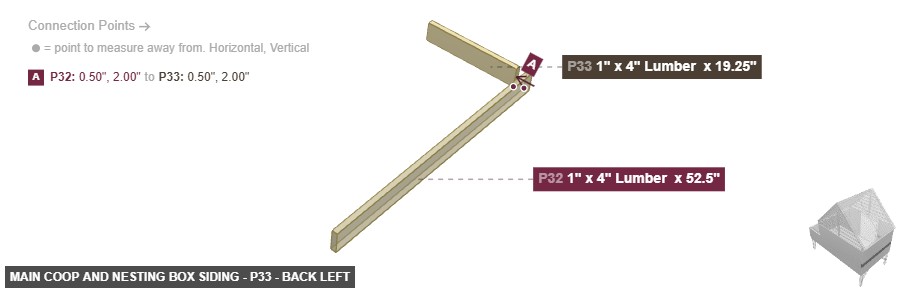
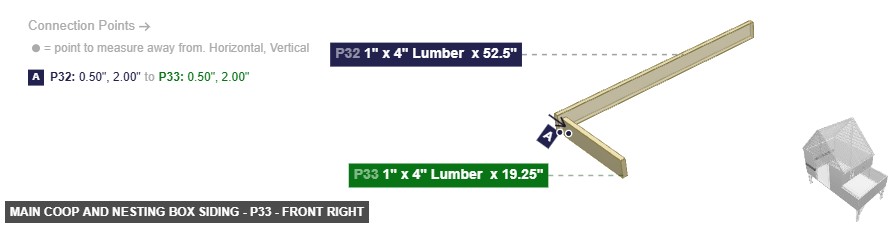
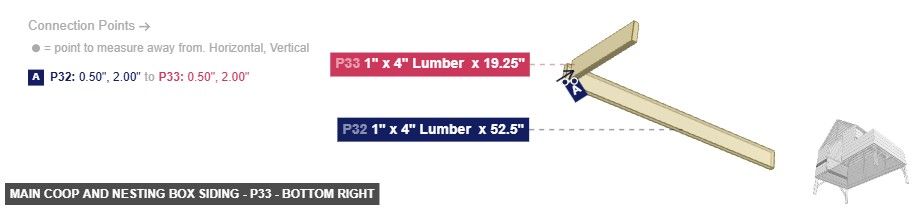
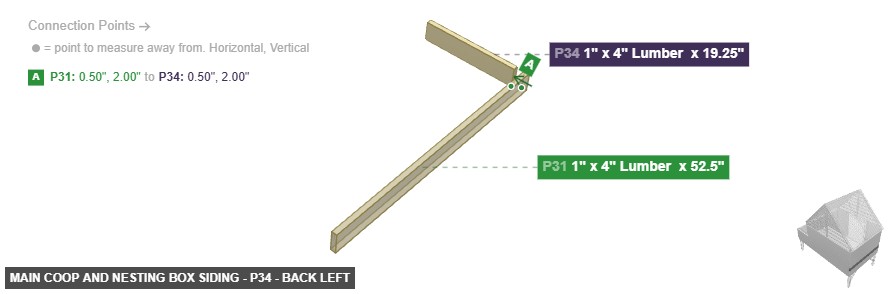
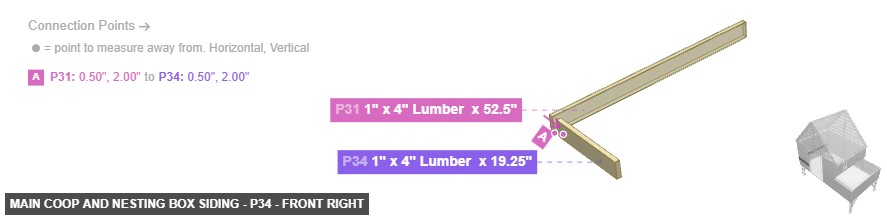
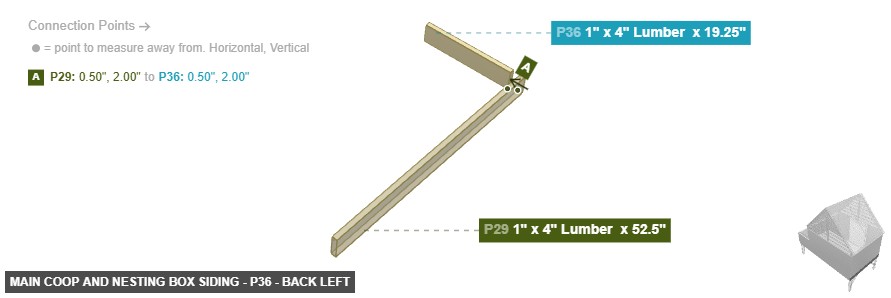
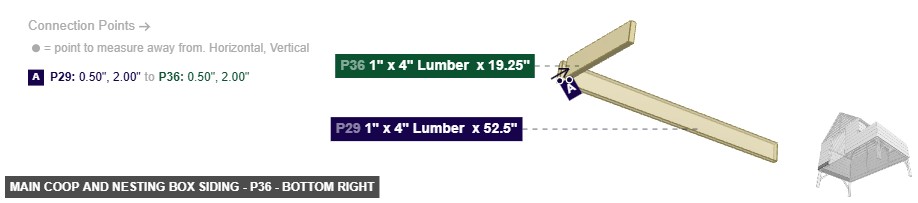
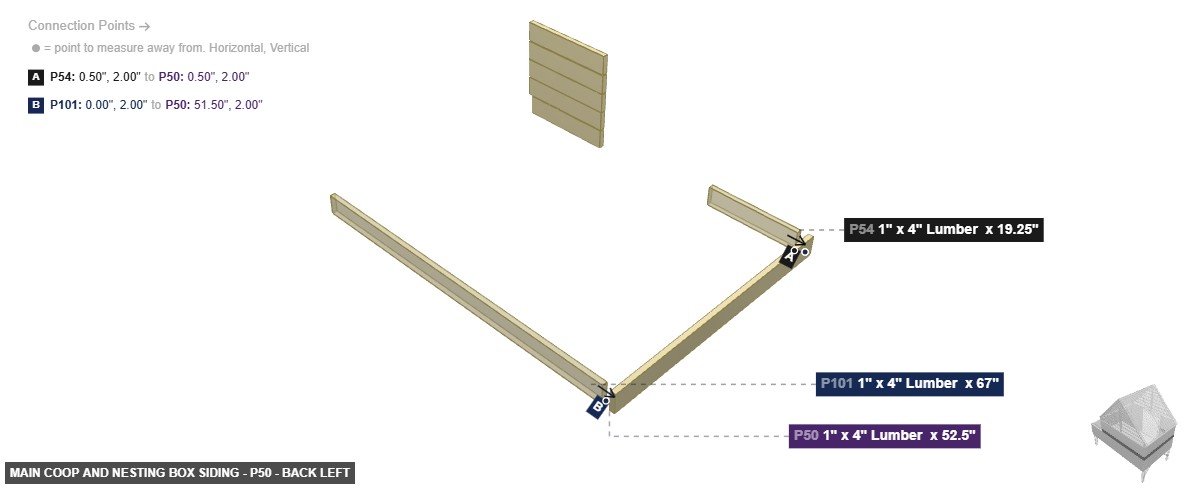
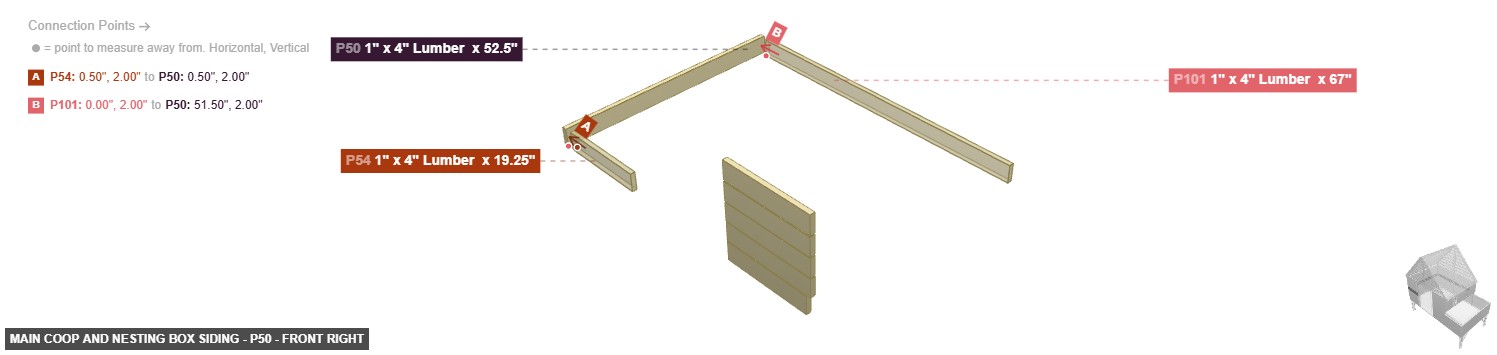
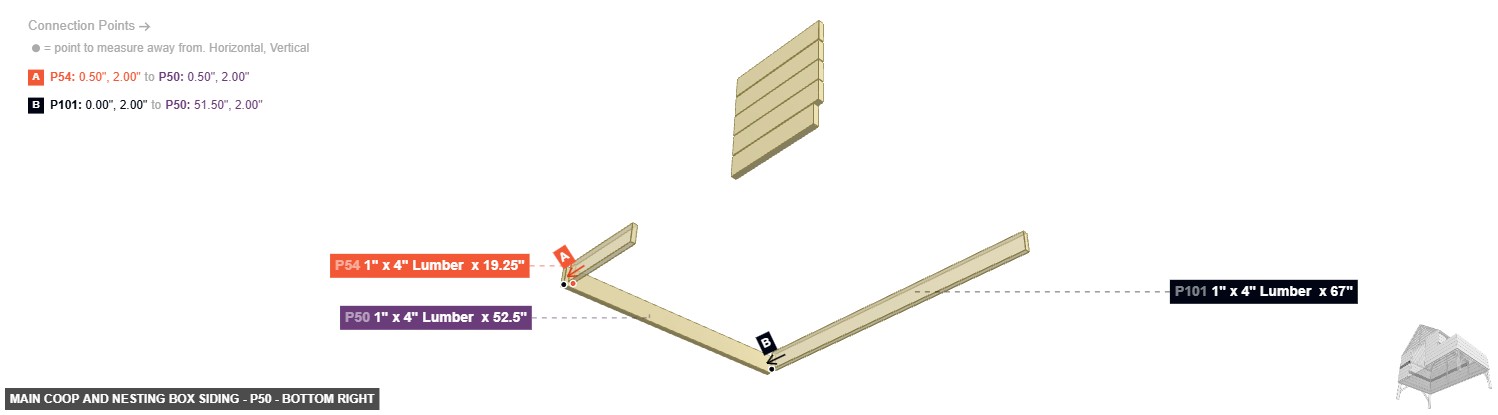
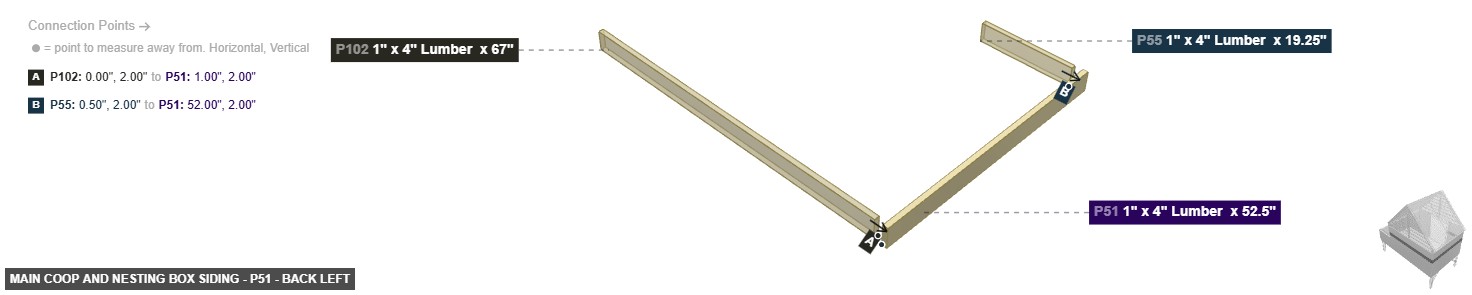
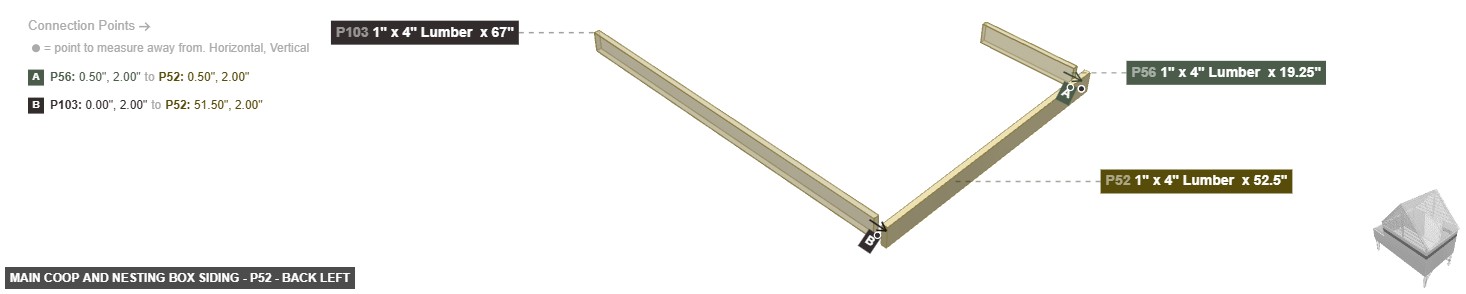
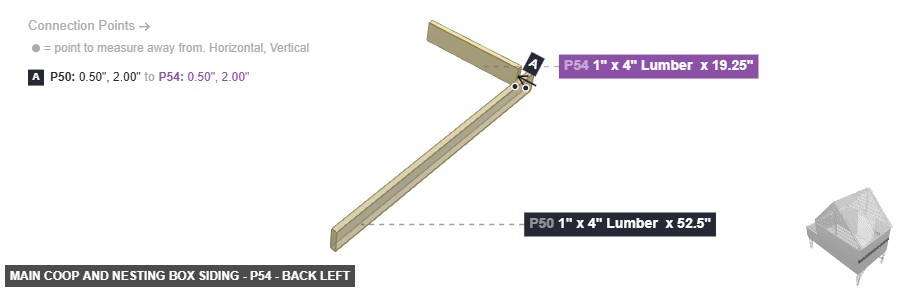
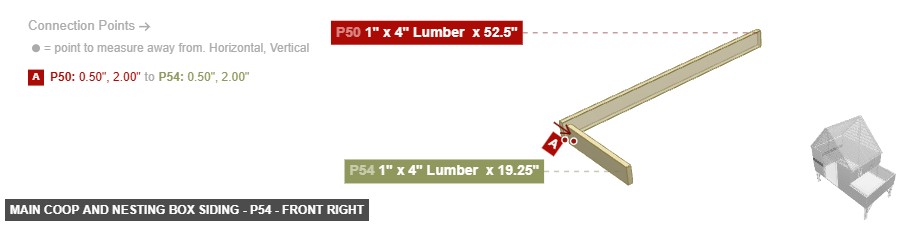
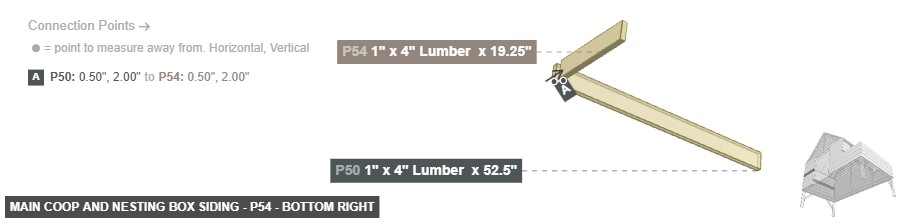
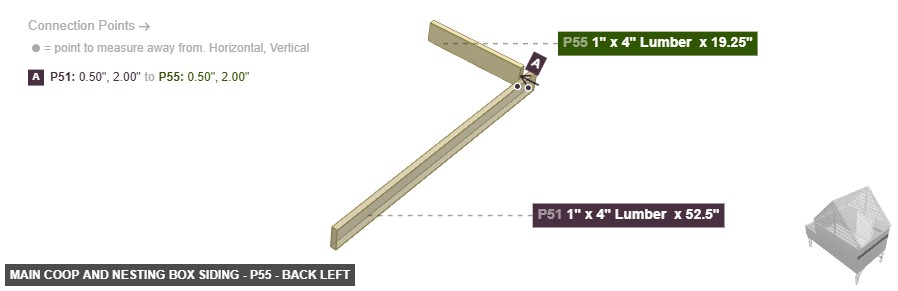
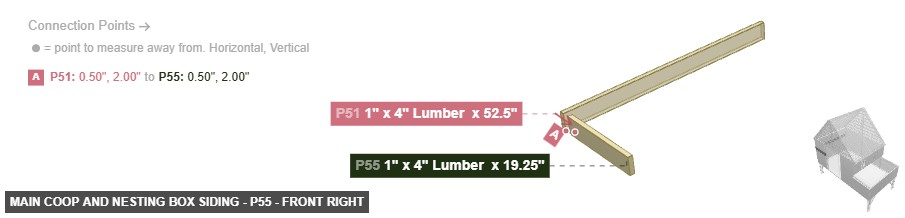
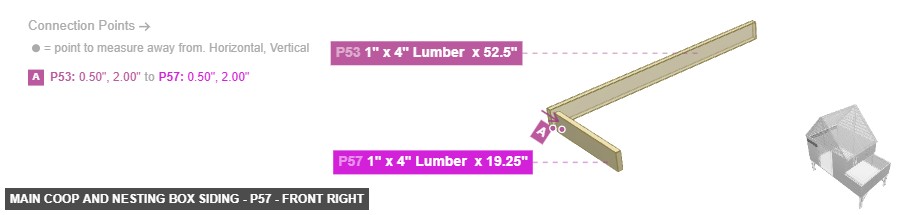
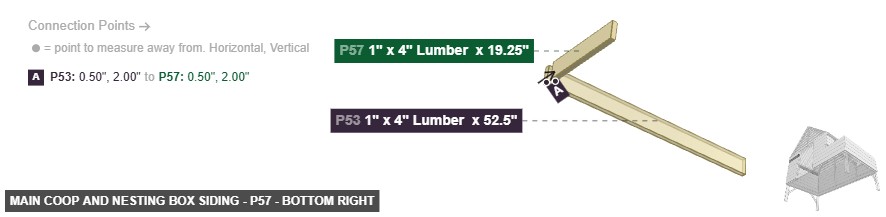
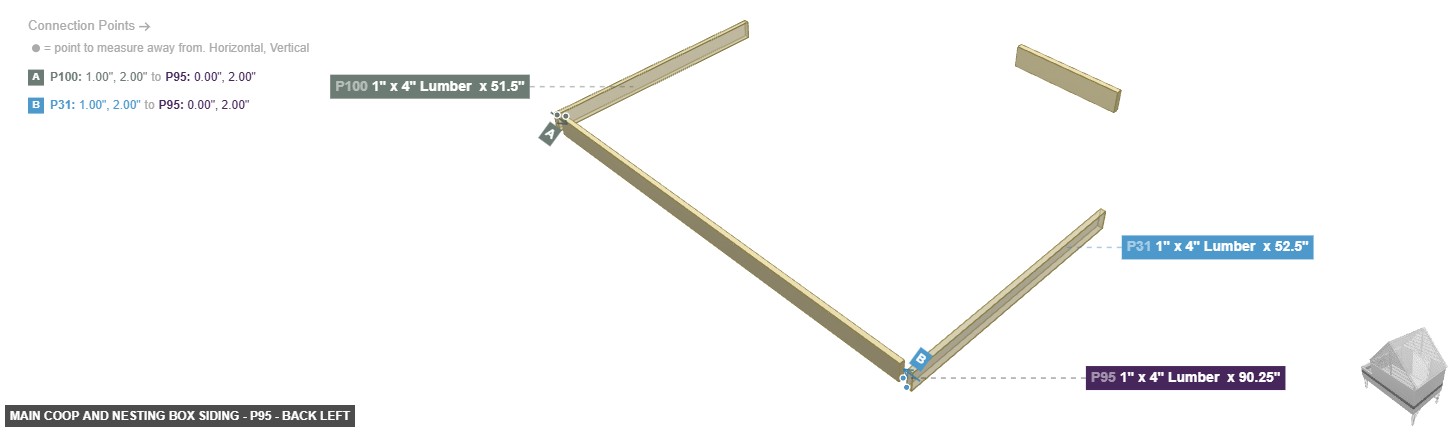
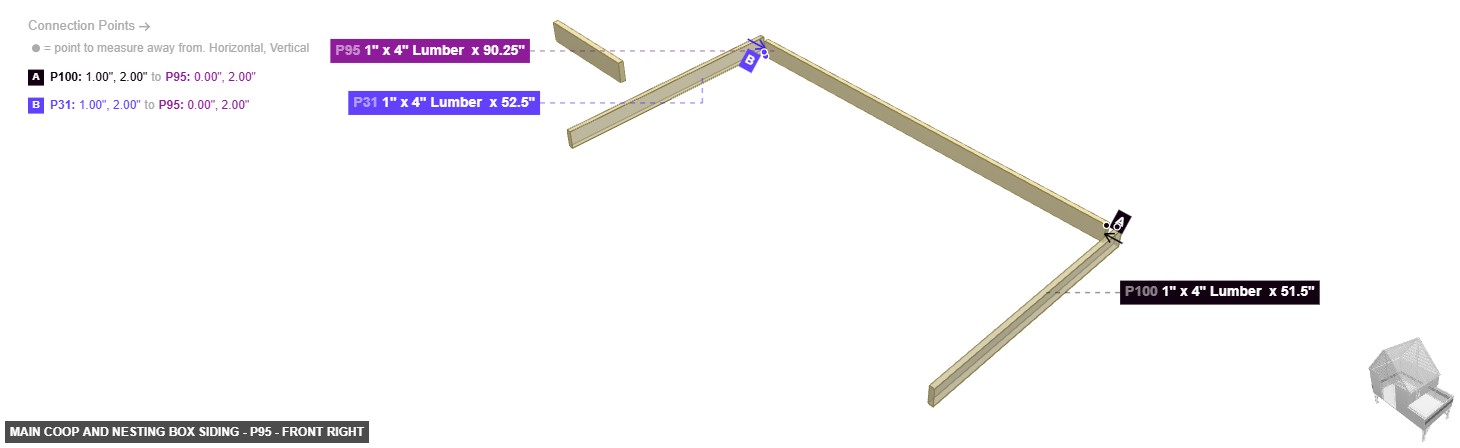
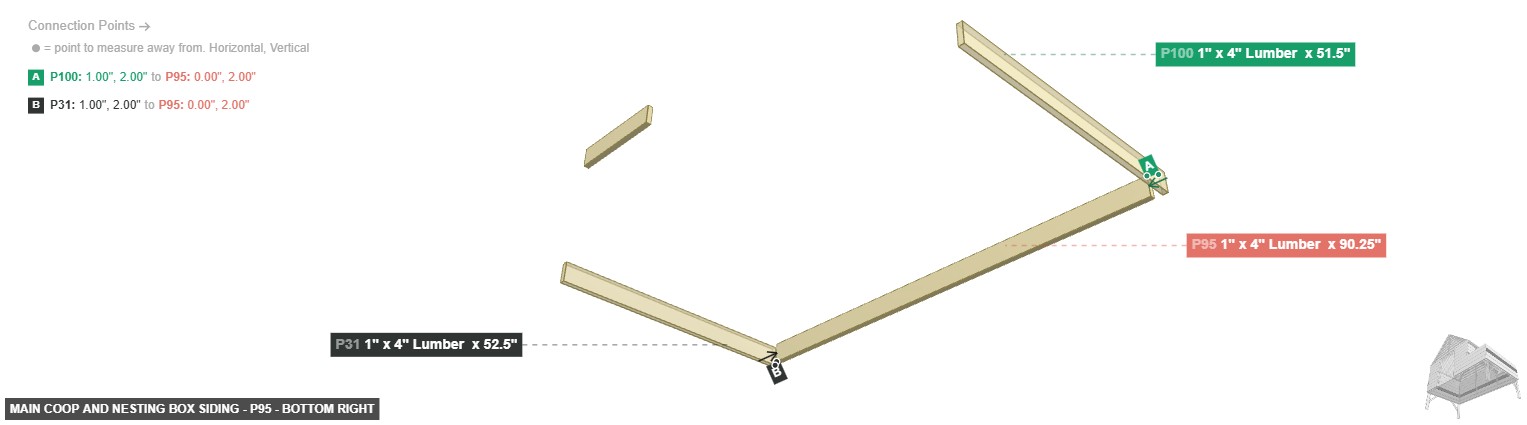
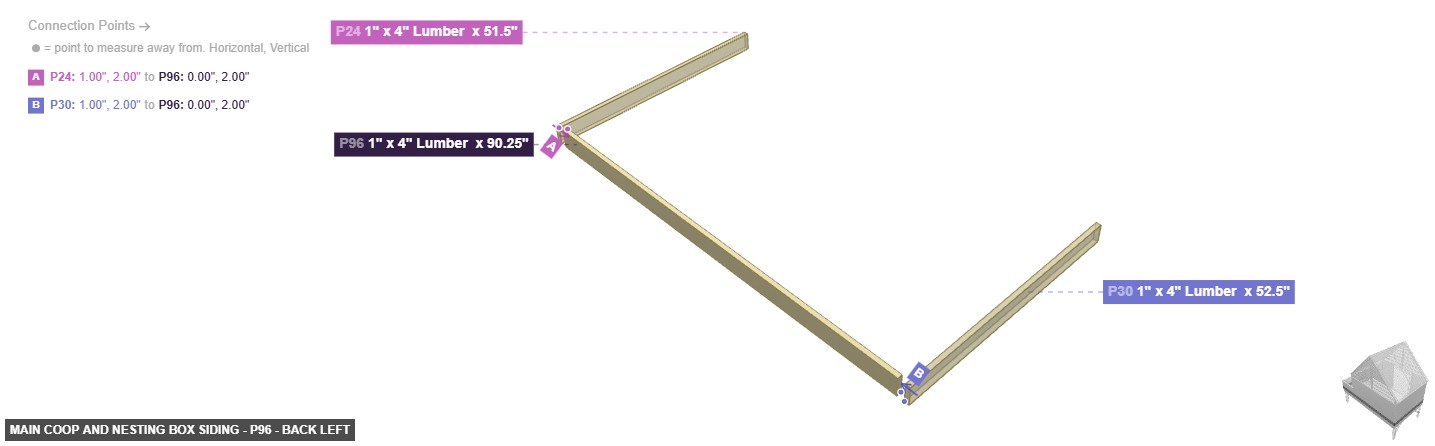
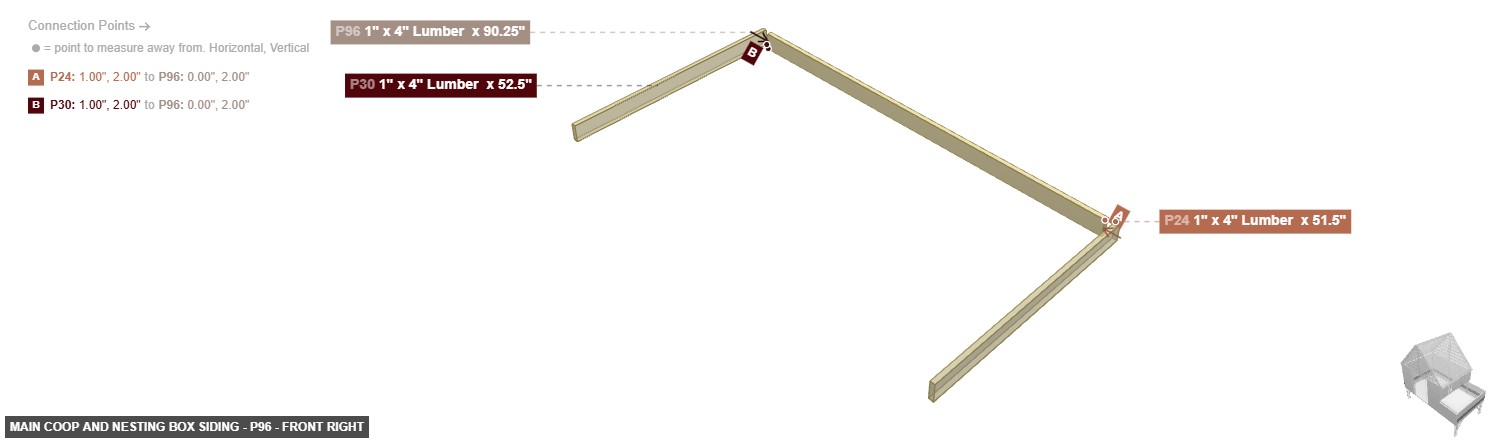
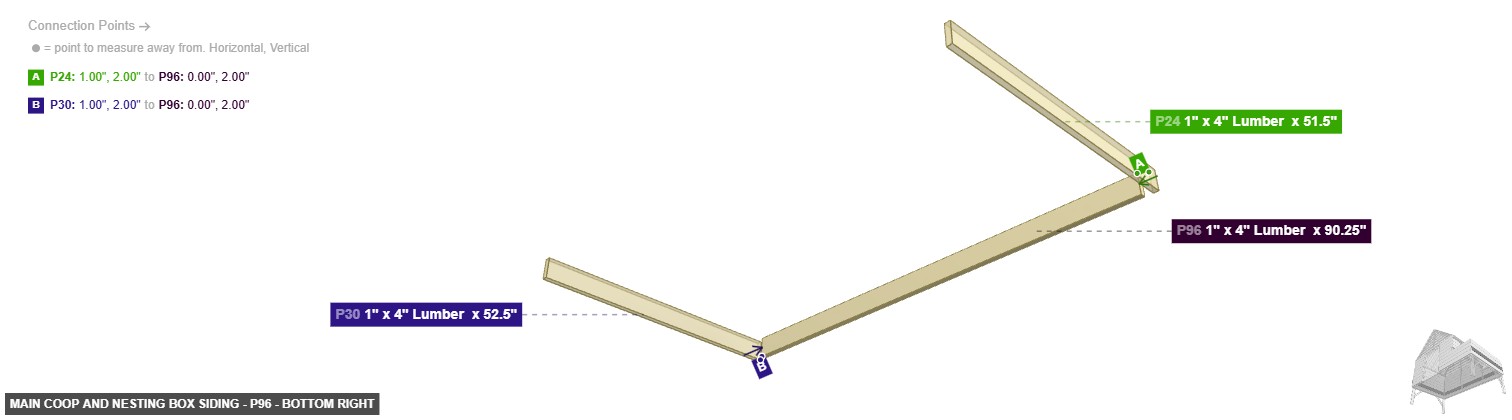
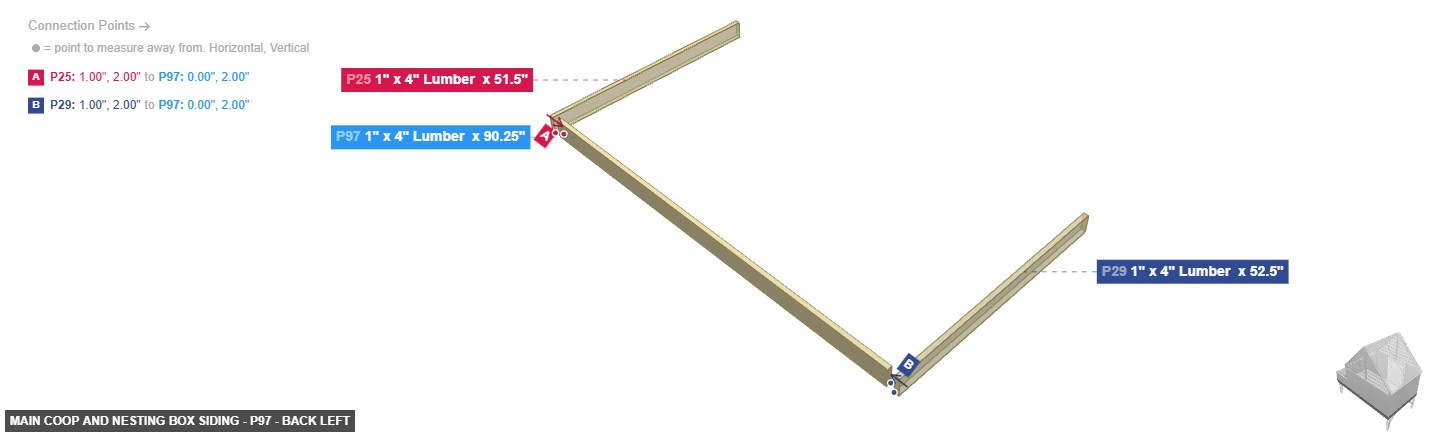
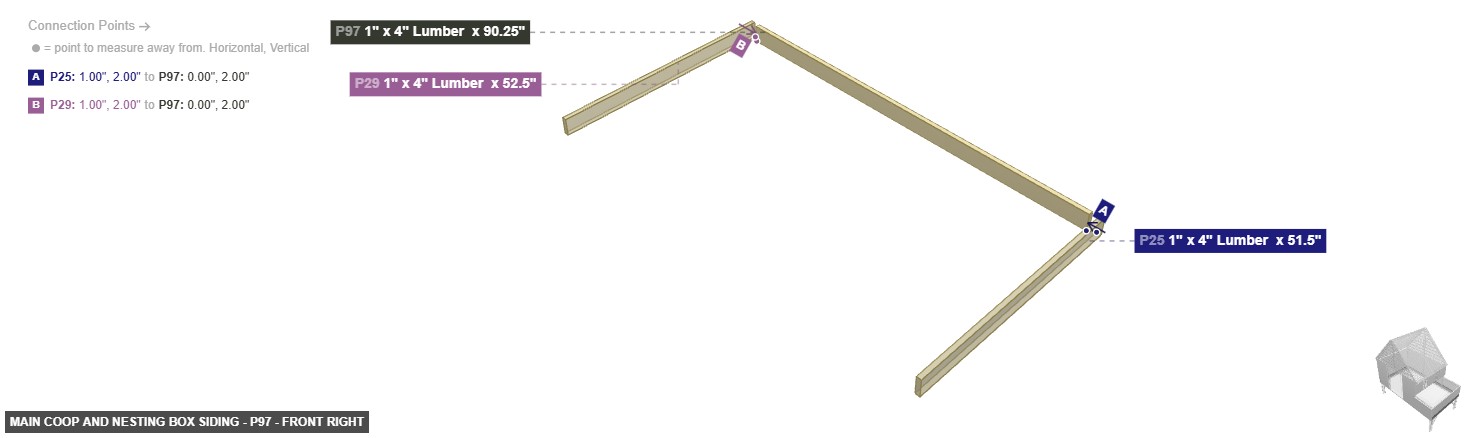
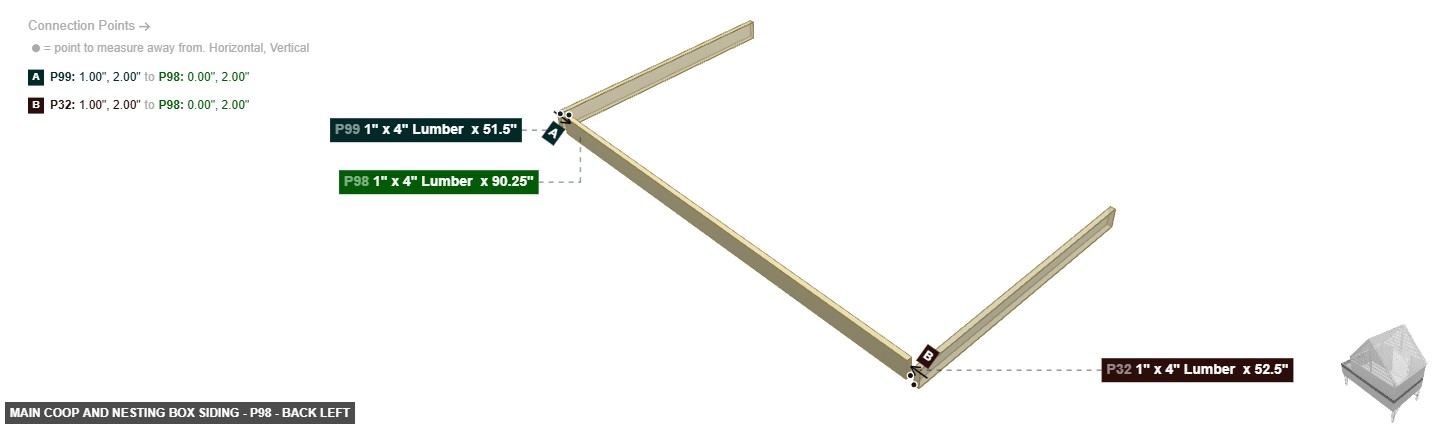
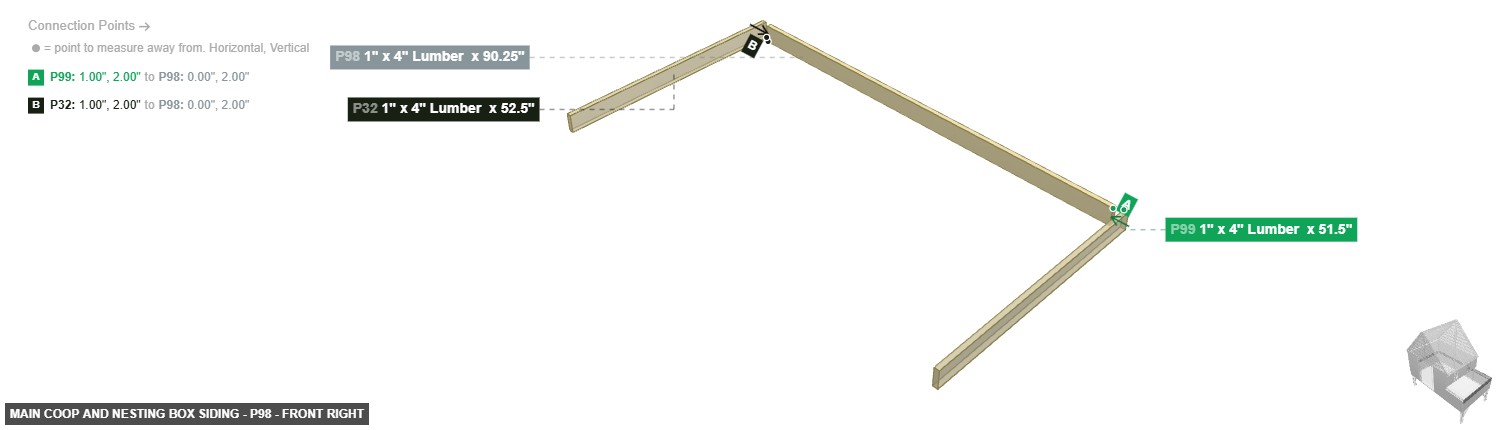
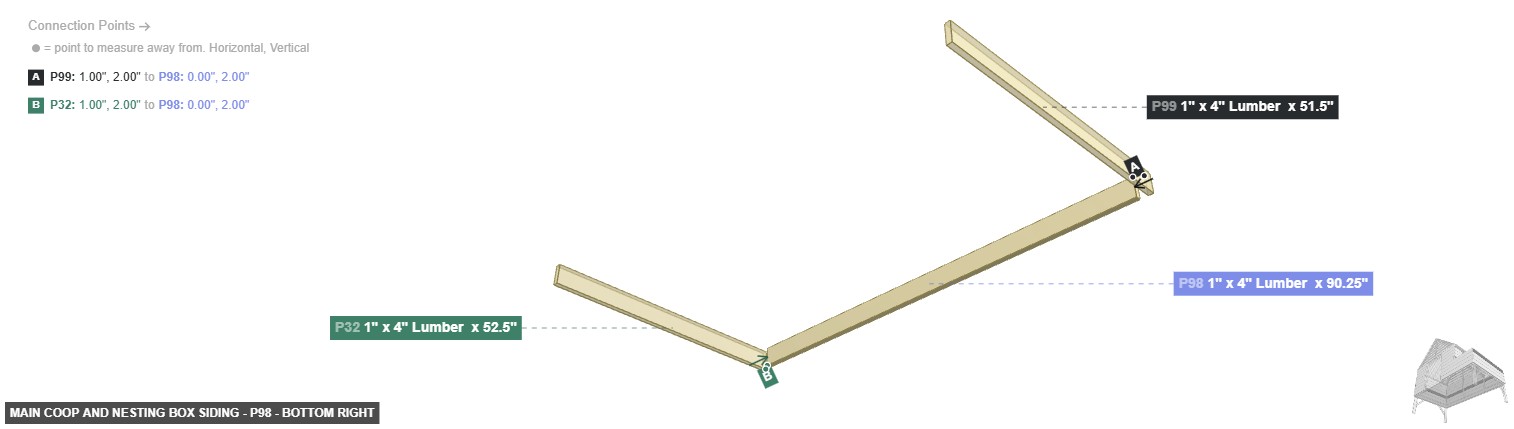
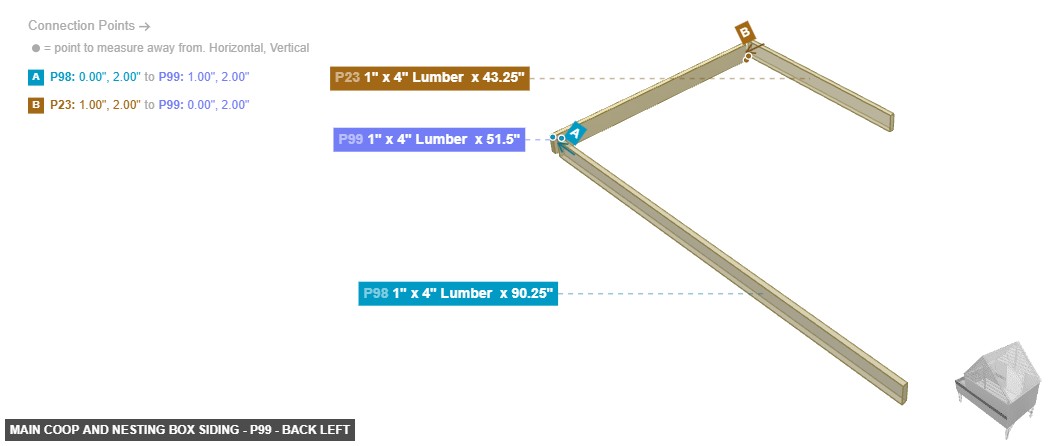
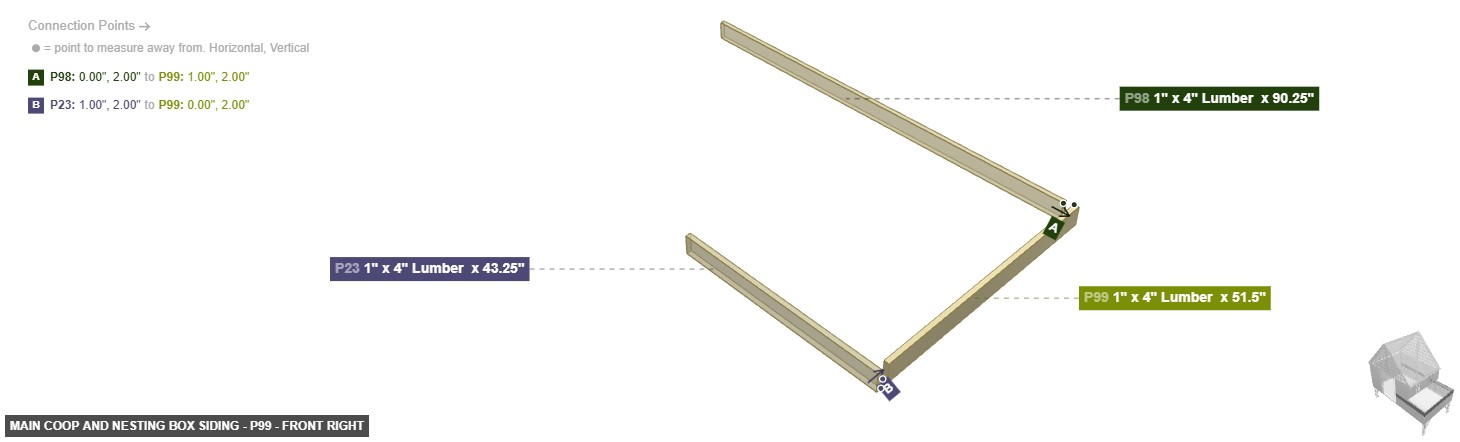
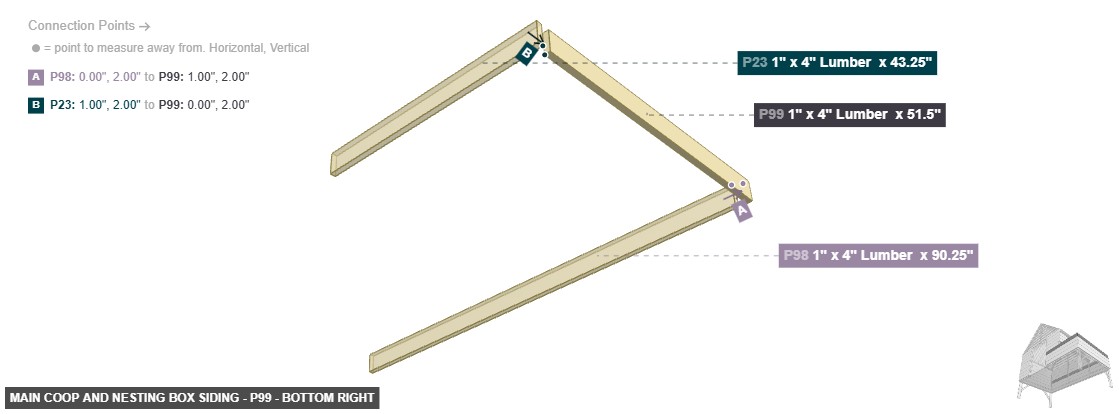
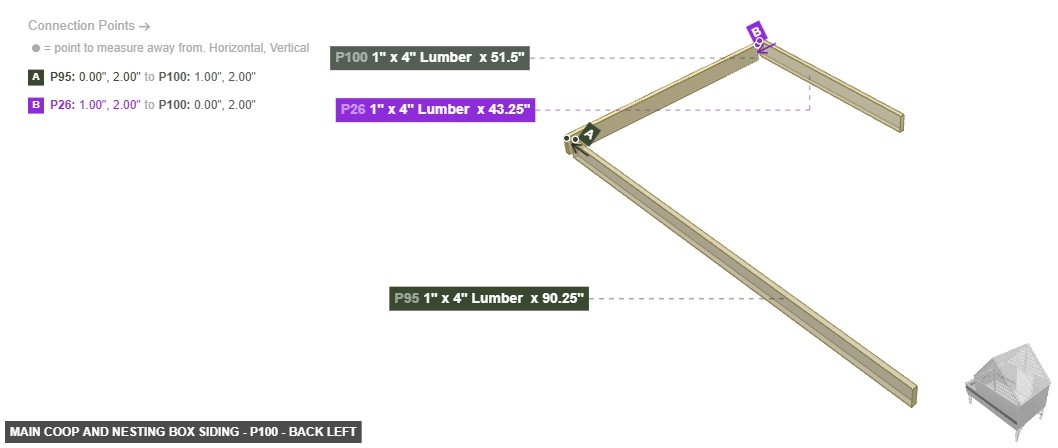
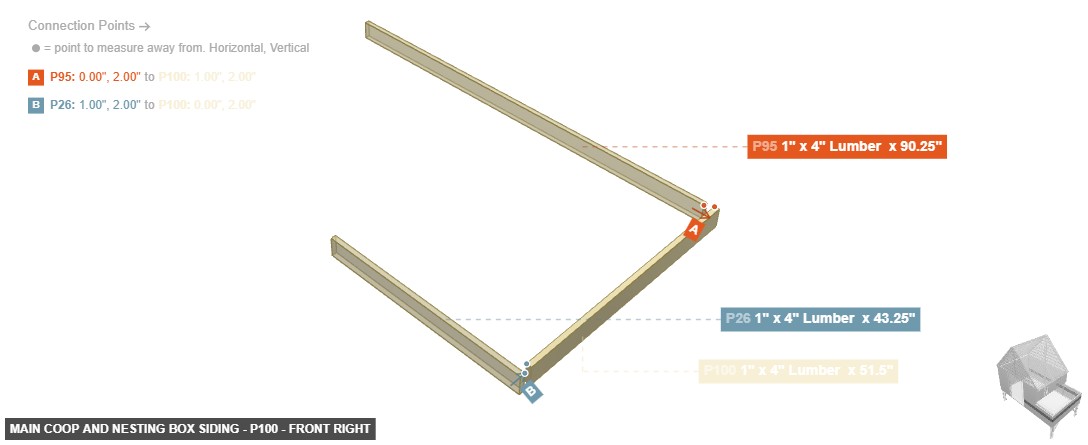
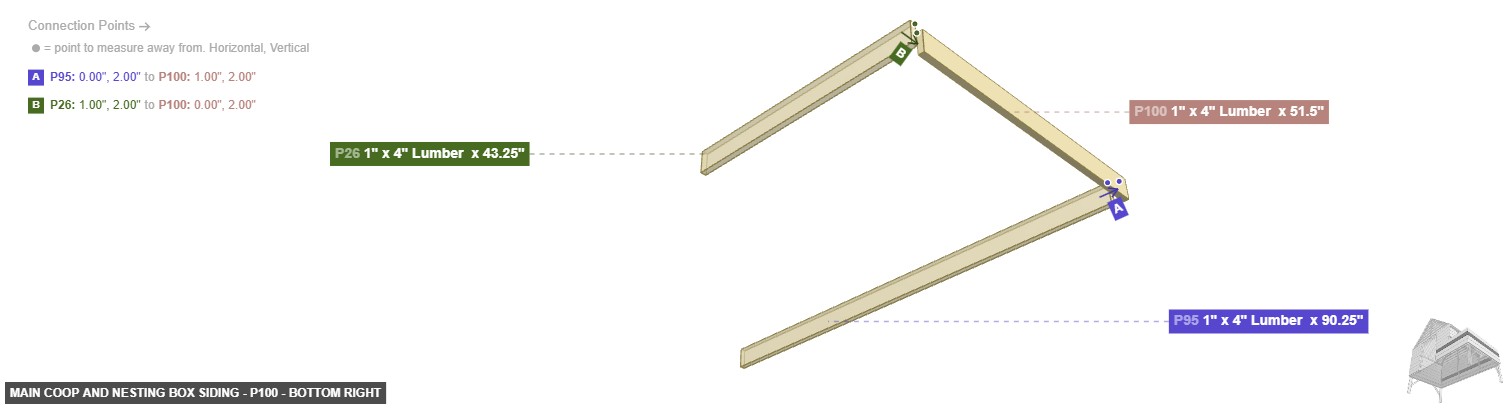
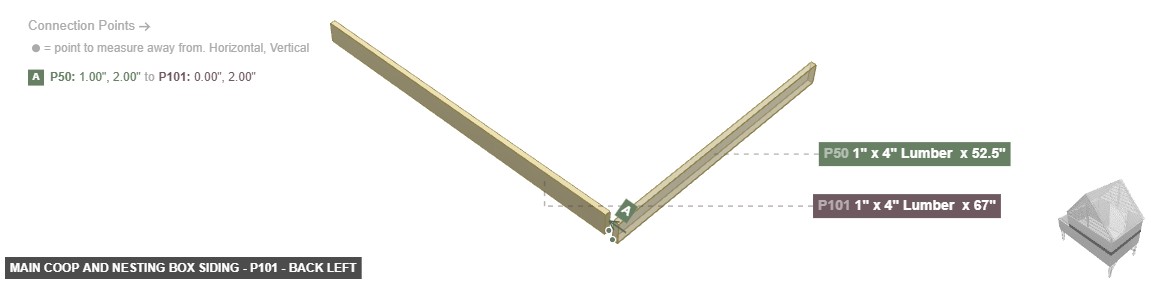
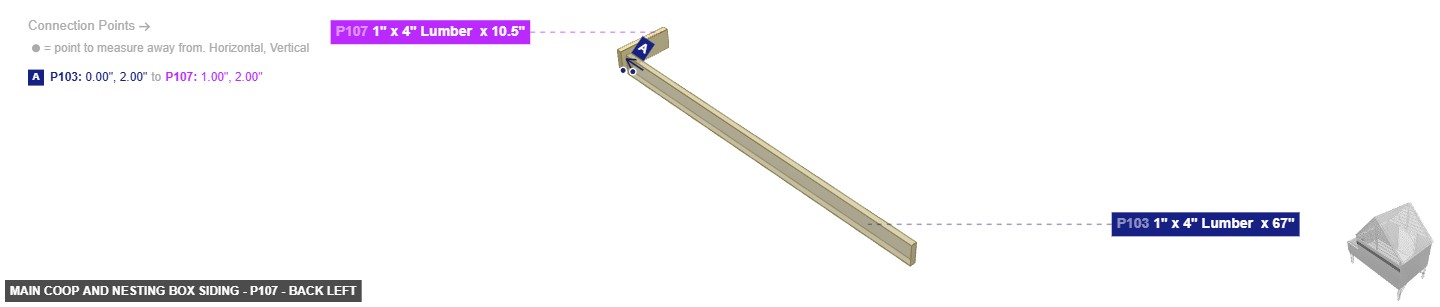
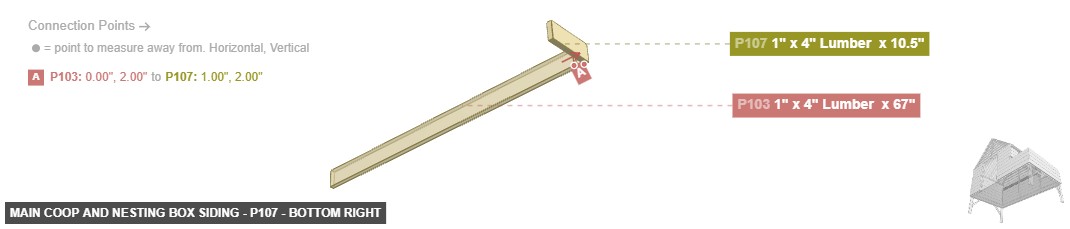
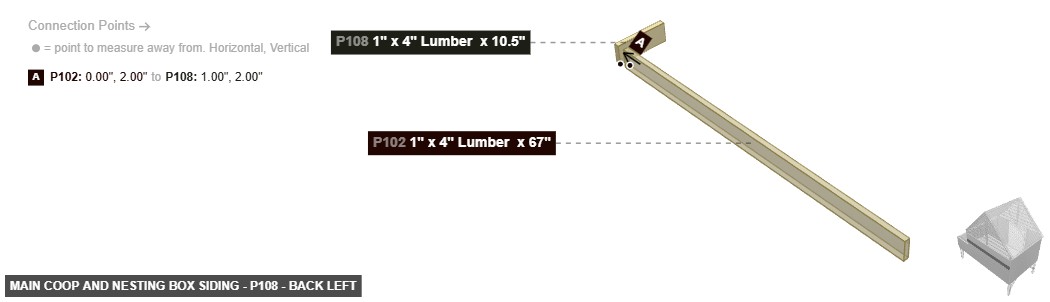
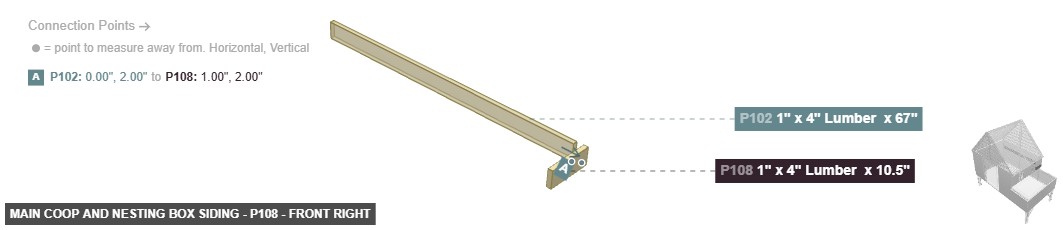
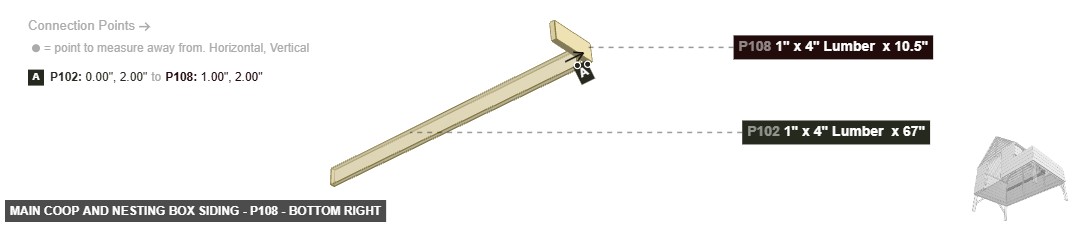
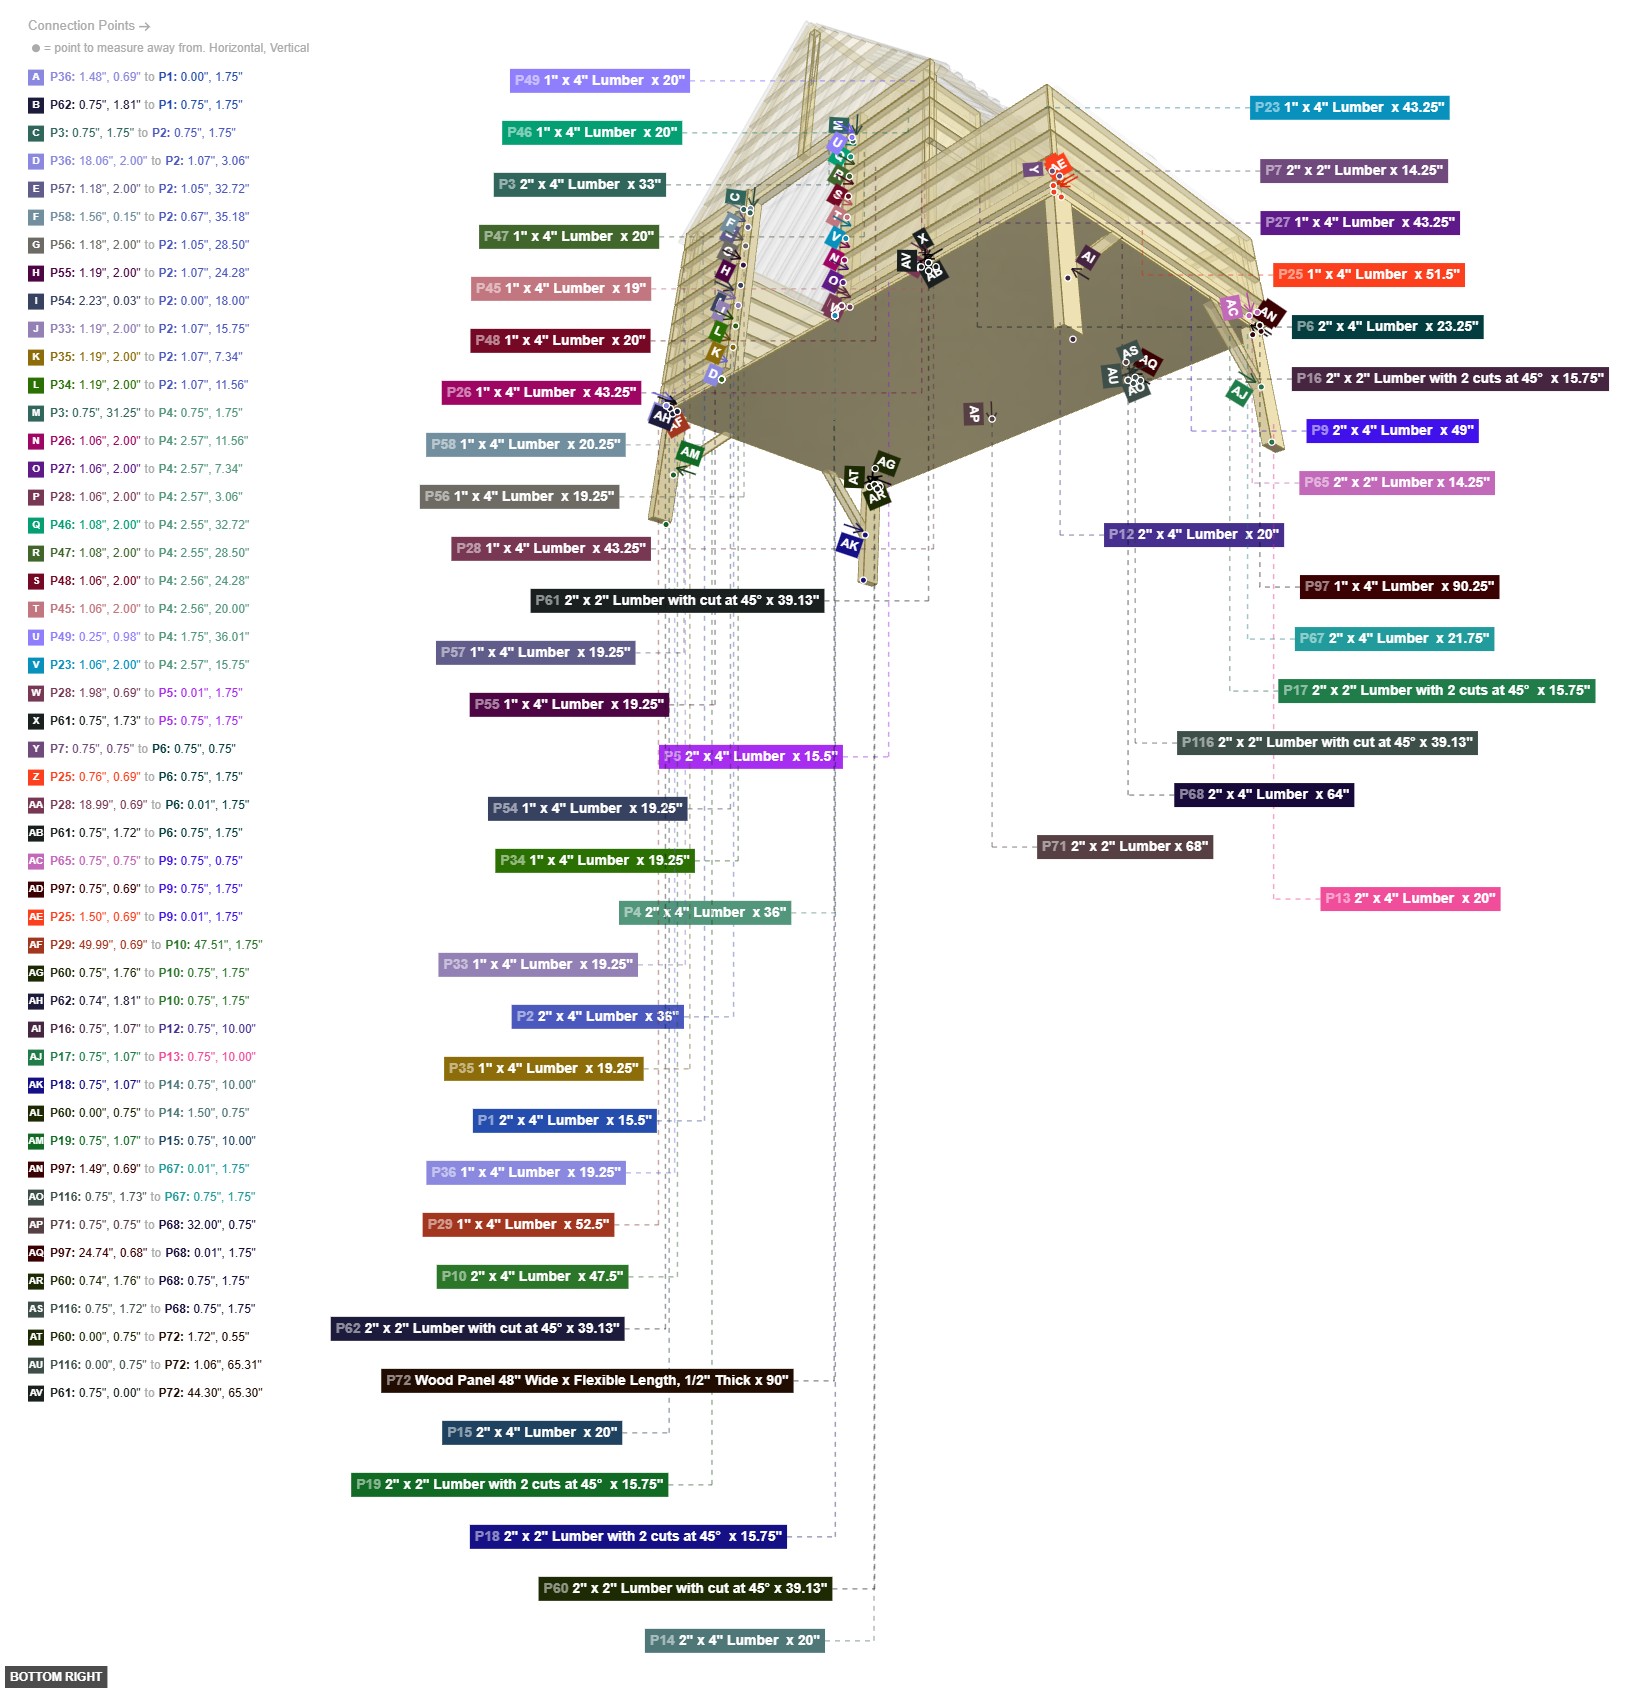
Encloses the main coop and nesting box areas with wooden slats.
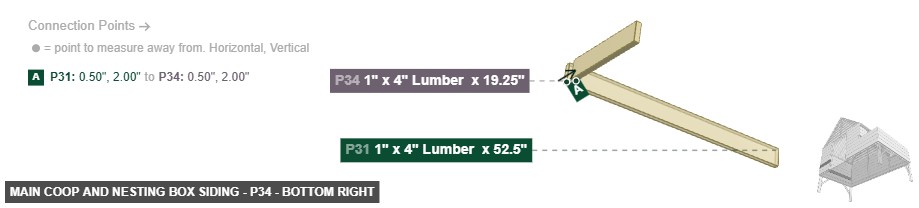
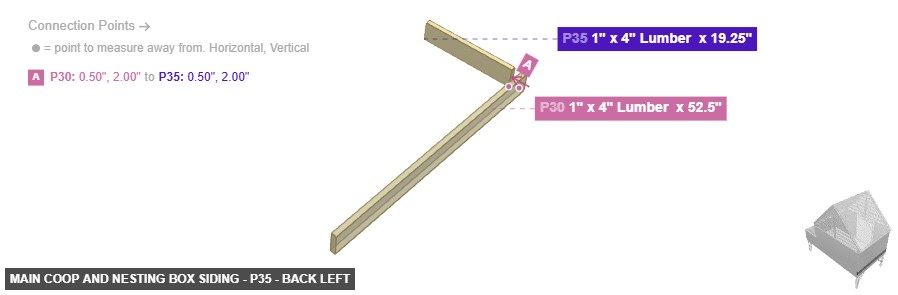
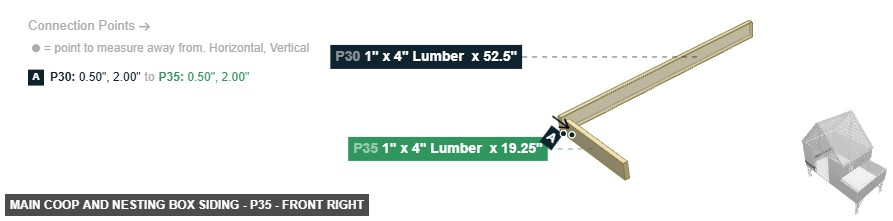
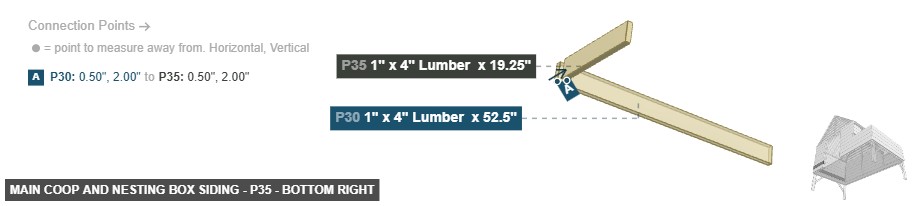
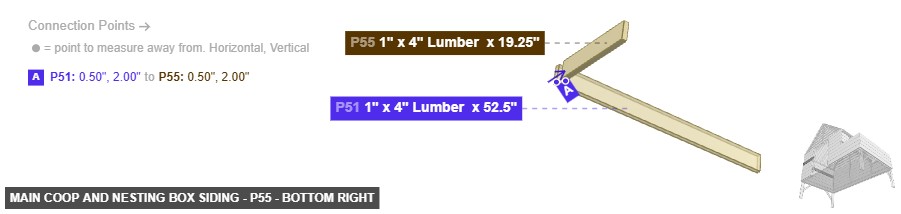
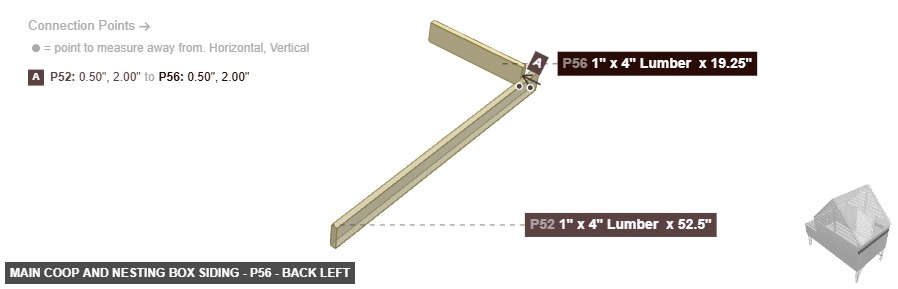
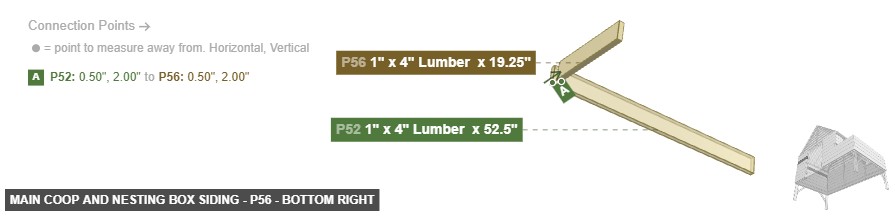
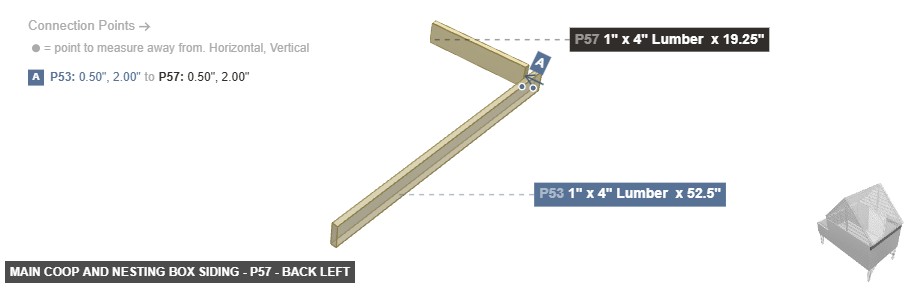
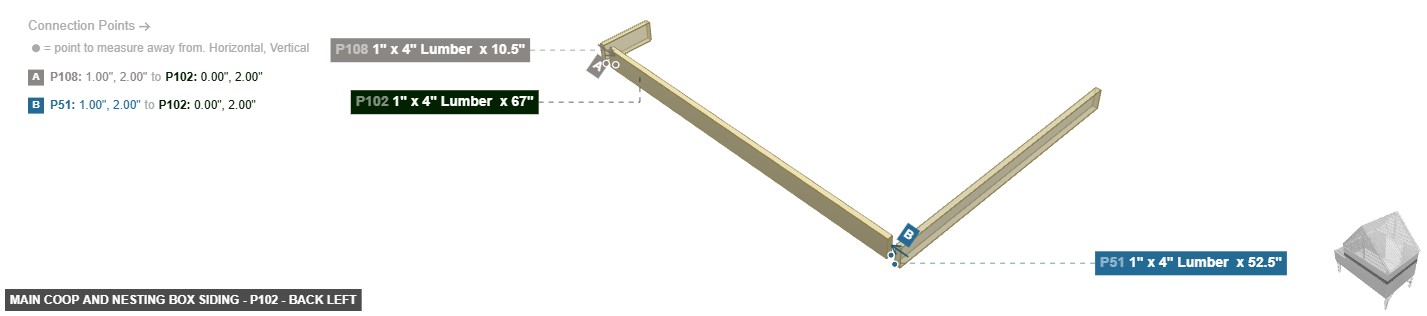
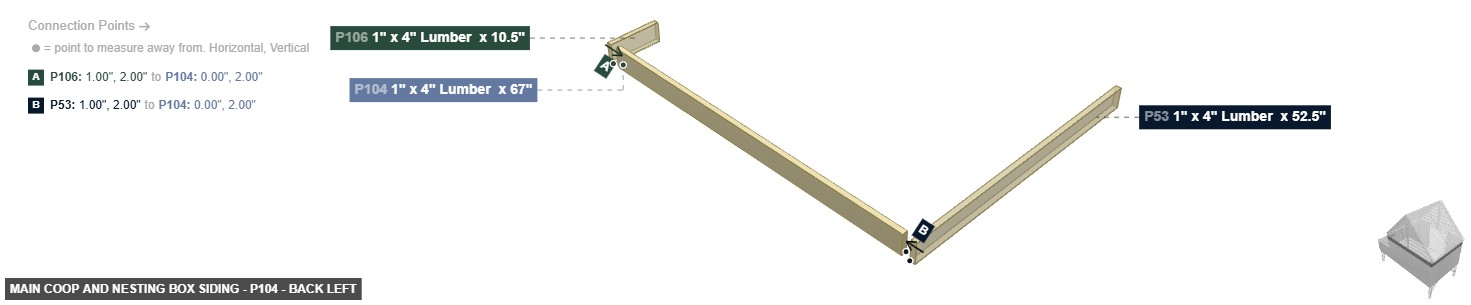
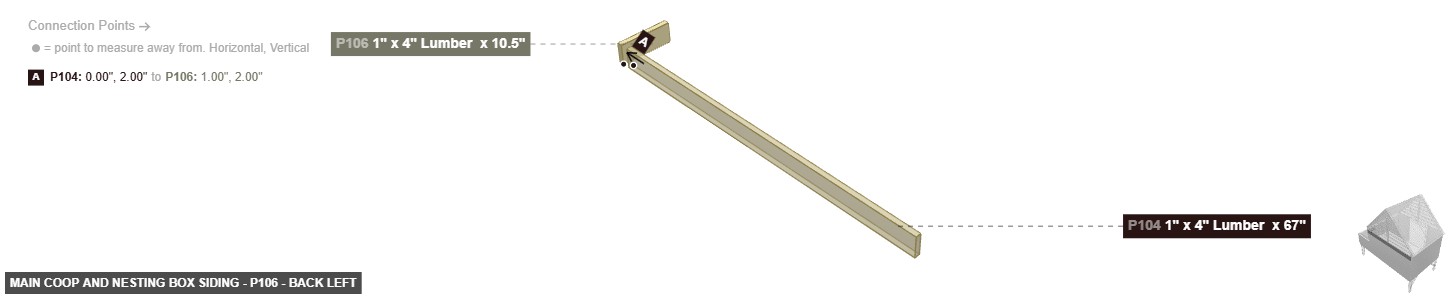
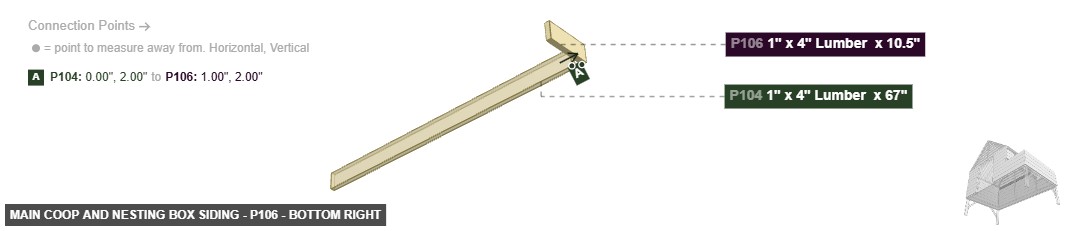
Attach the horizontal siding boards (P23-P28, P95-P100) to the exterior of the main coop wall framing. Install the vertical slats (P29-P36, P45-P58) to create the front wall. Attach the nesting box siding (P101-P104, P106-P114) to the Nesting Box and Run Framing.


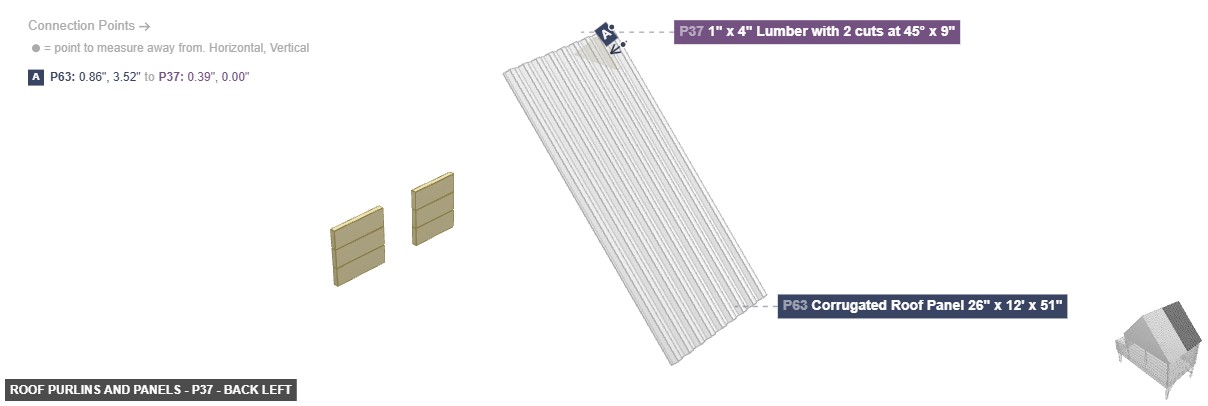
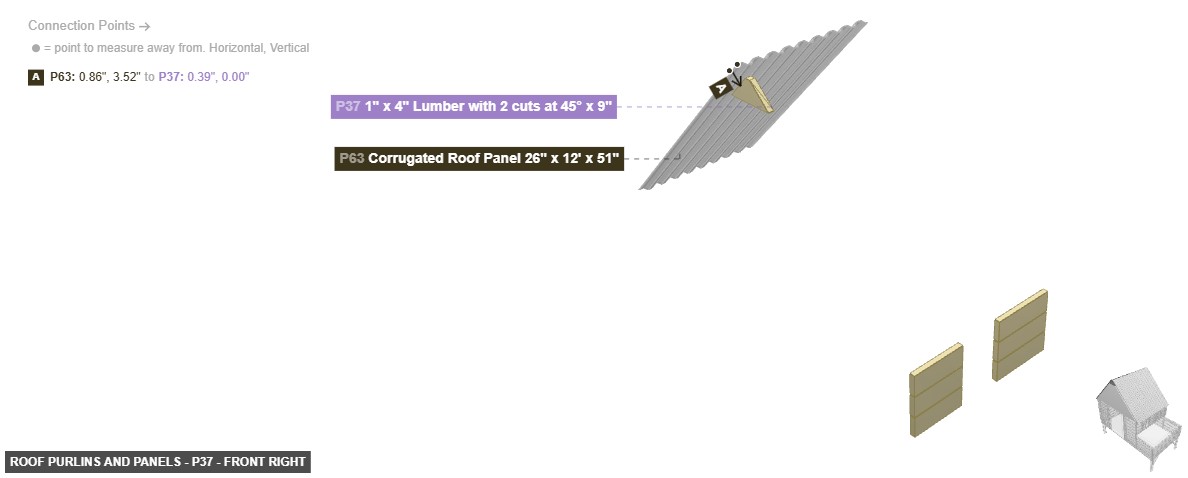
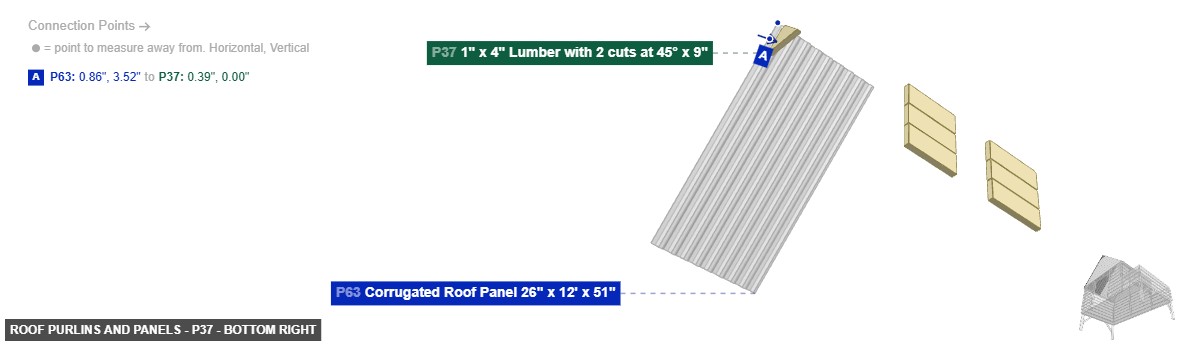
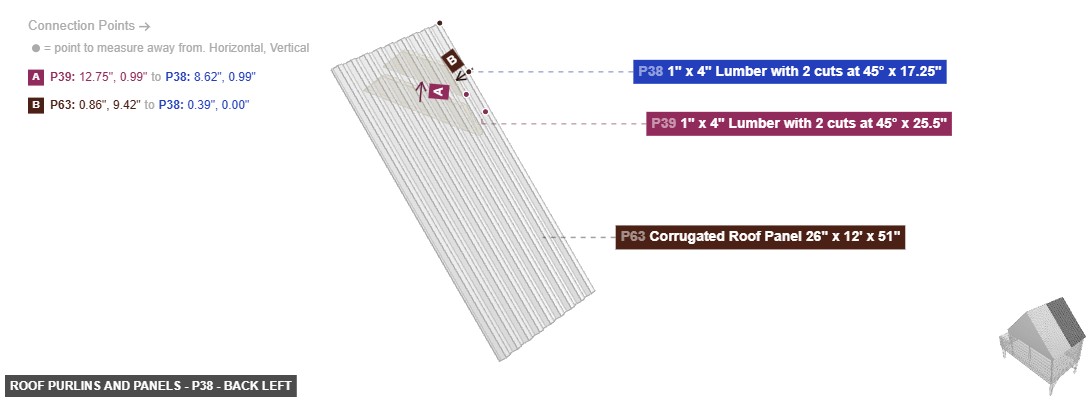
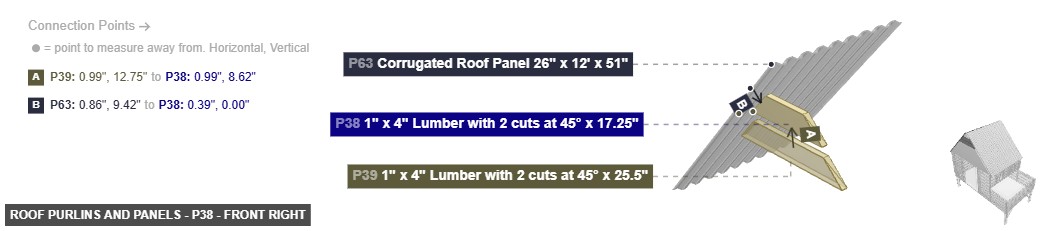
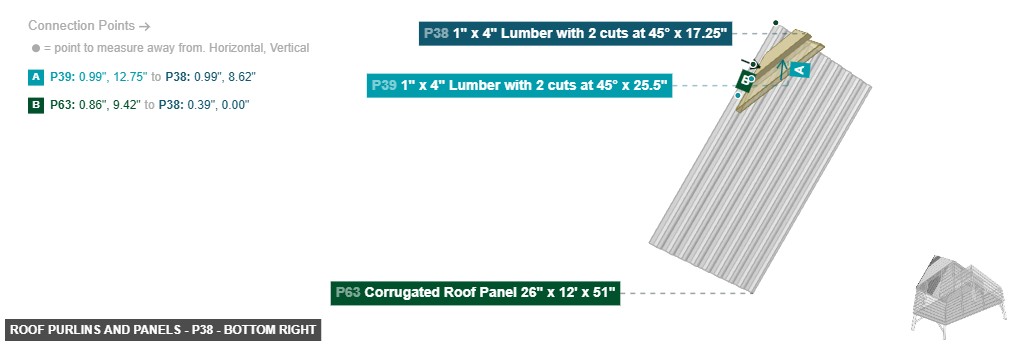
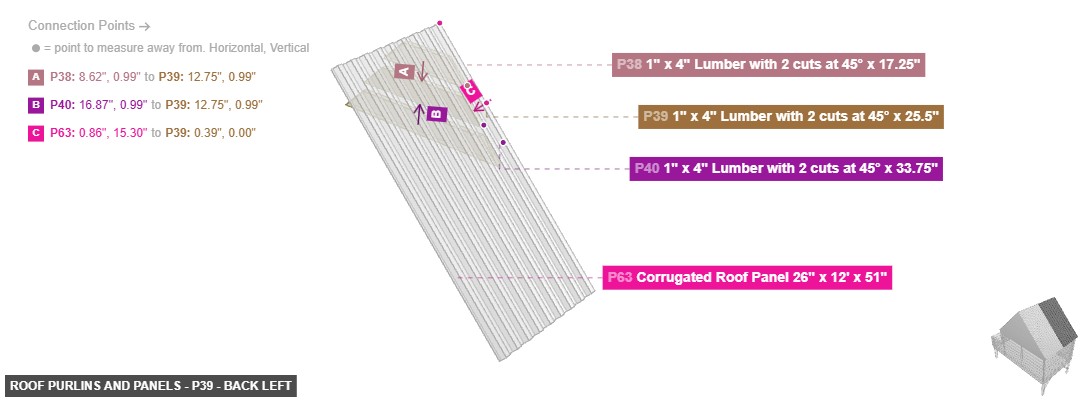
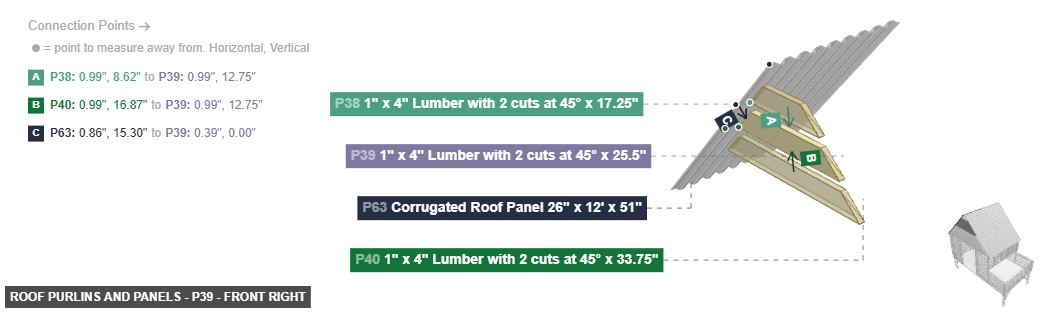
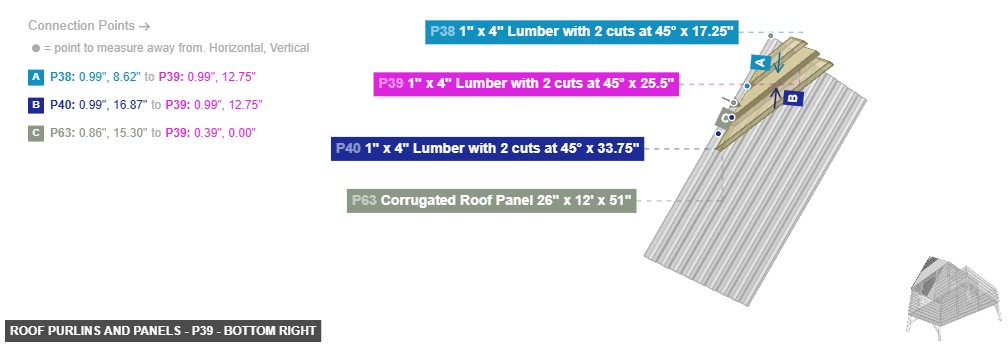
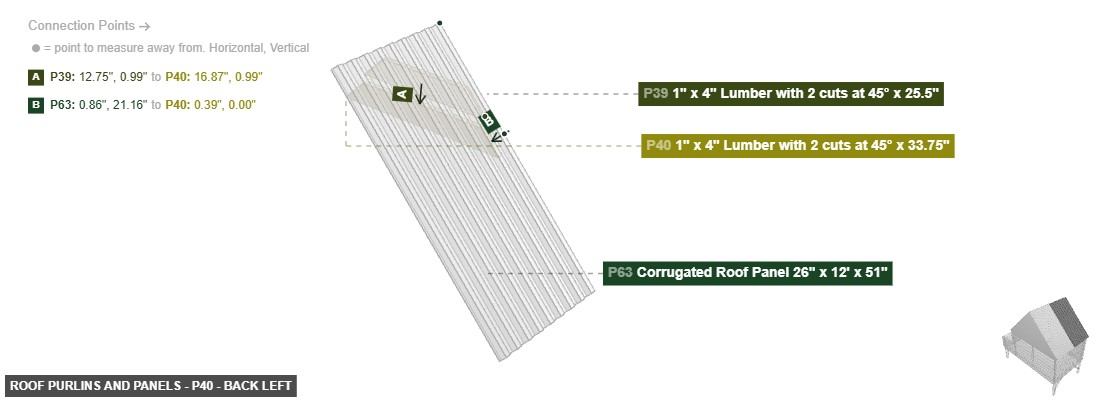
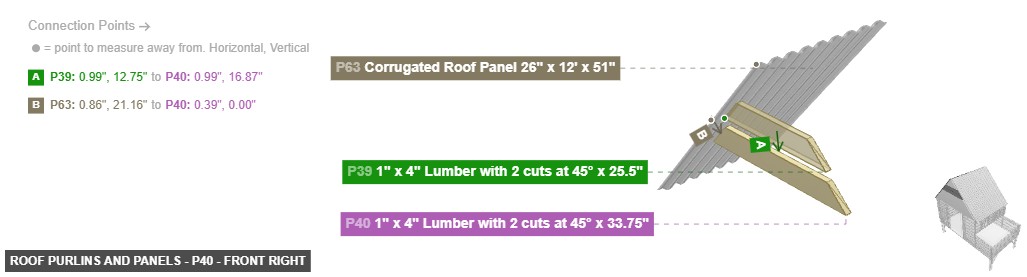
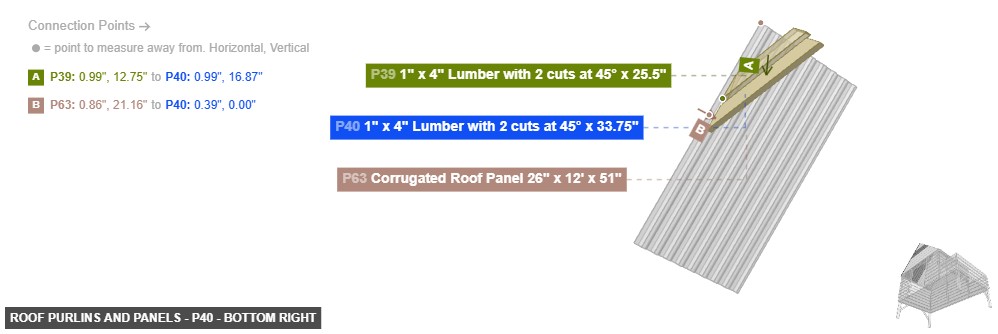
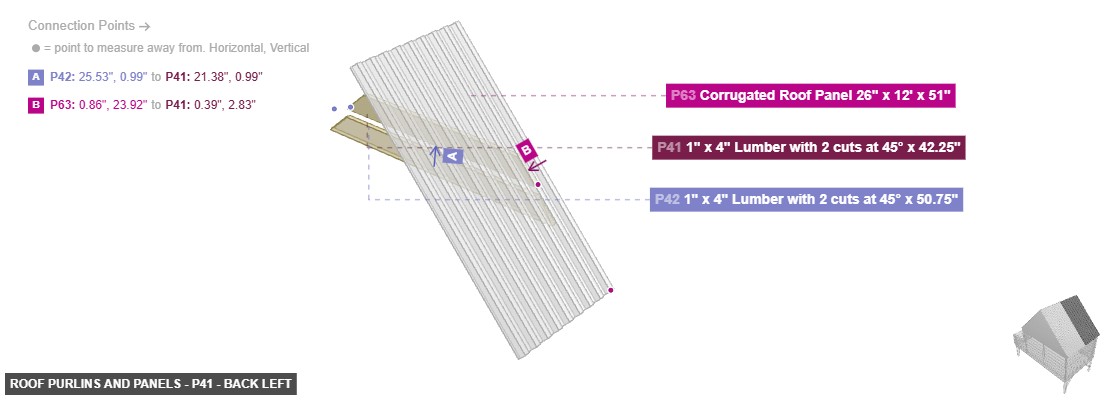
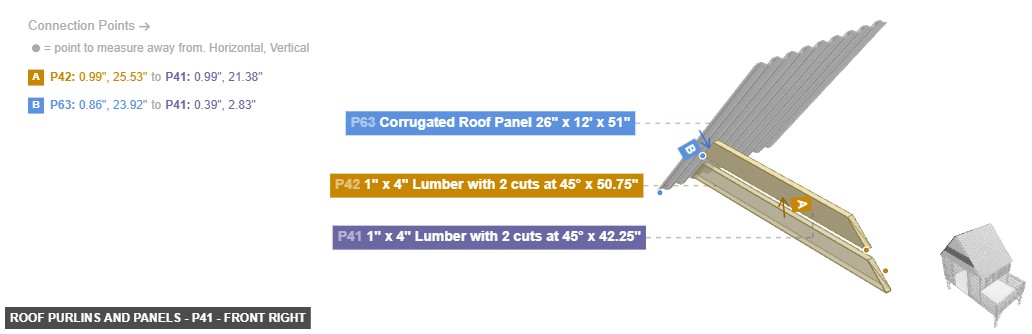
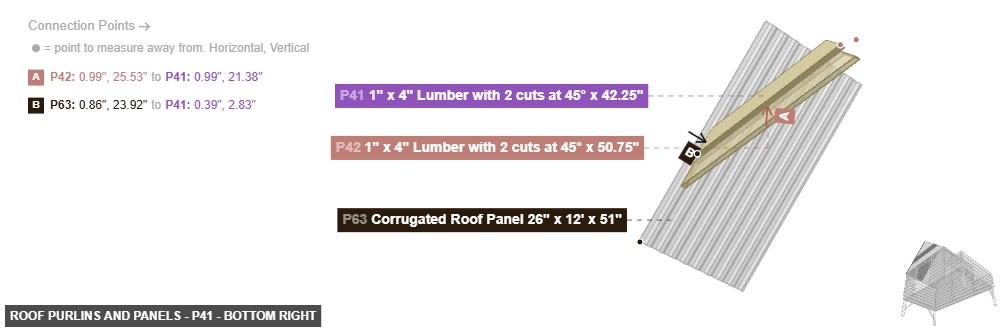
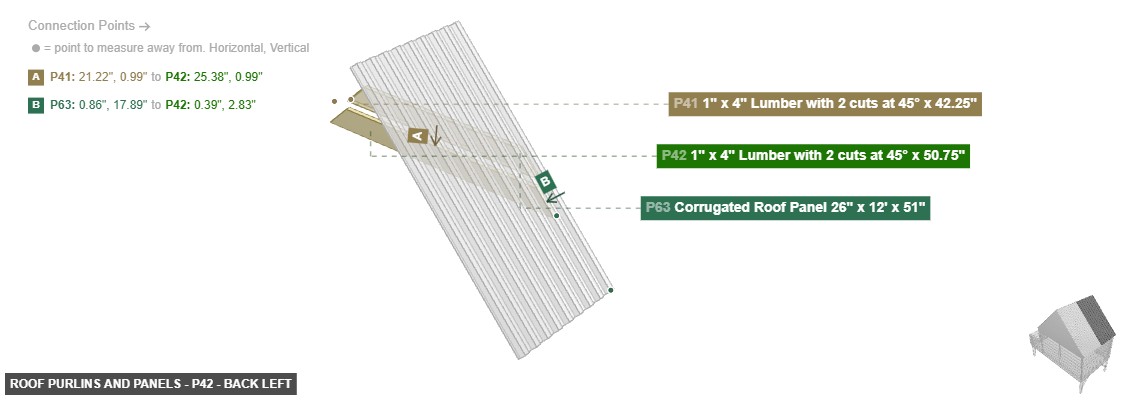
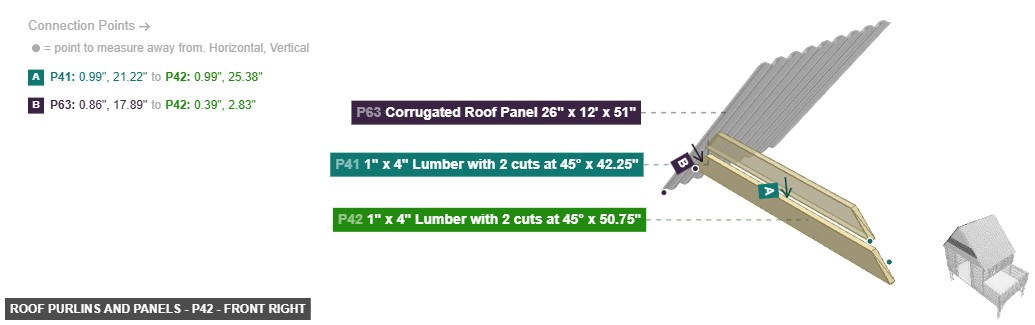
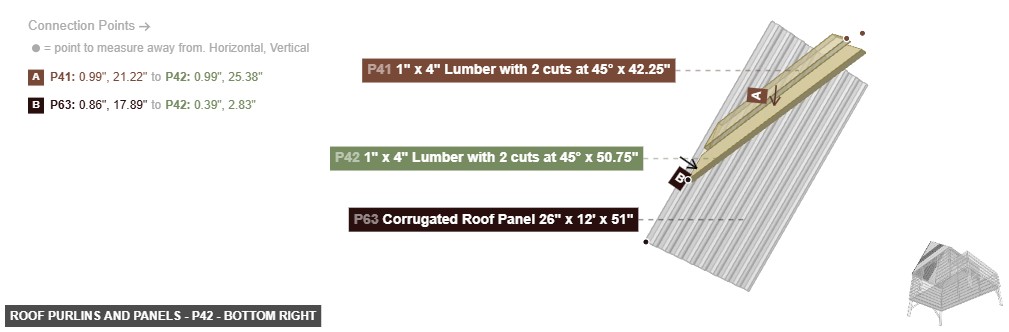
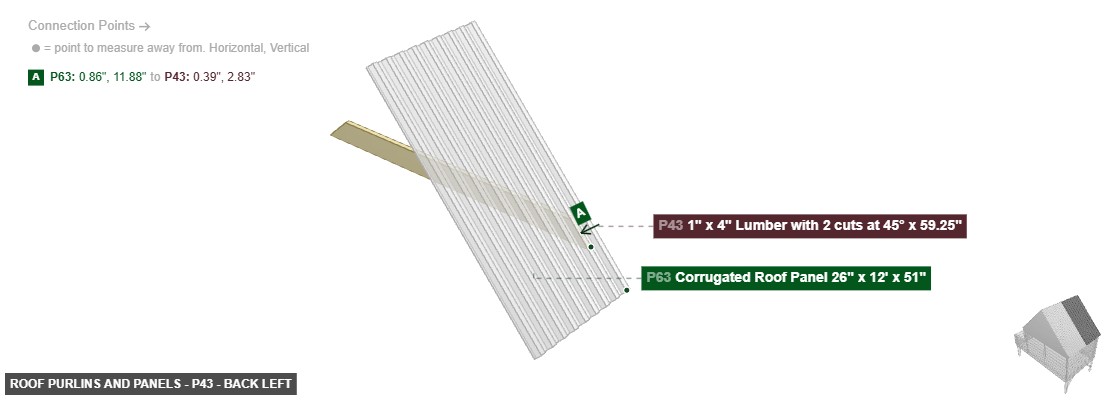
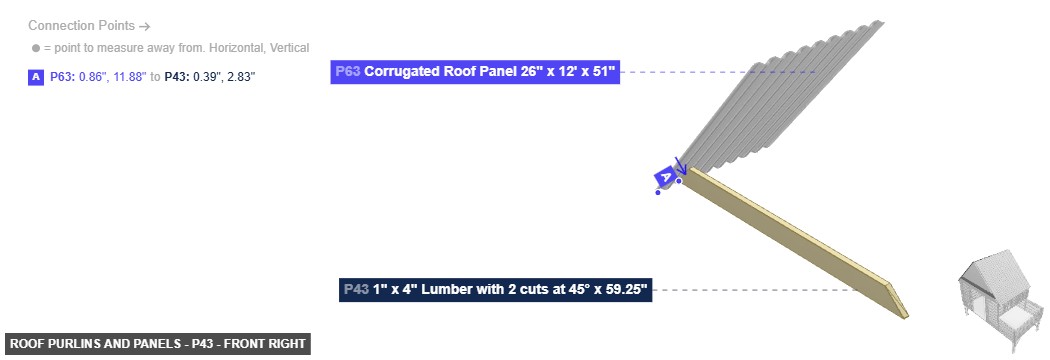
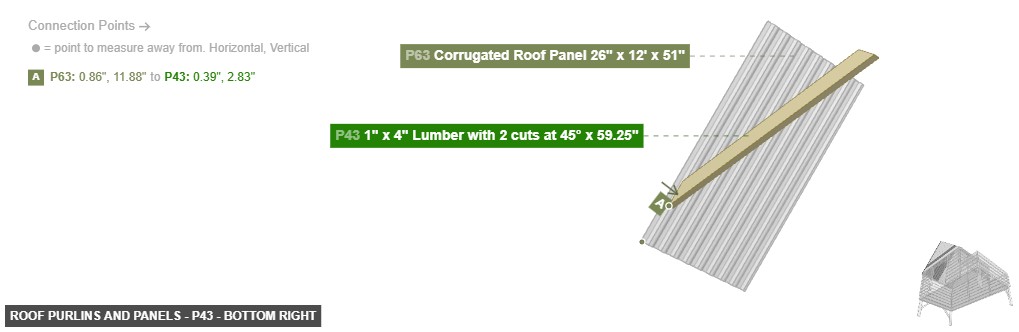
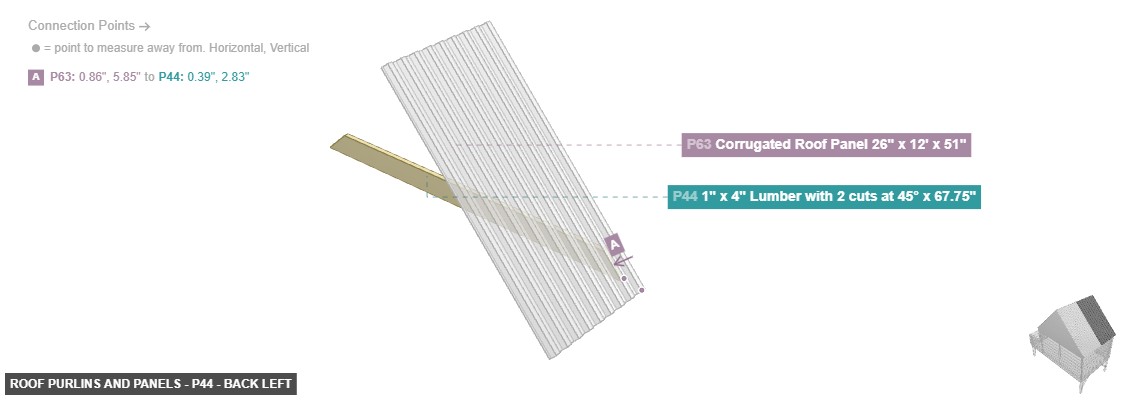
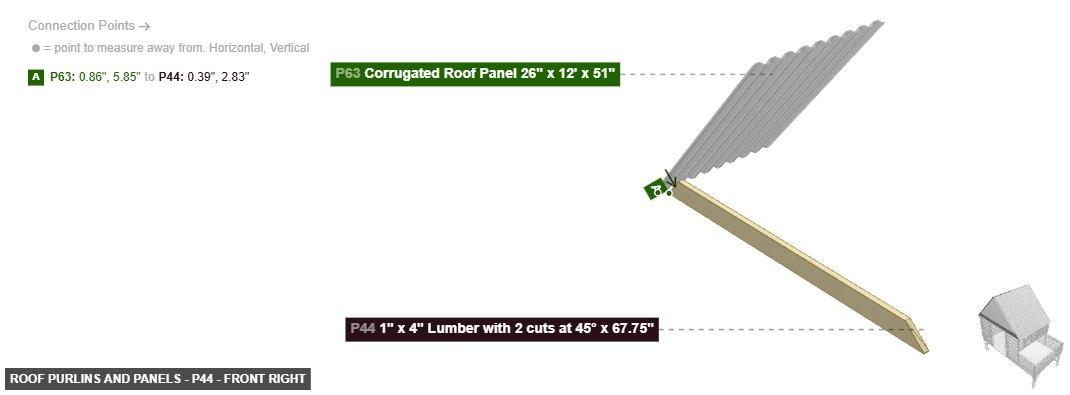
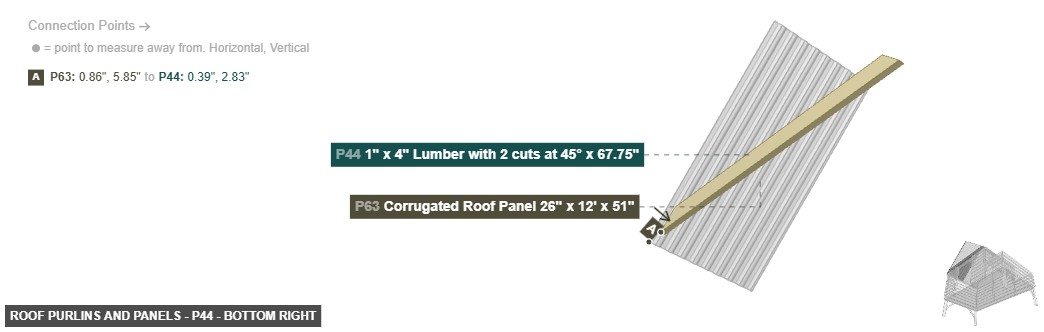
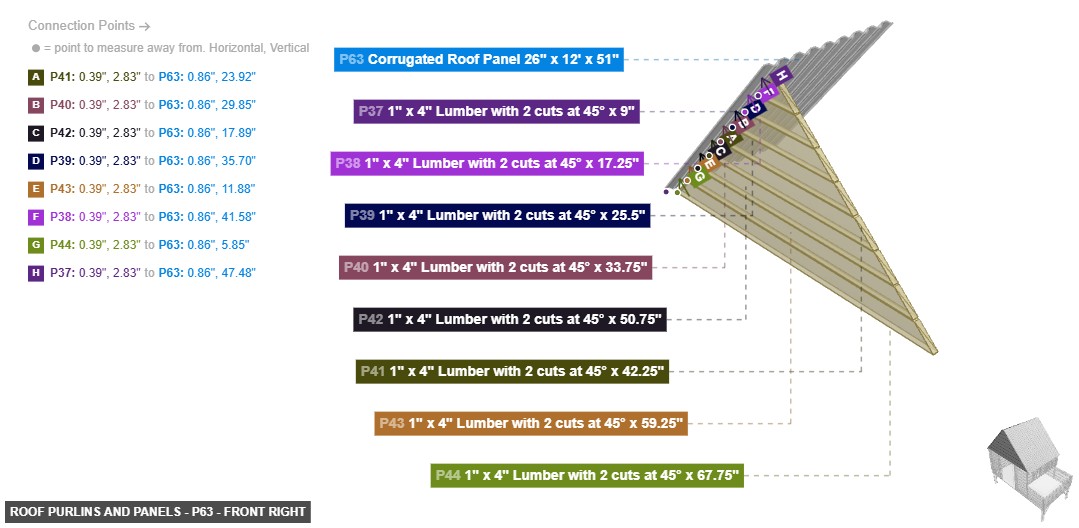
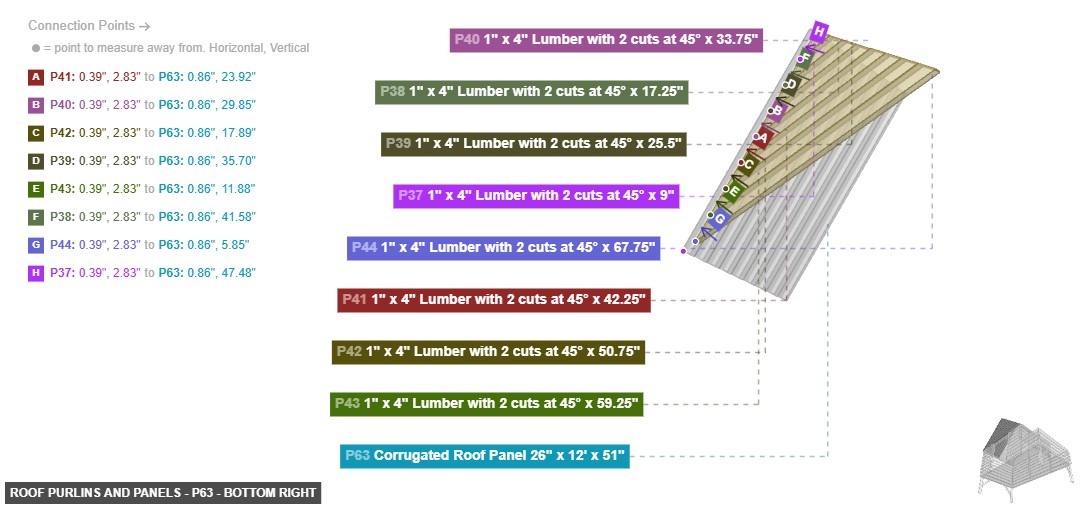
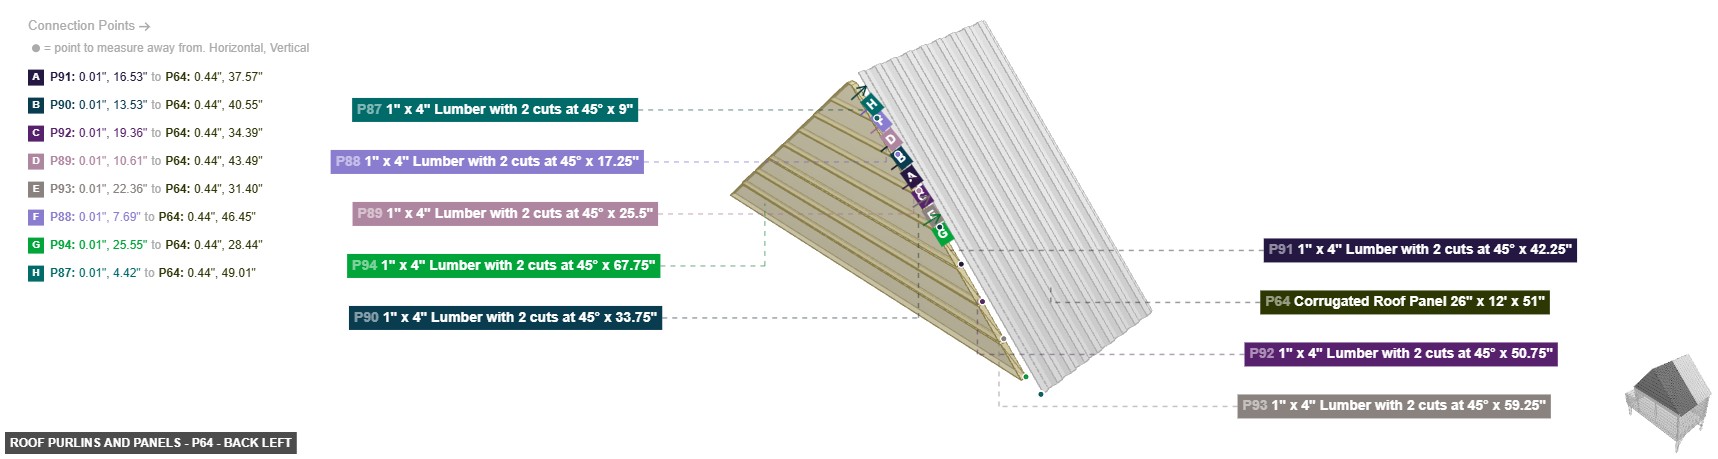
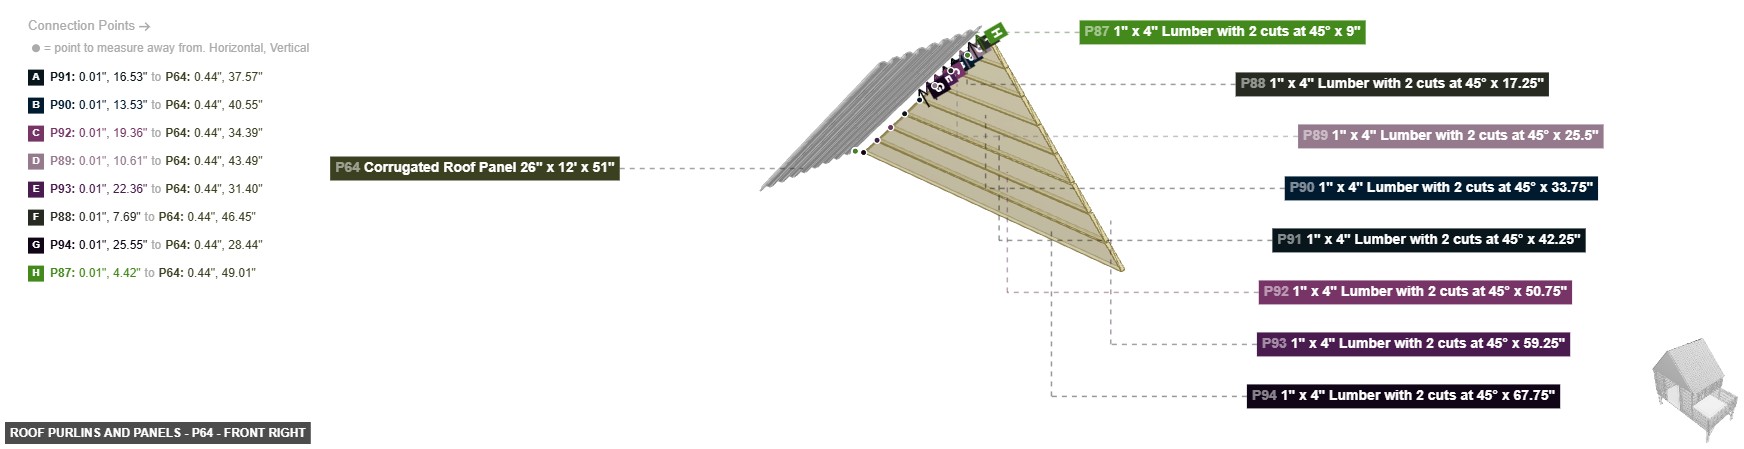
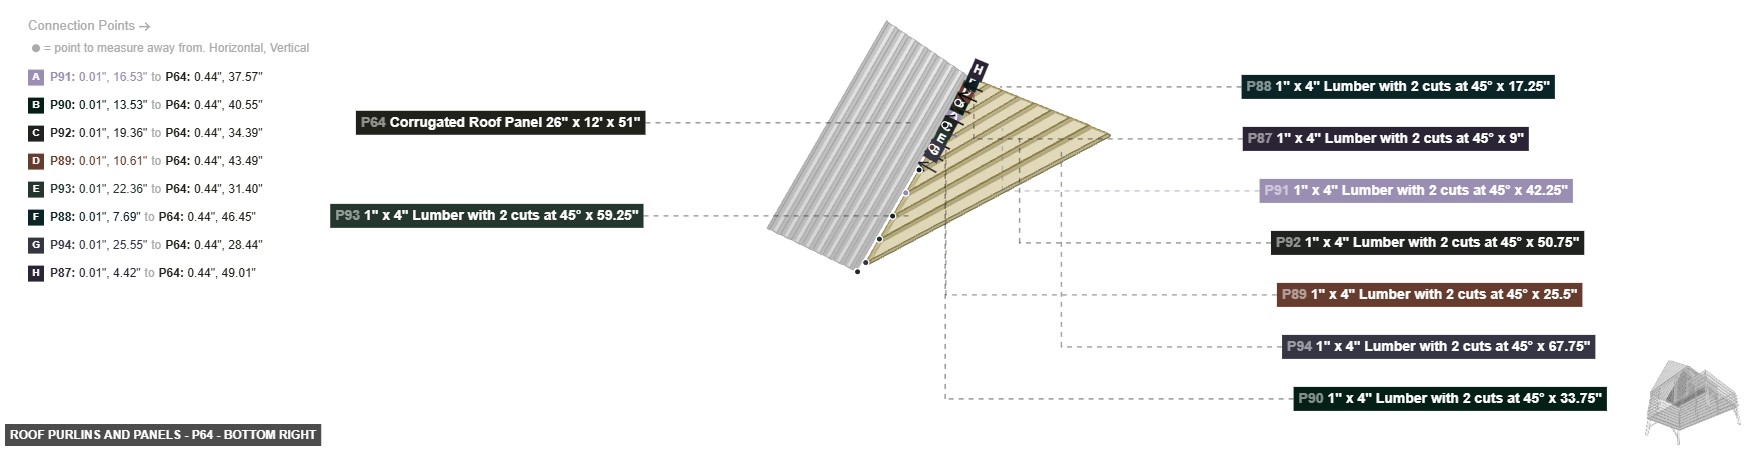
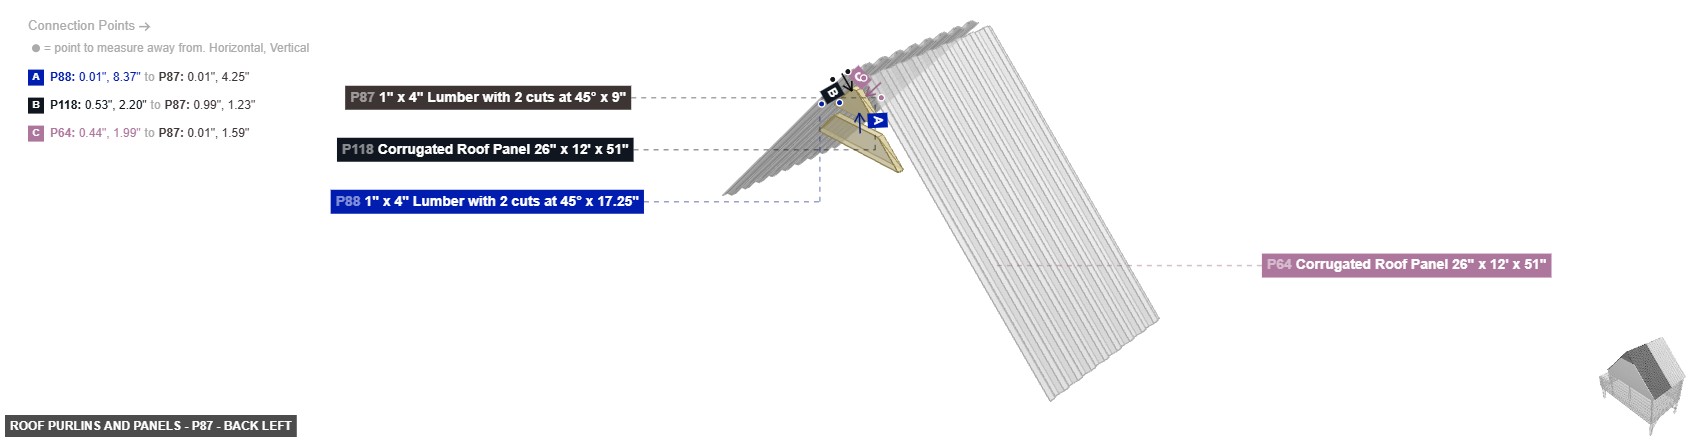
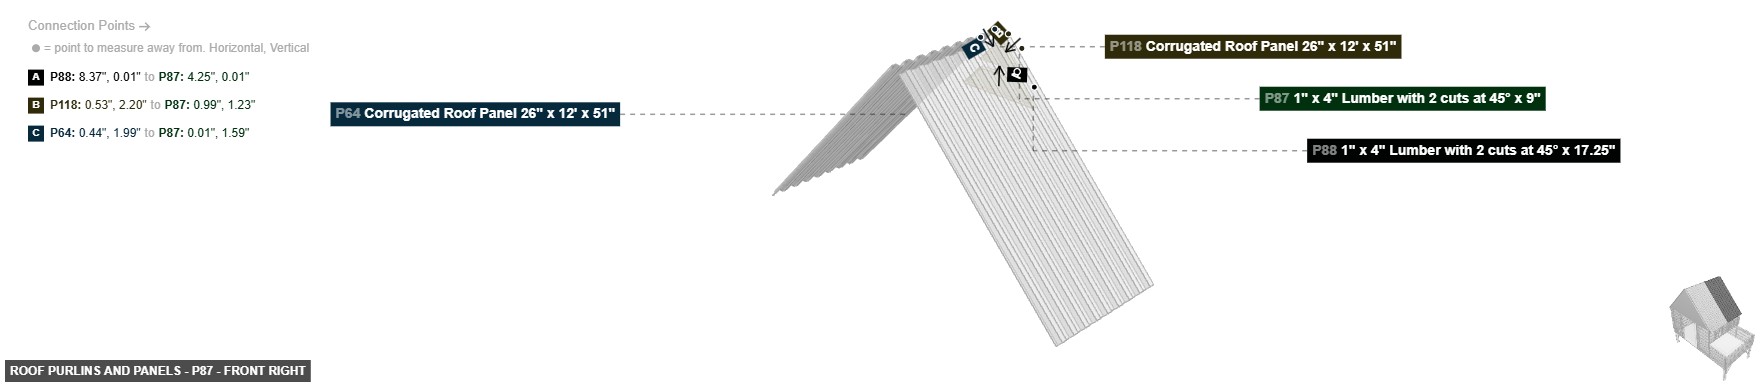
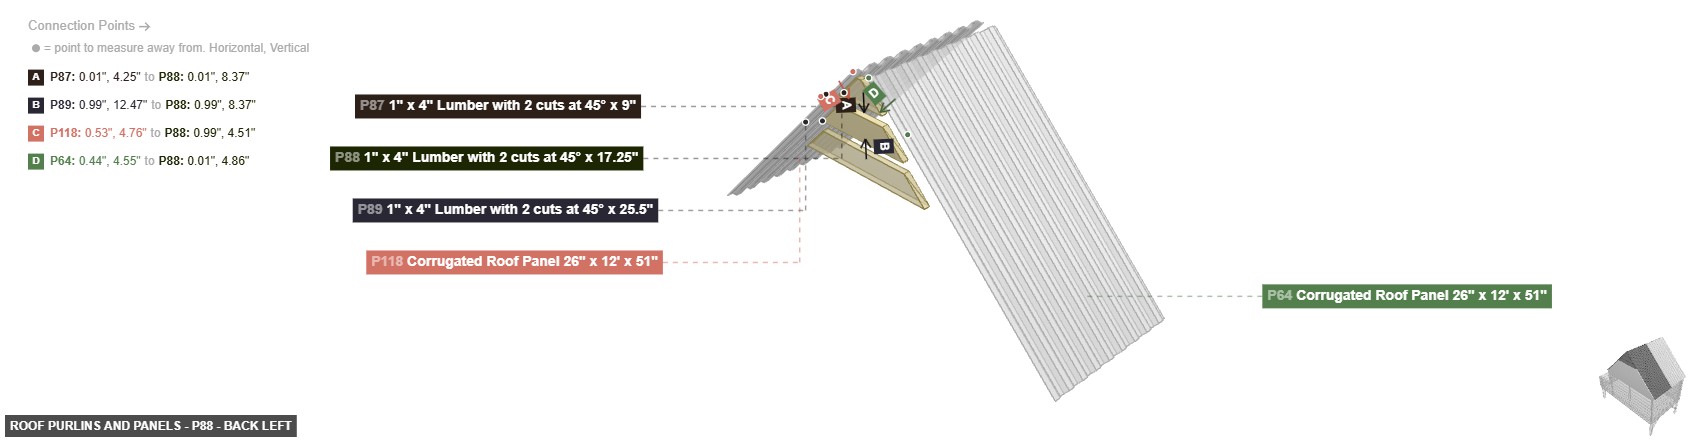
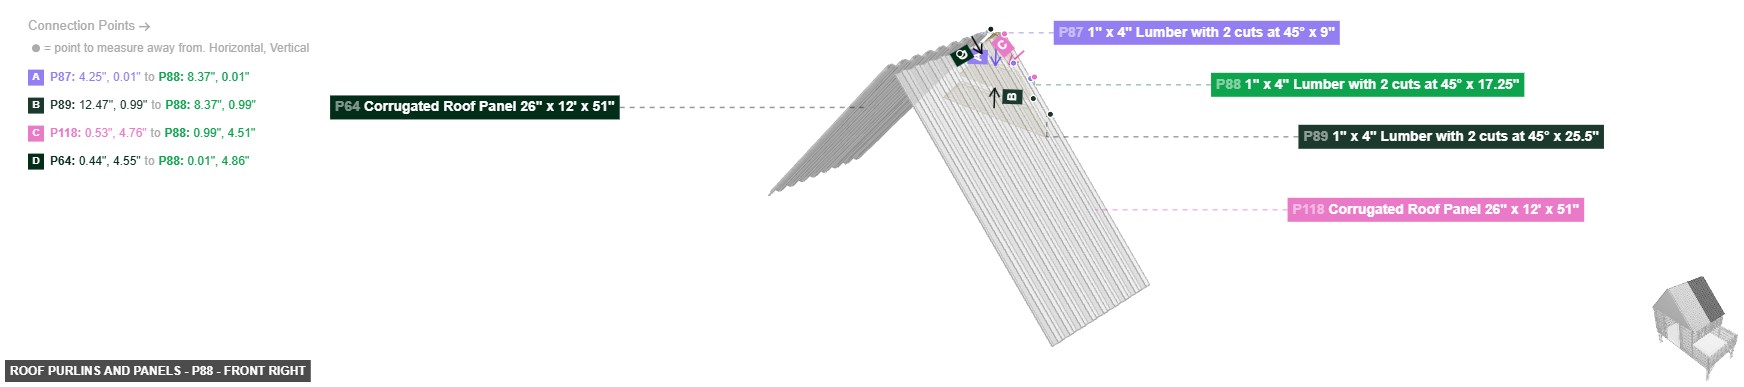
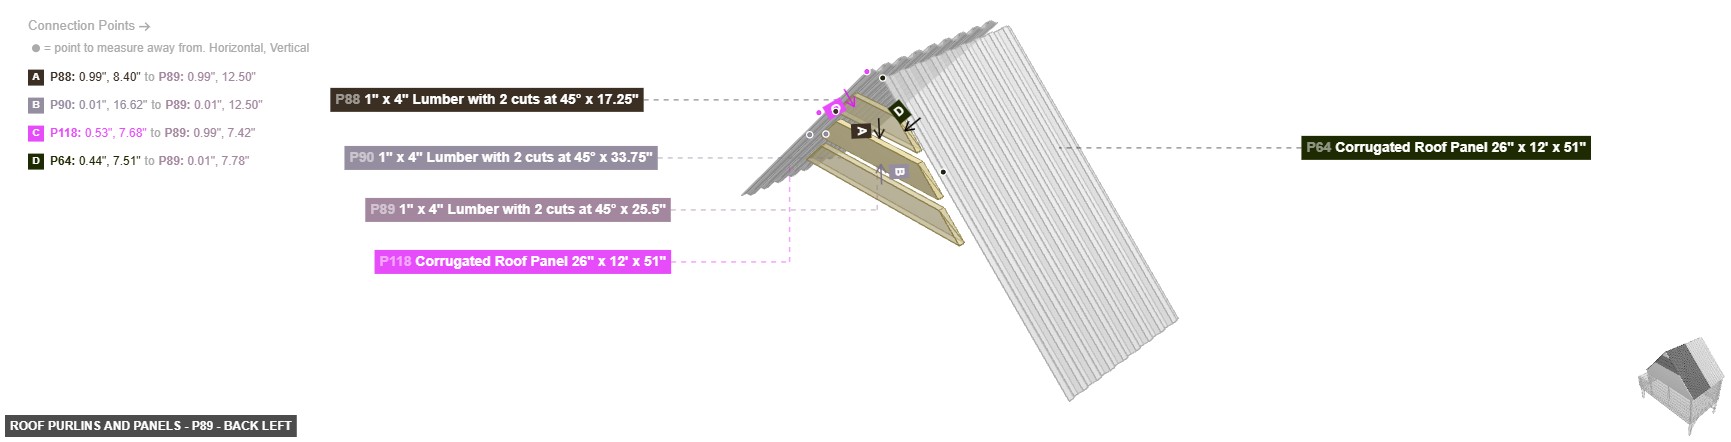
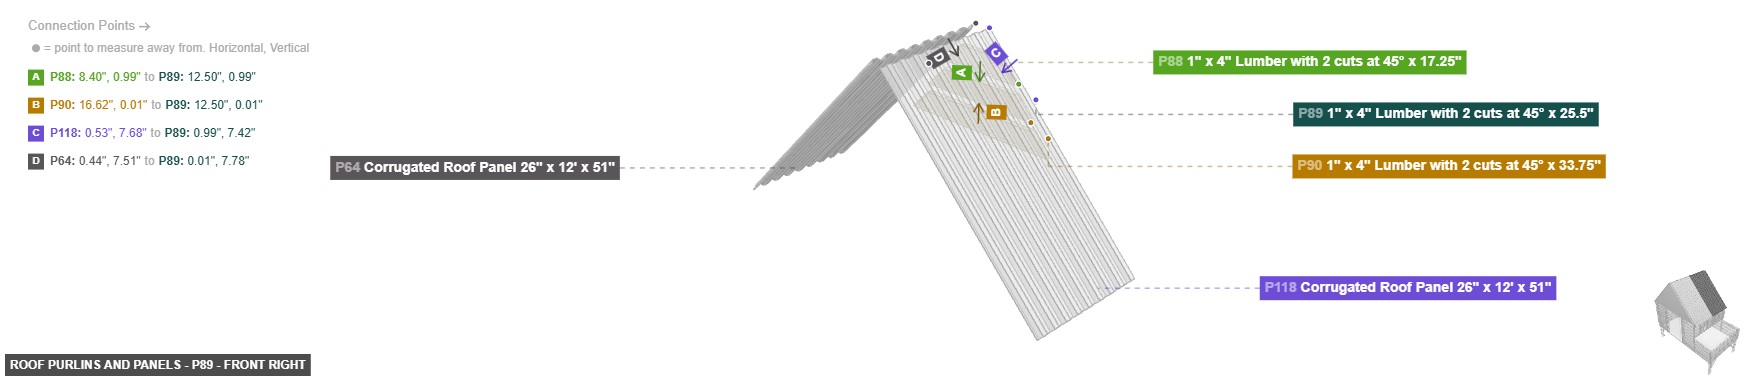
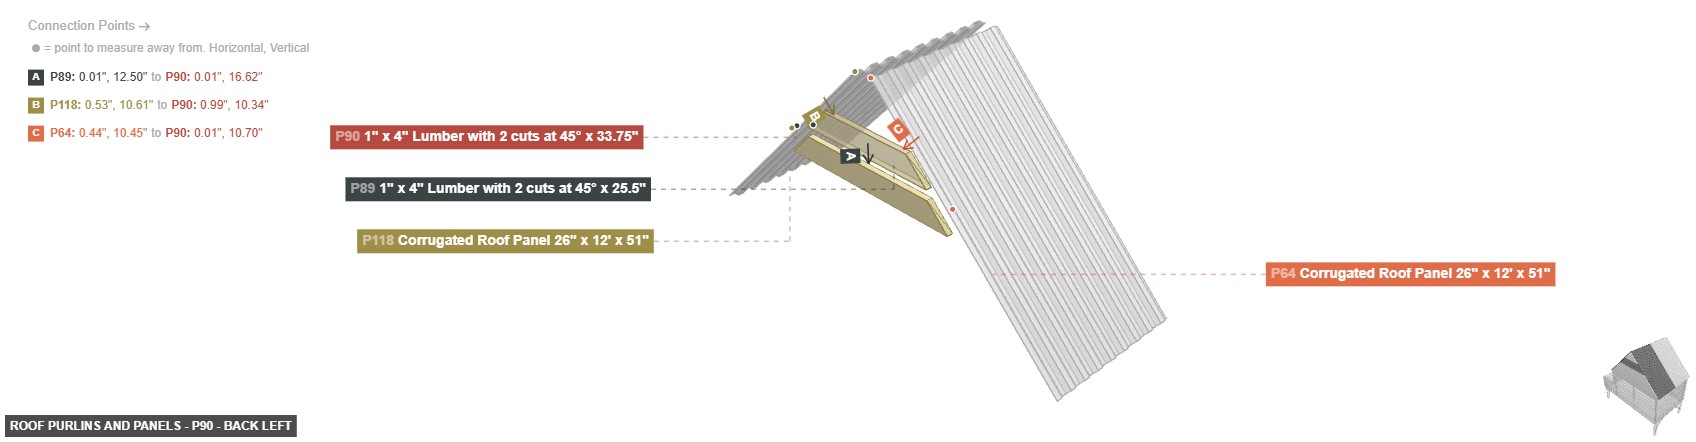
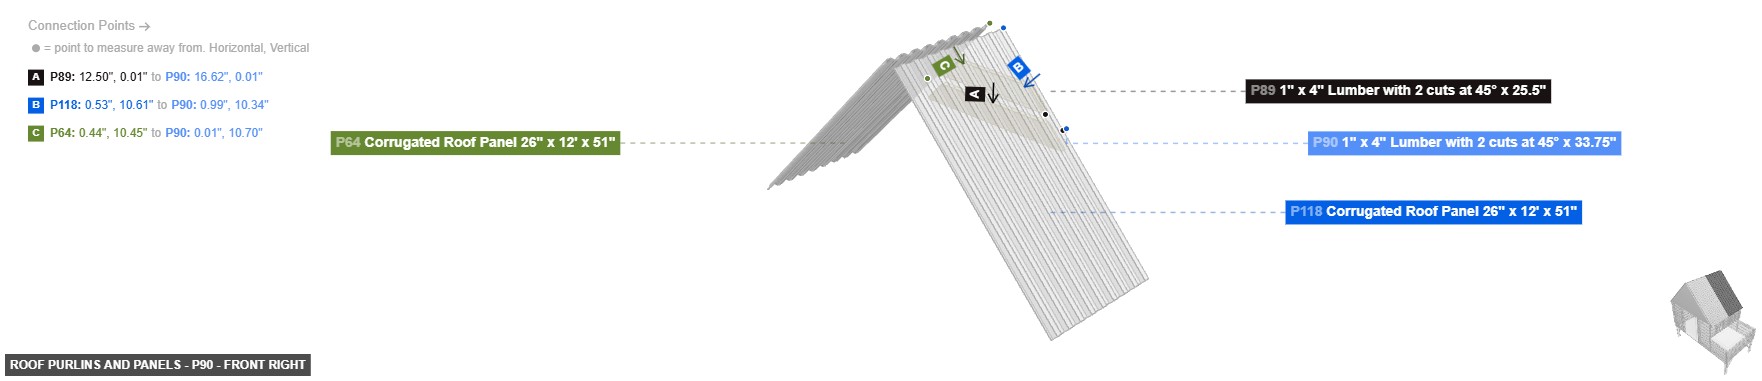
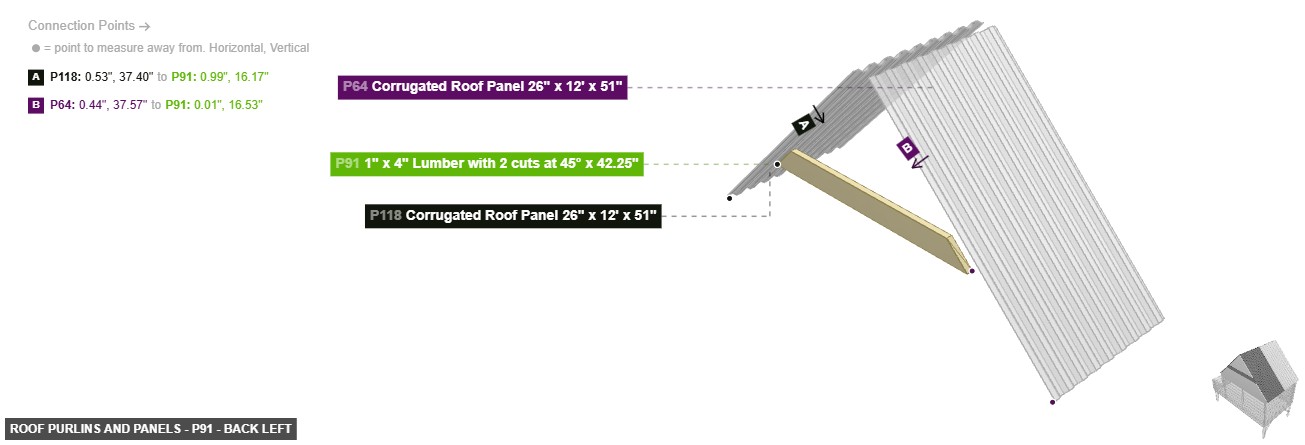
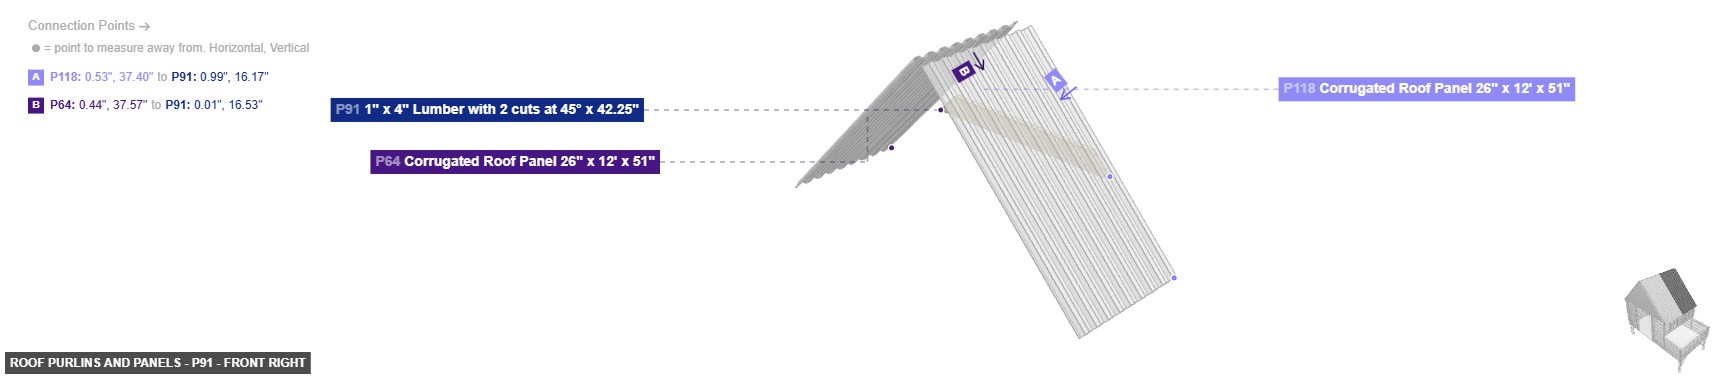
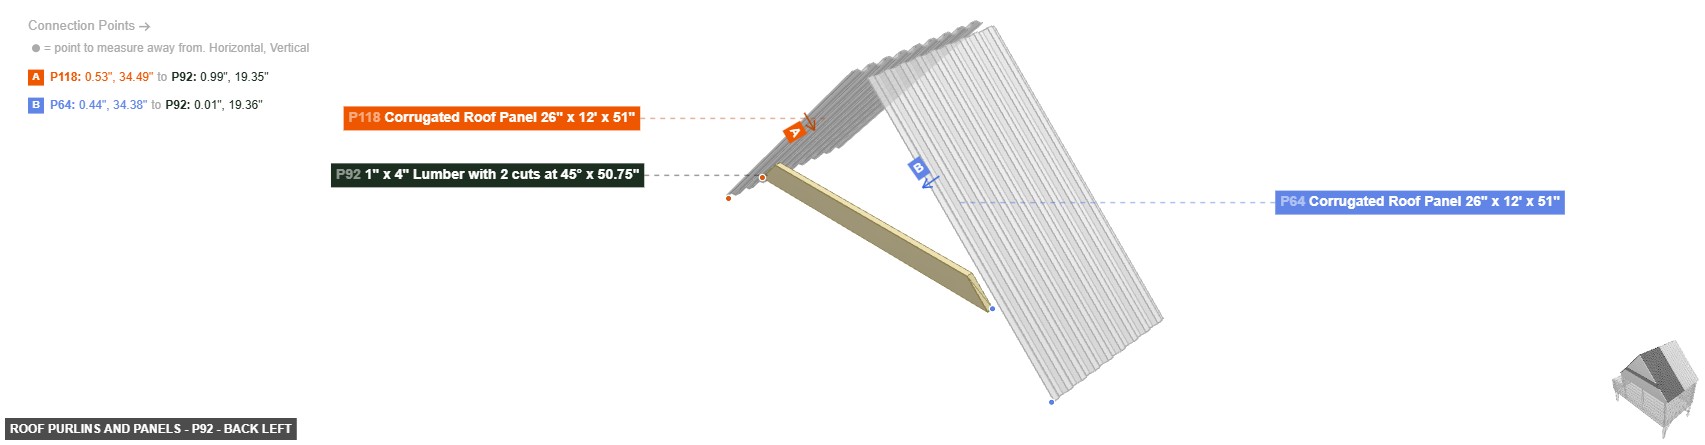
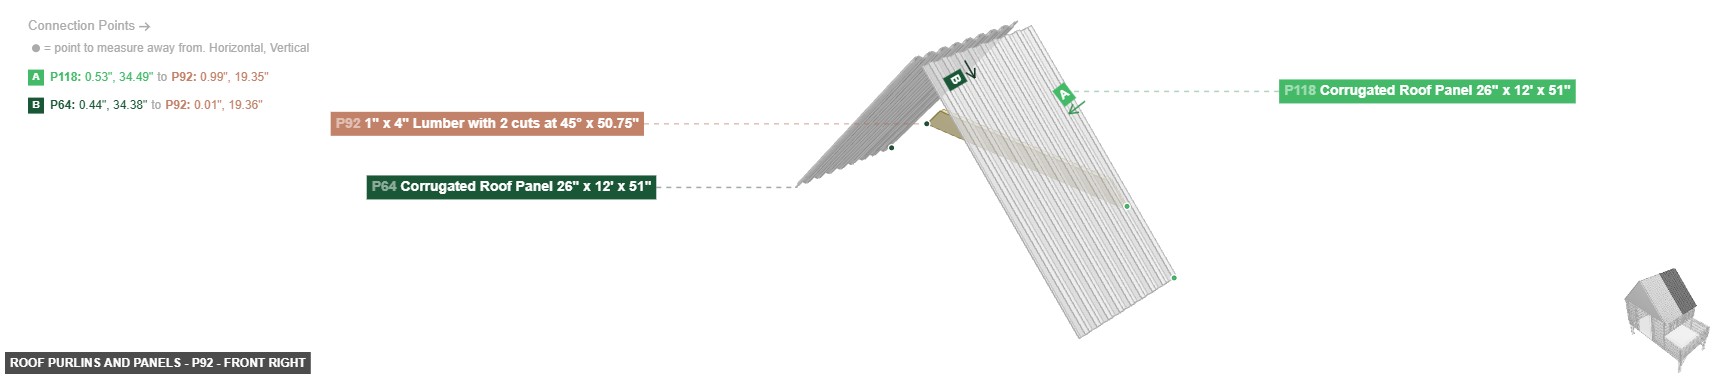
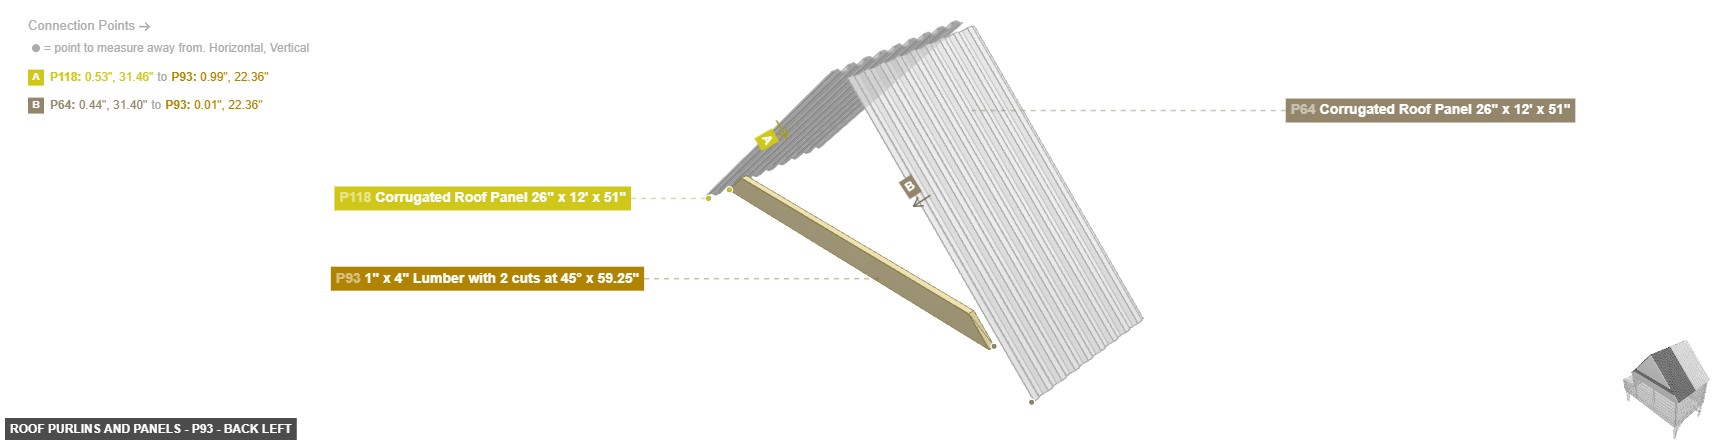
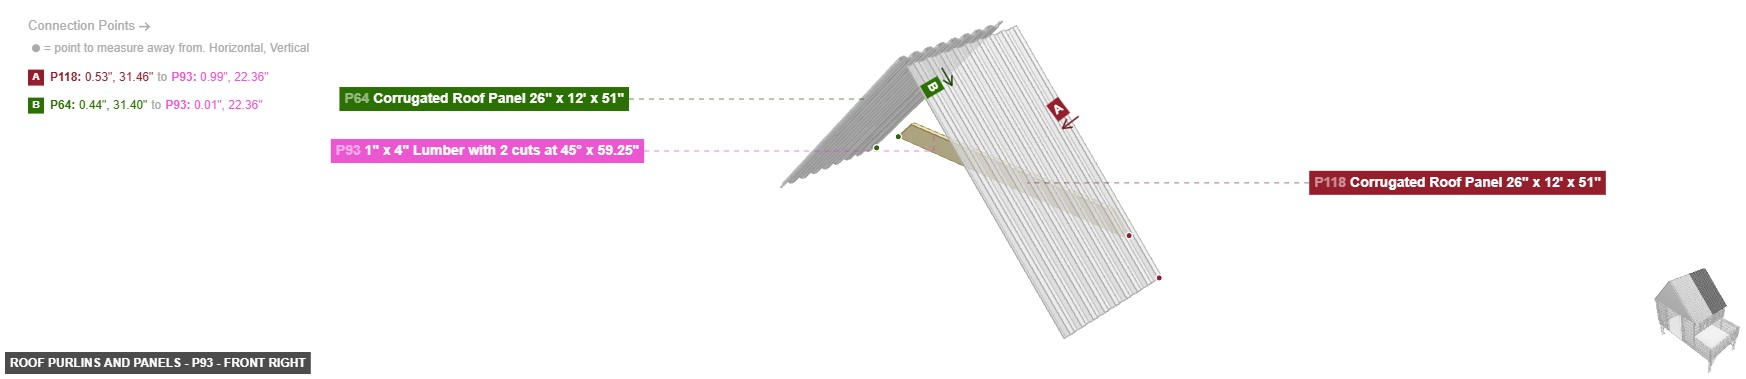
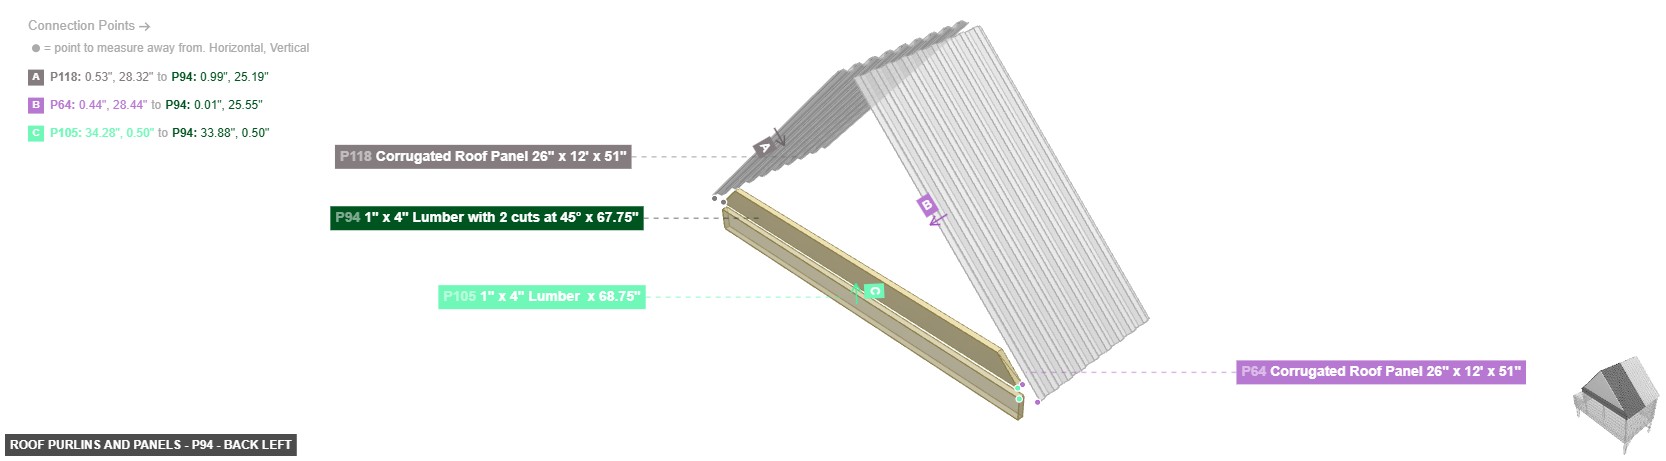
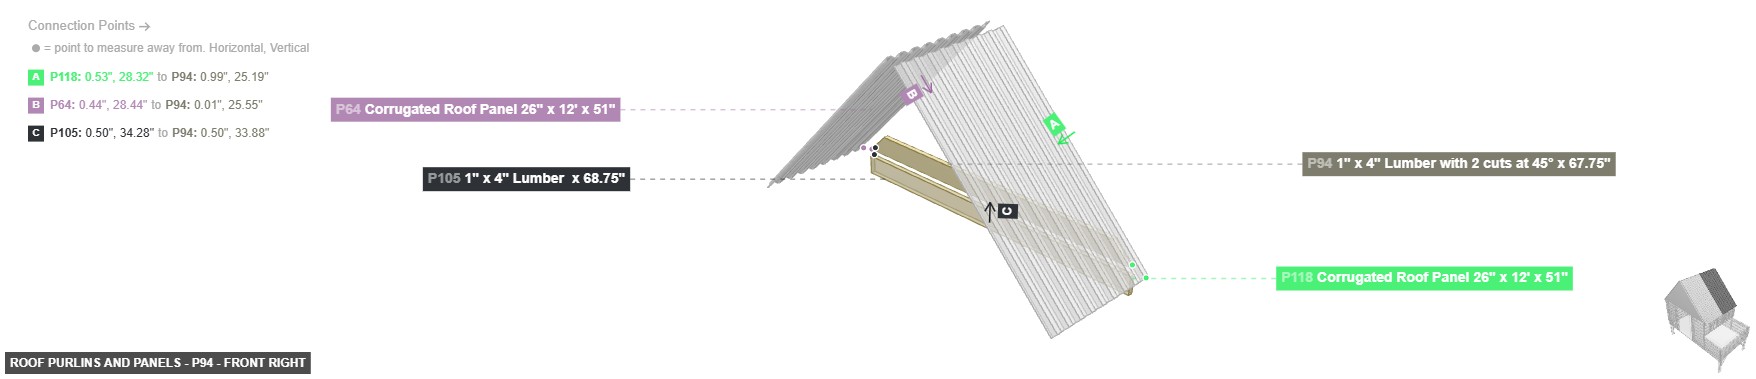
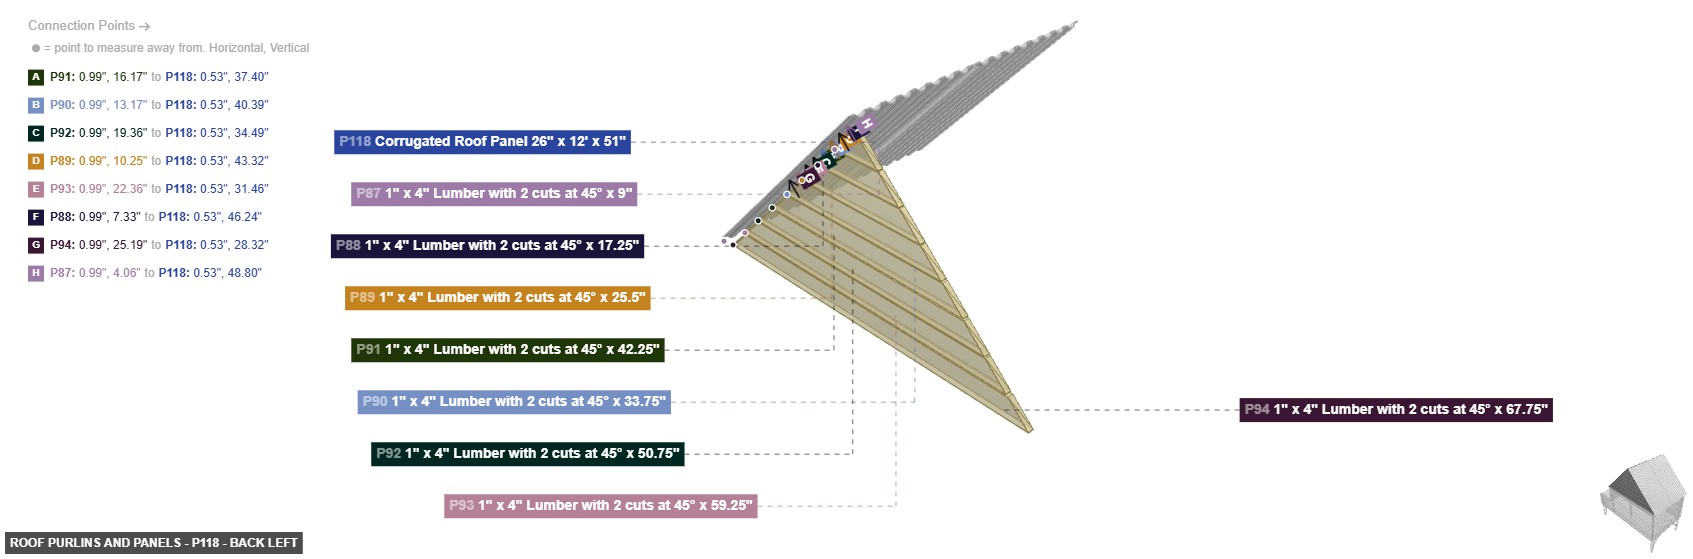
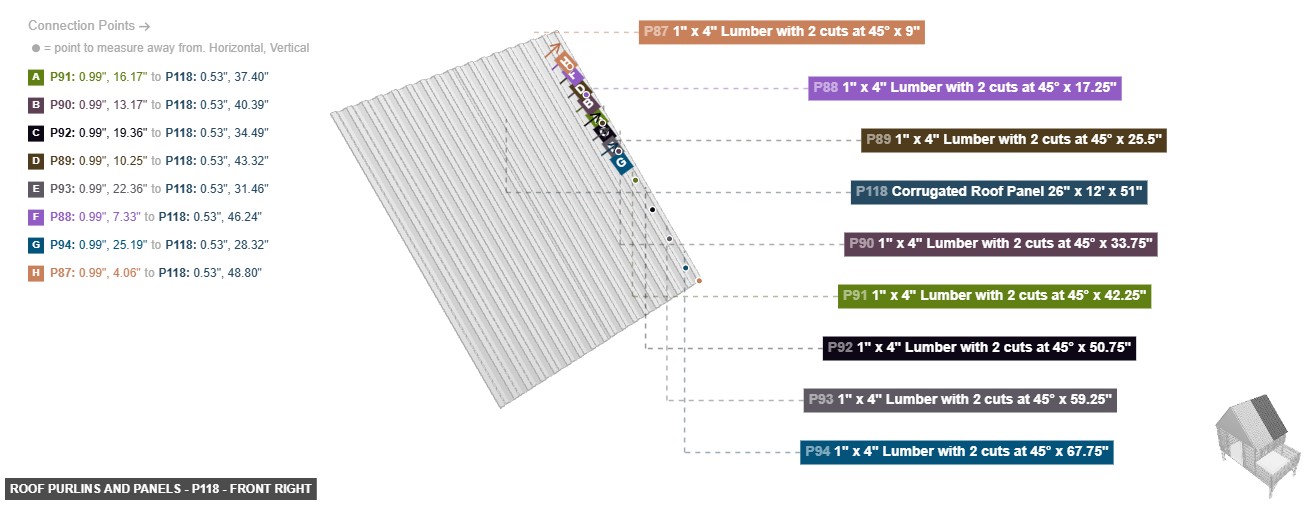
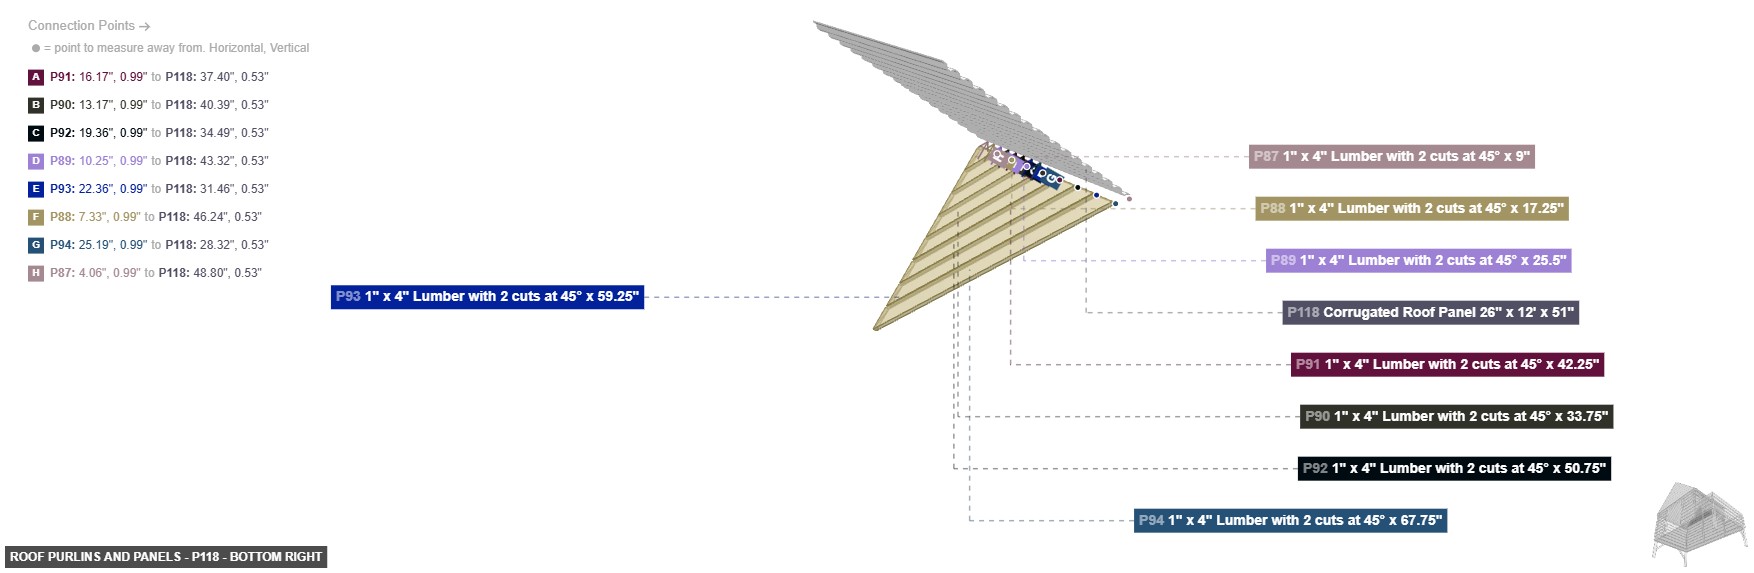
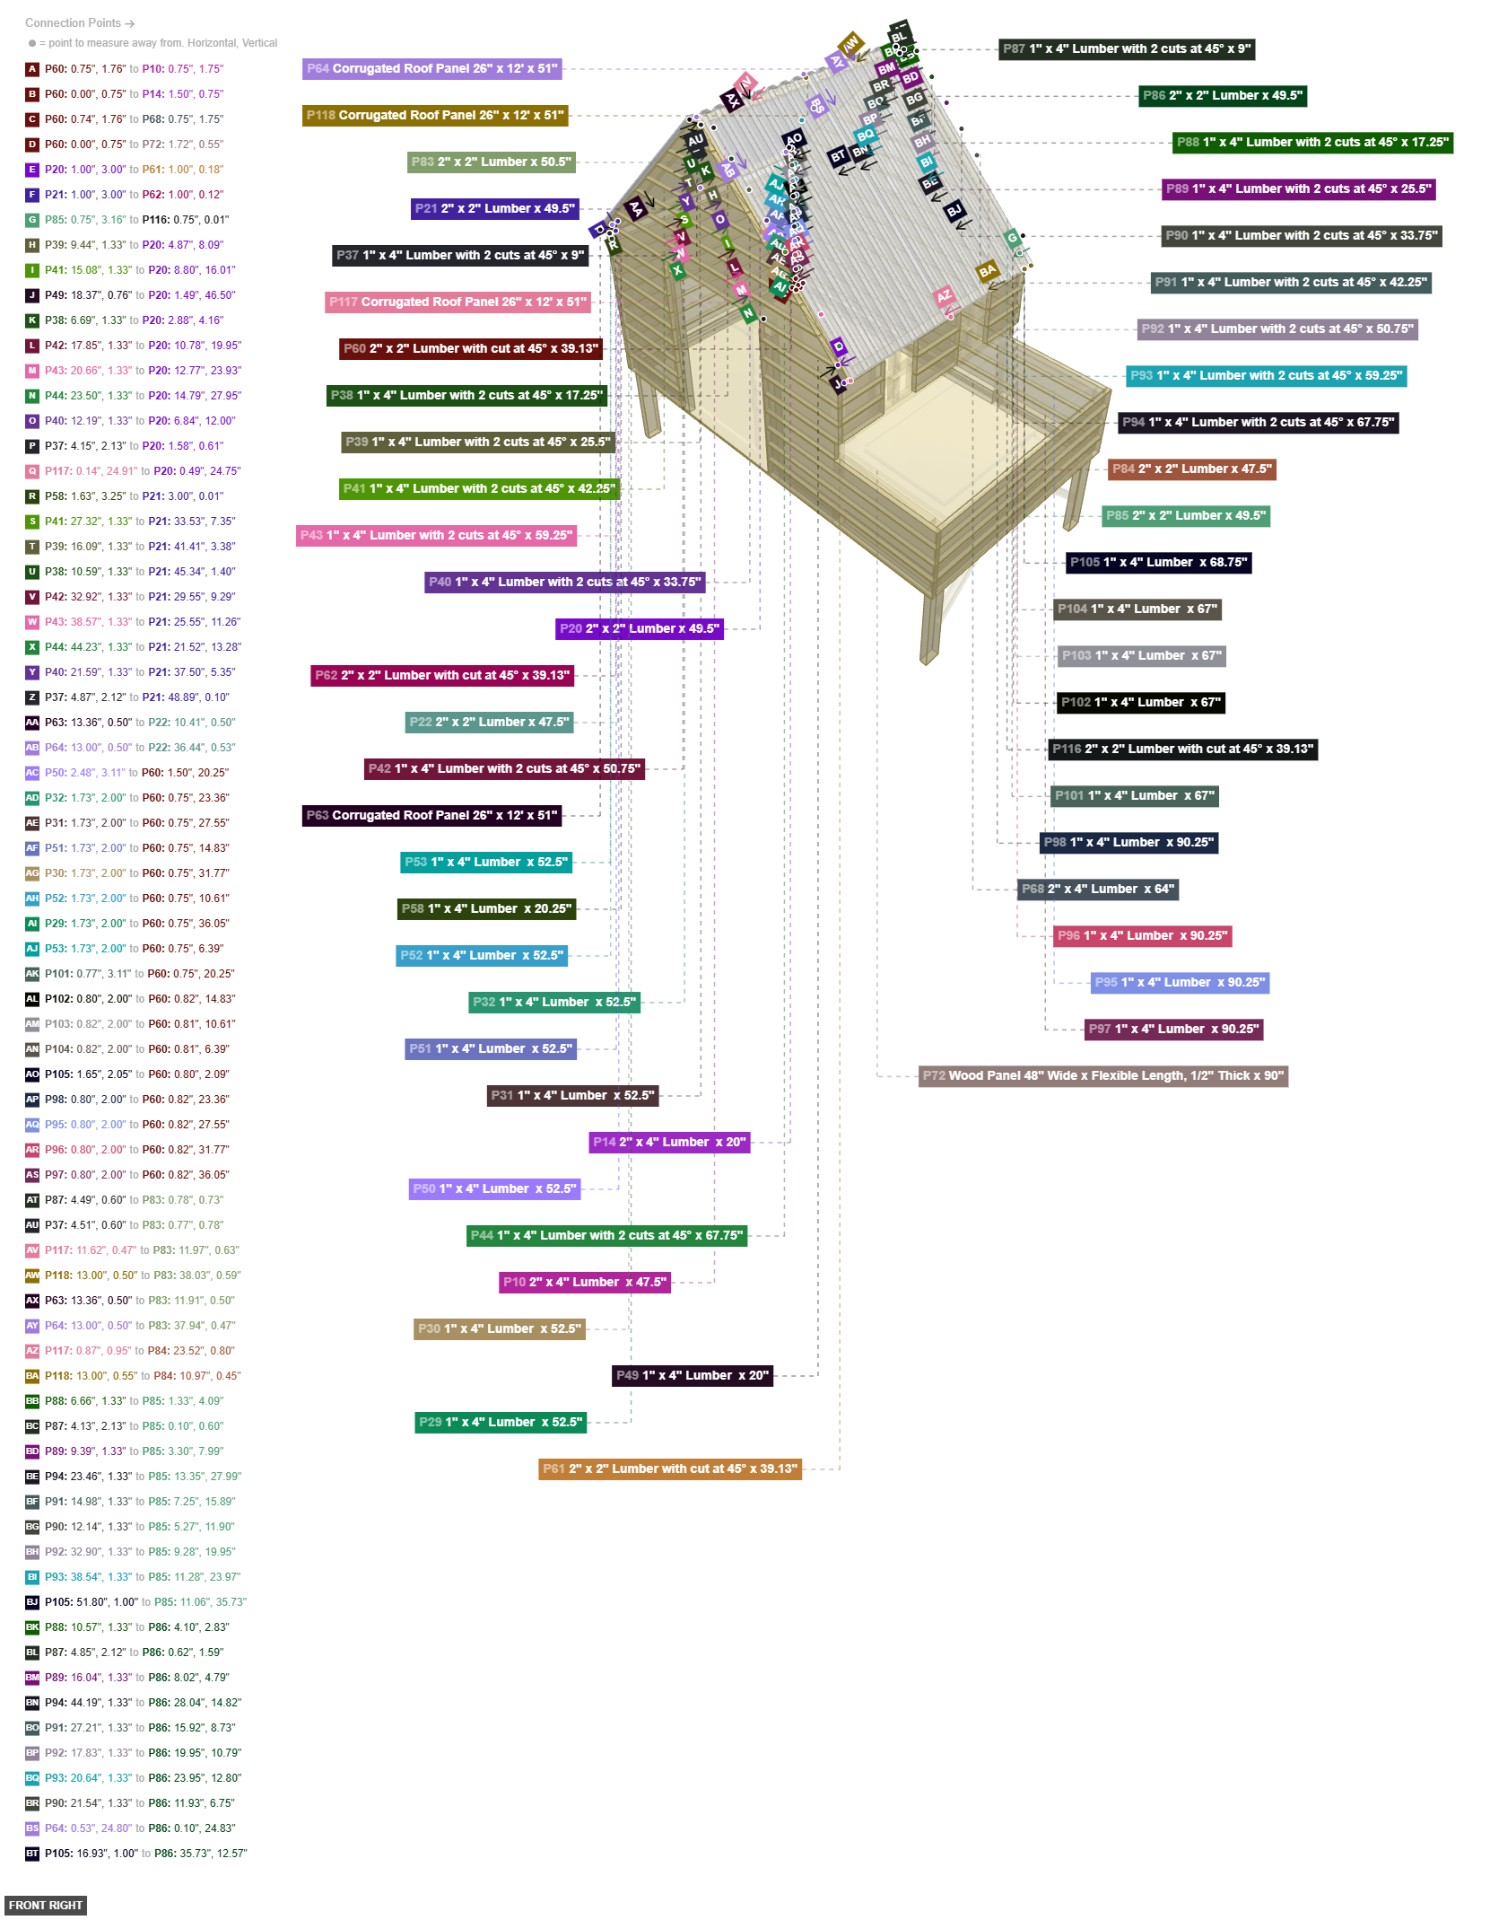
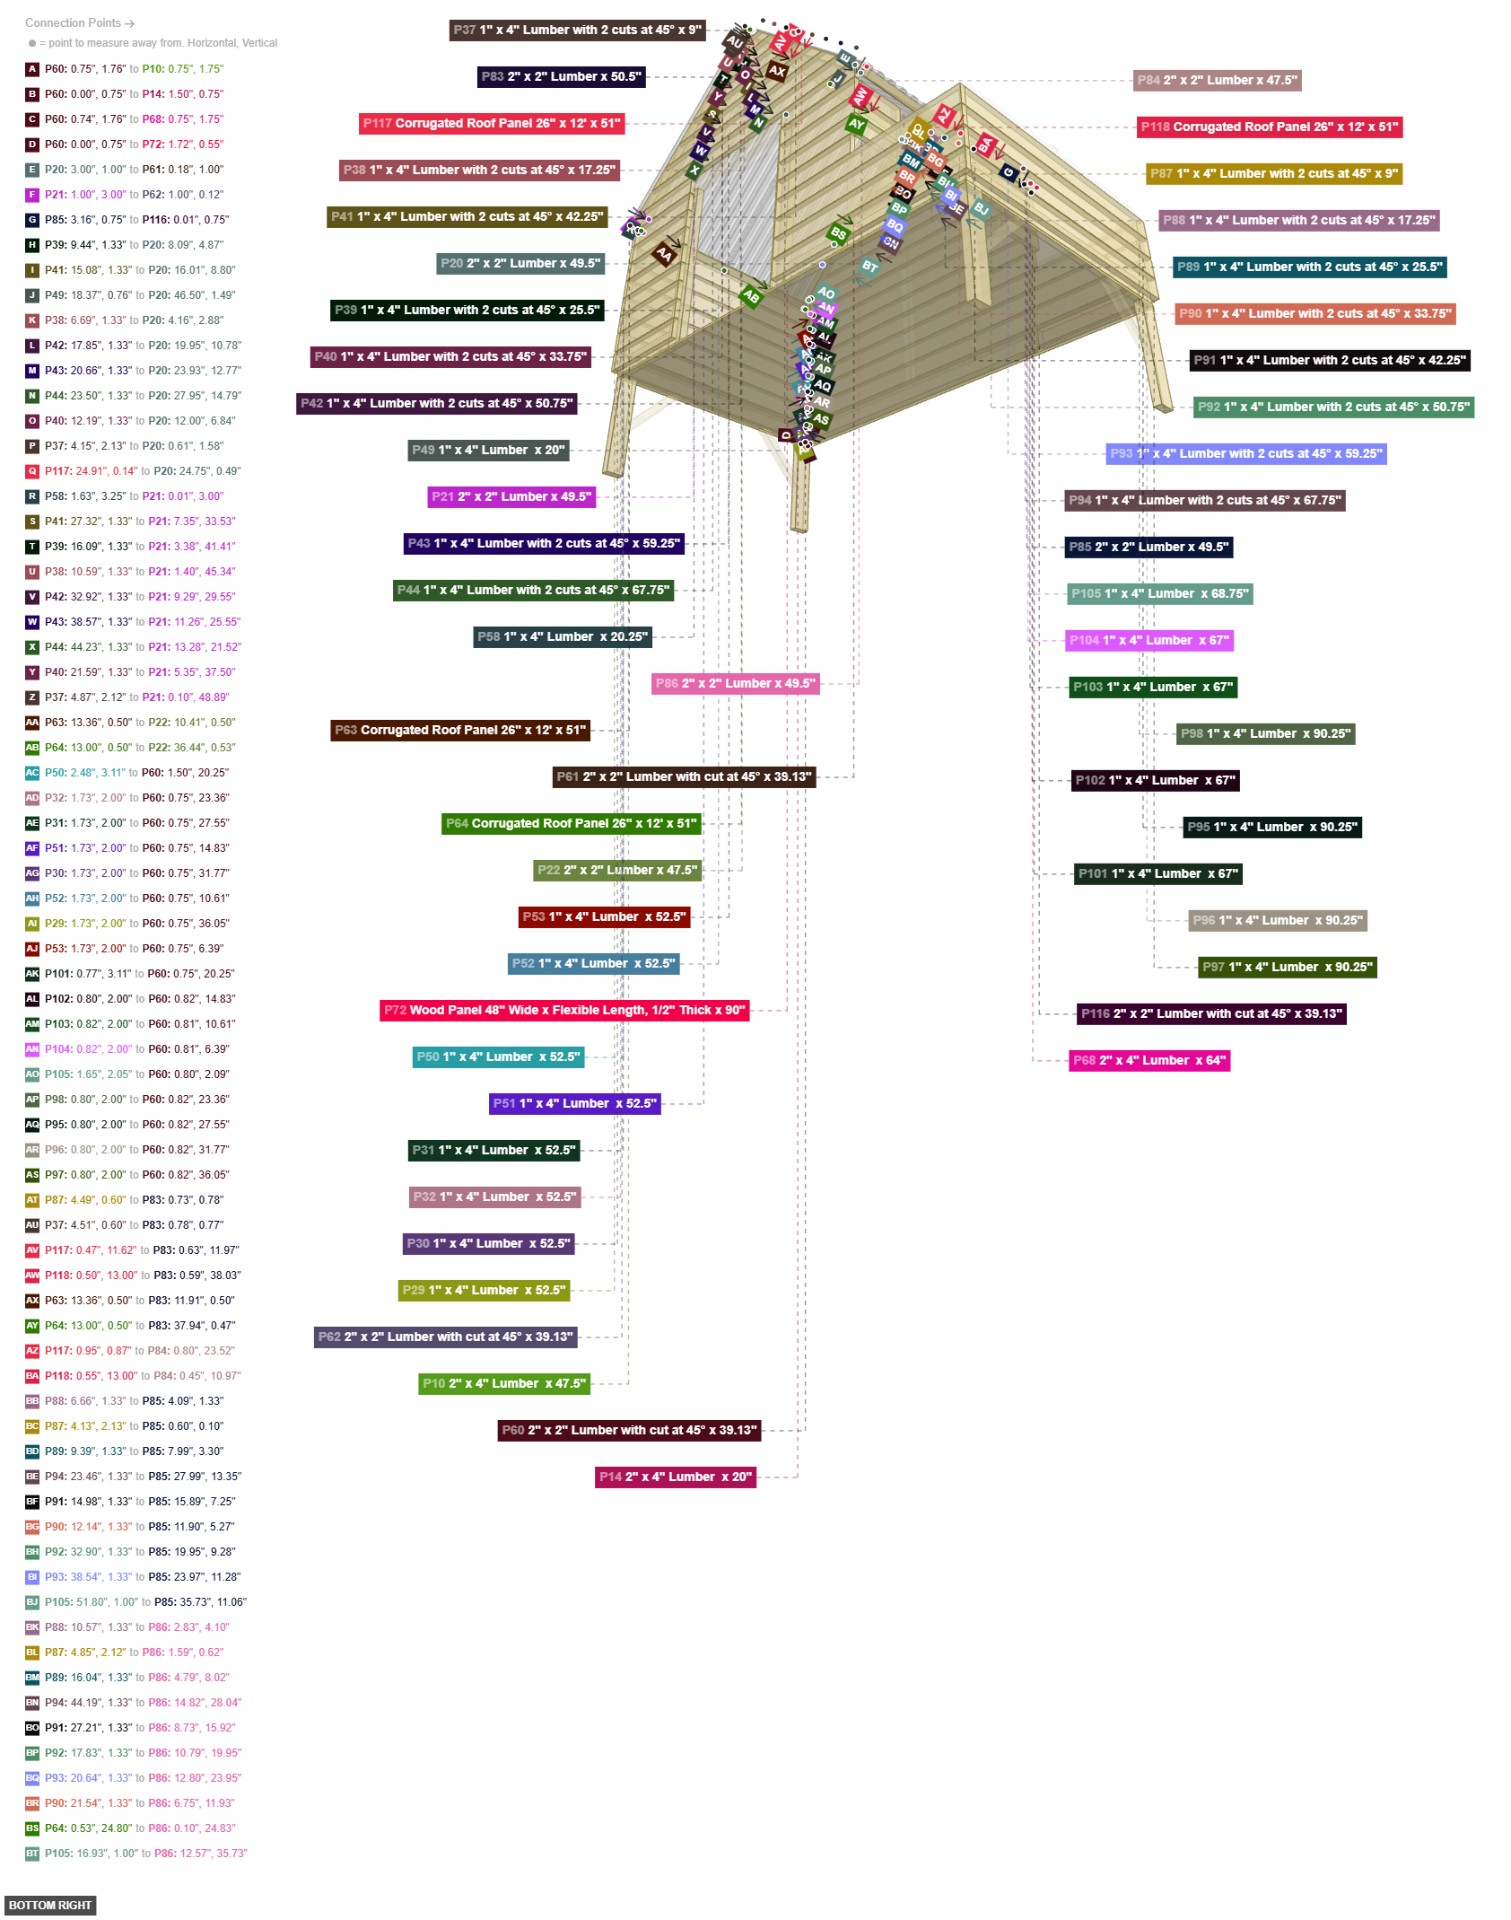
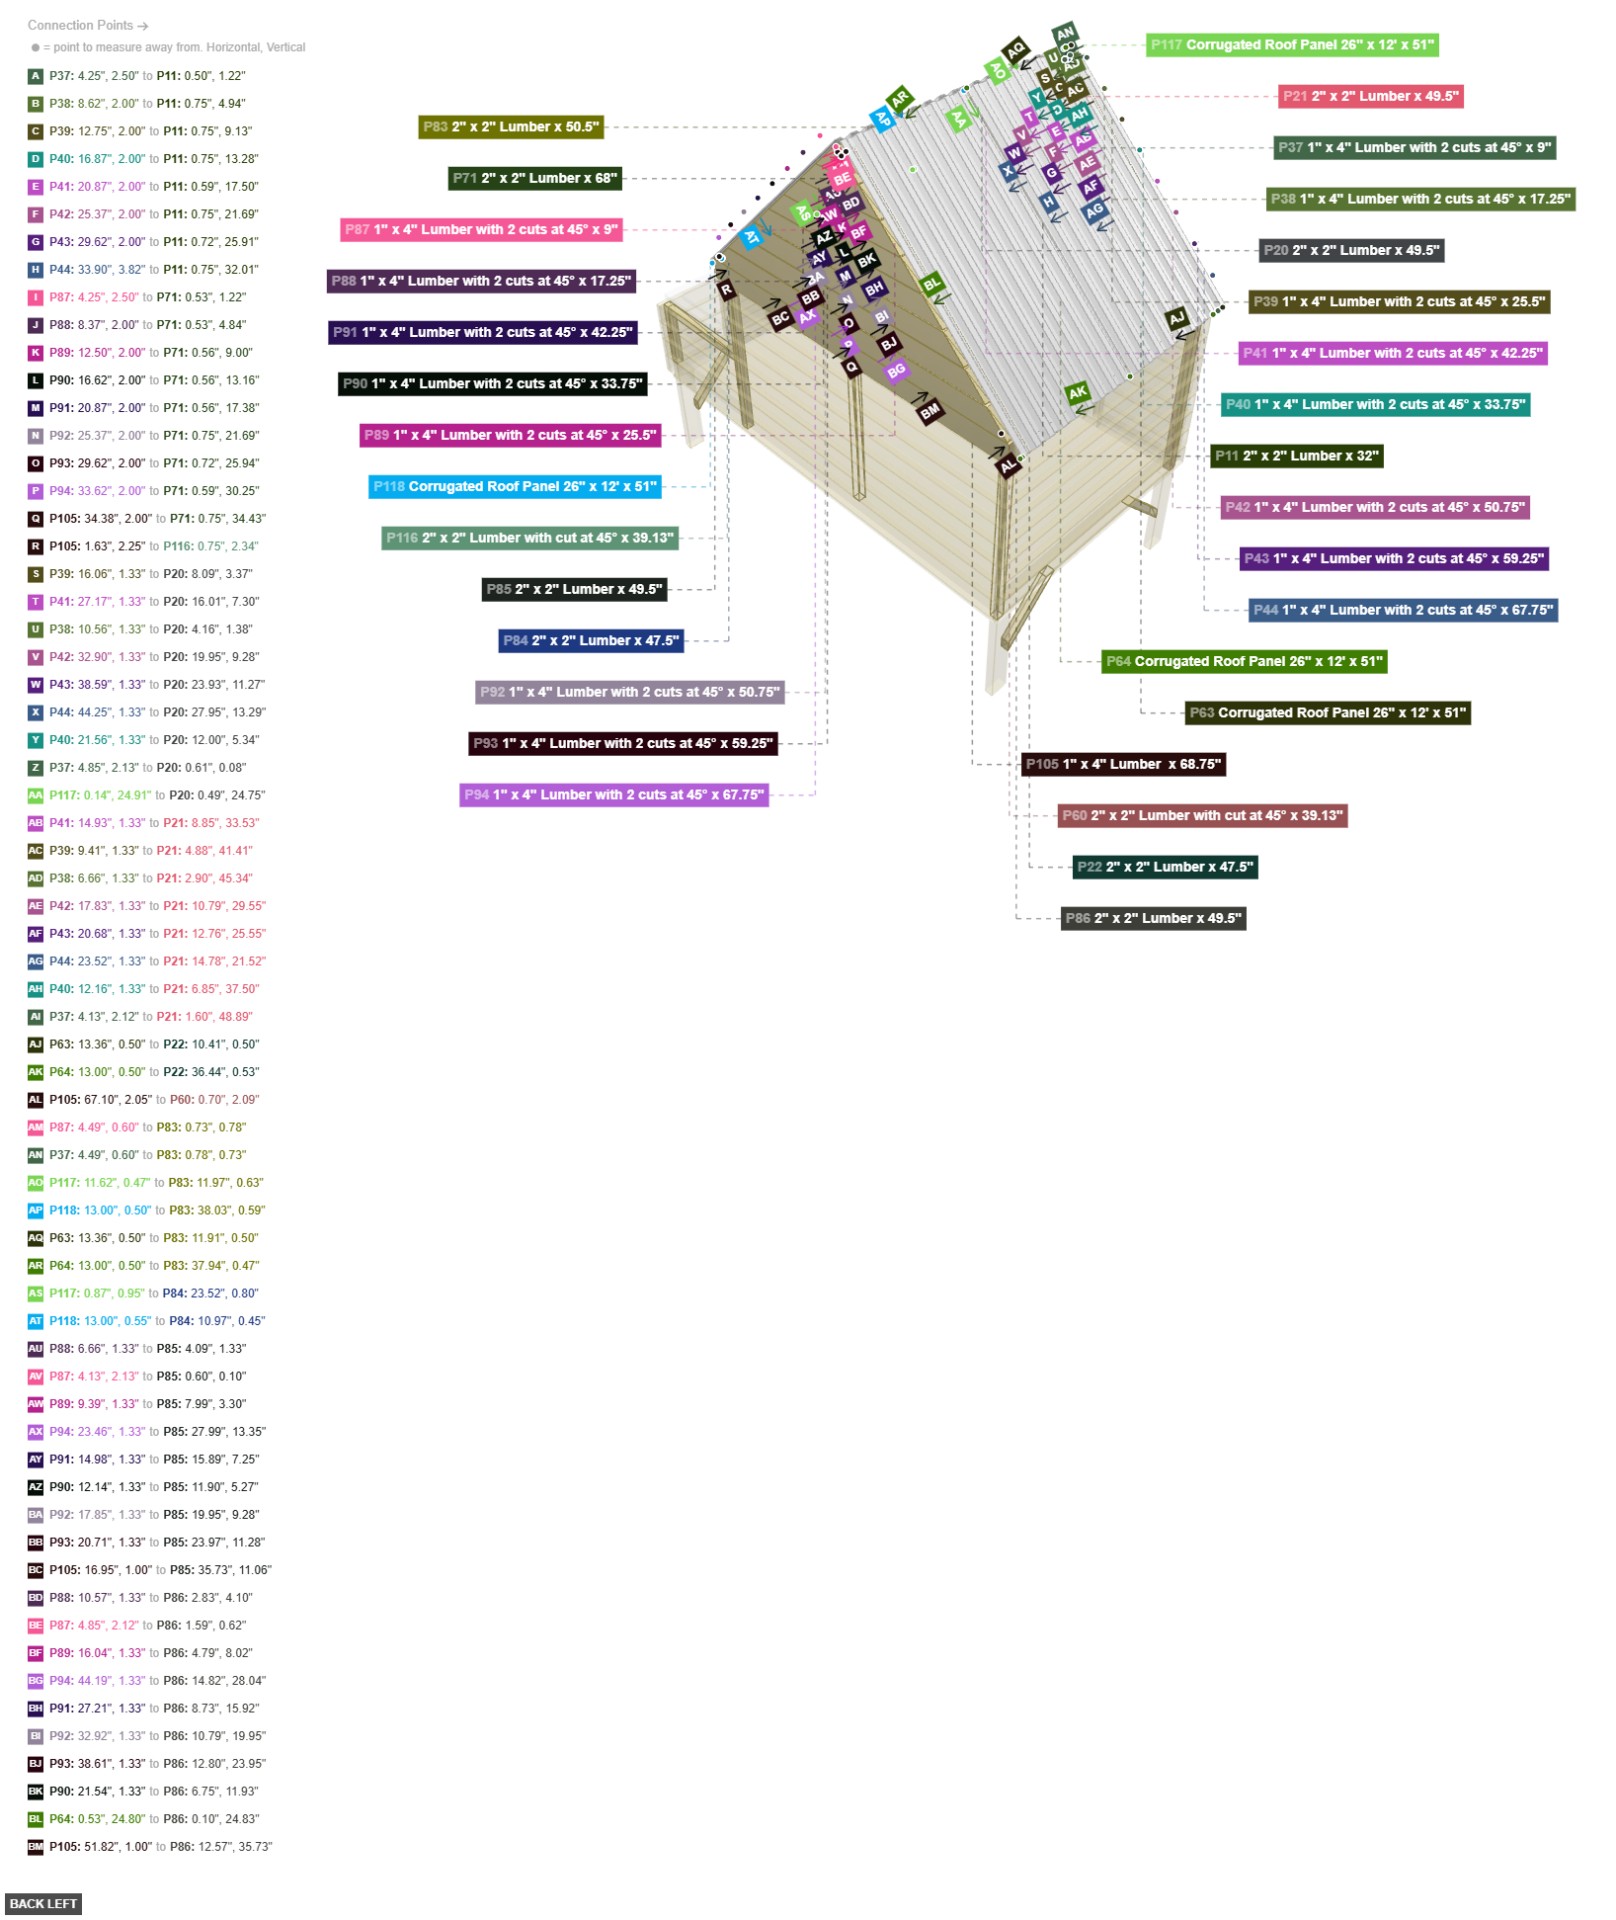
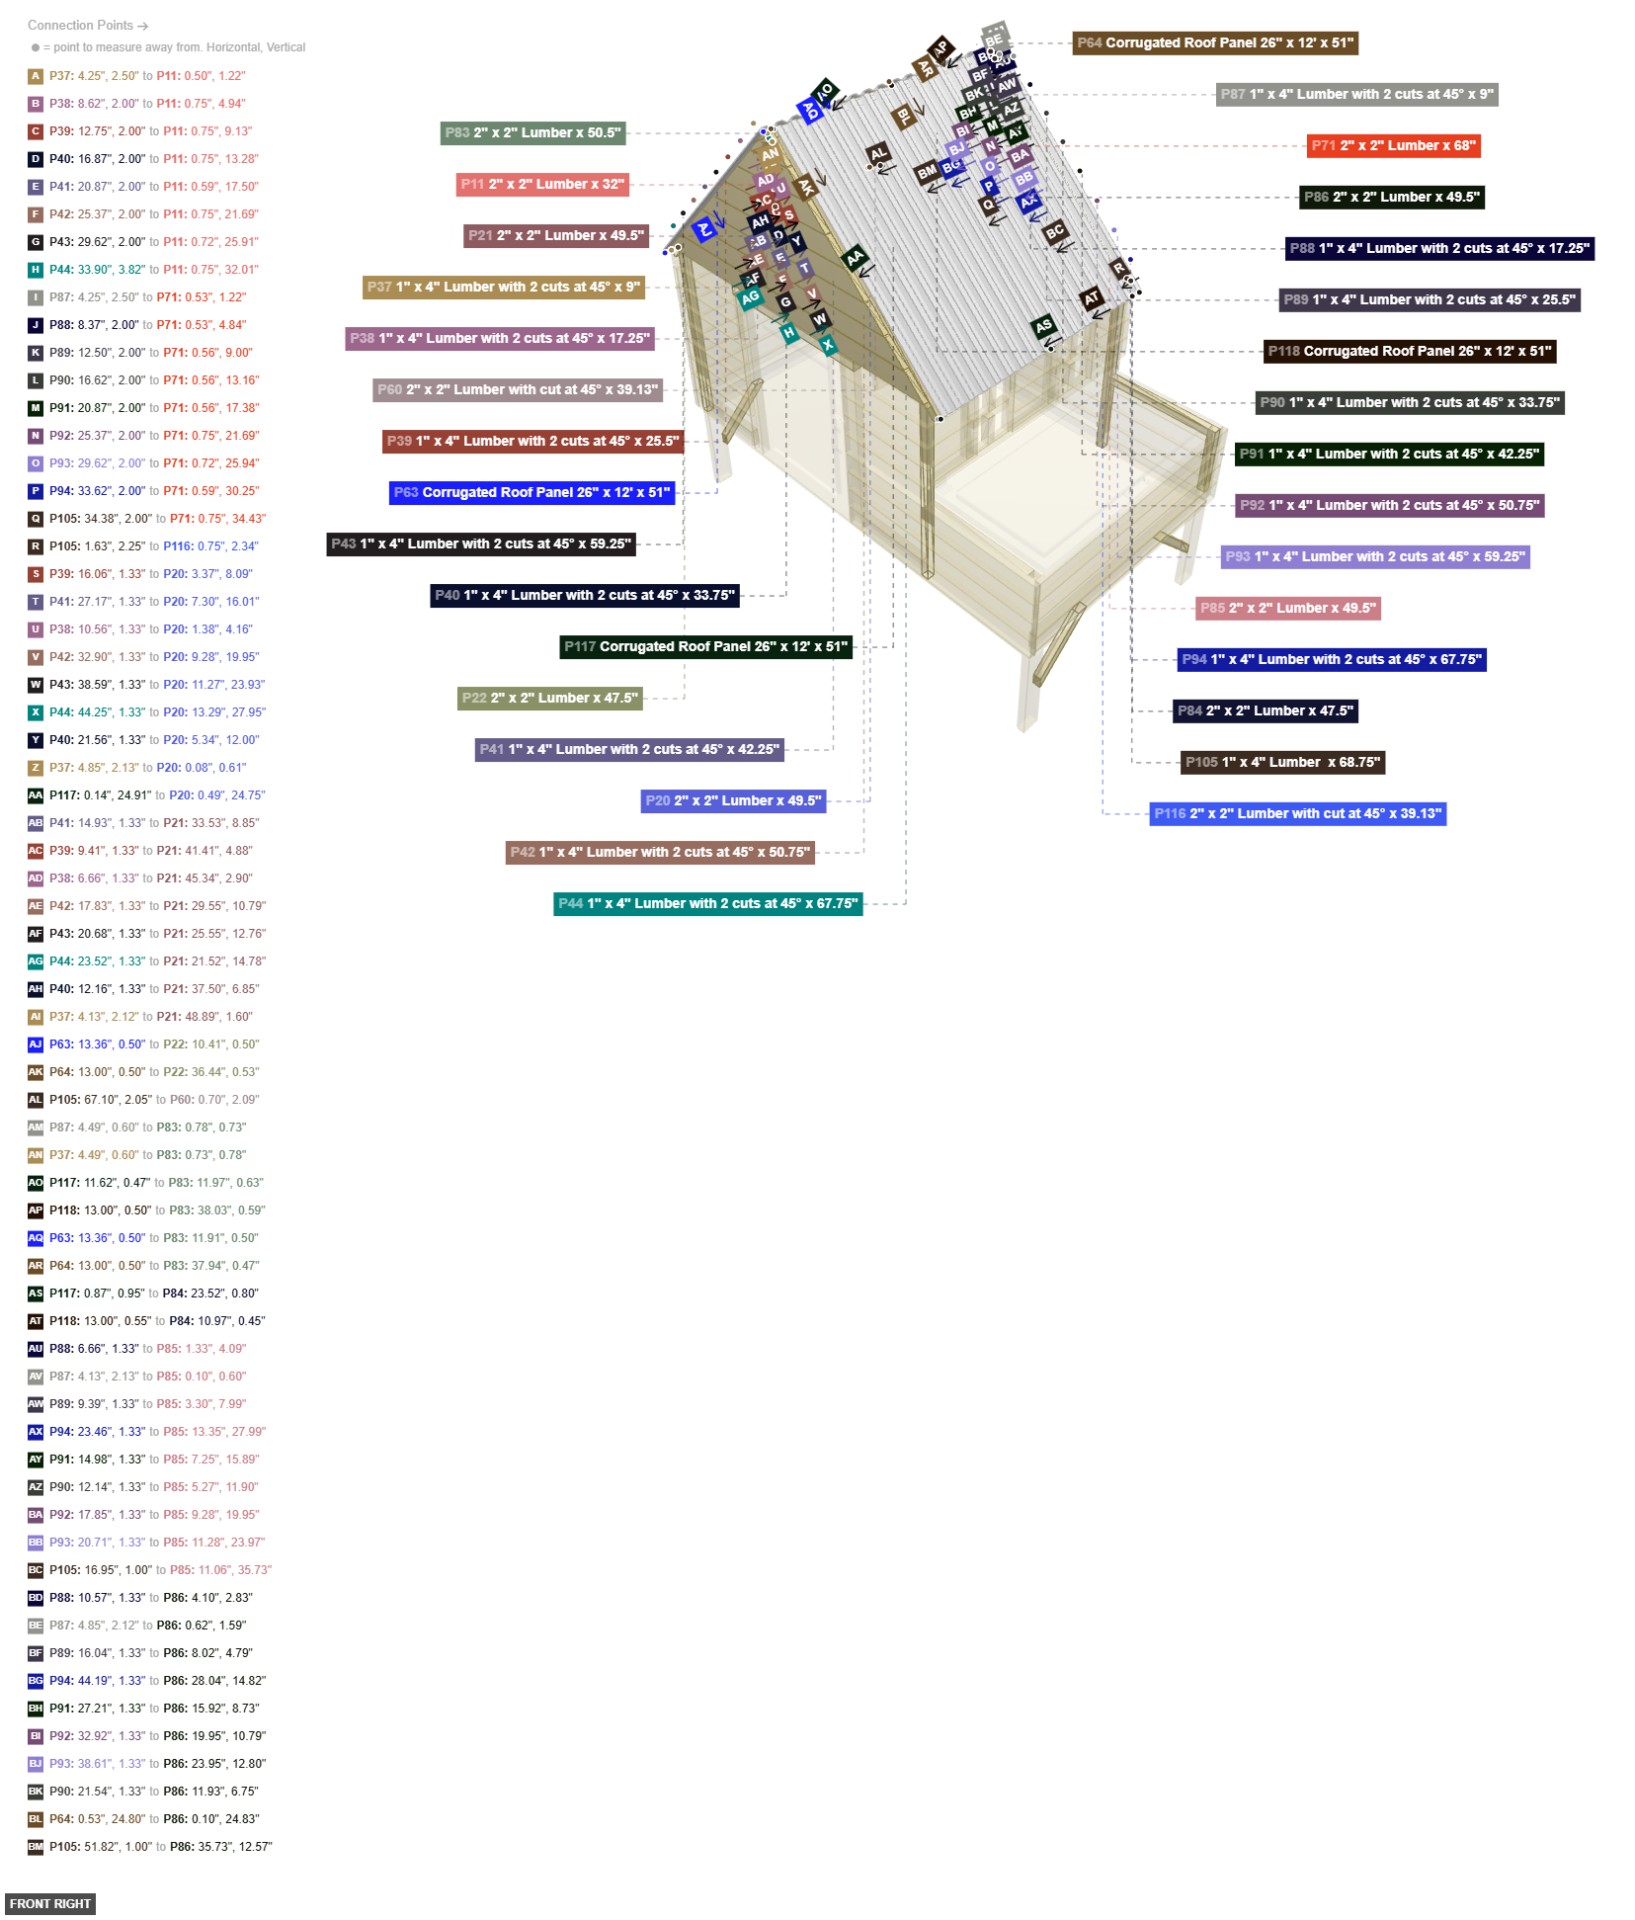
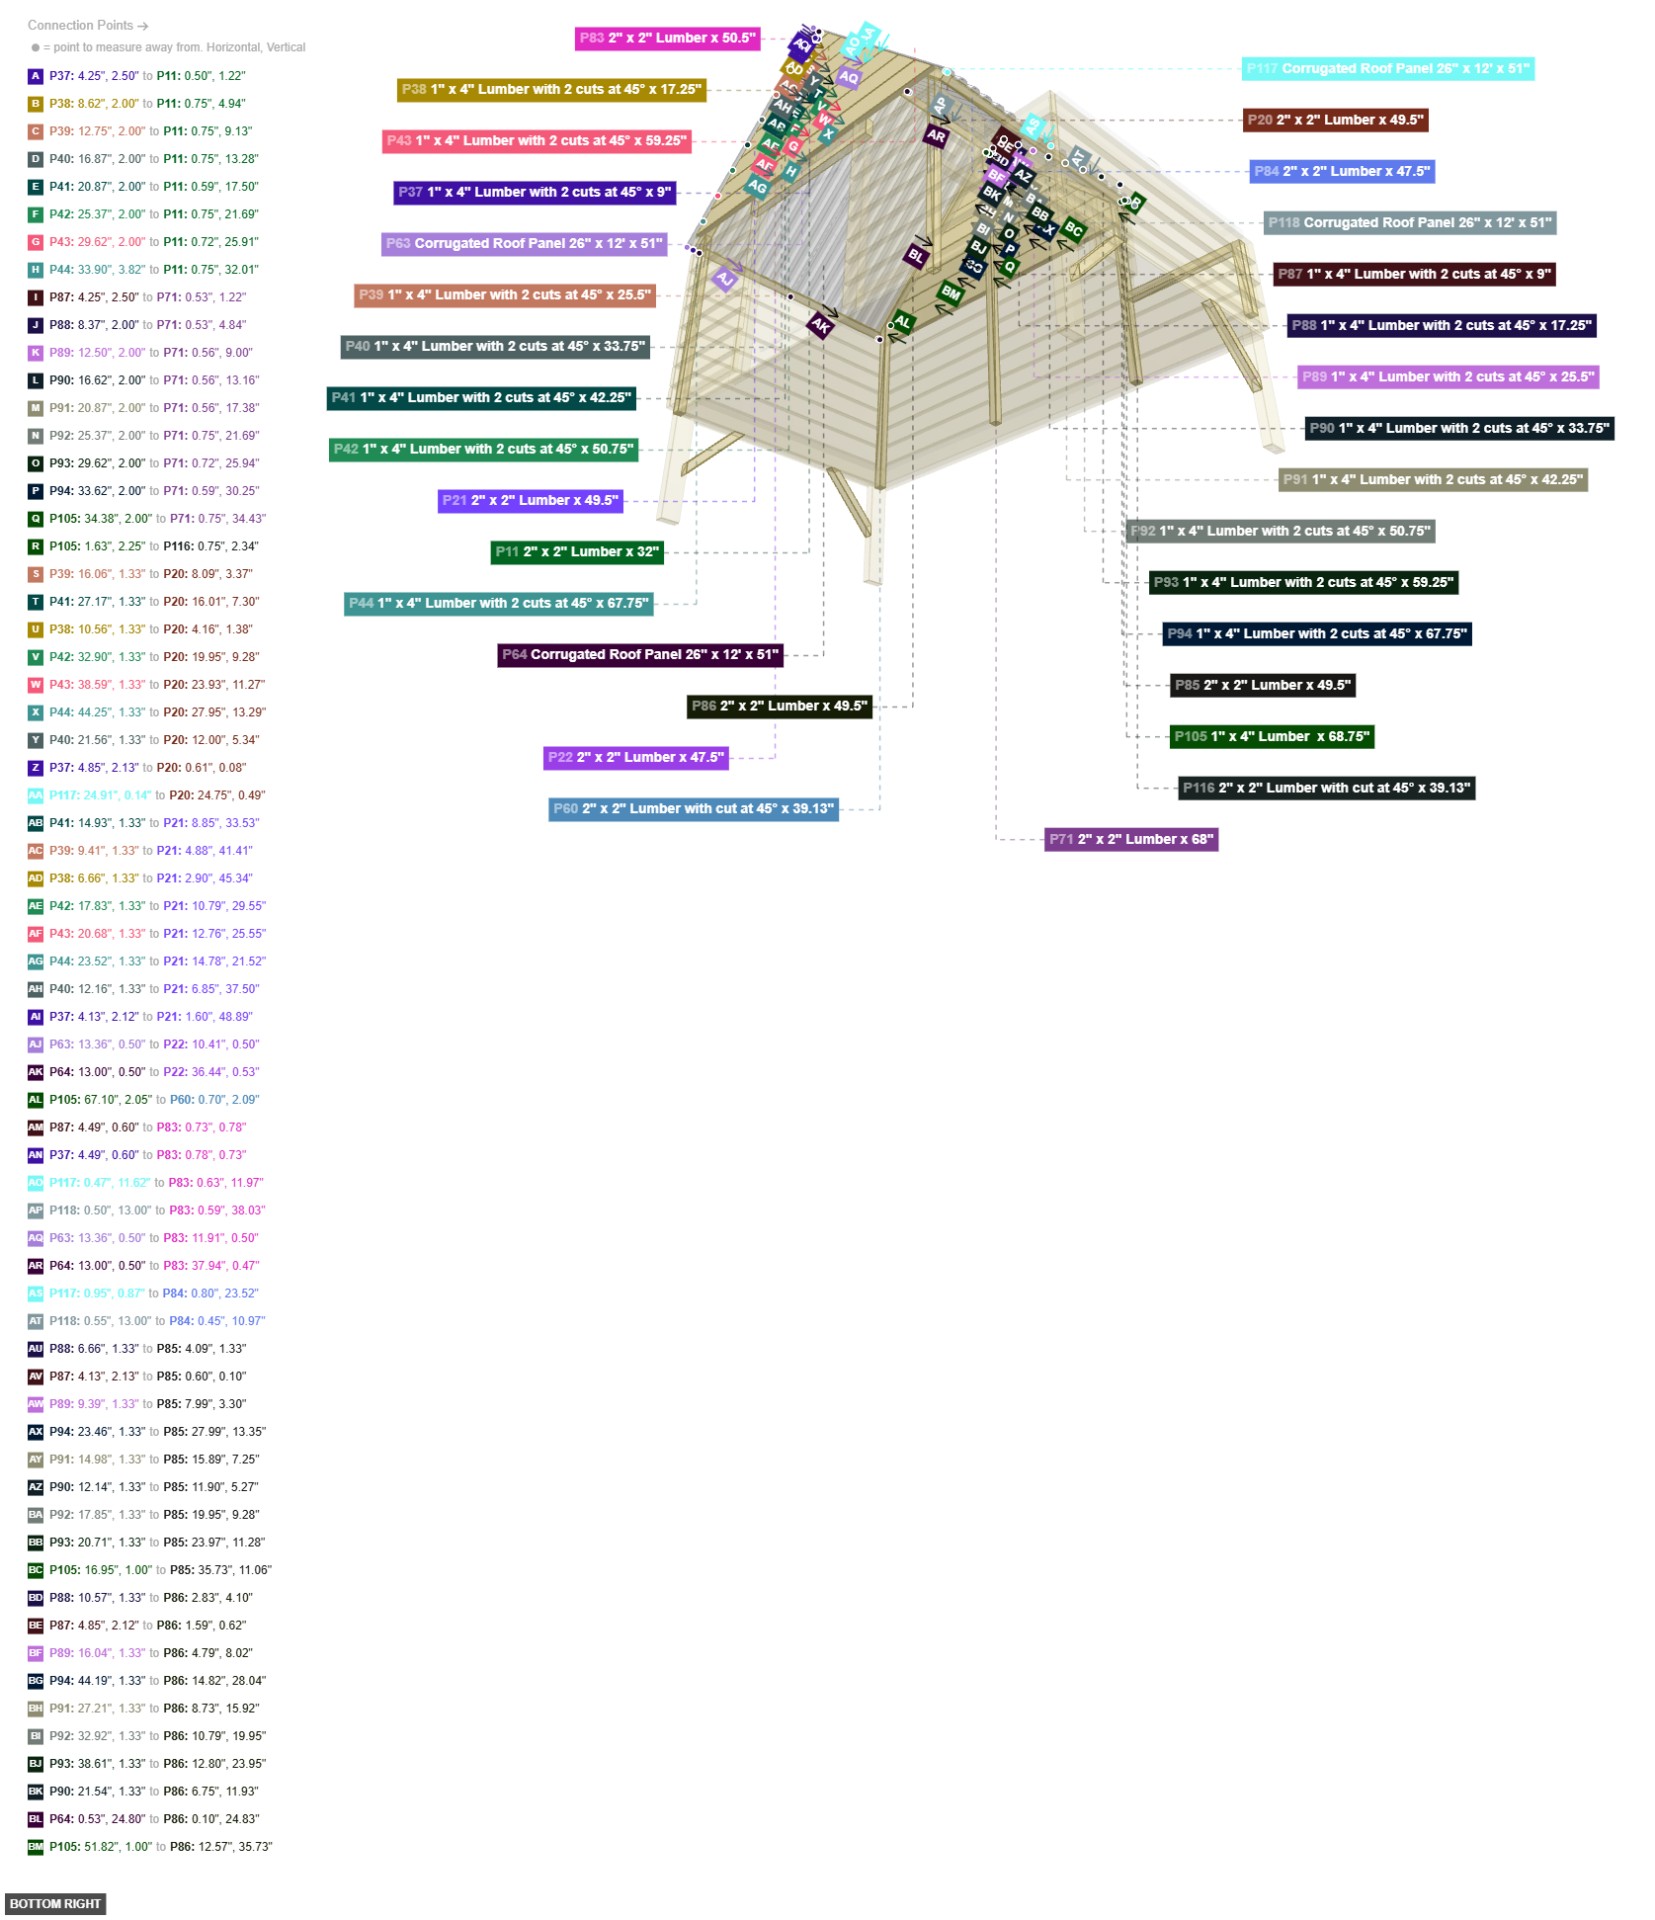
Adds the horizontal supports (purlins) and the final corrugated panels to create a weatherproof roof.
Fasten the angled purlins (P37-P44, P87-P94, and P105) horizontally across the roof rafters. Then, secure the corrugated roof panels P63, P64, P117, and P118 on top of the purlins.


Creates the elevated base and floor for the main coop area, providing a solid foundation for the rest of the structure.
This completed floor frame is the base. The Main Coop Wall Framing will be built directly on top of it.
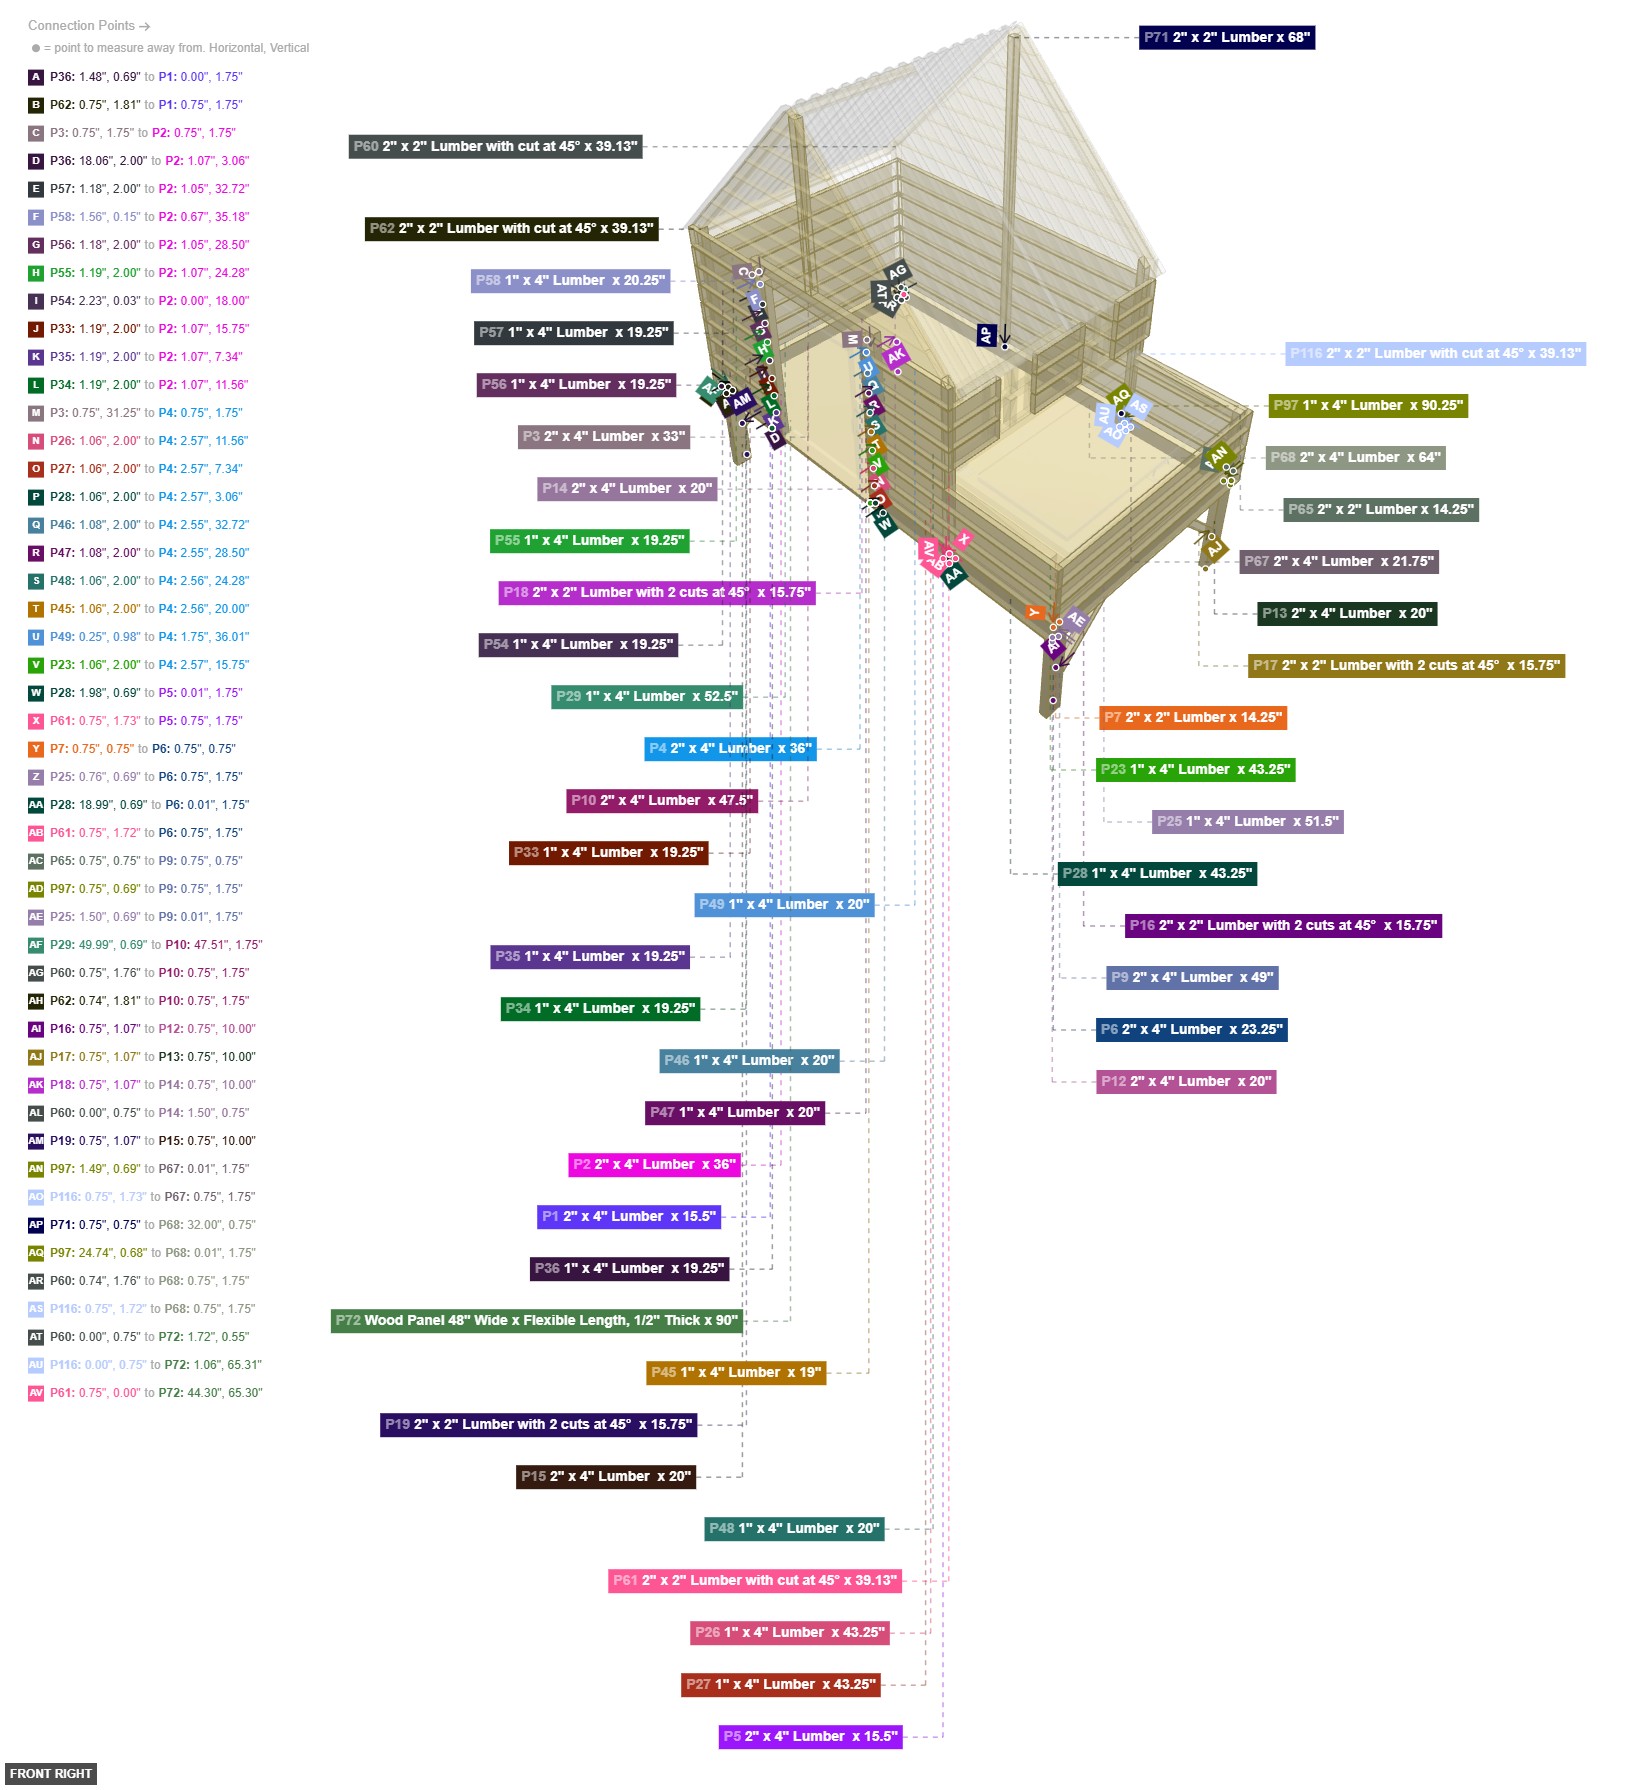
Builds the vertical walls and upper frame of the main coop house, which will support the roof.
This wall frame attaches to the top of the Main Coop Floor Frame. The Roof Framing will be installed on top of this group.

Constructs the frame for the side run and the integrated nesting boxes.
Attach this entire assembly to the side of the Main Coop Wall Framing.
Creates the main A-frame support structure for the roof.
This frame sits on top of the Main Coop Wall Framing and will support the Roof Purlins and Panels.
Encloses the main coop and nesting box areas with wooden slats.
This siding attaches to the exterior of the Main Coop Wall Framing and the Nesting Box and Run Framing to enclose the structure.
Adds the horizontal supports (purlins) and the final corrugated panels to create a weatherproof roof.
The purlins attach to the Roof Framing, and the panels attach to the purlins.
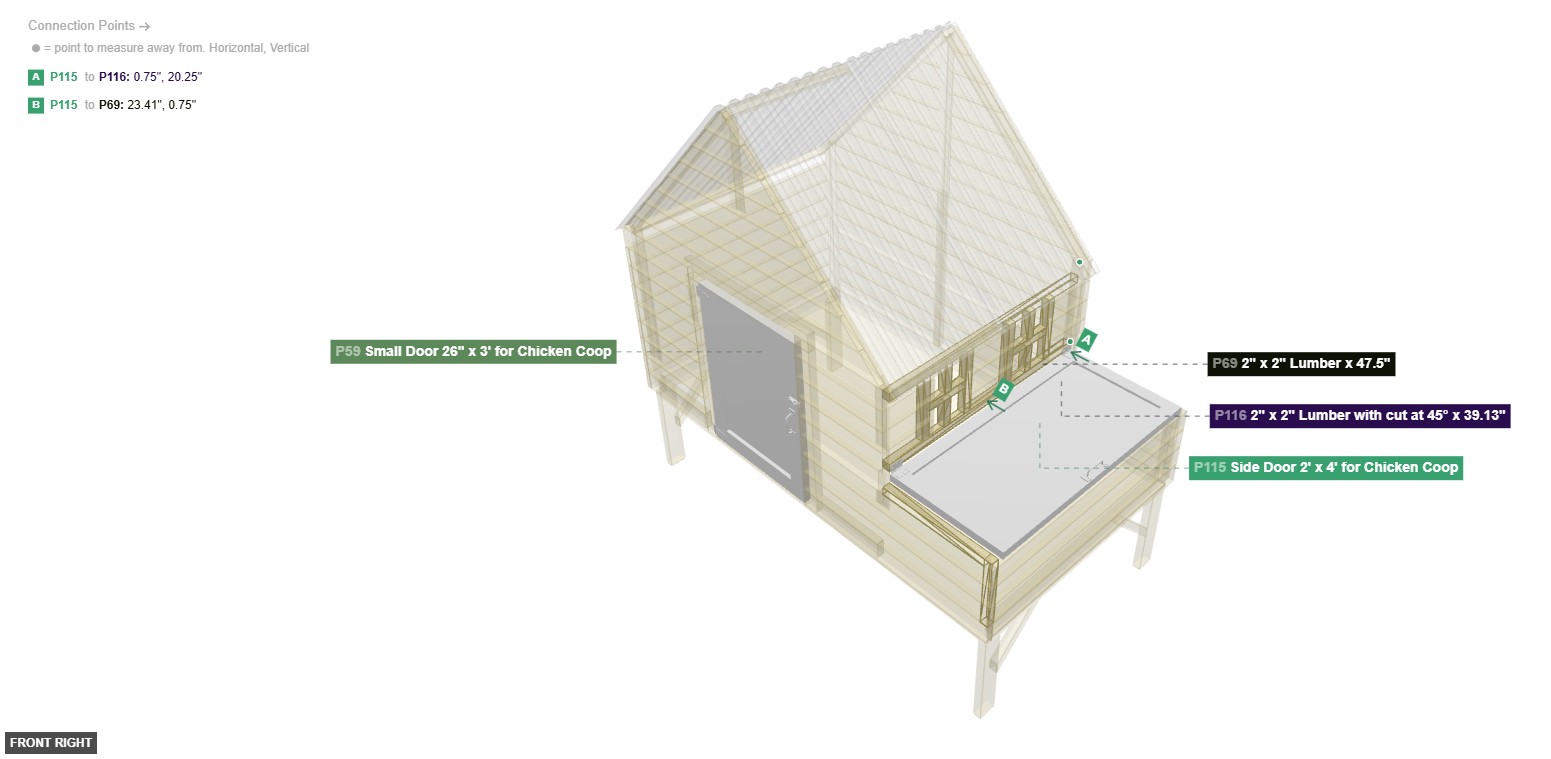
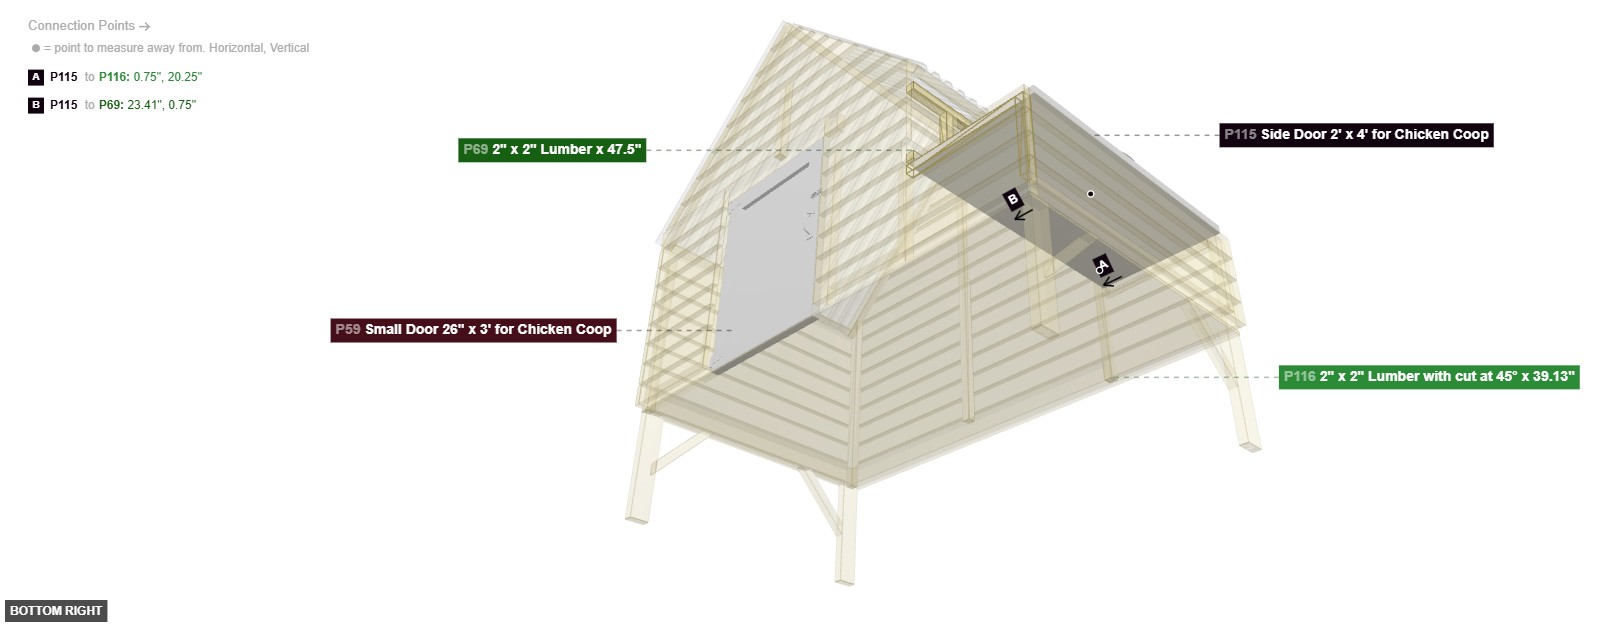
Installs the access doors for the coop.
The doors attach to the openings in the Main Coop and Nesting Box Siding.