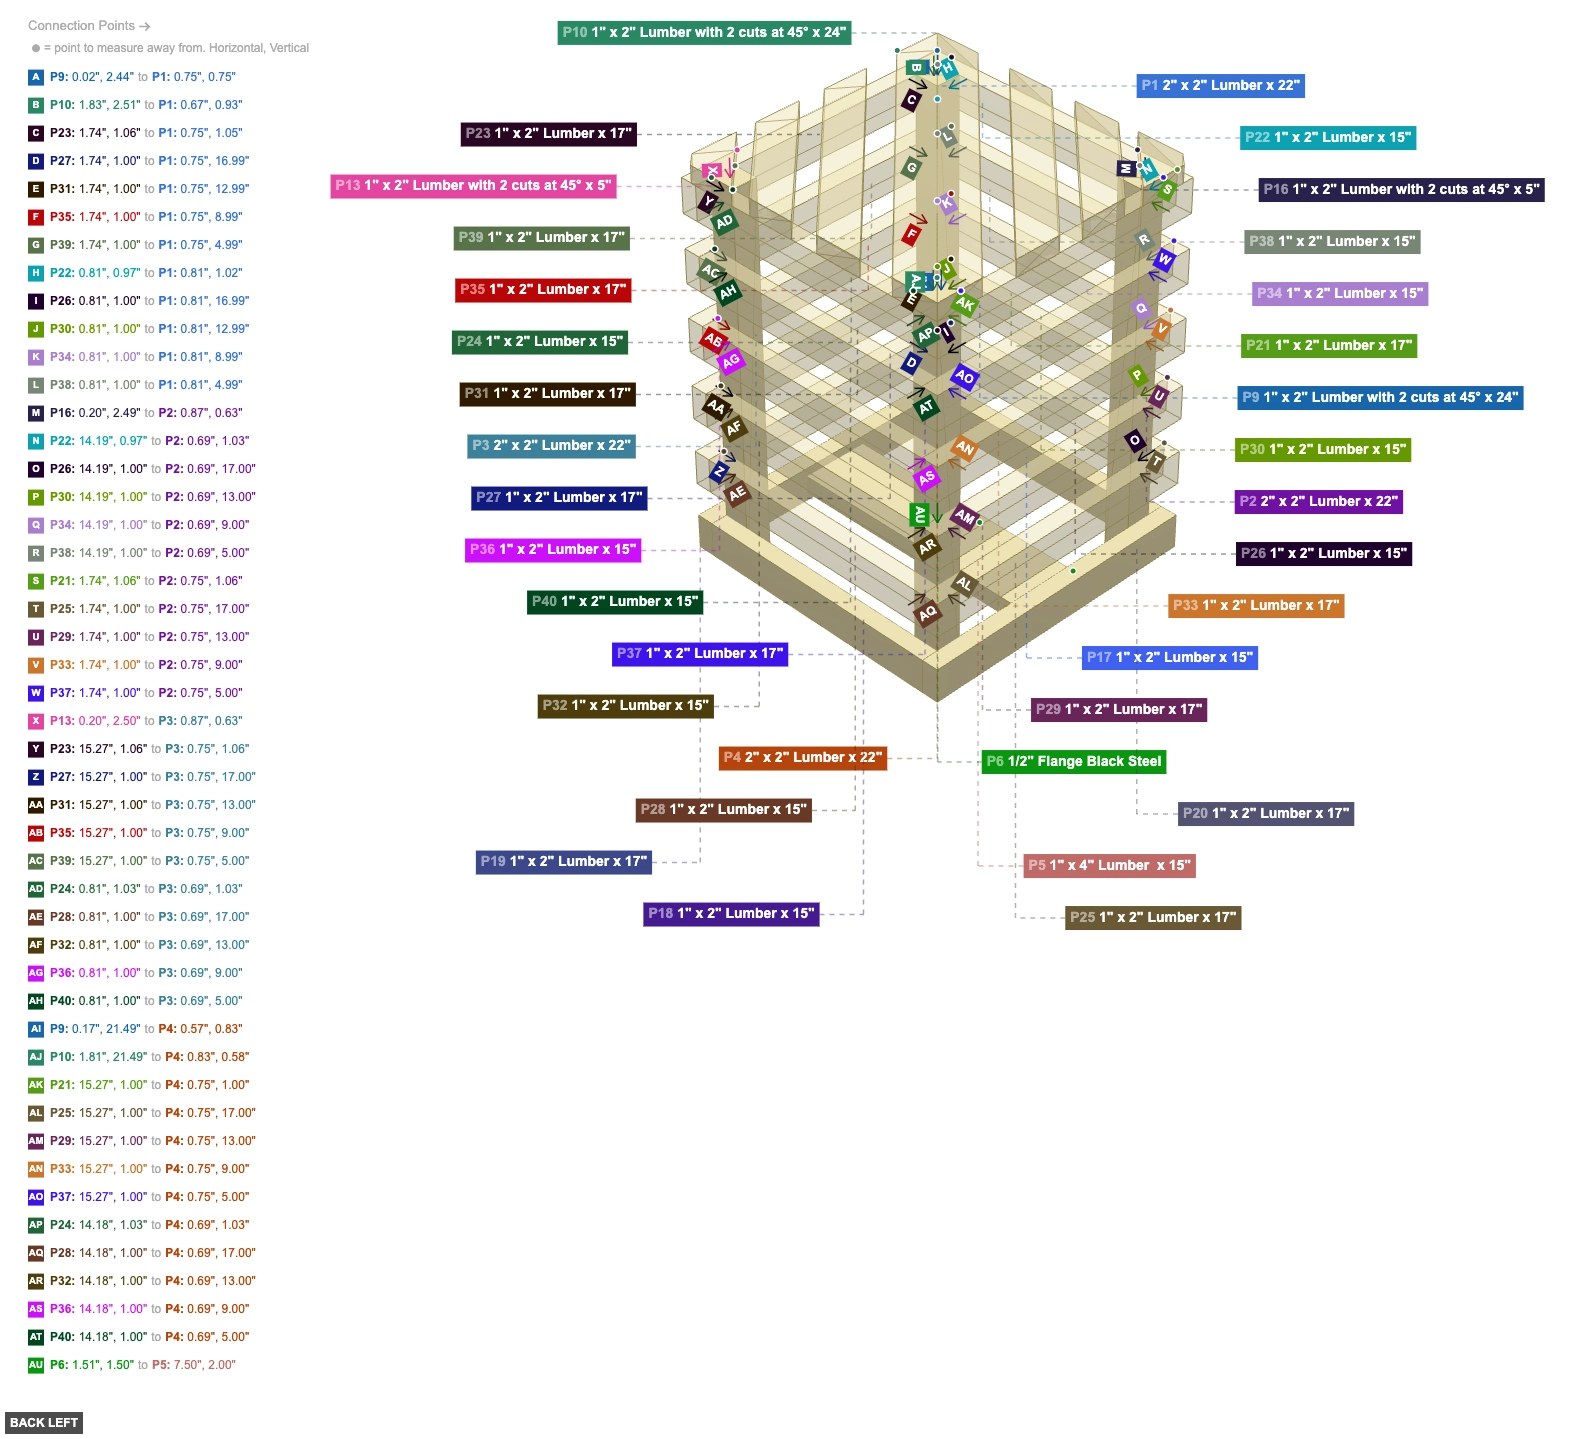
A wooden nightstand constructed from stacked layers of lumber, supported by four vertical posts. It features an open, layered design and incorporates a lamp fixture (flange, nipple, adapter) mounted centrally on a lower shelf. - Nightstand with Lamp


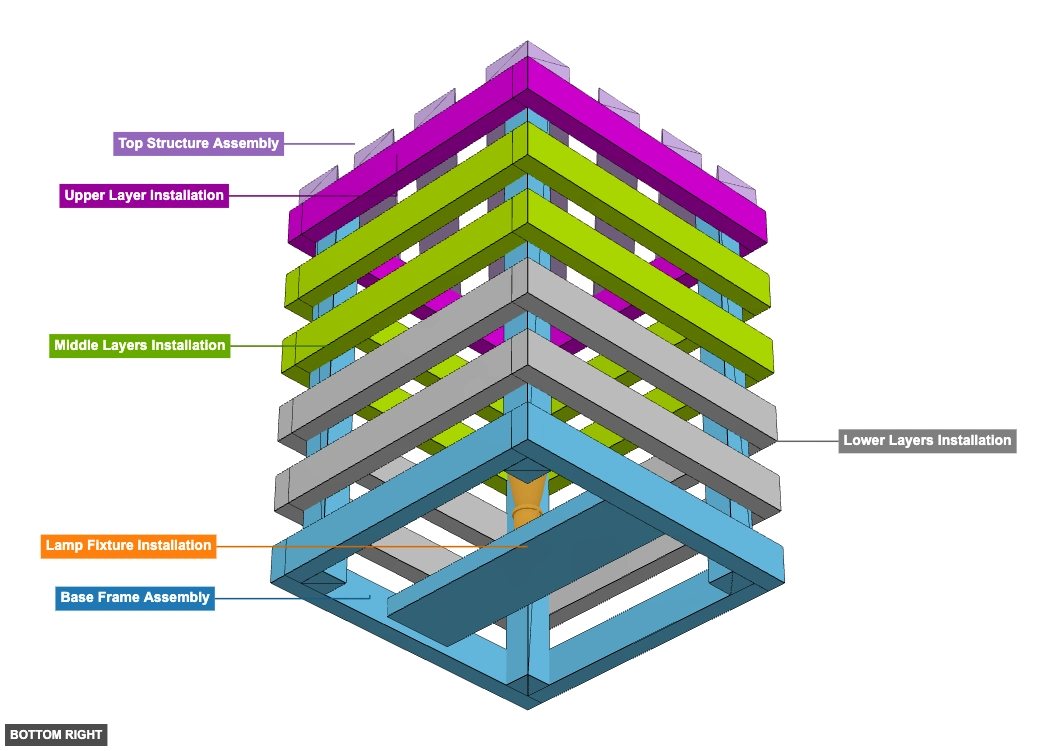
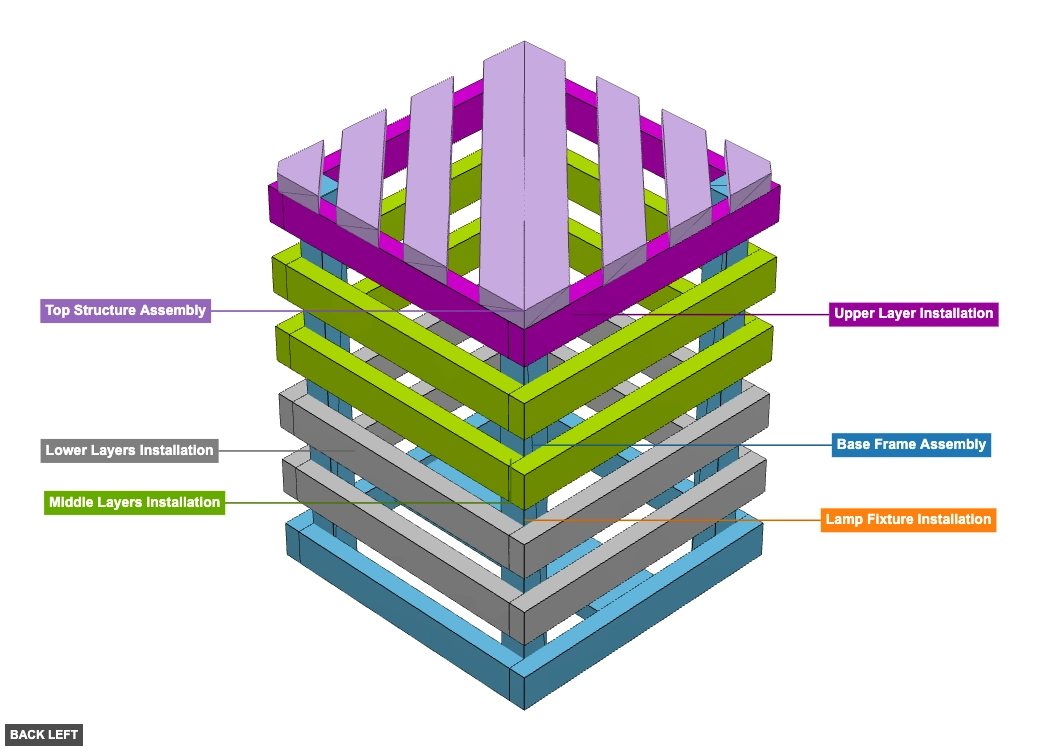
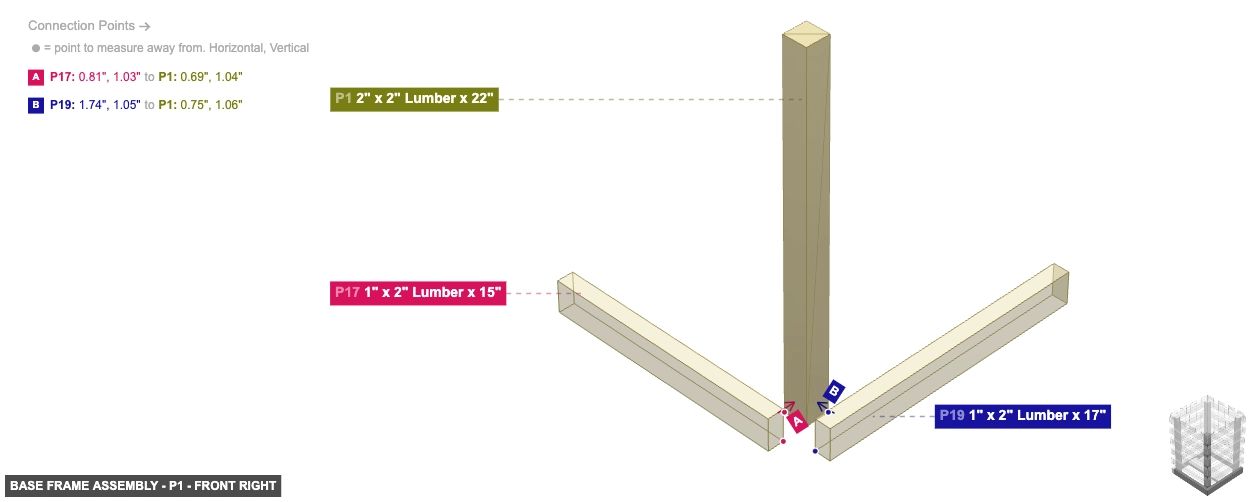
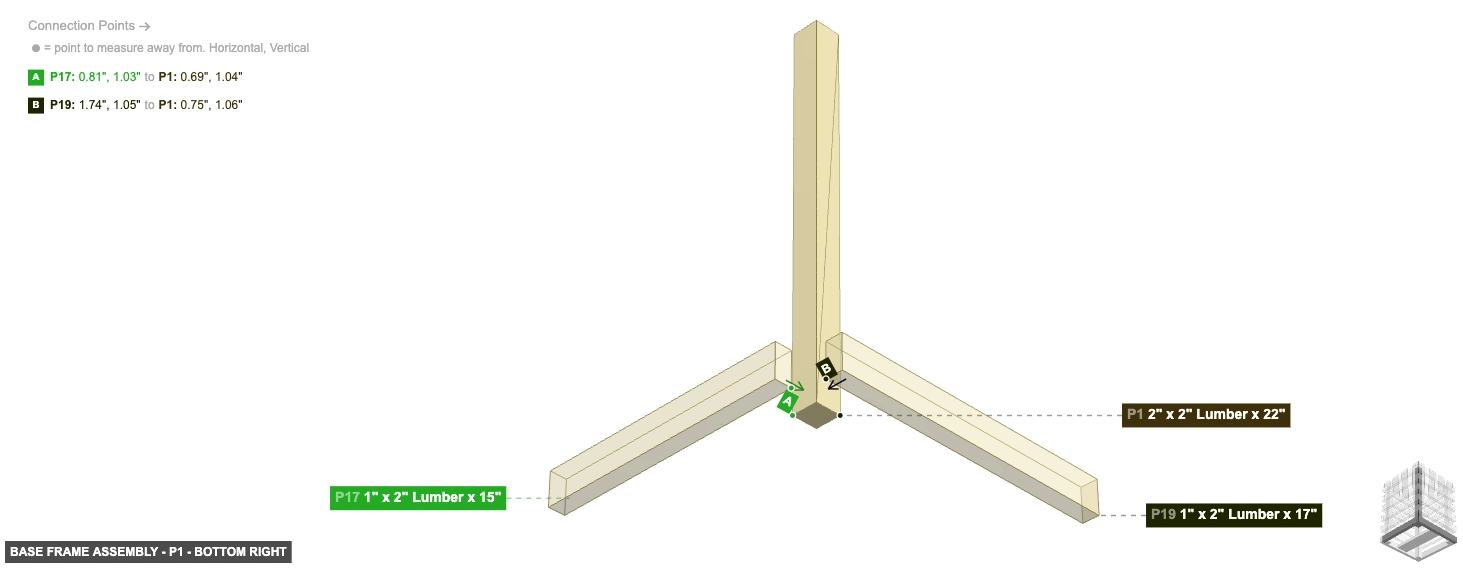
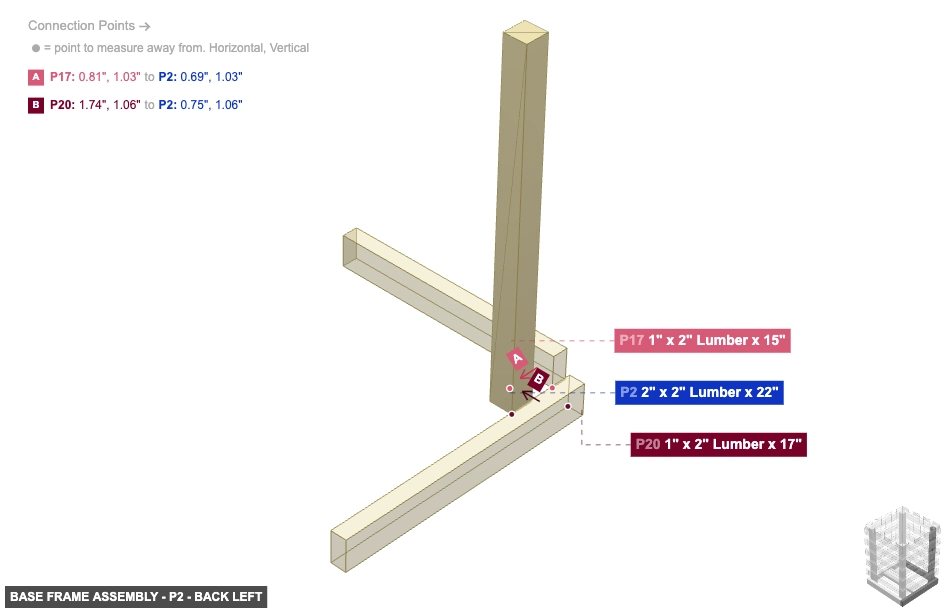
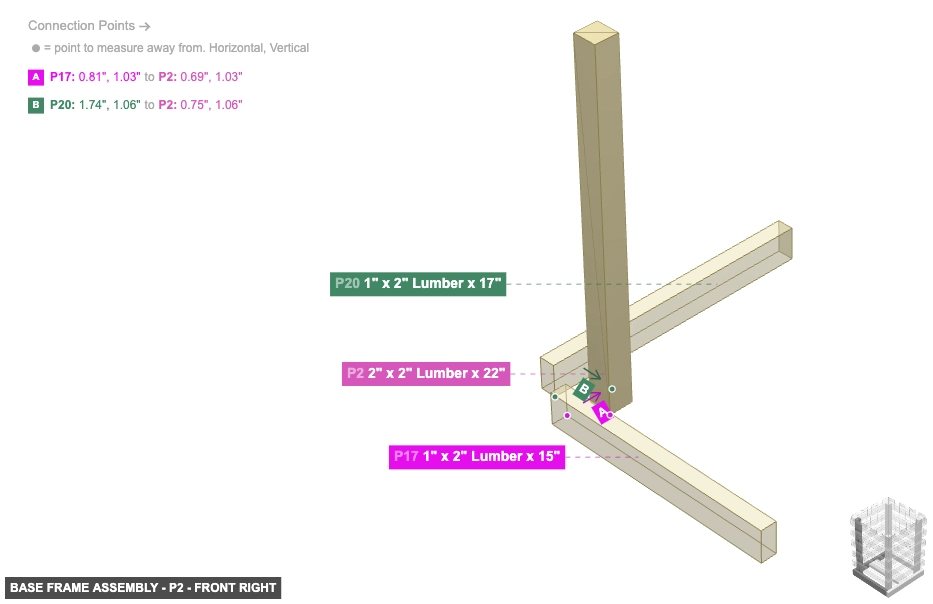
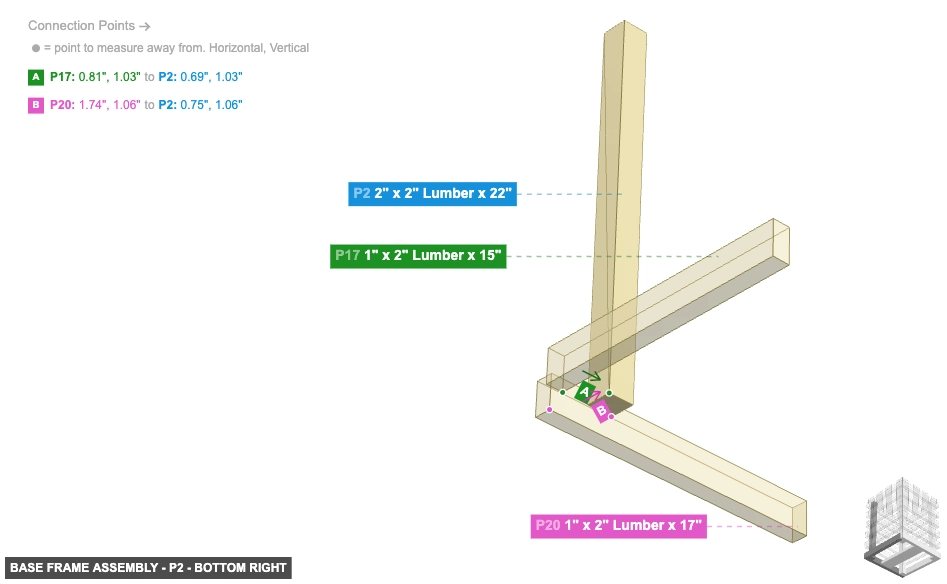
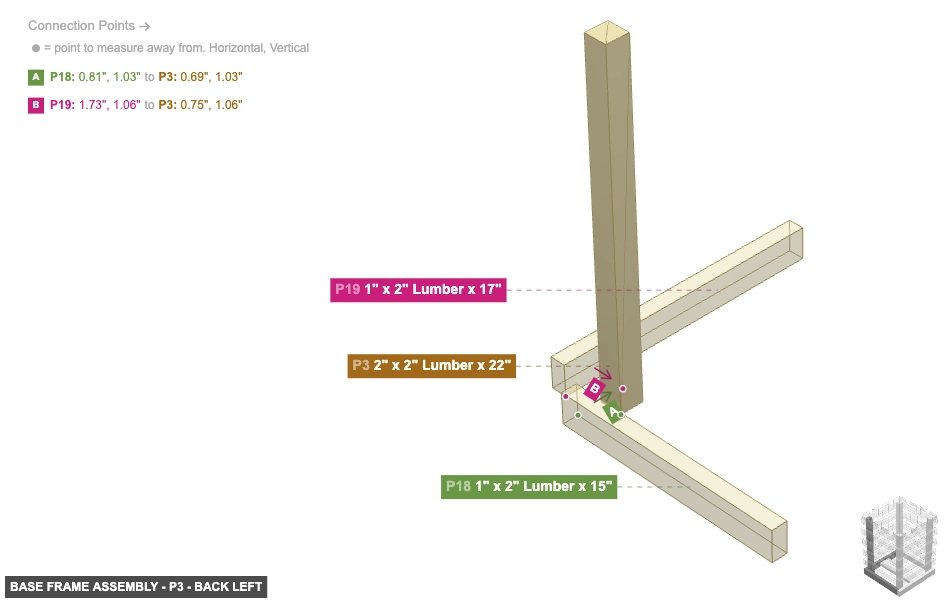
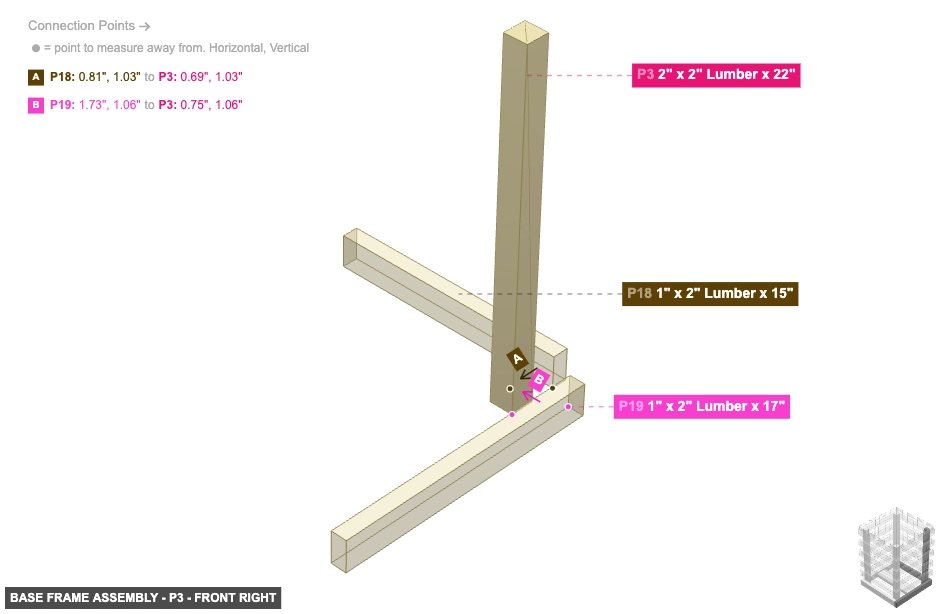
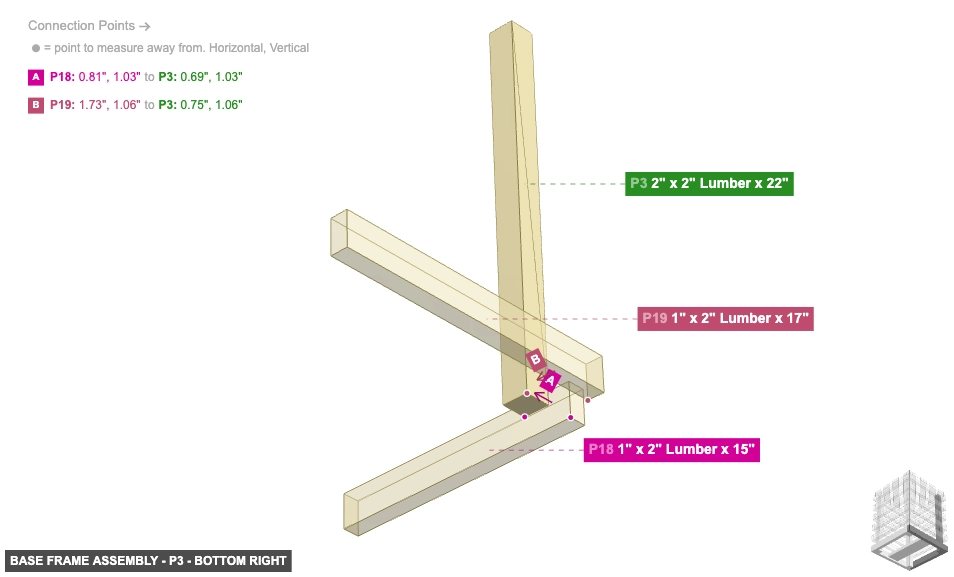
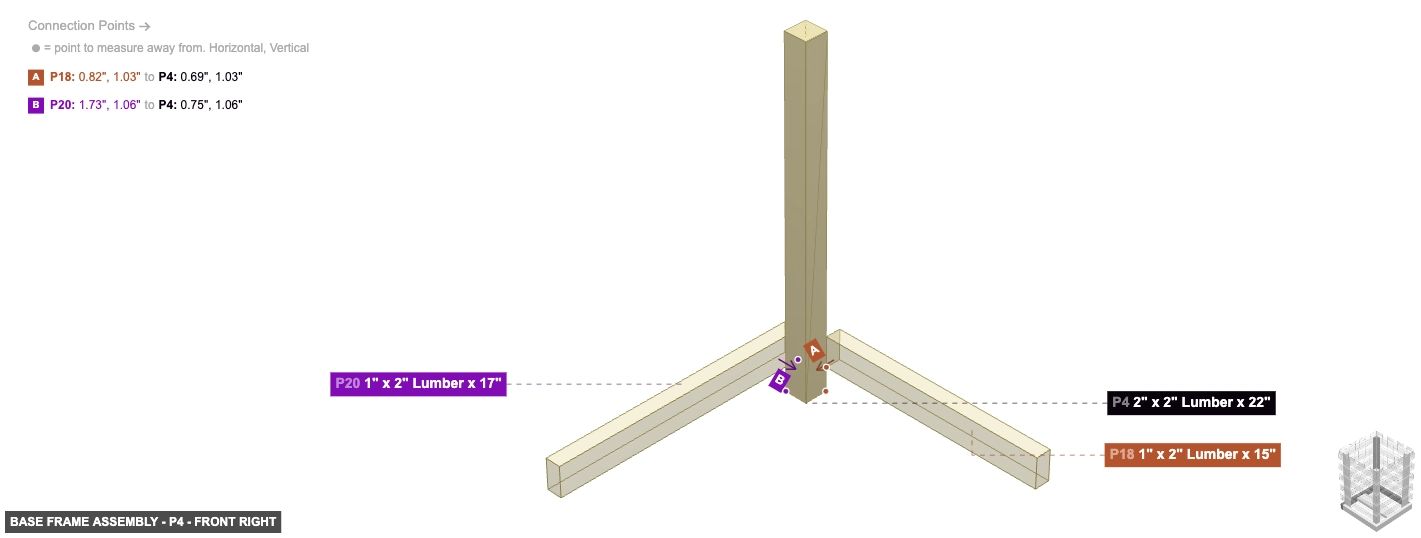
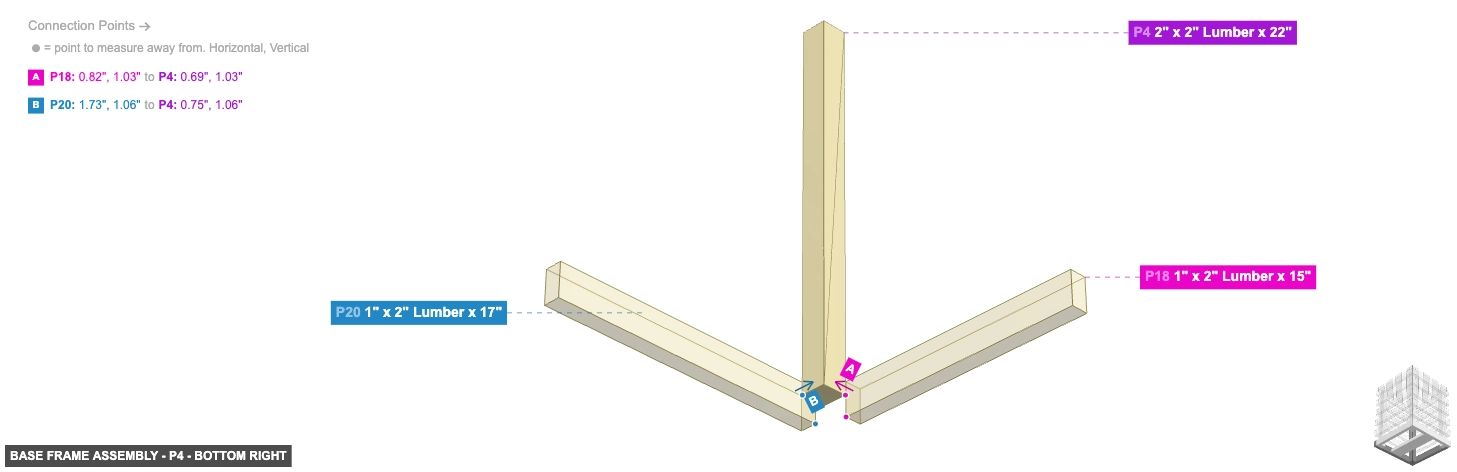
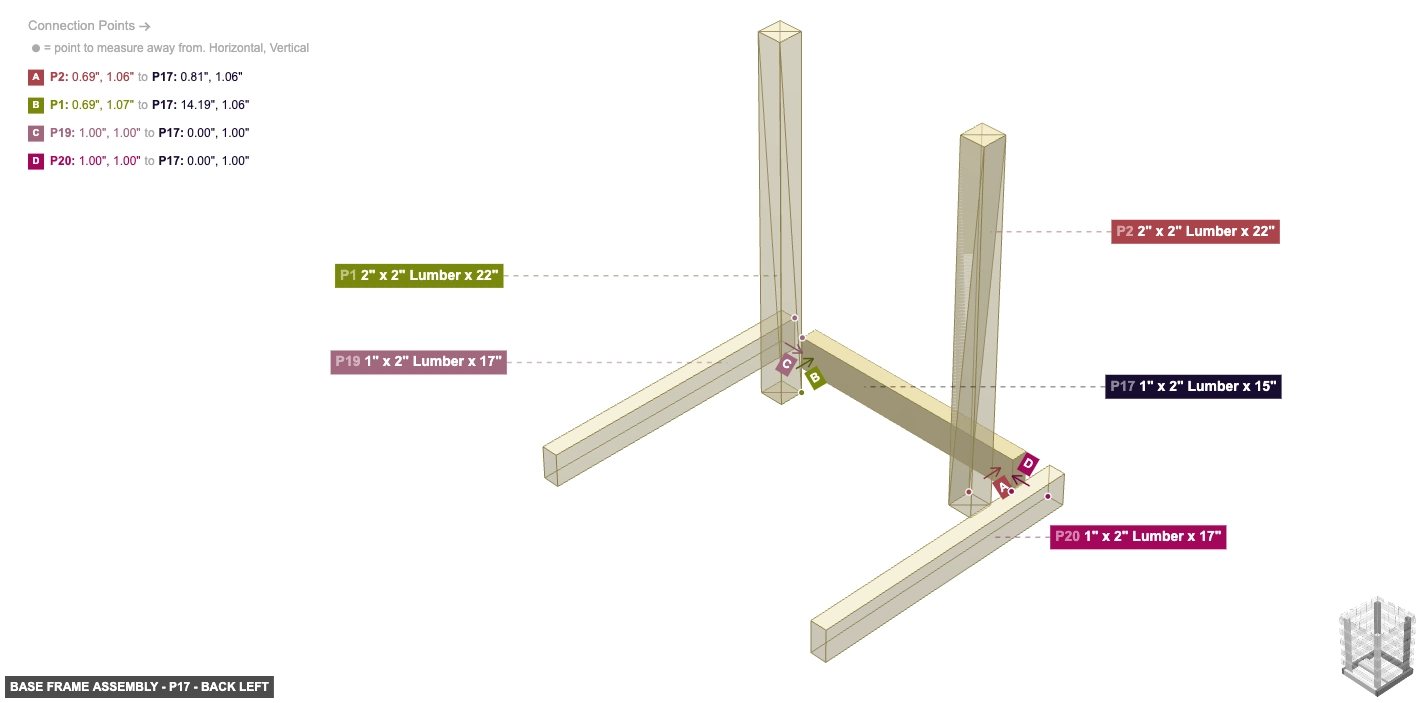
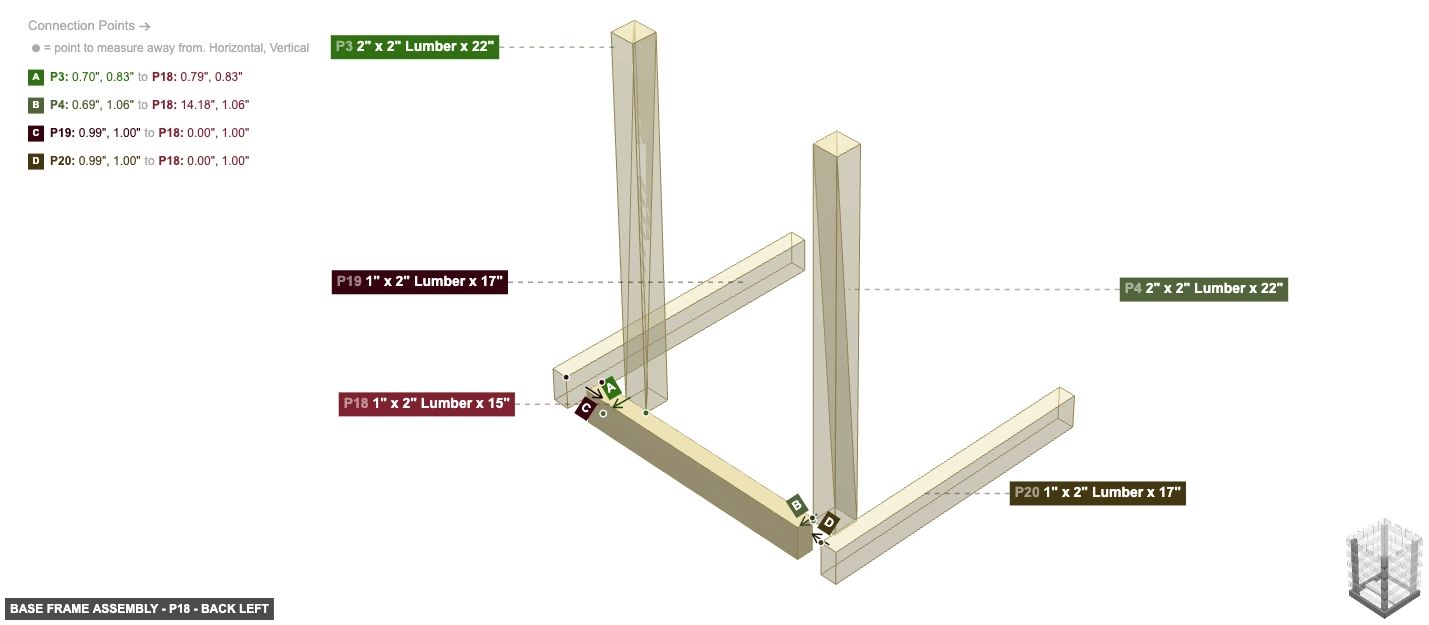
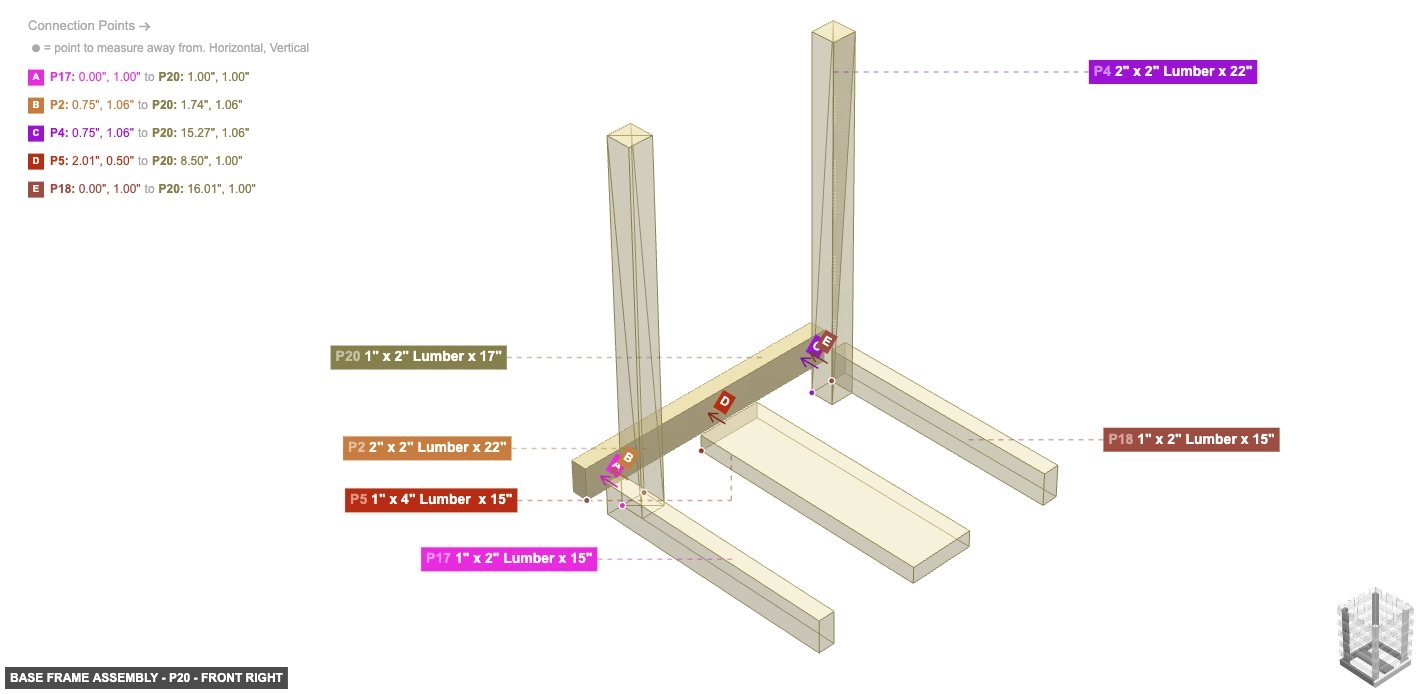
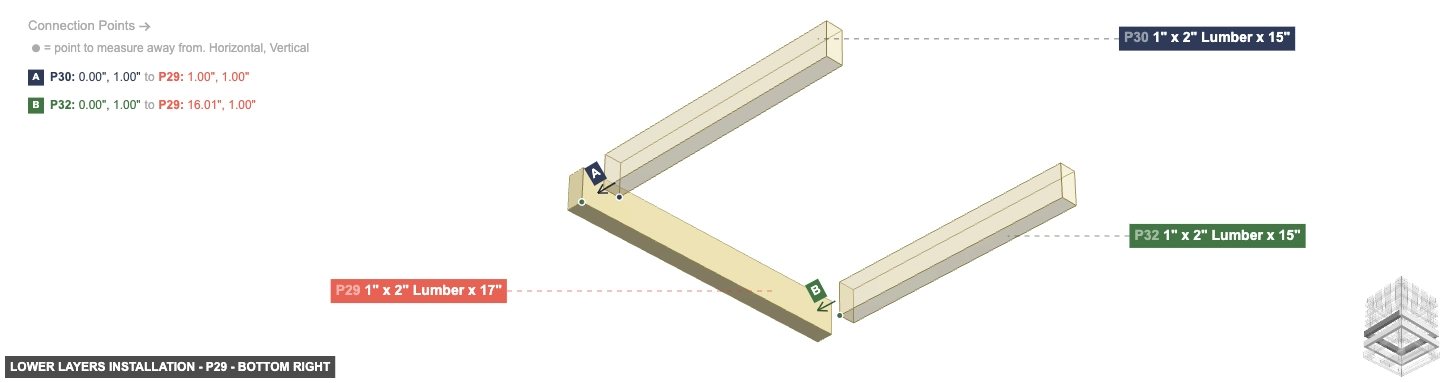
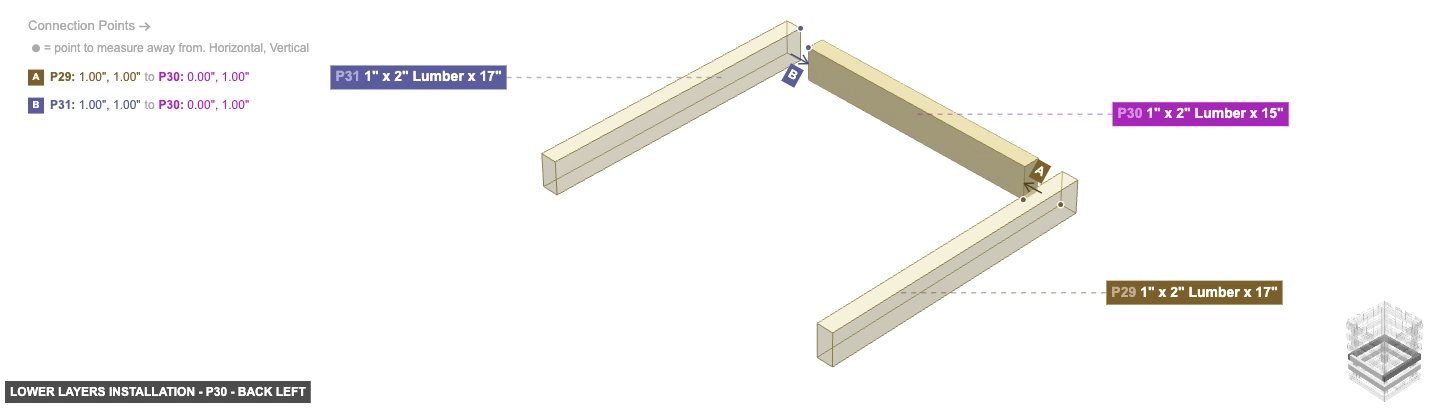
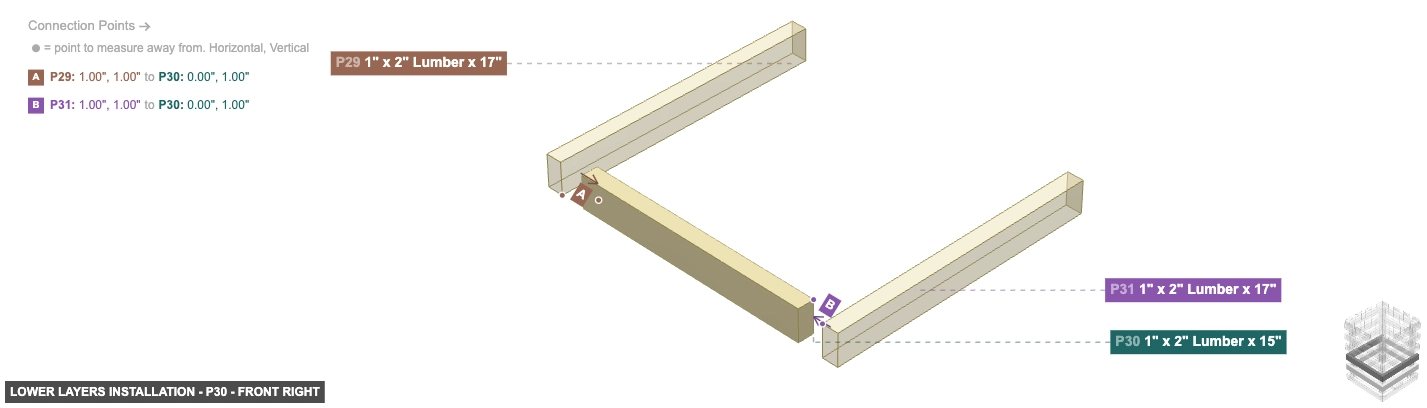
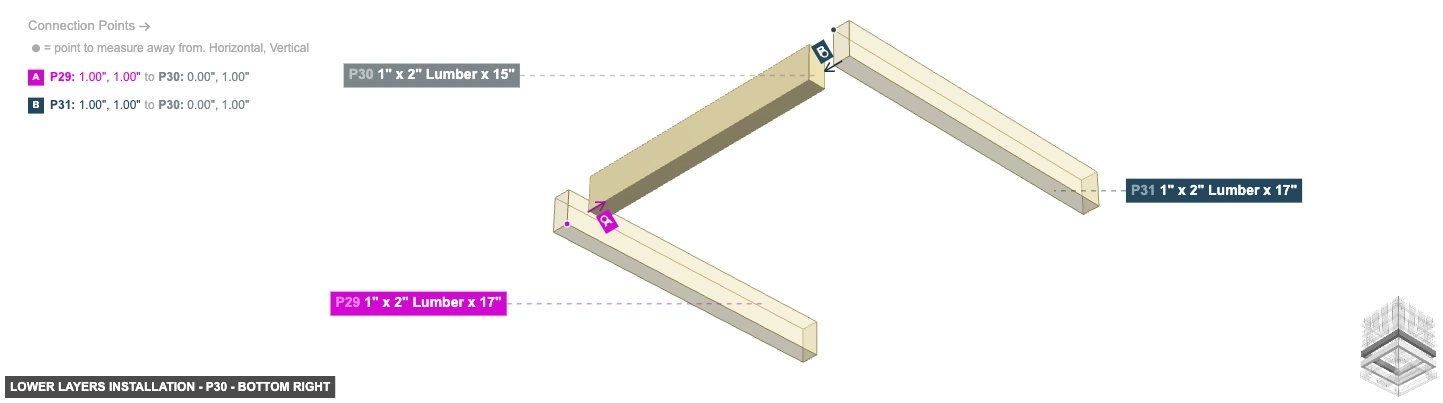
Assemble the main vertical posts and the lowest set of horizontal supports, including the base piece for the lamp.


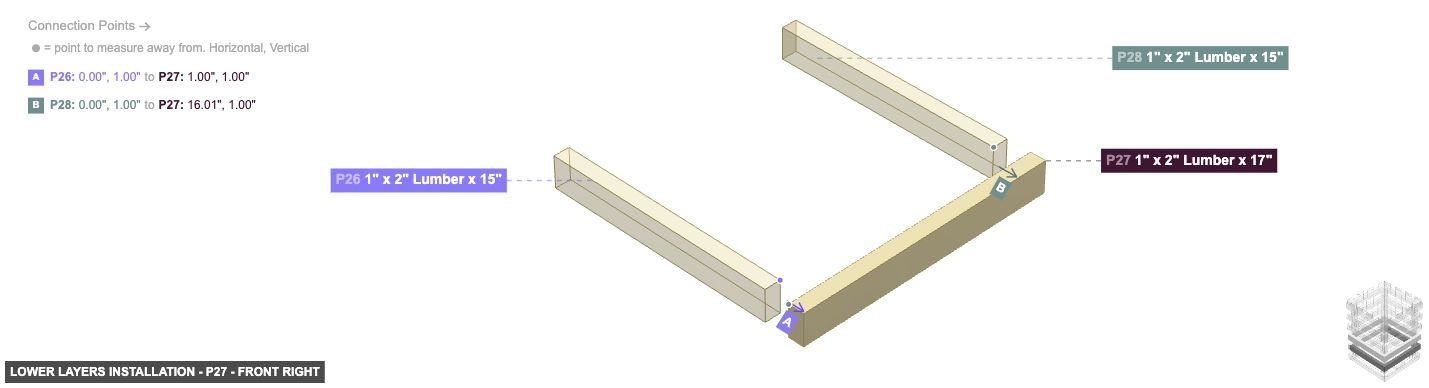
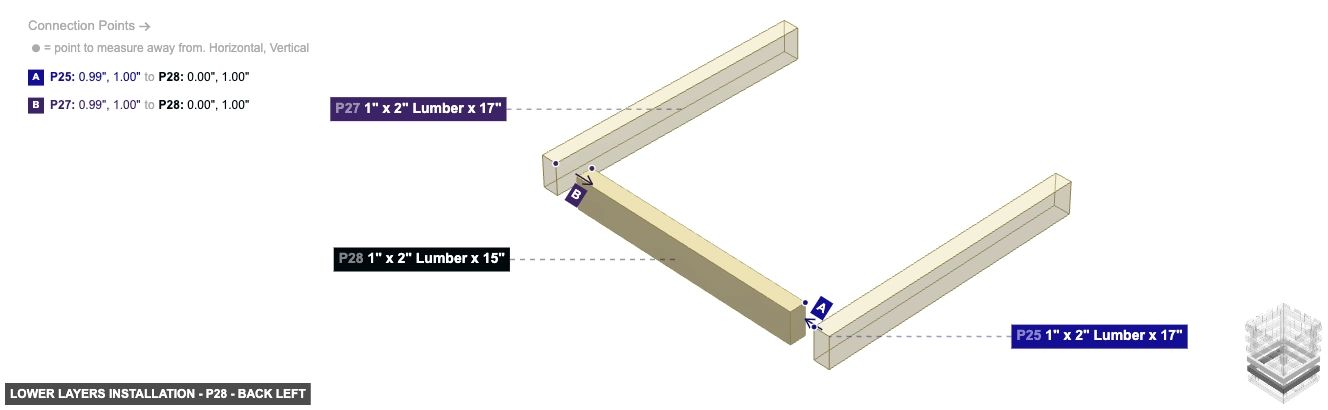
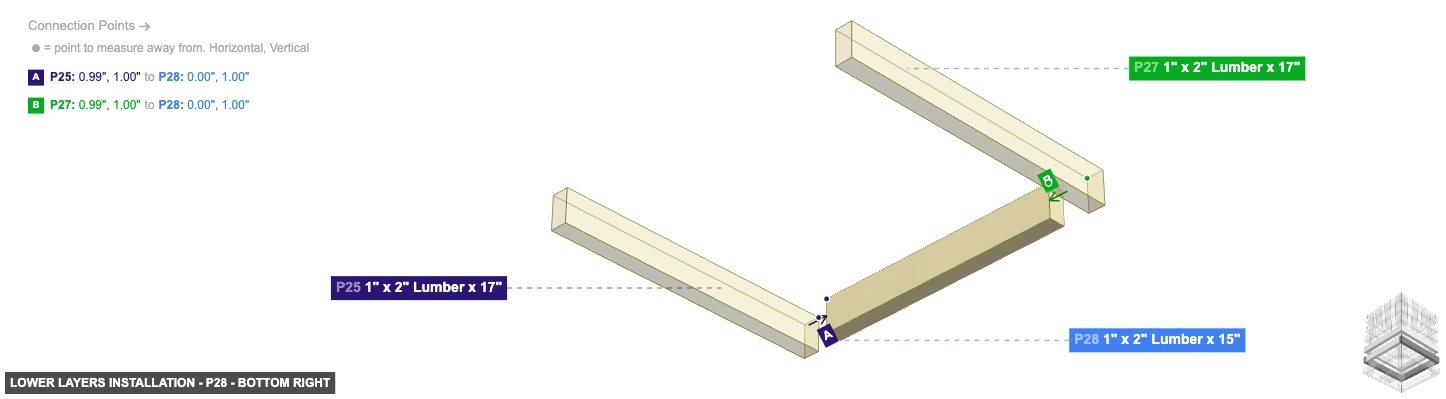
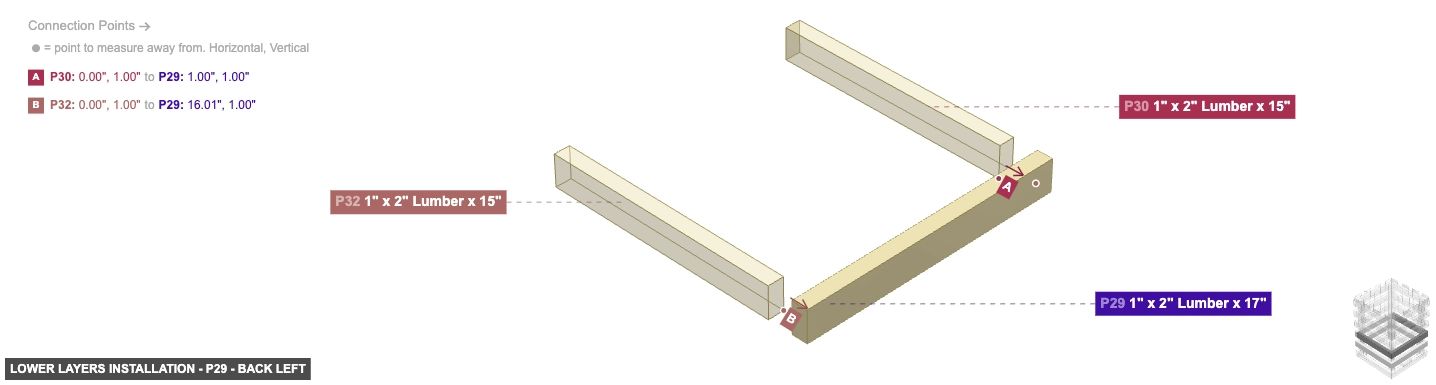
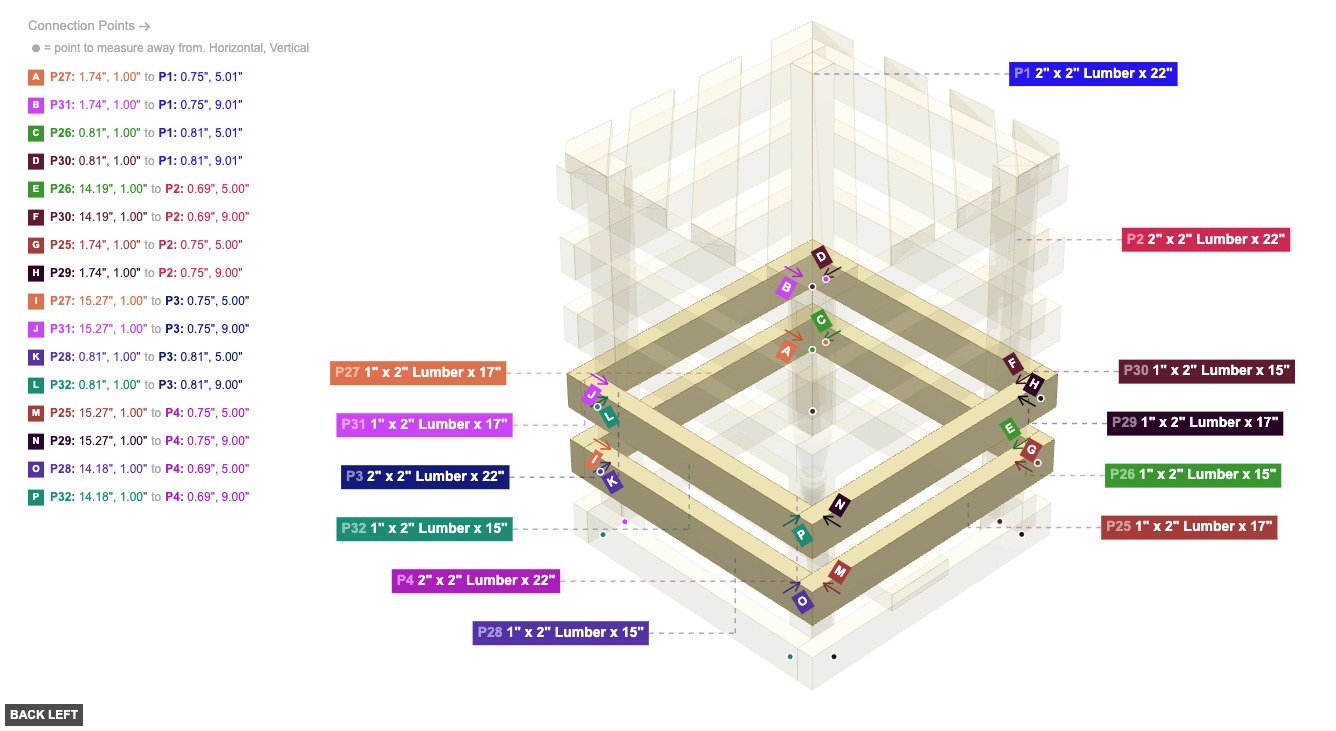
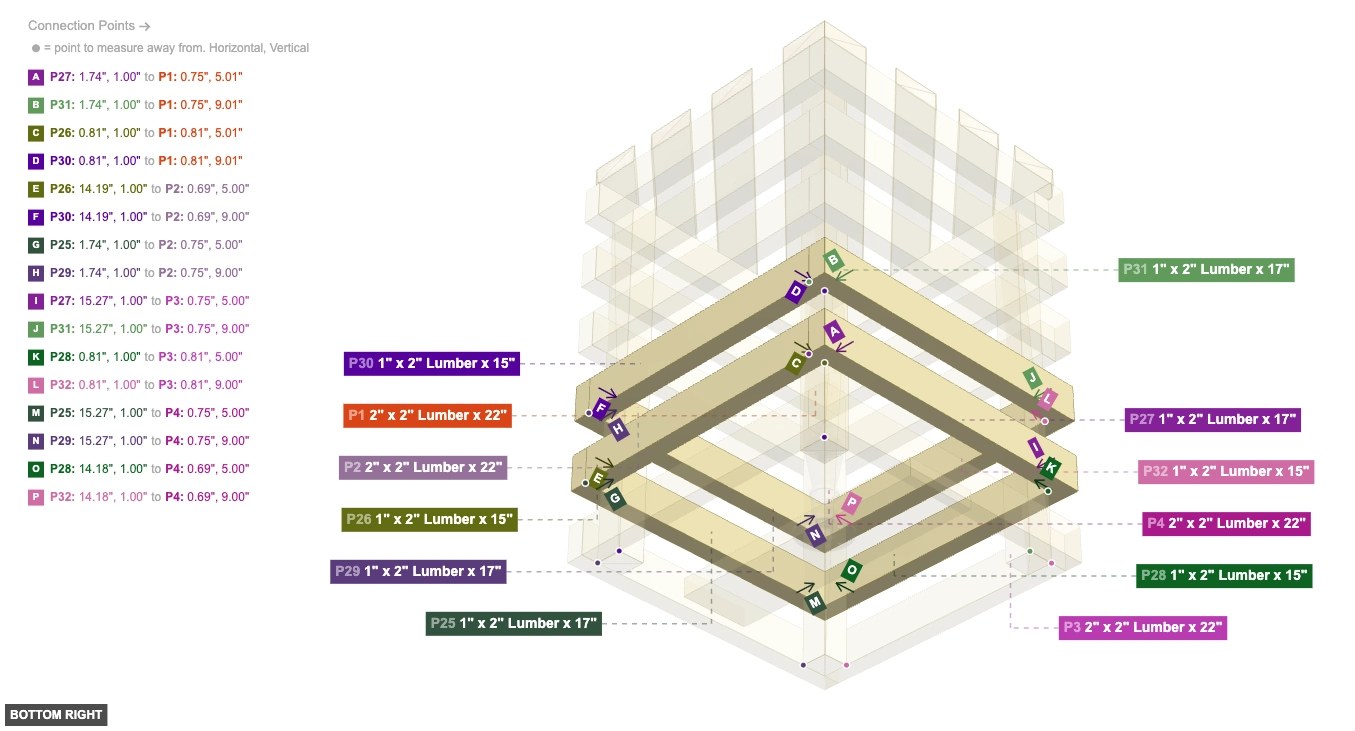
Attach the first two sets of horizontal layers above the base frame.
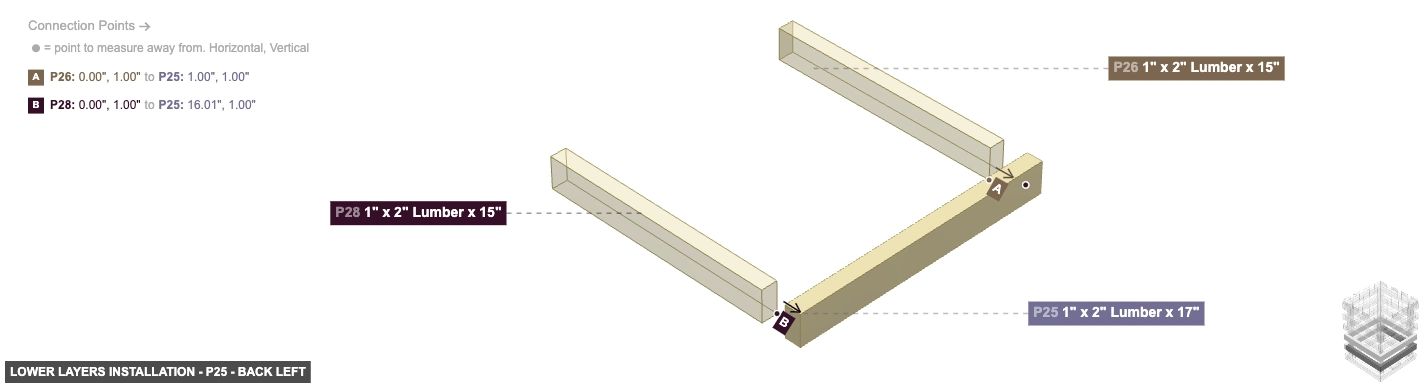


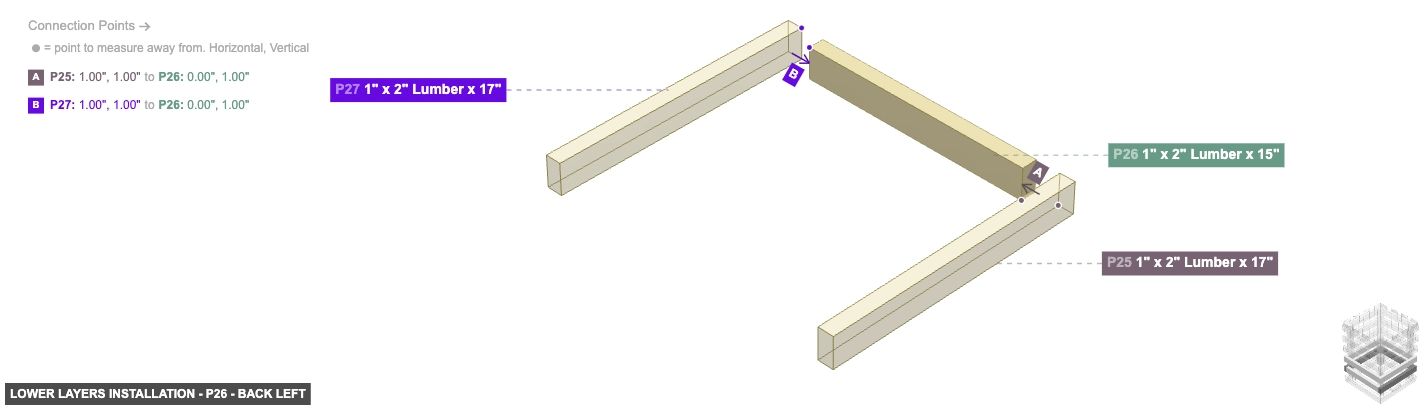

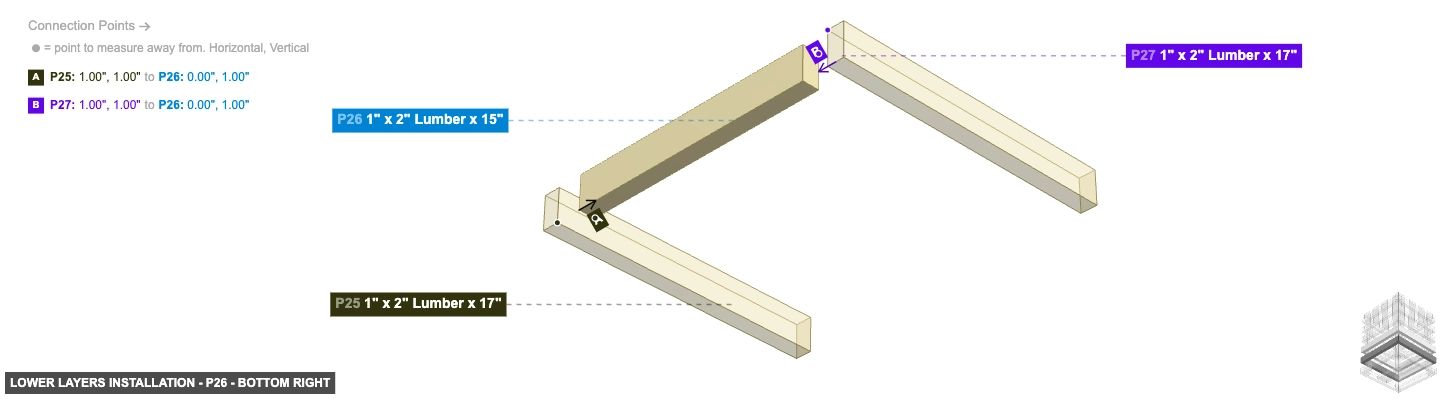


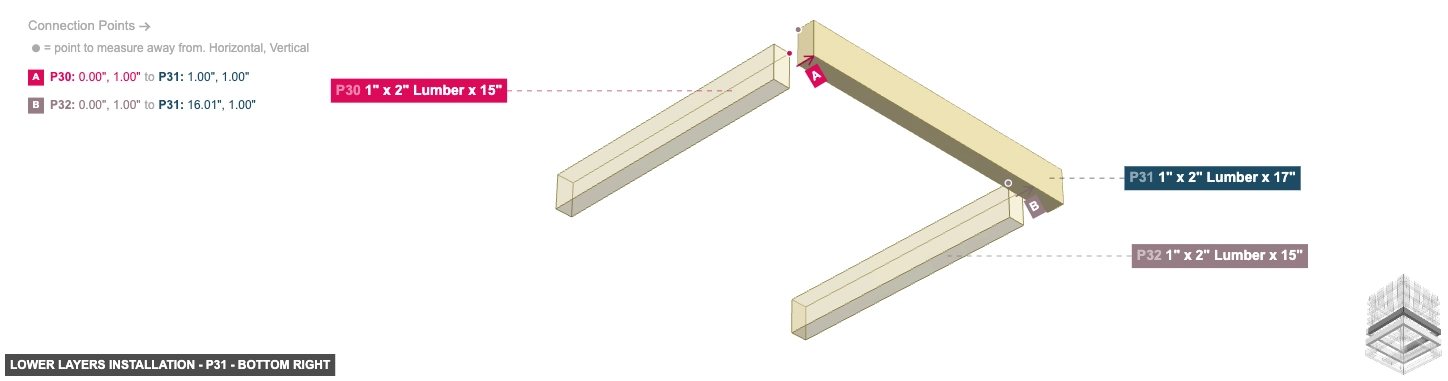

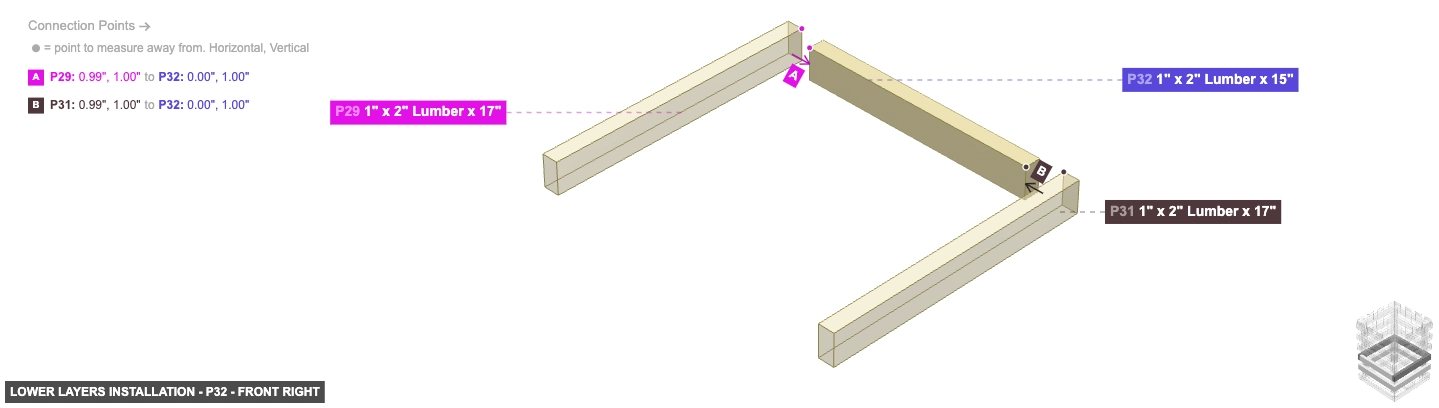
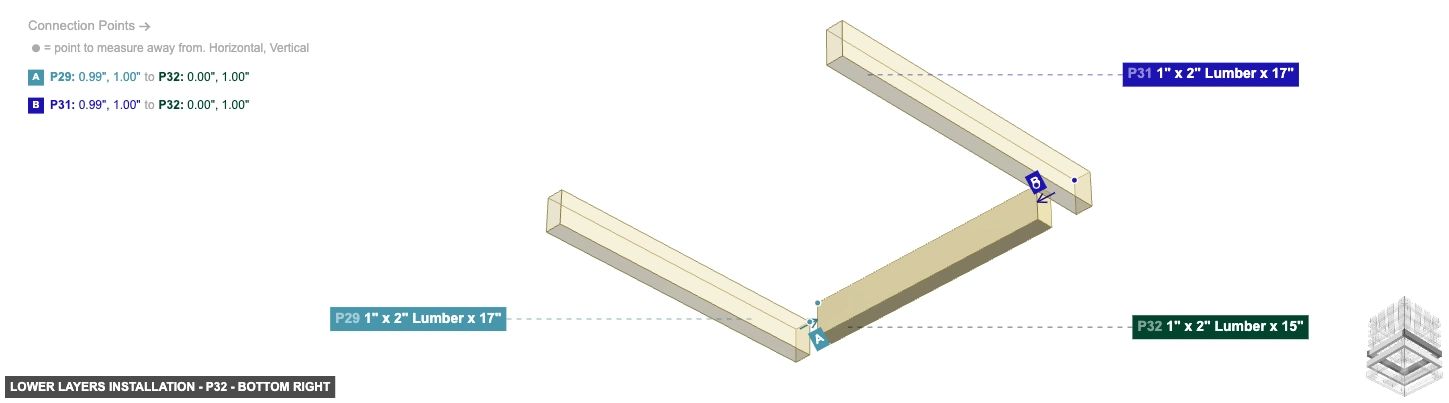
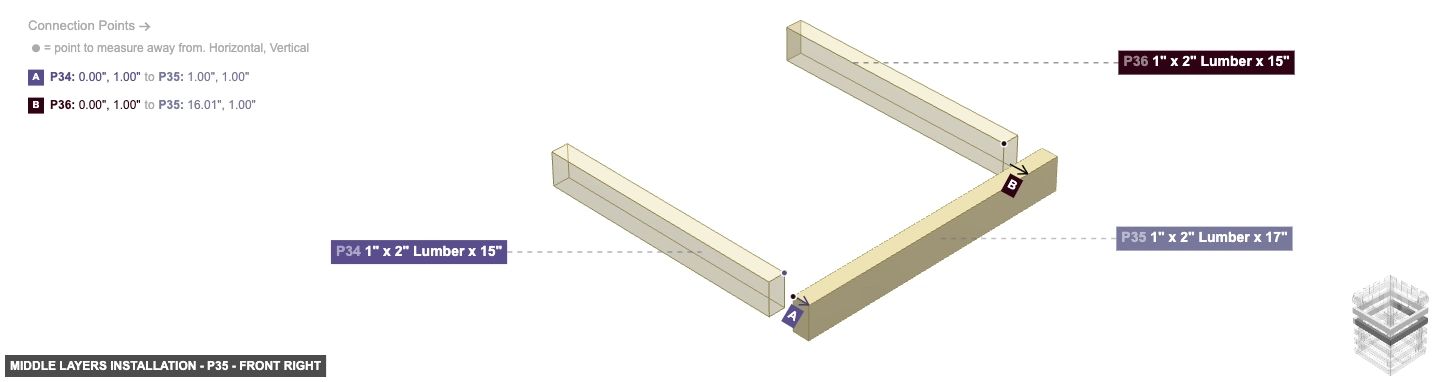
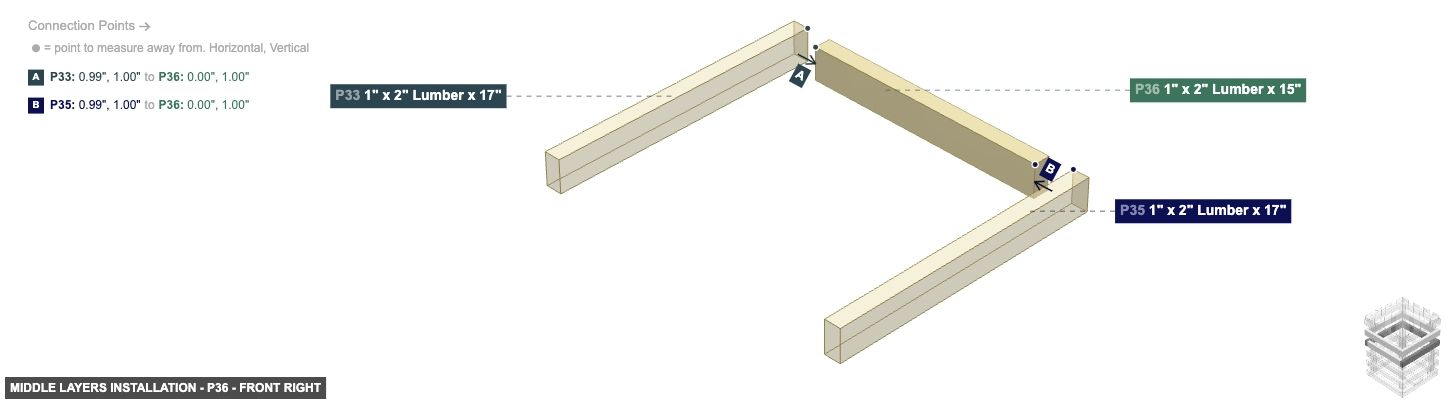
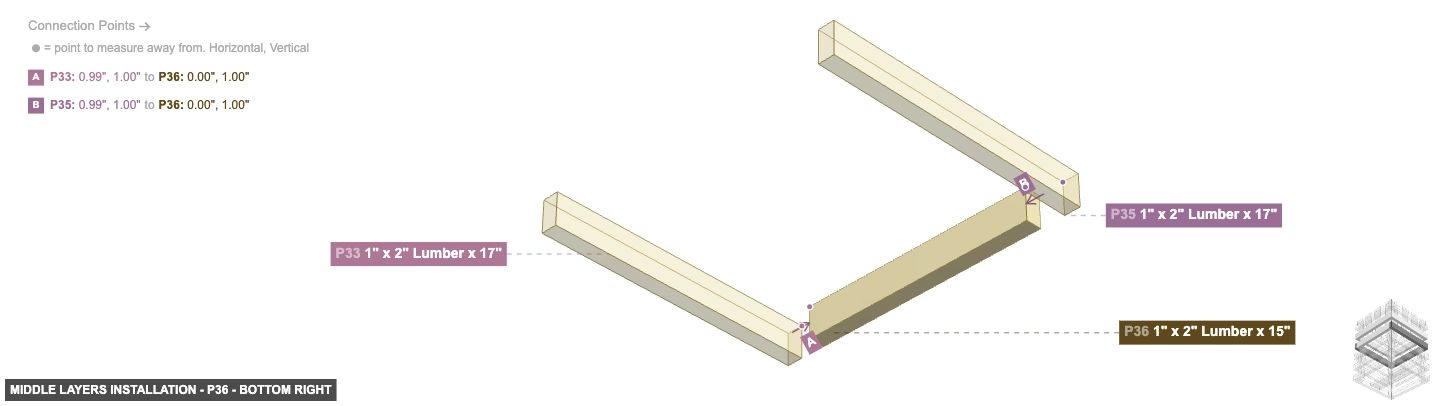
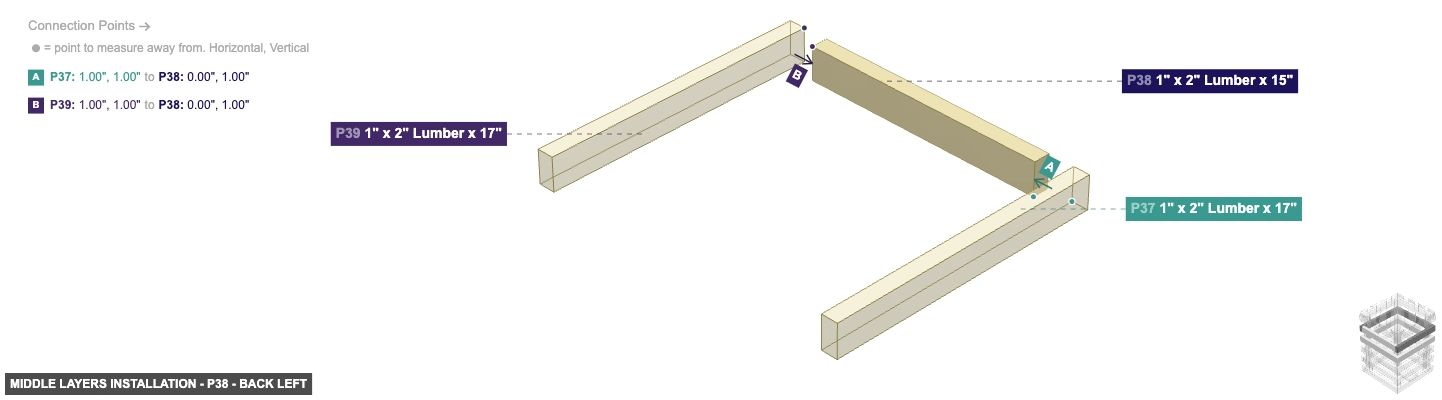
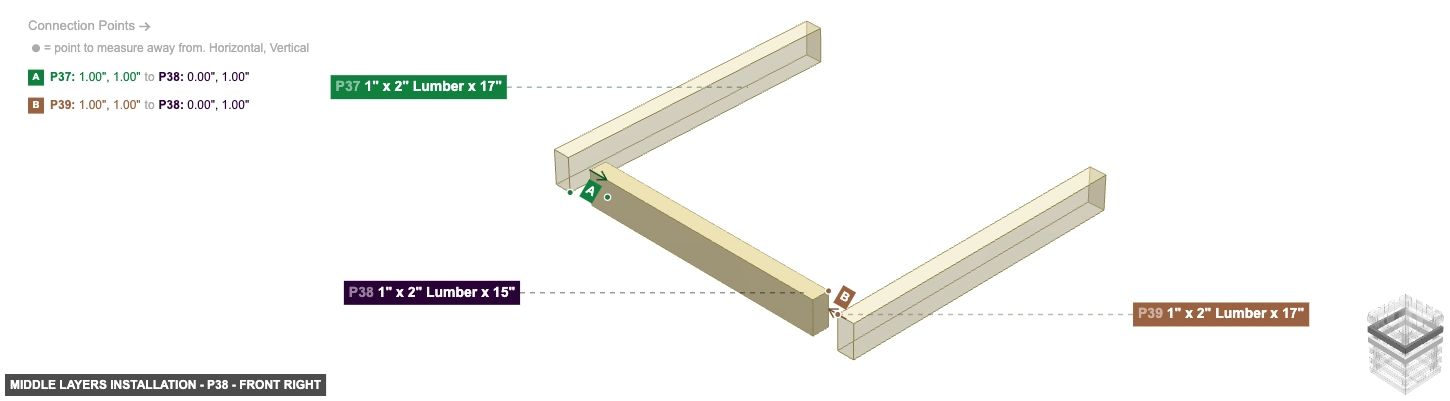
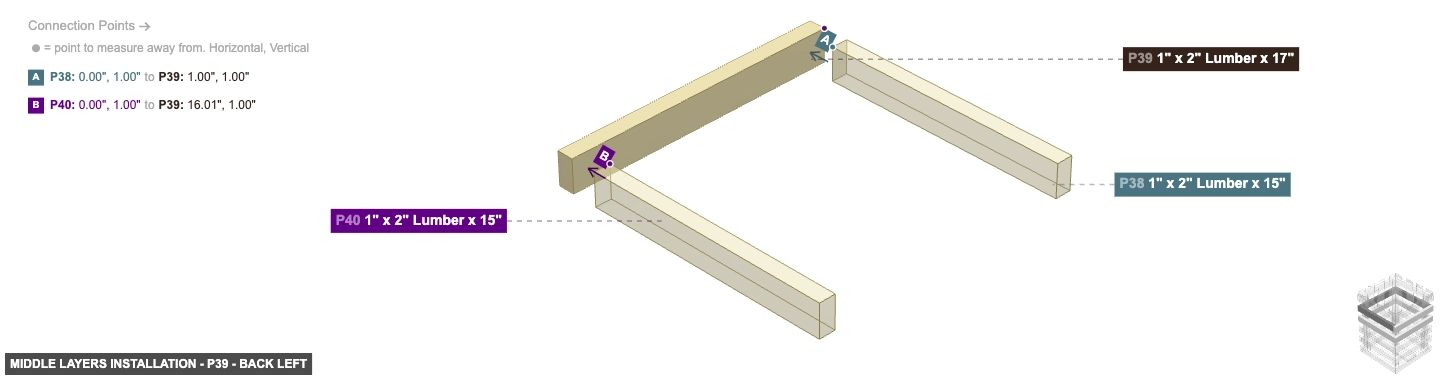
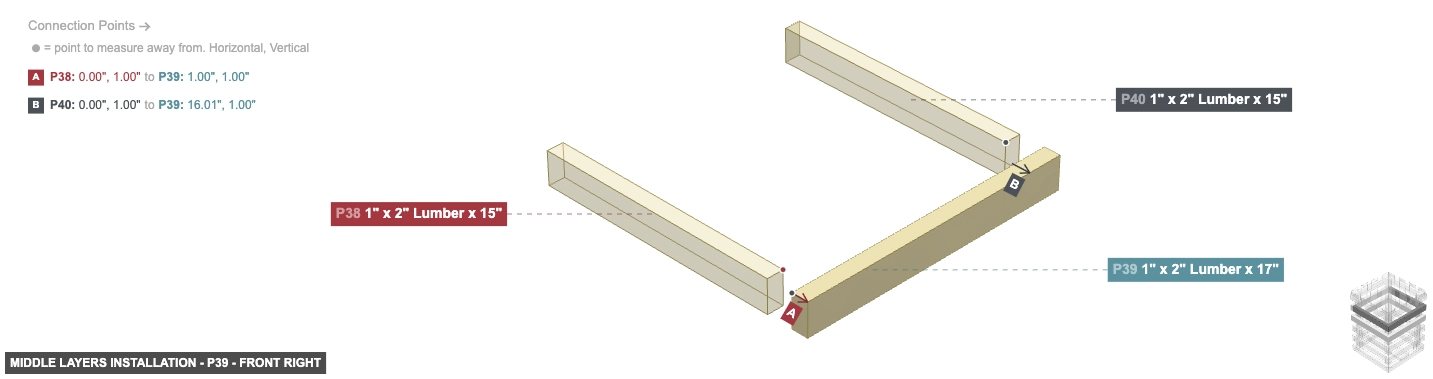
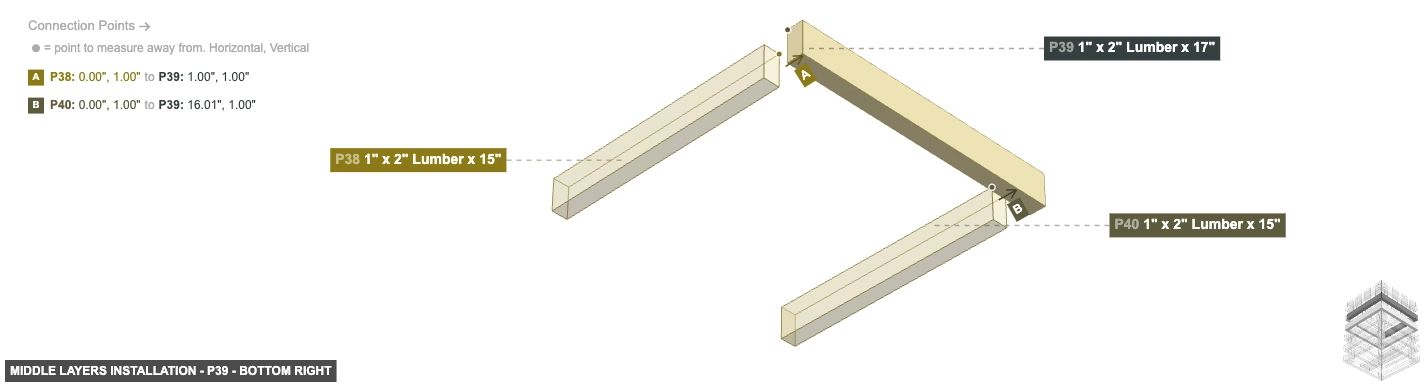
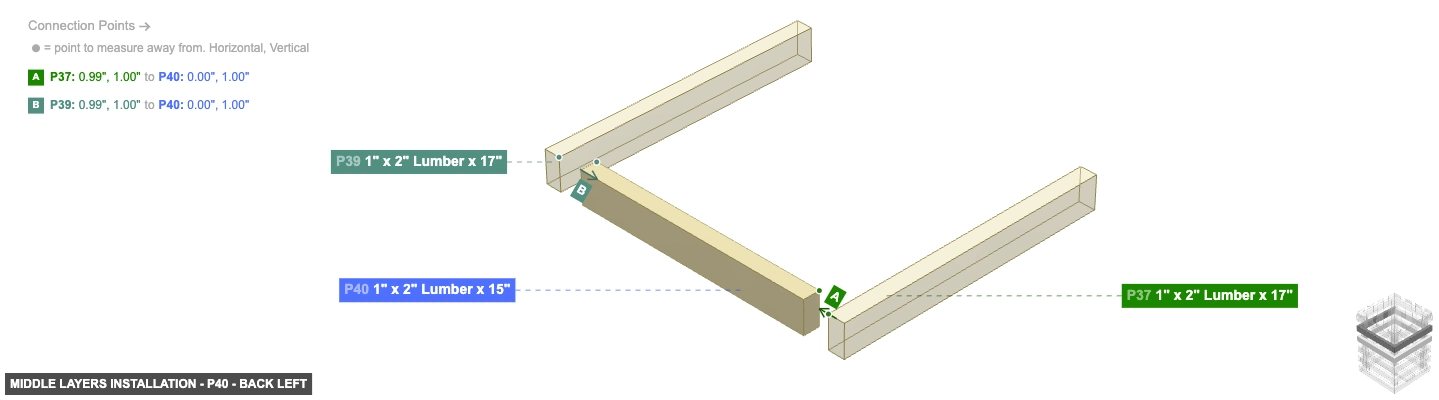
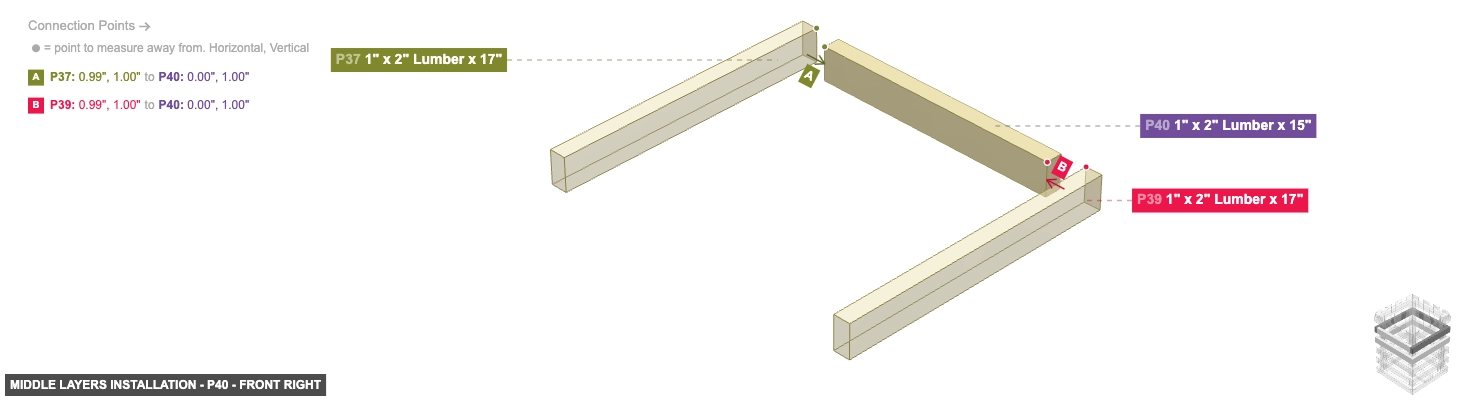
Attach the next two sets of horizontal layers.
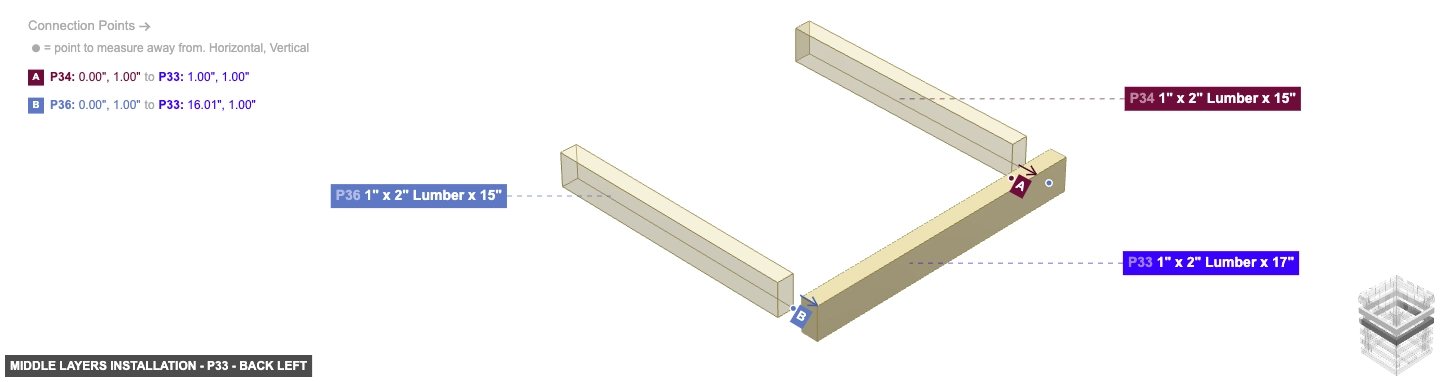


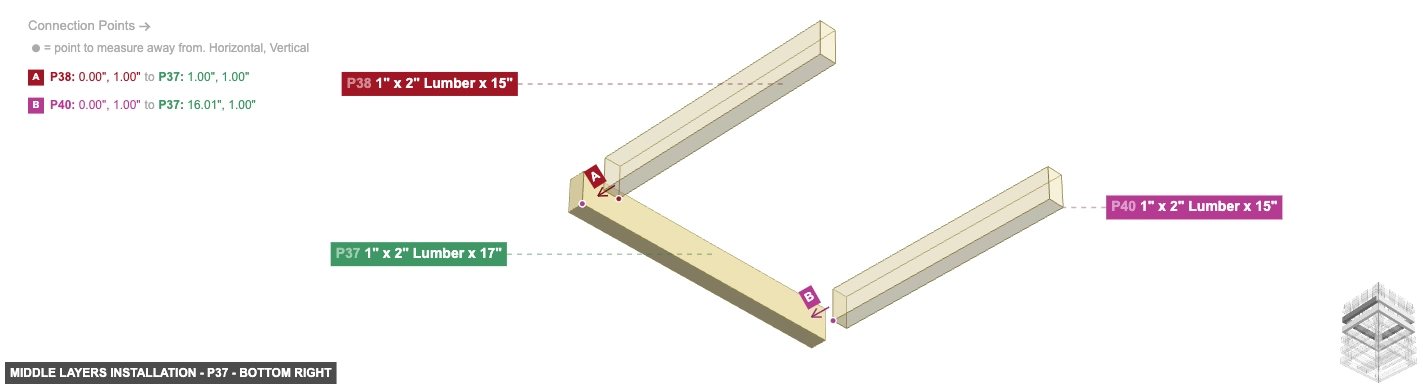


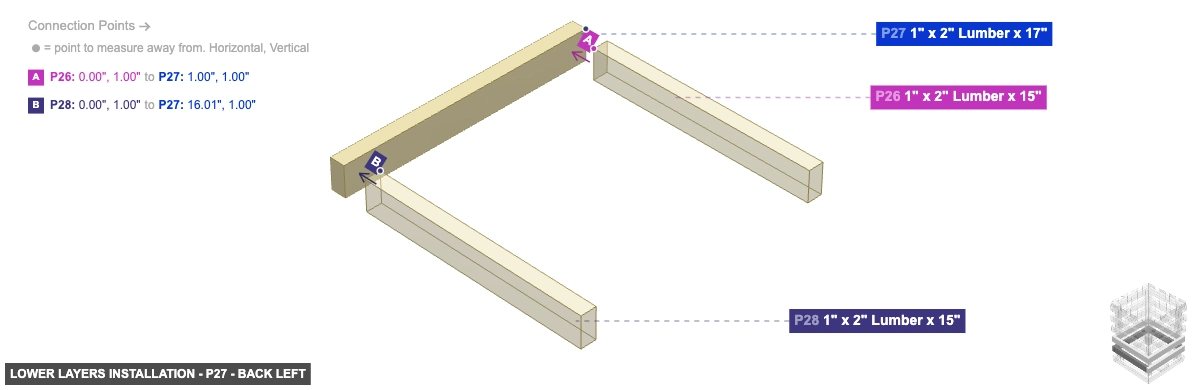
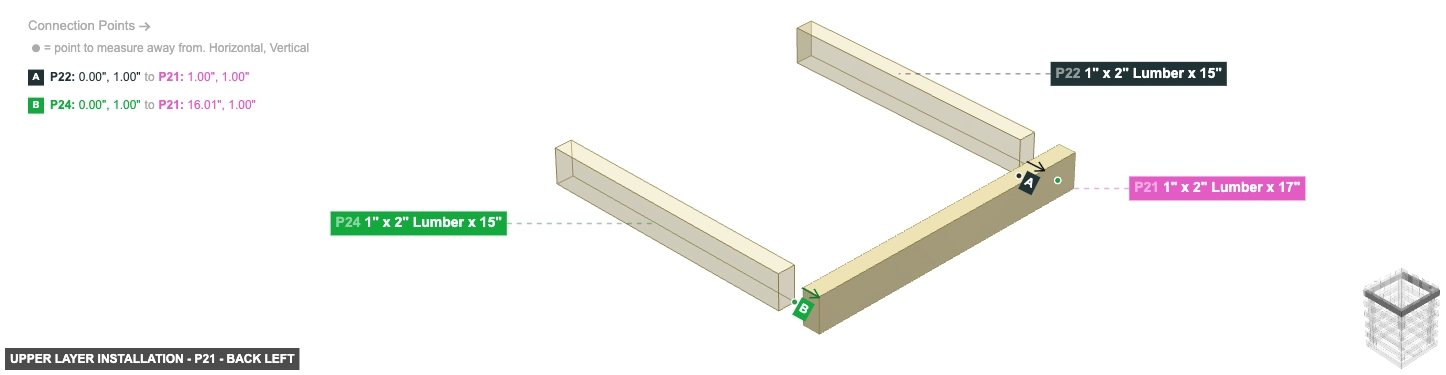
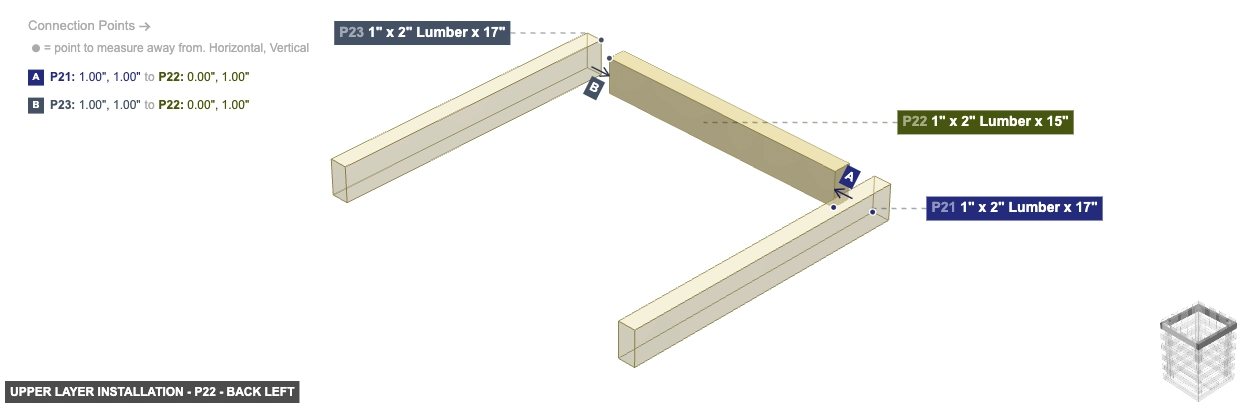
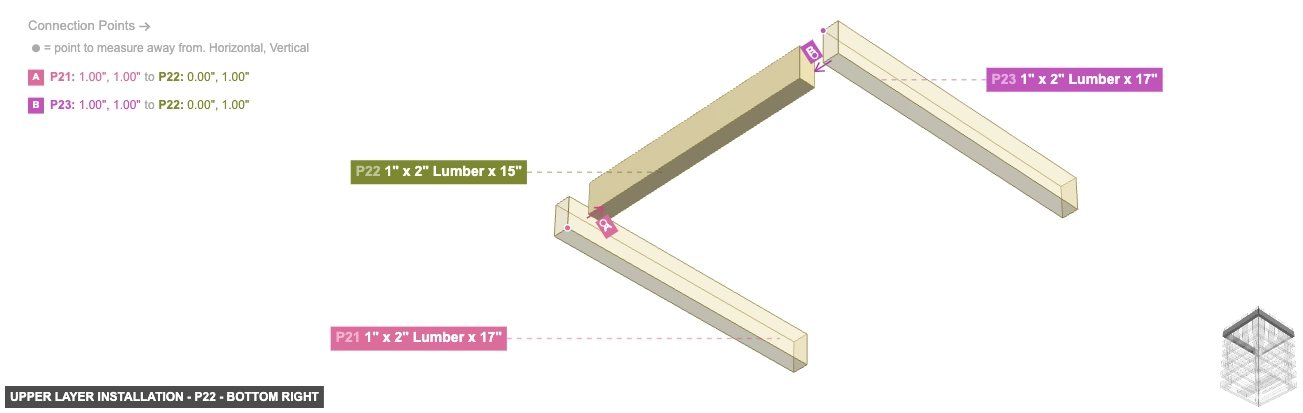
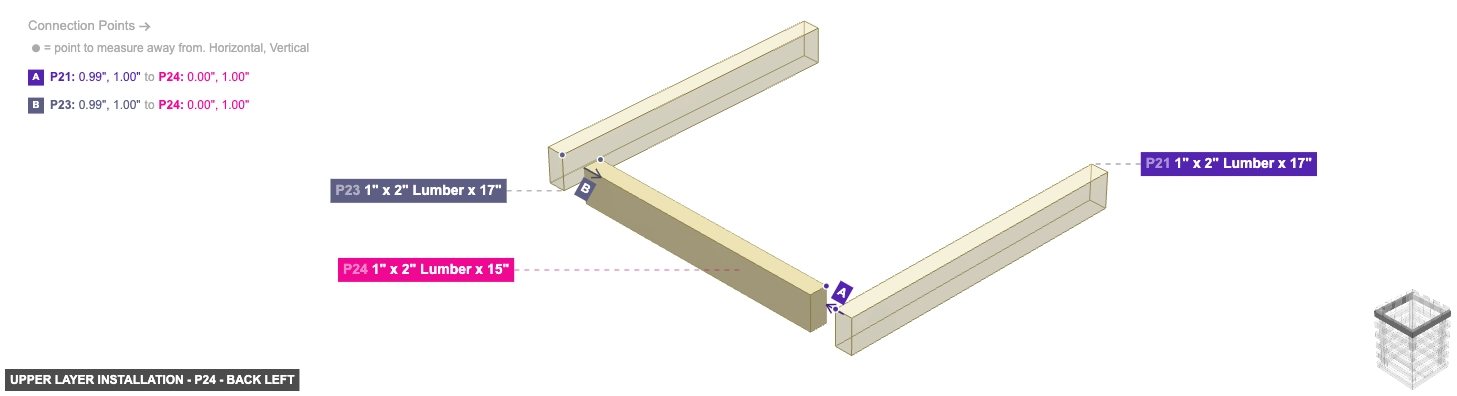
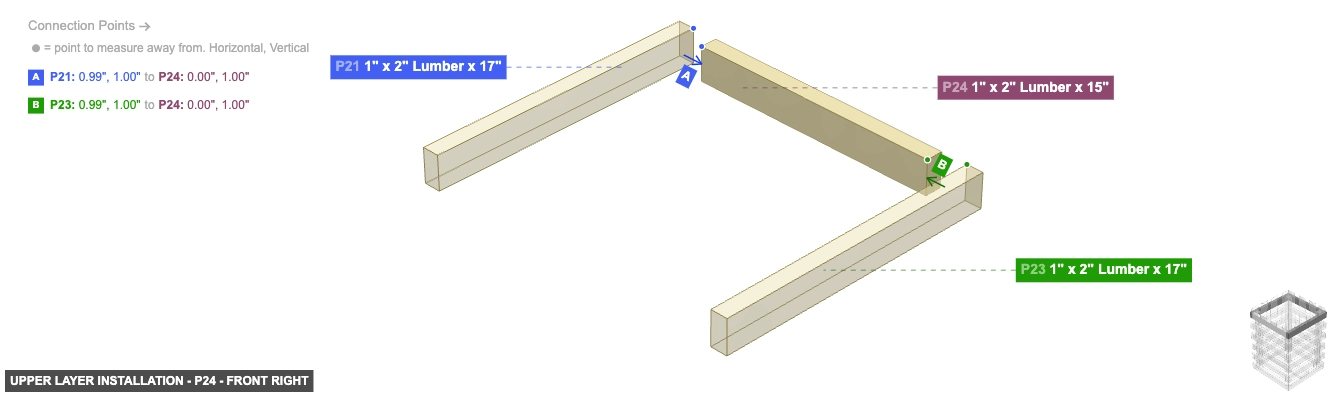
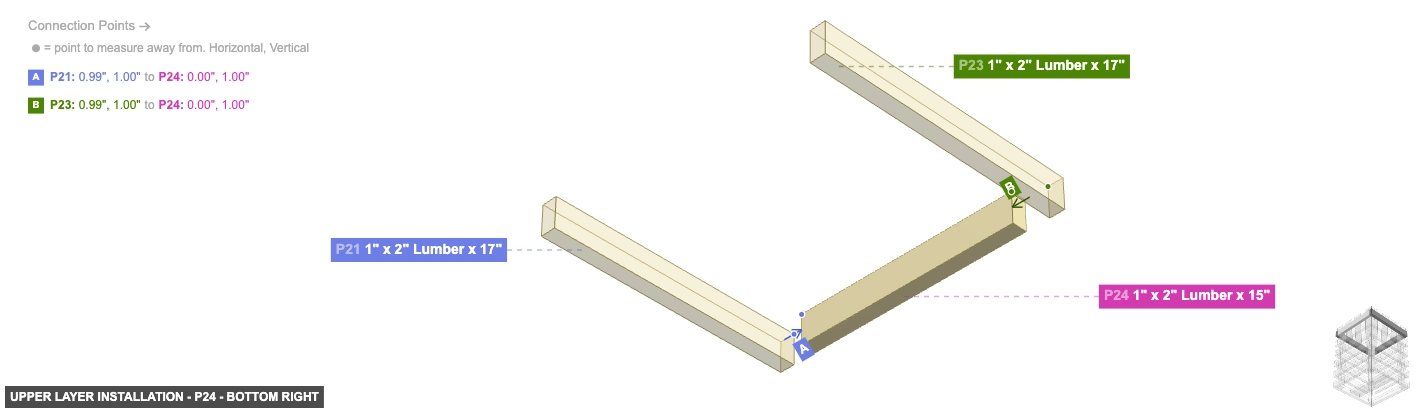
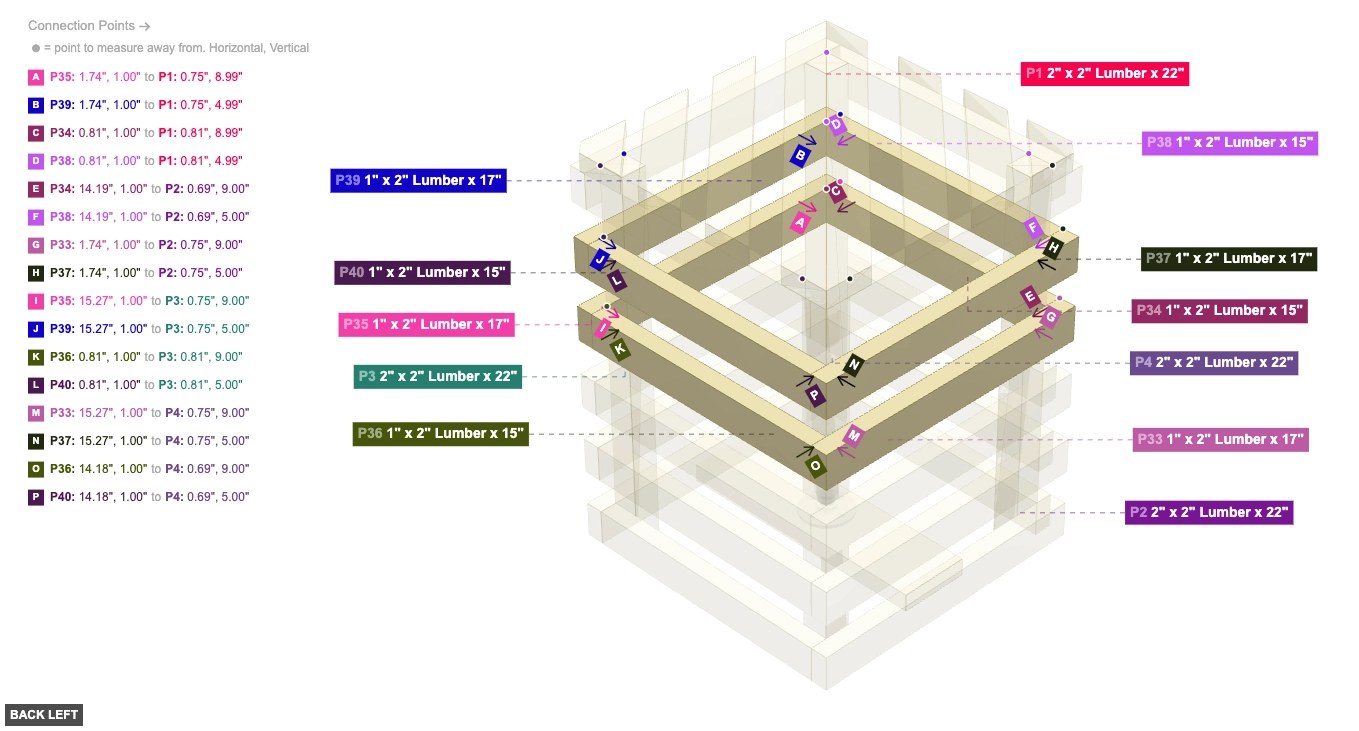
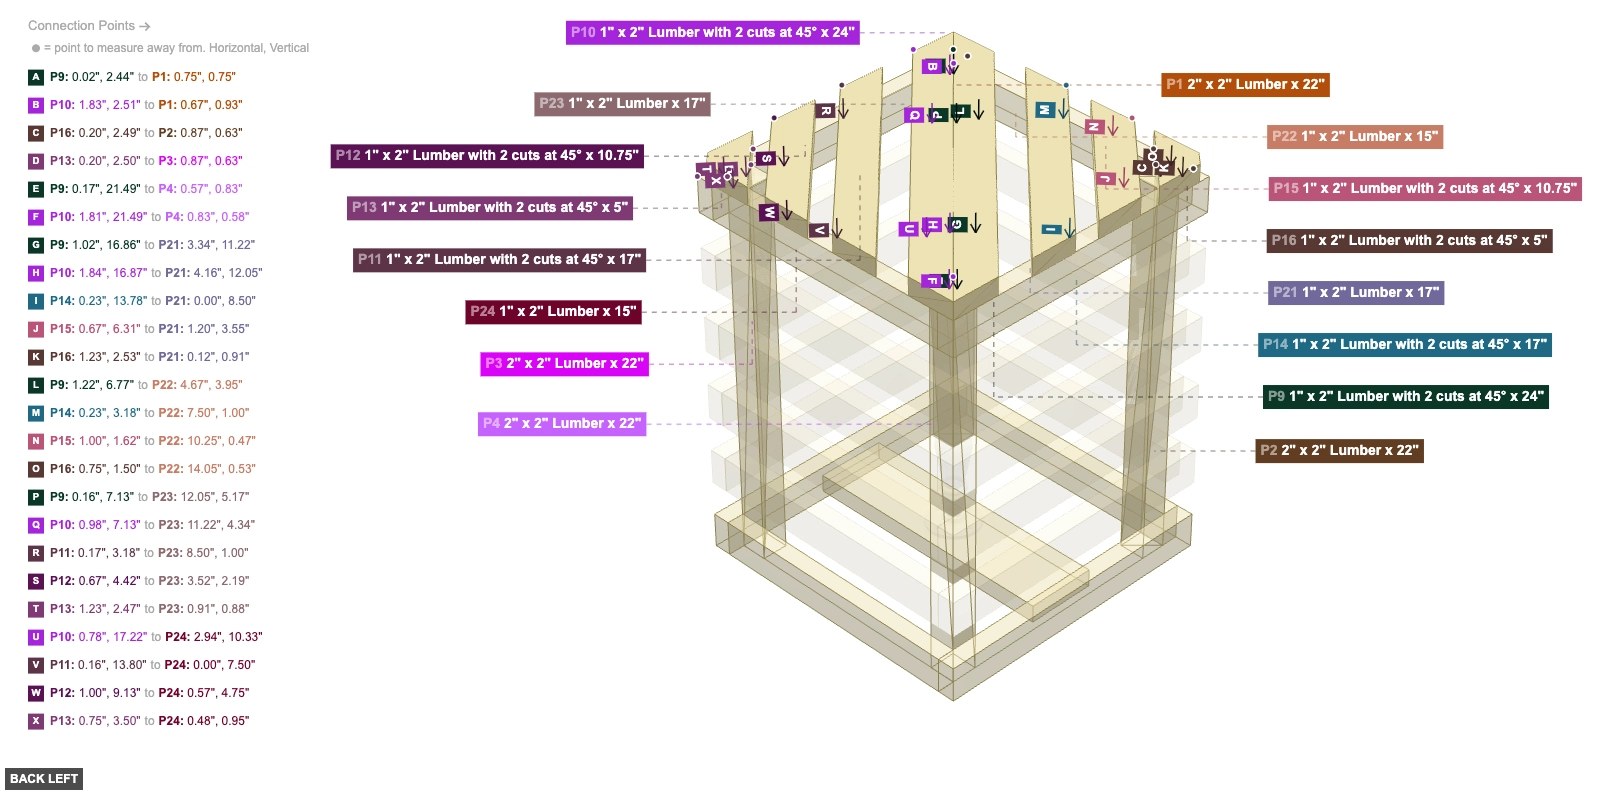
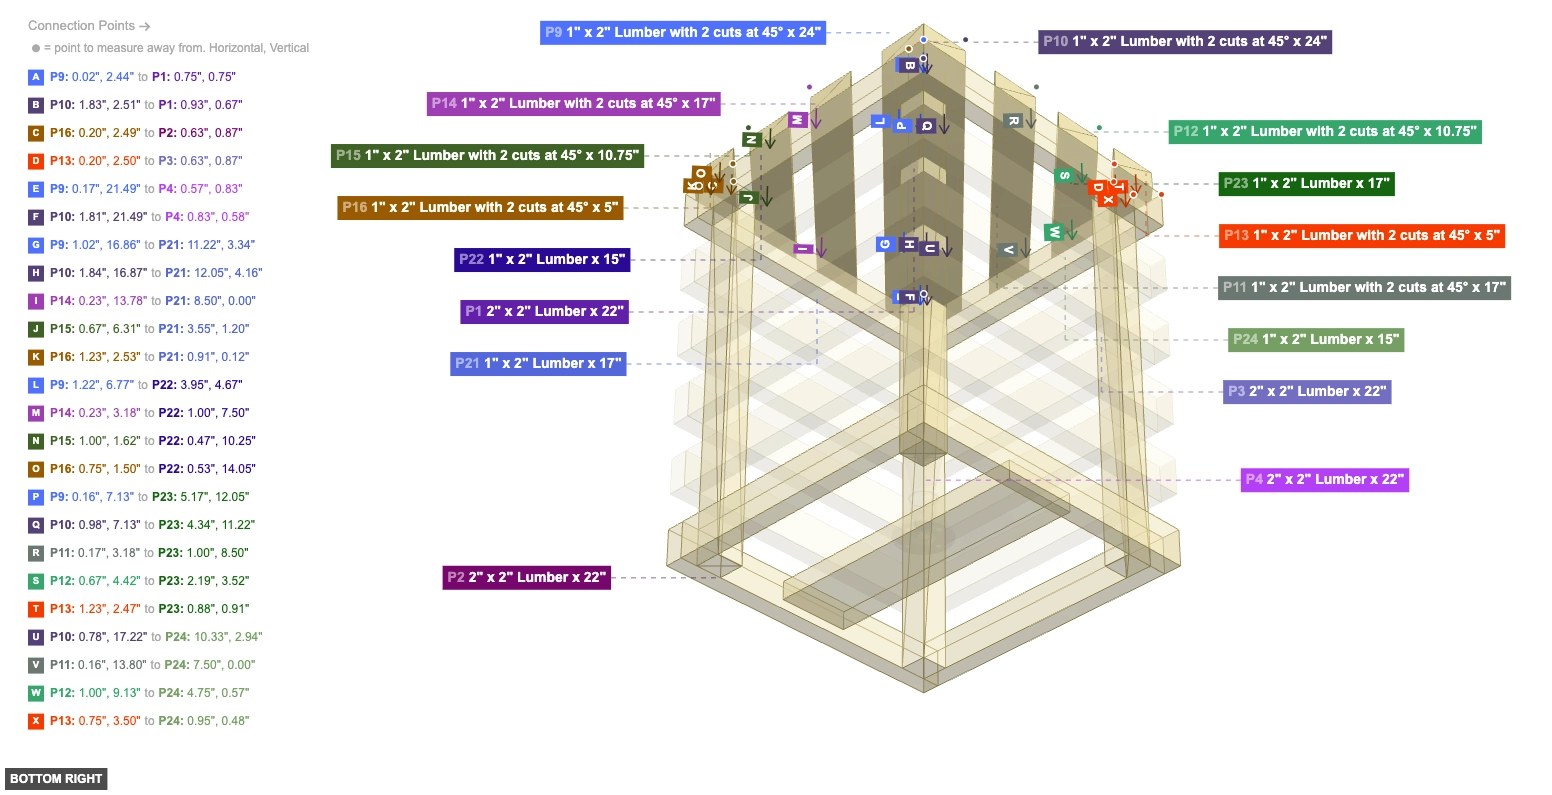
Attach the final set of horizontal layers before the top structure.


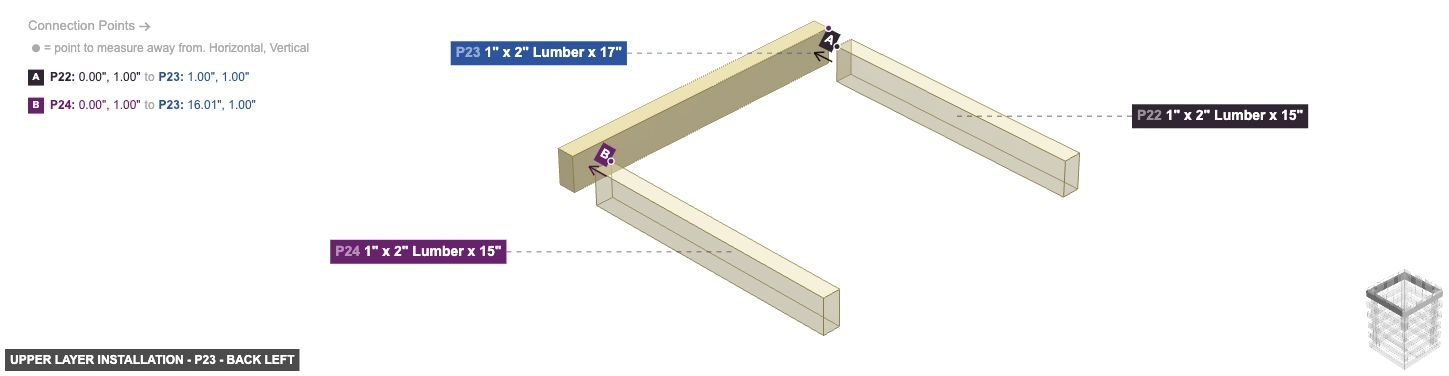
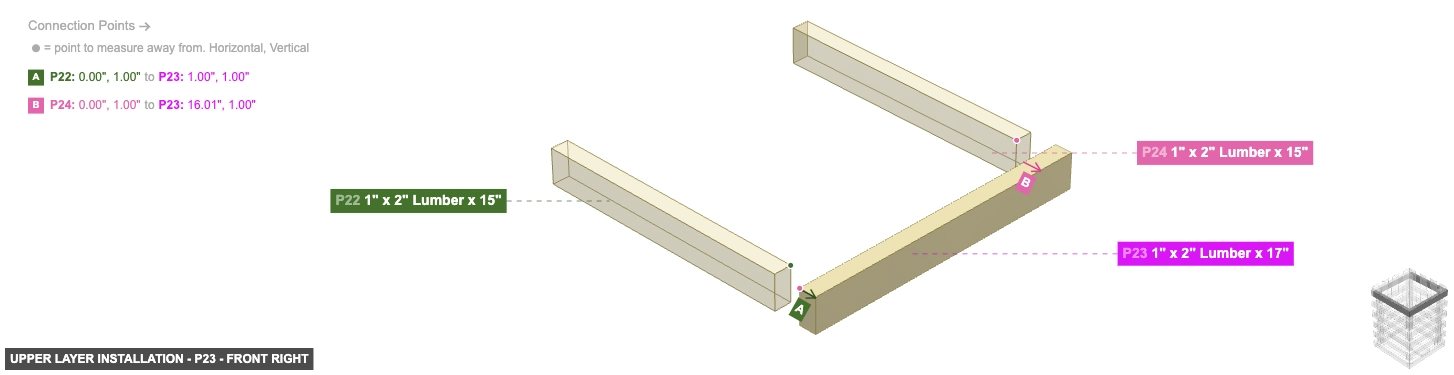

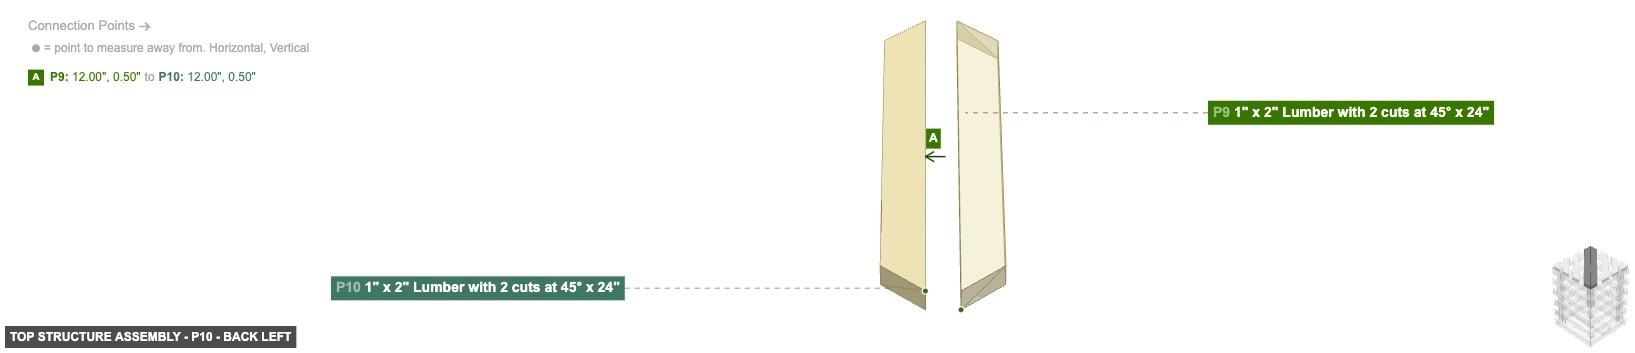
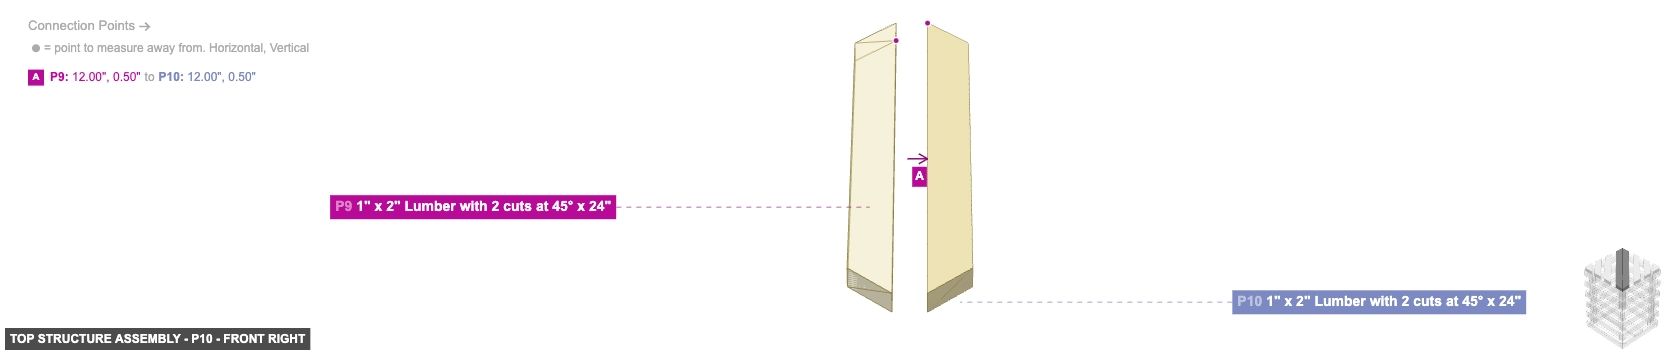
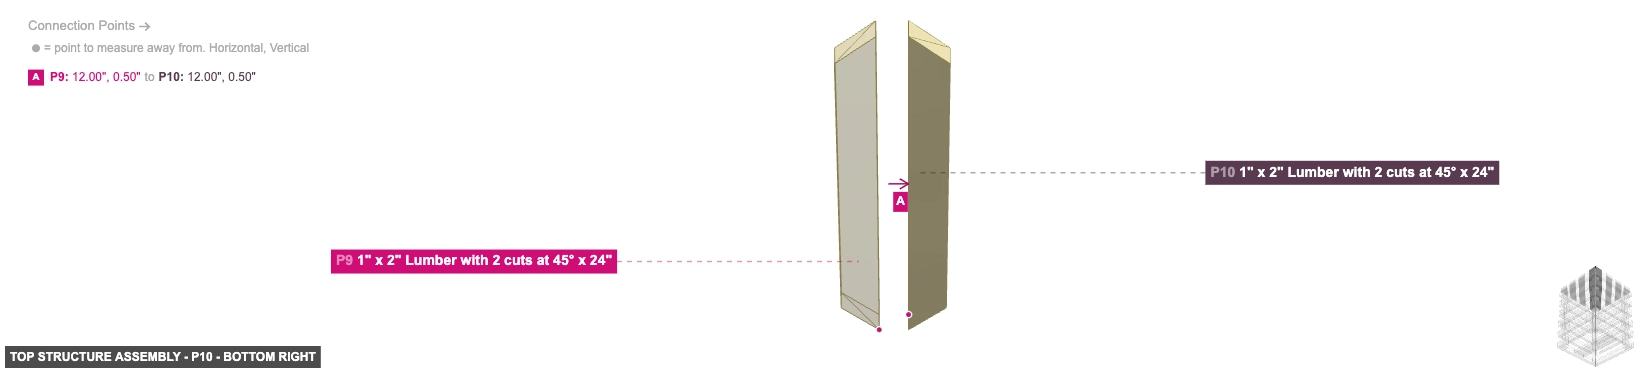
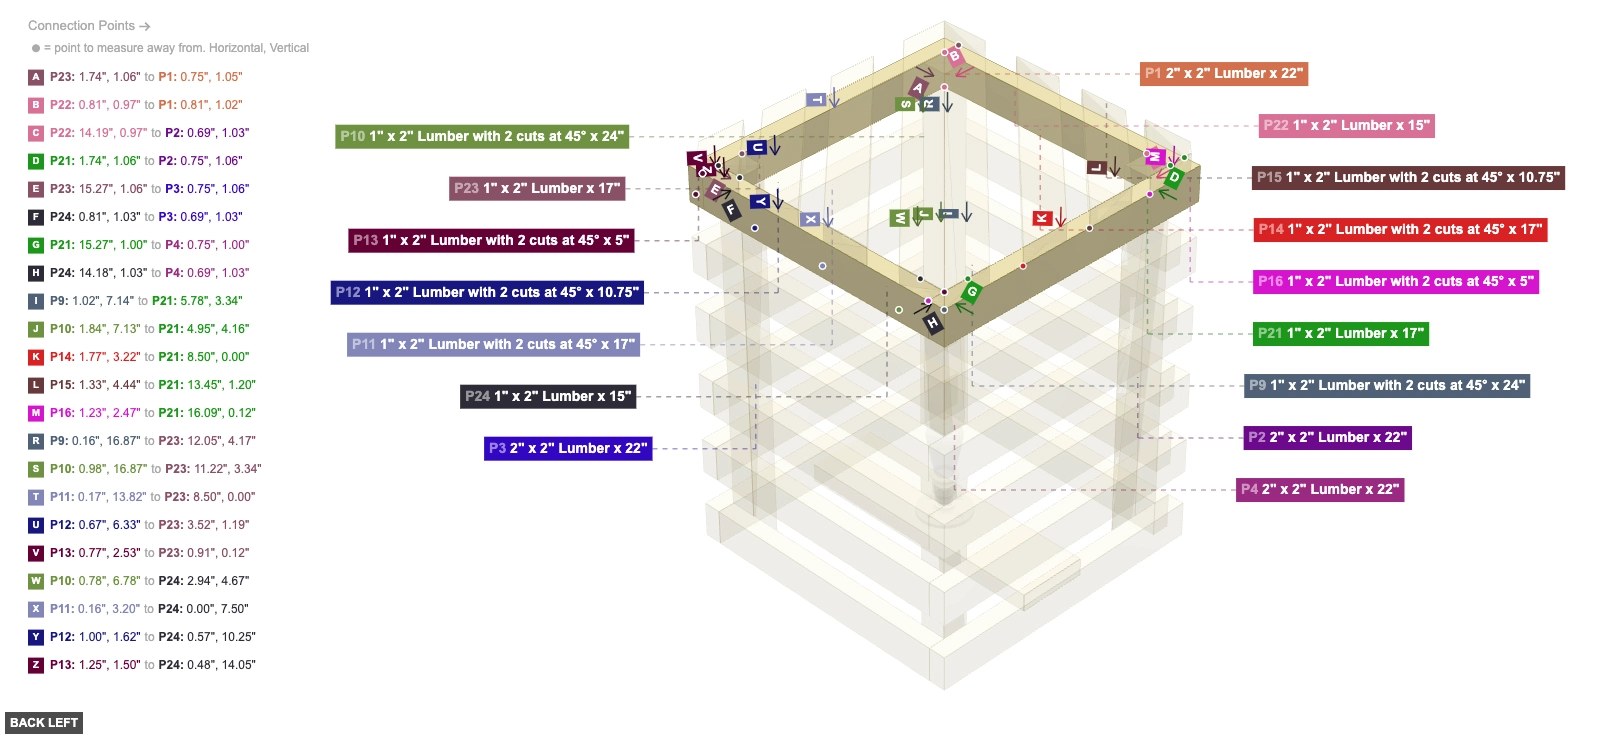
Assemble and attach the angled top pieces and supports.


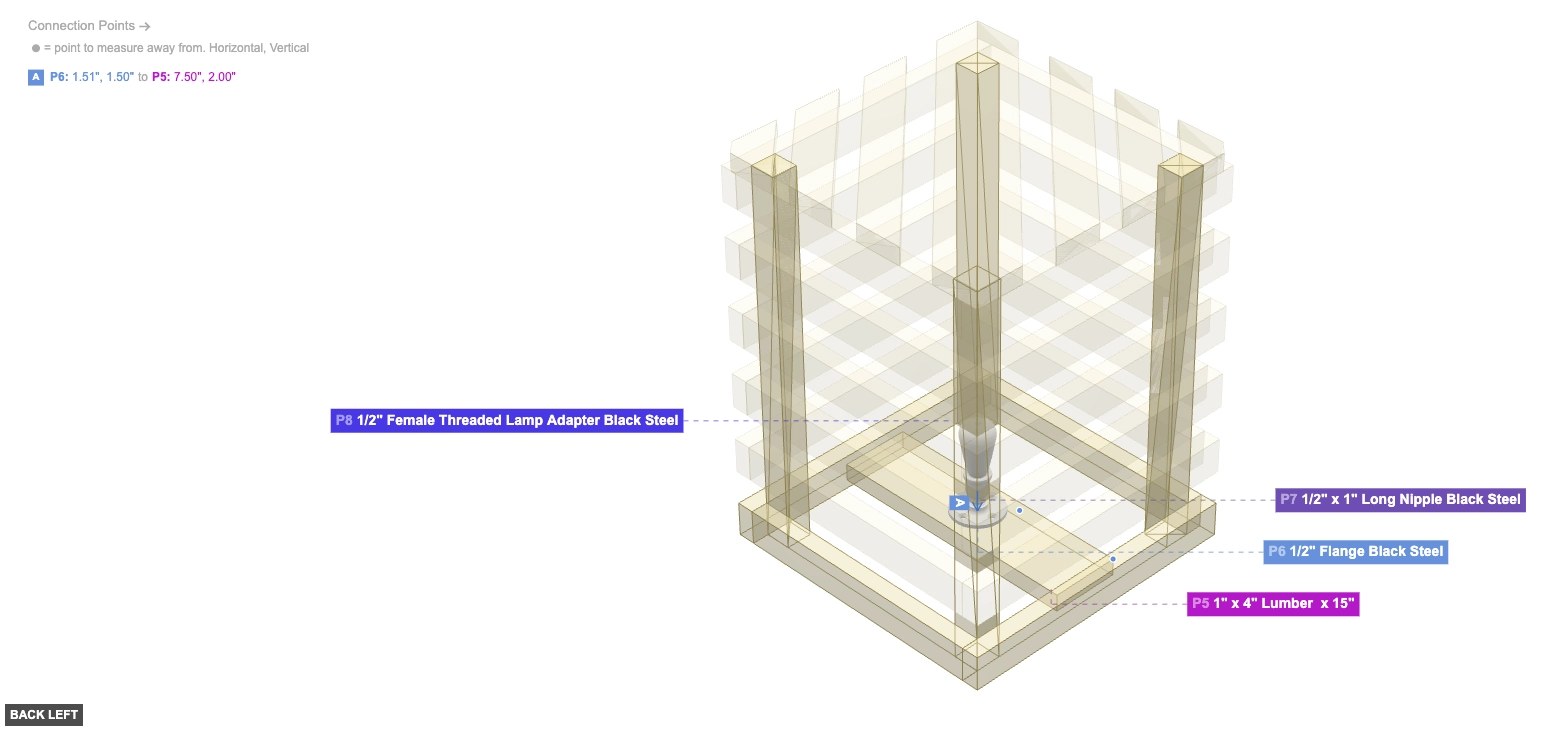
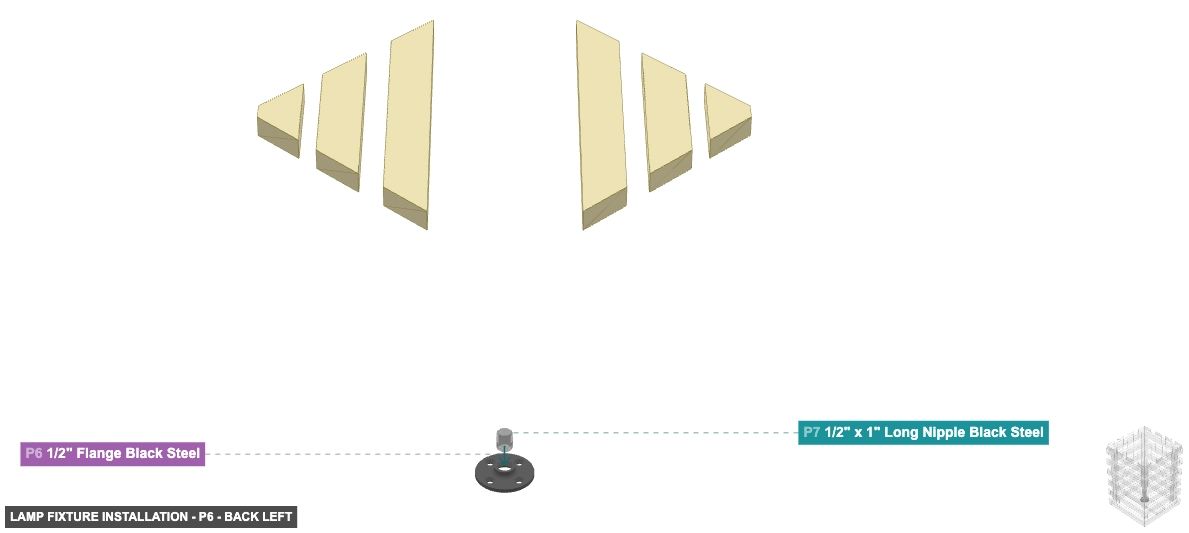
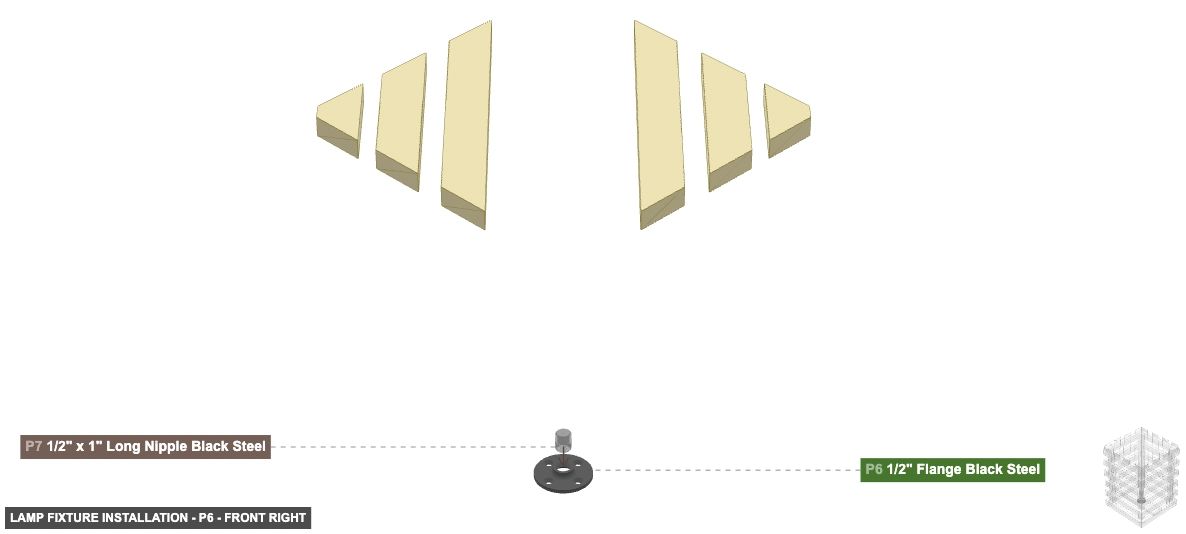
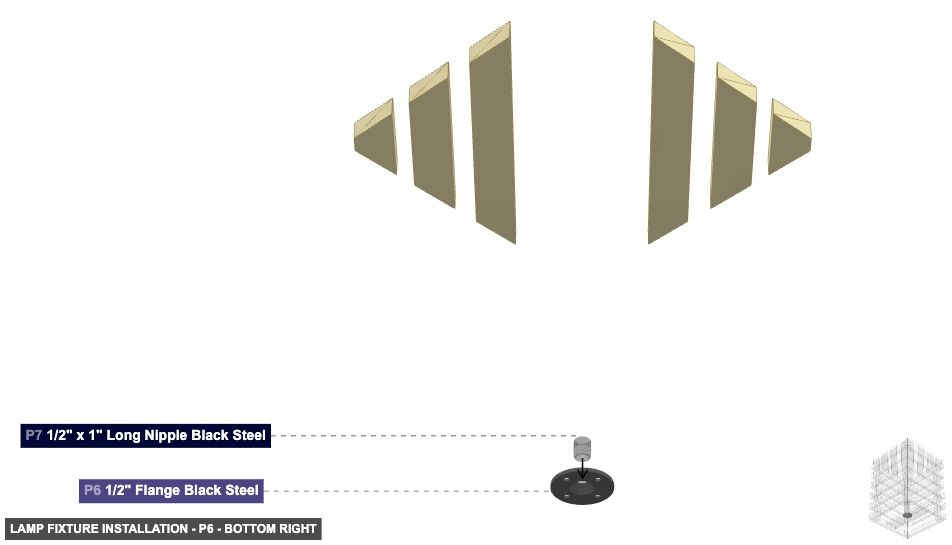
Assemble the lamp components (flange, nipple, adapter) and attach them to the lamp base (P5).


Assemble the main vertical posts and the lowest set of horizontal supports, including the base piece for the lamp.
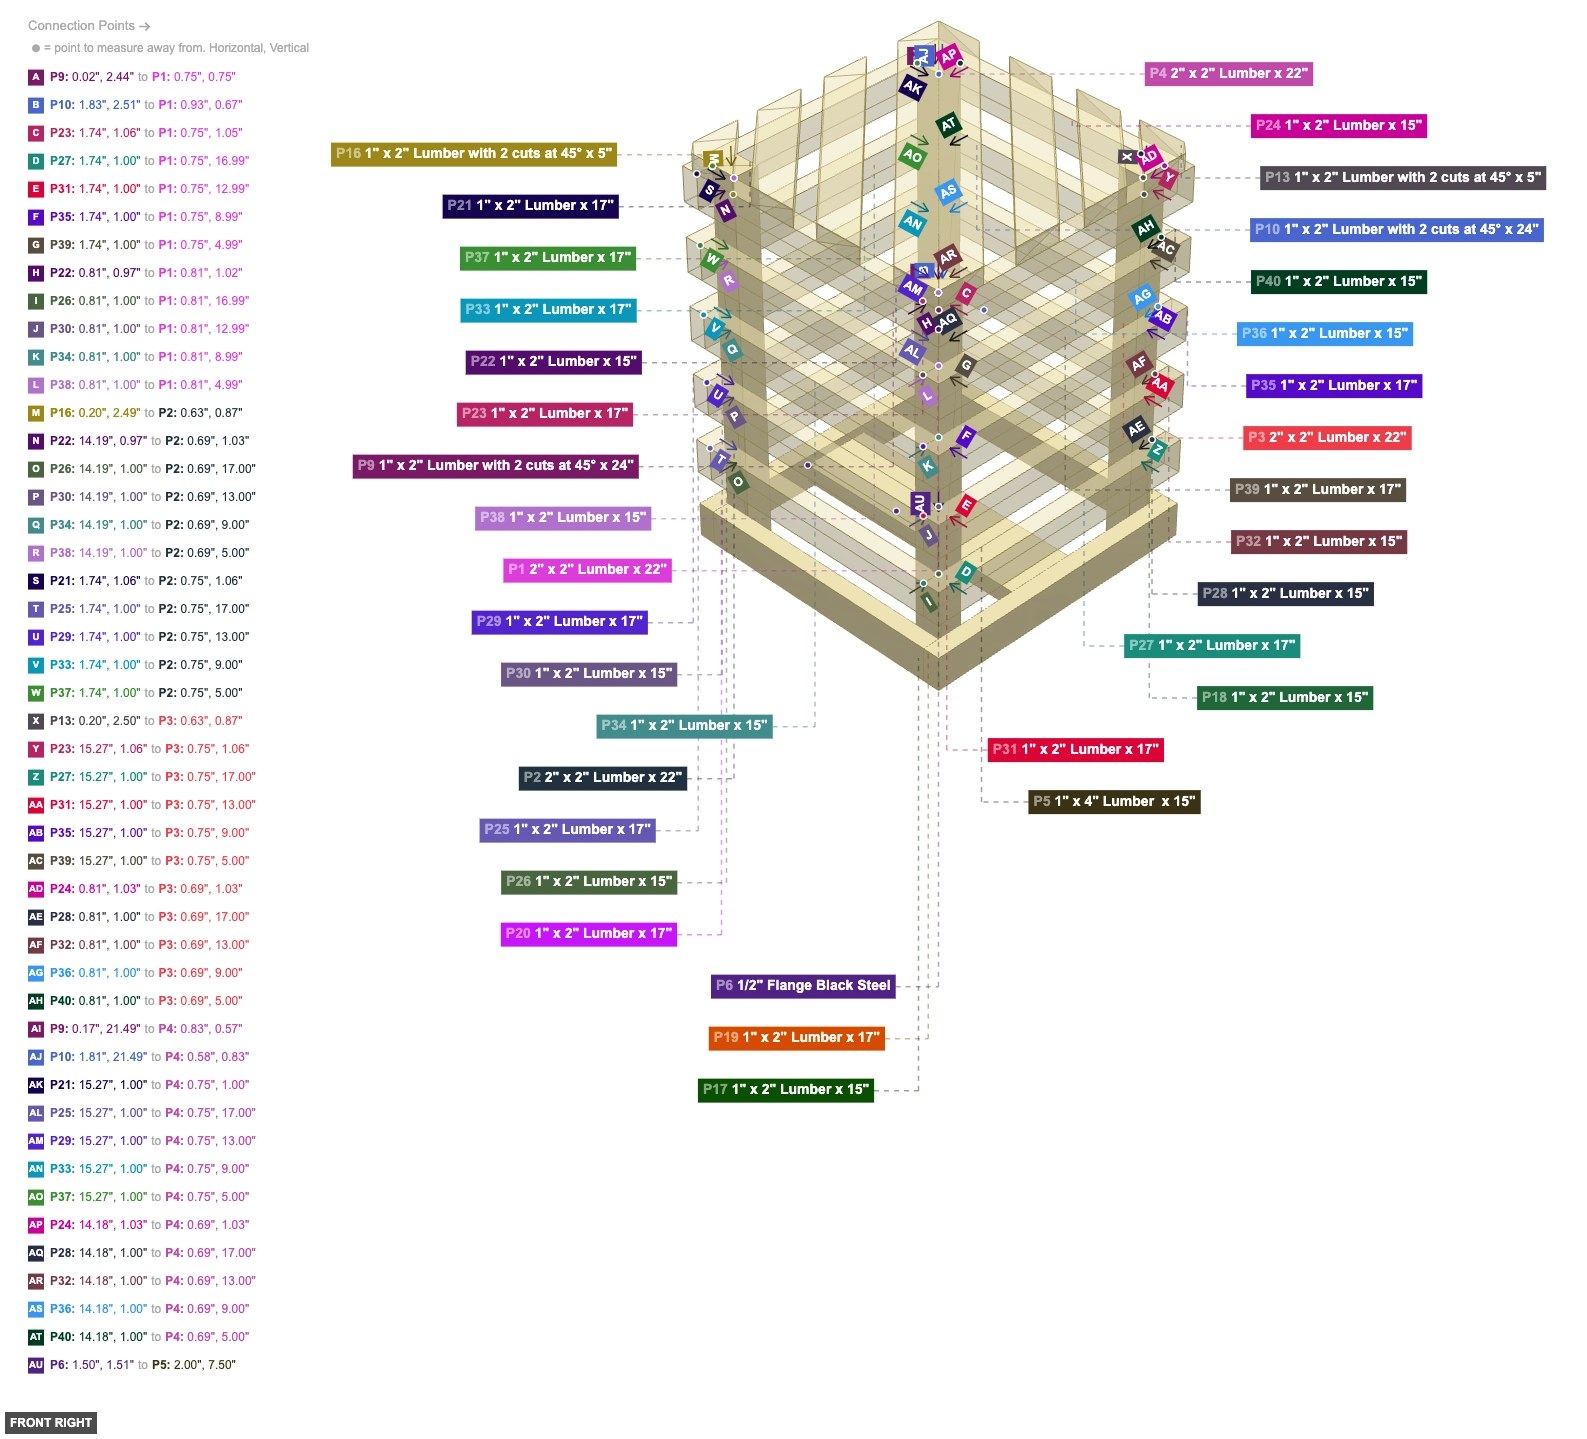
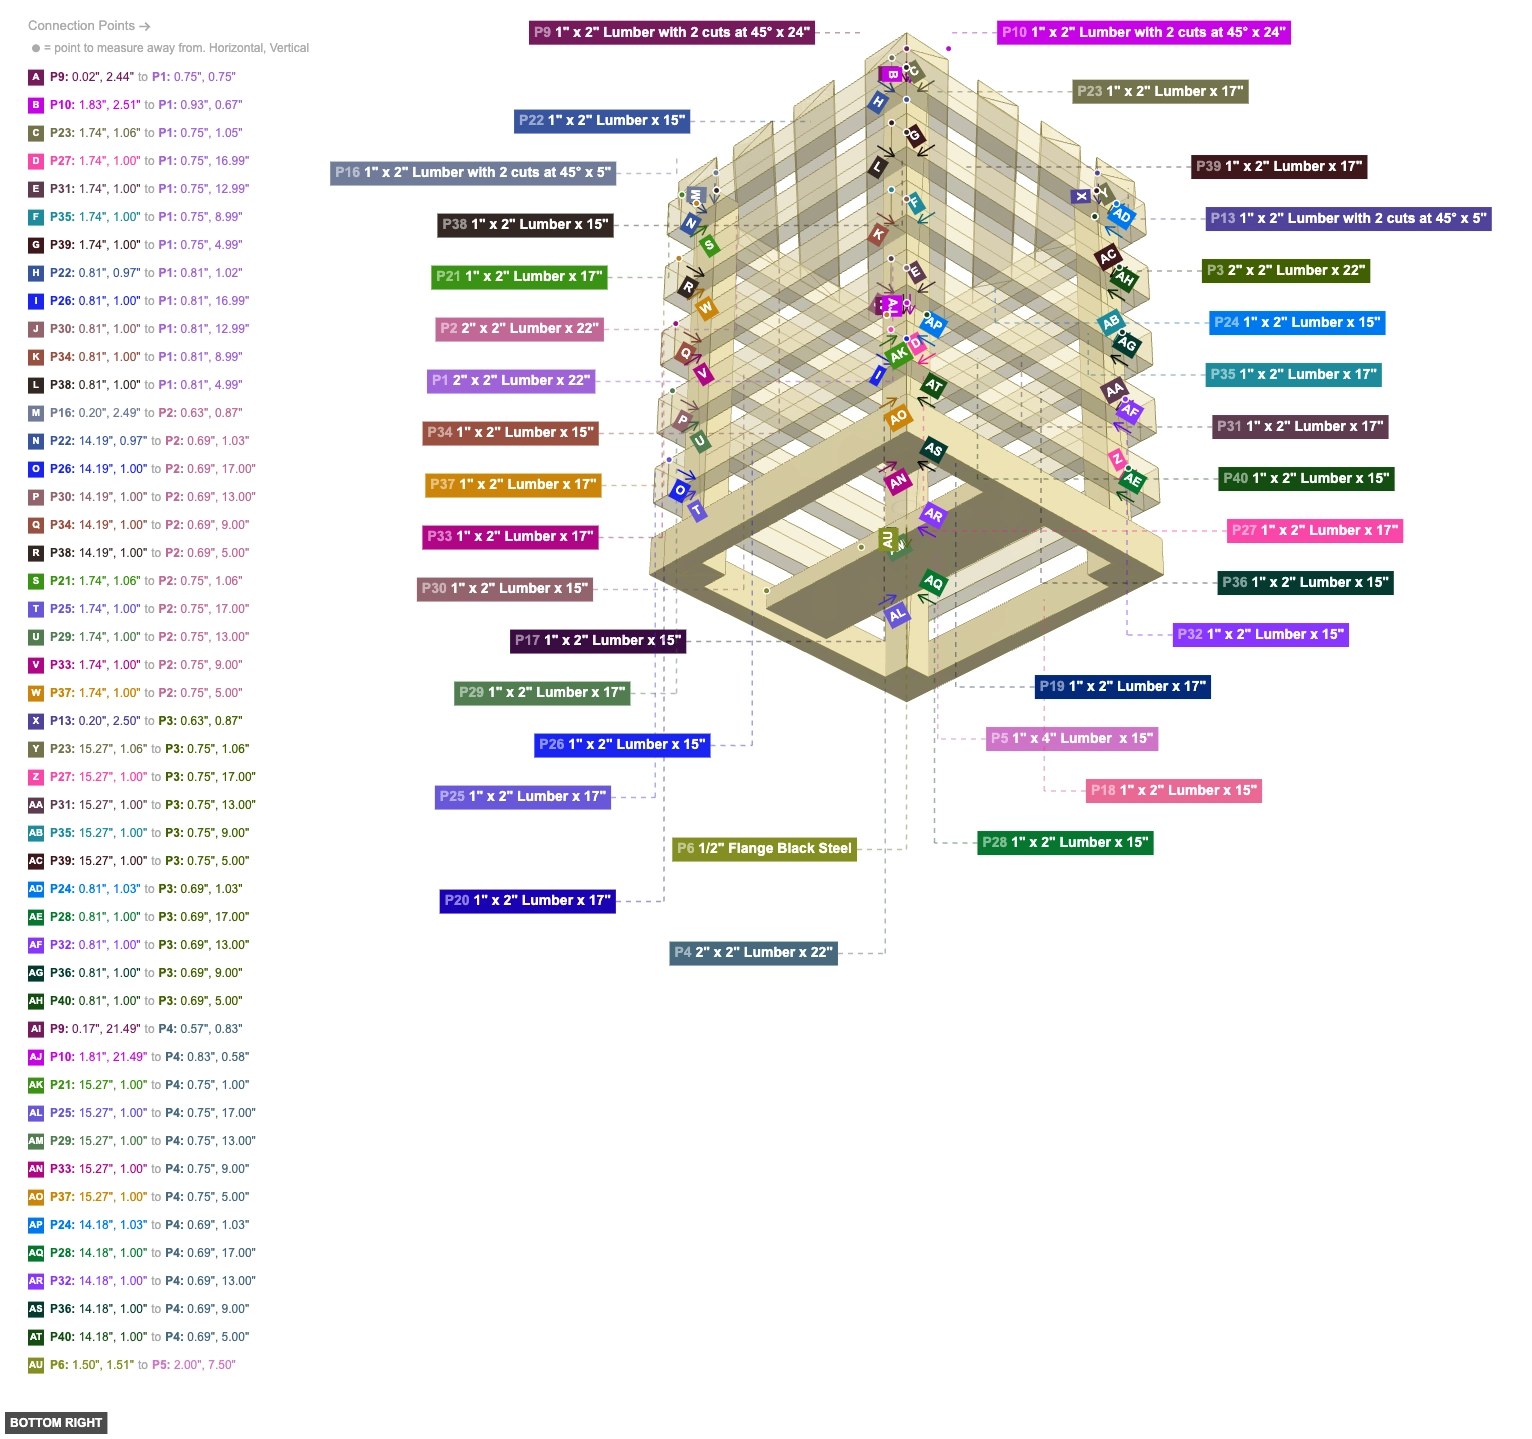
Attach the first two sets of horizontal layers above the base frame.

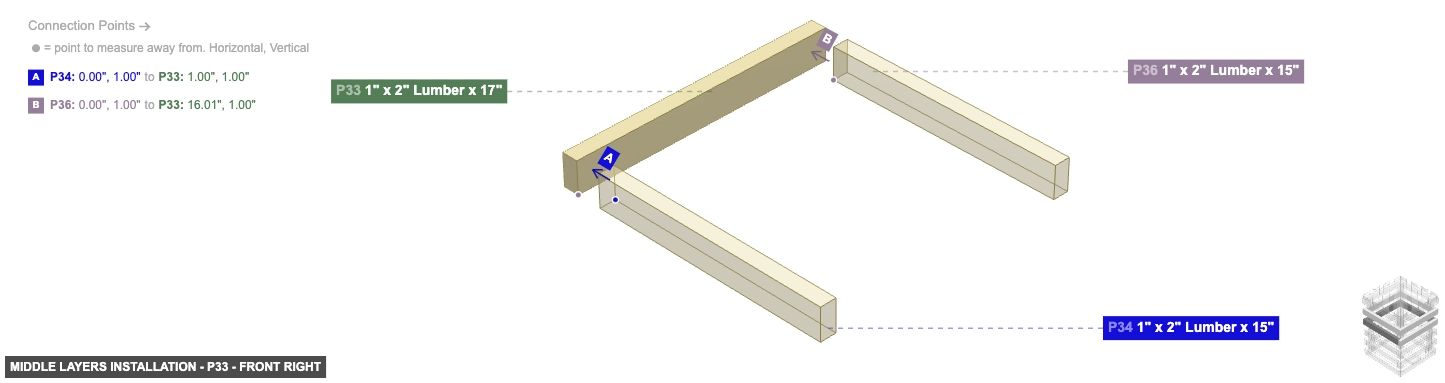
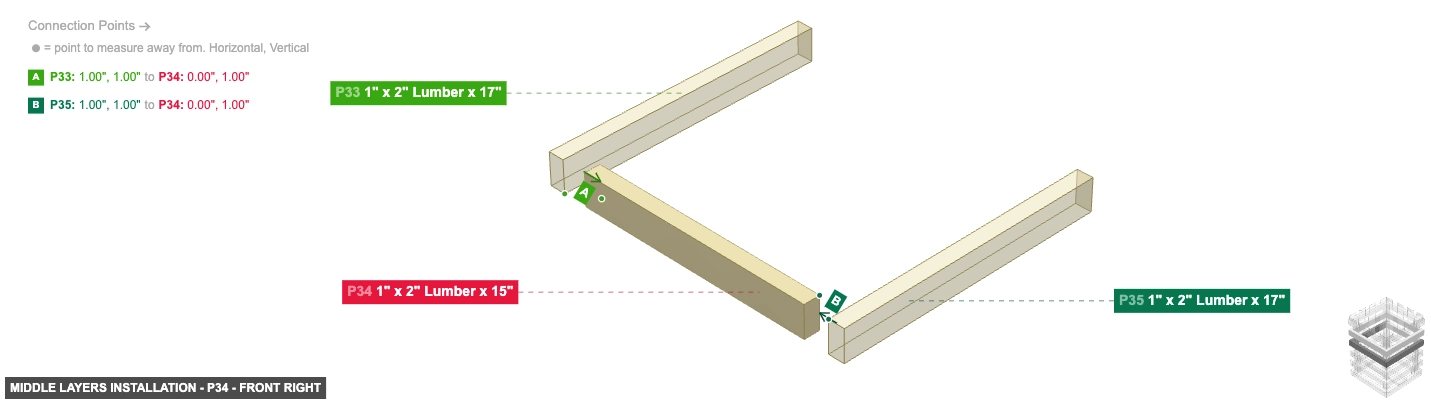
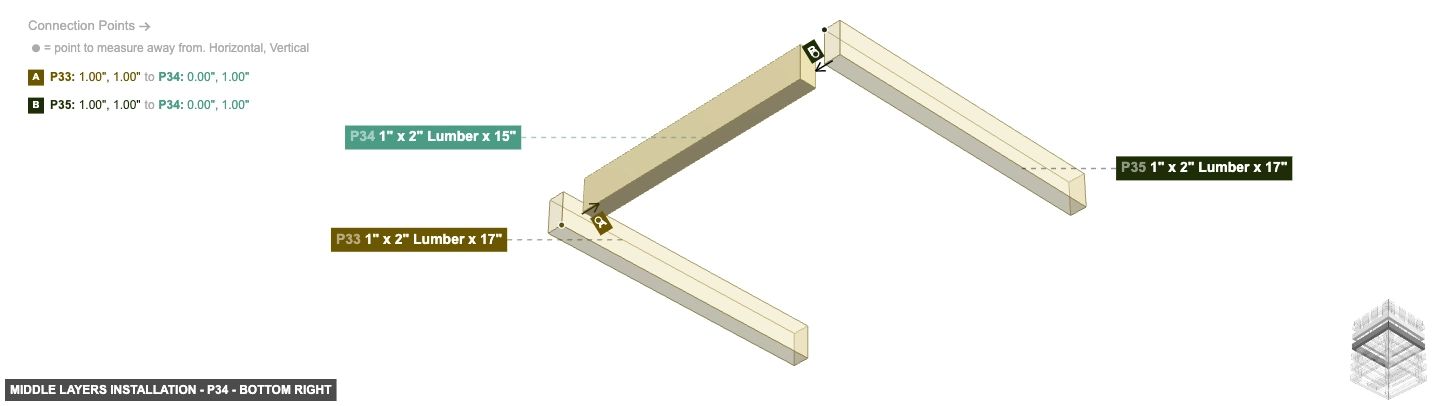
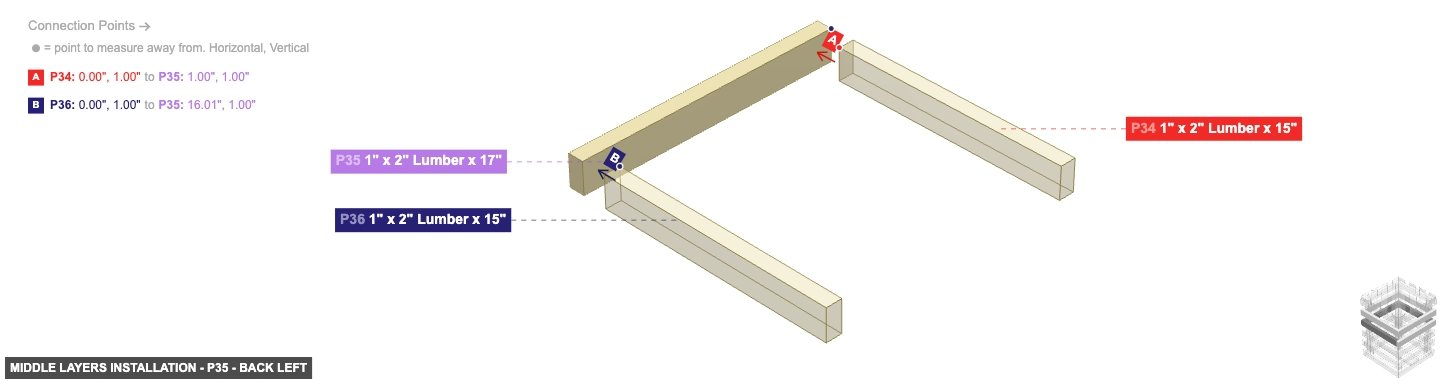
Attach the next two sets of horizontal layers.


Attach the final set of horizontal layers before the top structure.
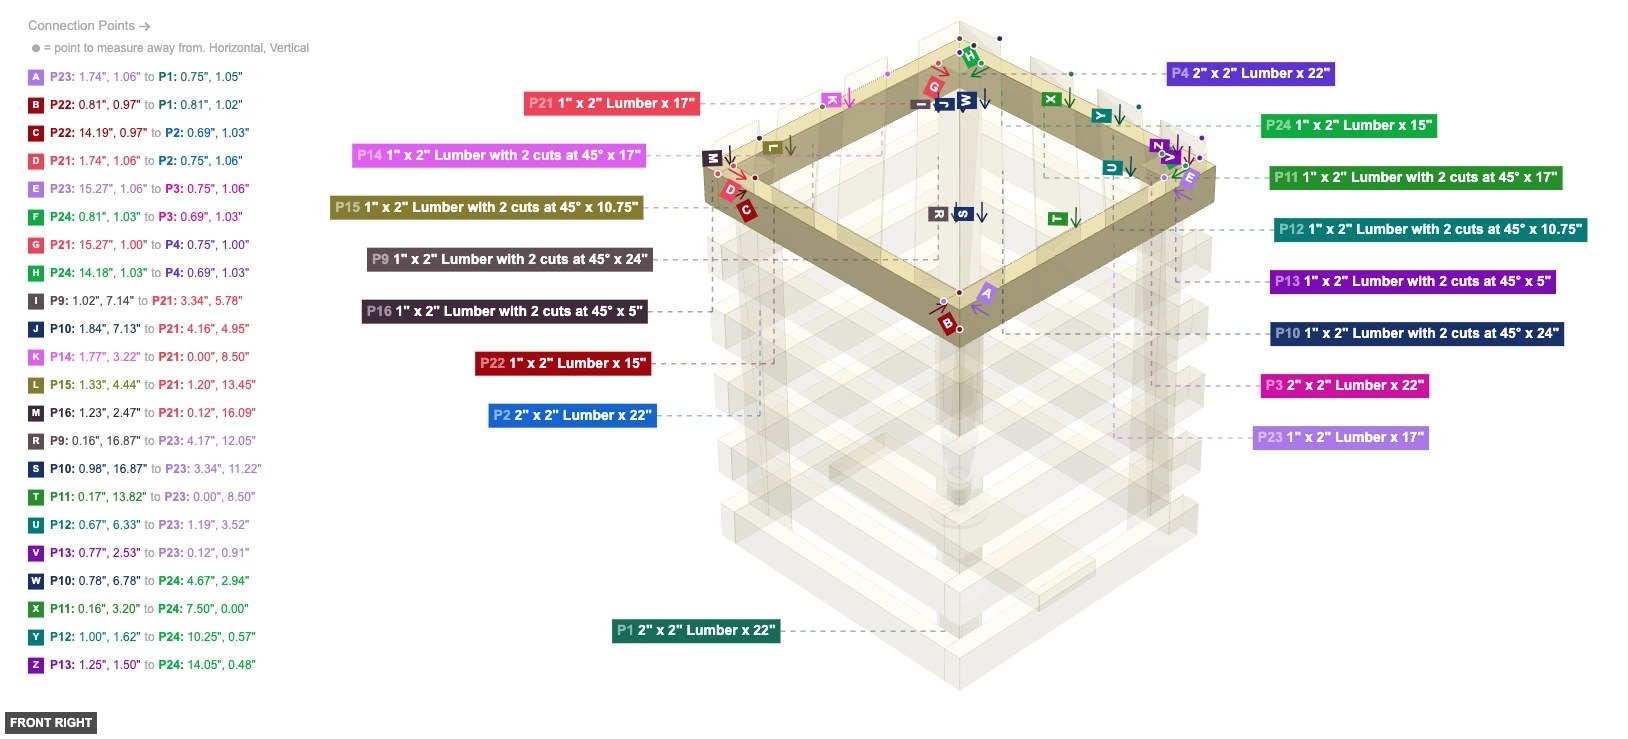
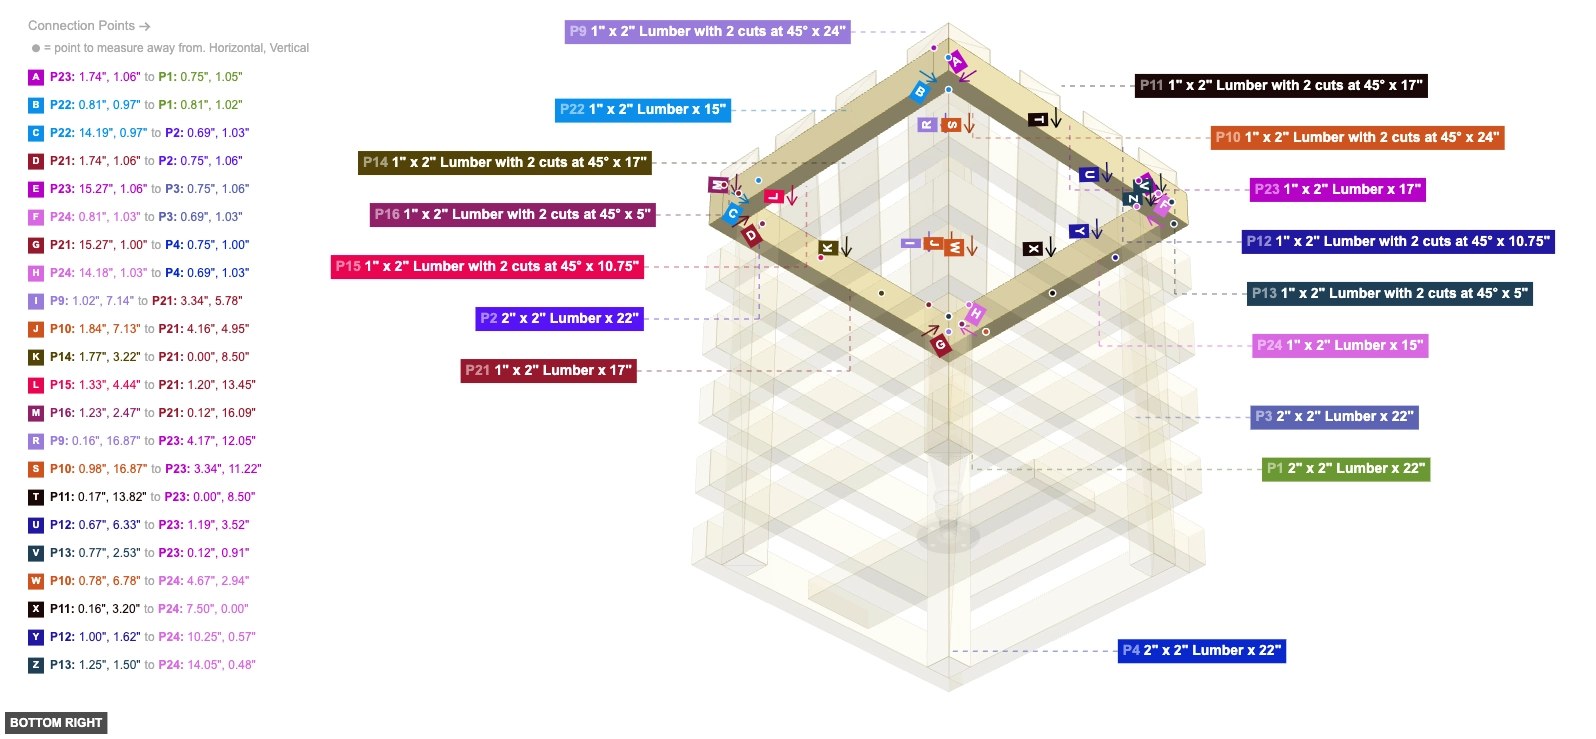
Assemble and attach the angled top pieces and supports.

Assemble the lamp components (flange, nipple, adapter) and attach them to the lamp base (P5).