A tall, multi-shelf storage unit constructed from T-slot aluminum extrusions. It features a wheeled base, three main vertical supports (one on the left, two closely spaced on the right side), numerous small shelves attached cantilever-style to these supports, diagonal bracing for stability, and a top connecting rail. - Tall Aluminum Organizer/Shelving Unit -A tall, multi-level shelving unit or organizer constructed primarily from aluminum T-slot rails, angle joints, and end caps. It features a wheeled base, three main vertical supports, and numerous small divider units forming shelves or compartments stacked vertically. - Aluminum Organizer/Shelving Unit -A tall, multi-level shelving unit constructed from aluminum T-slot extrusions, angle connectors, and end caps. It features multiple shelf levels of varying configurations mounted on three main vertical posts, supported by a wheeled base frame and reinforced with diagonal braces. - Tall Aluminum T-Slot Organizer/Shelving Unit


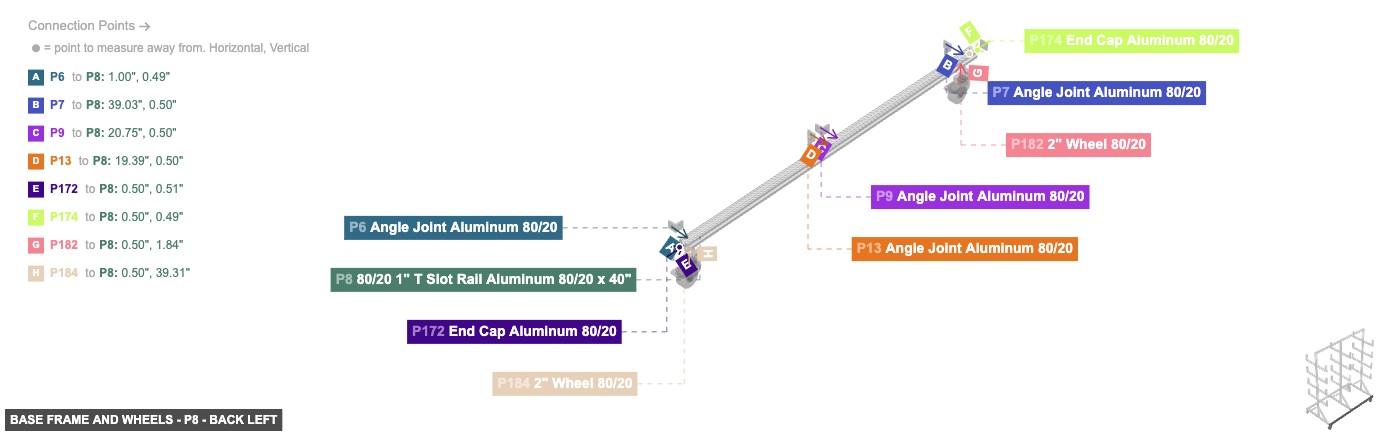
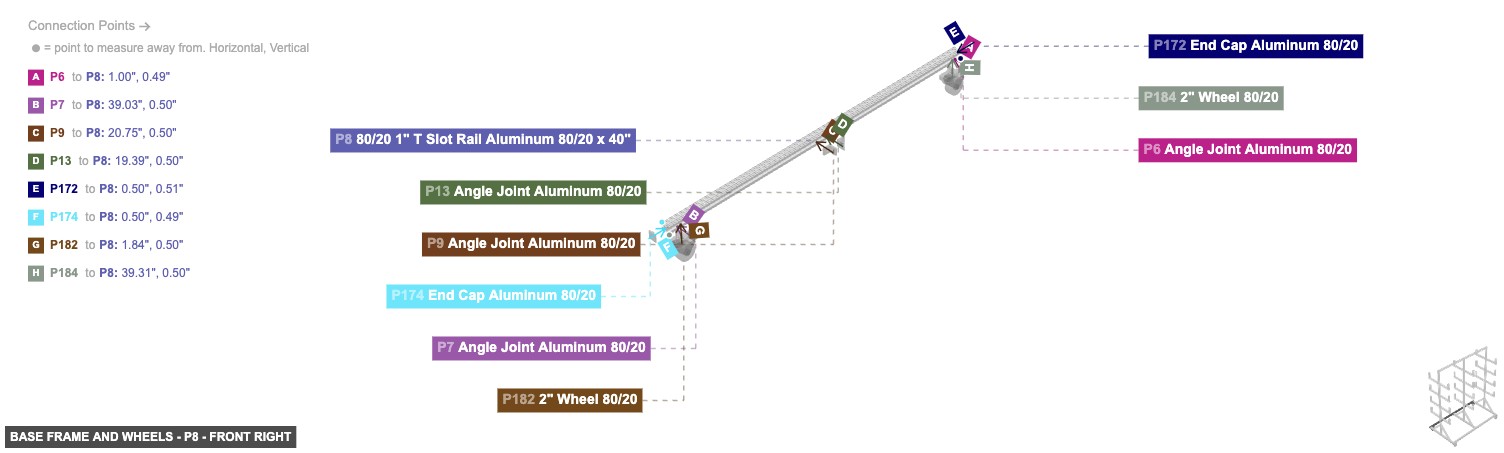
Forms the bottom foundation of the organizer and provides mobility.
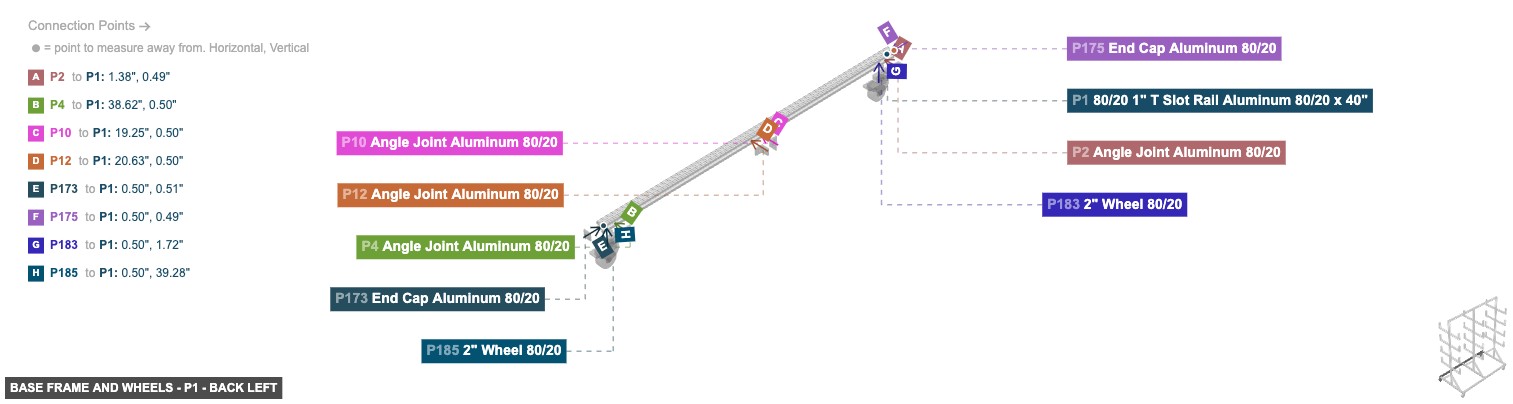
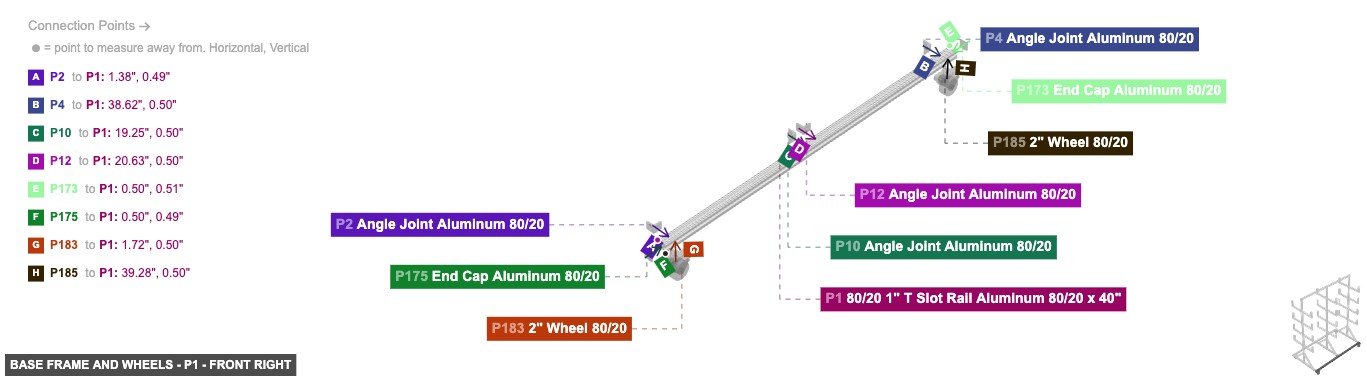
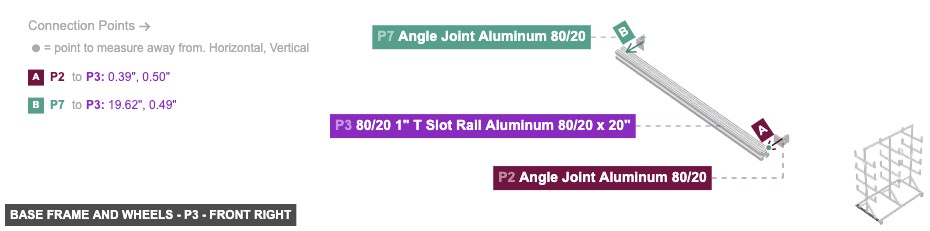
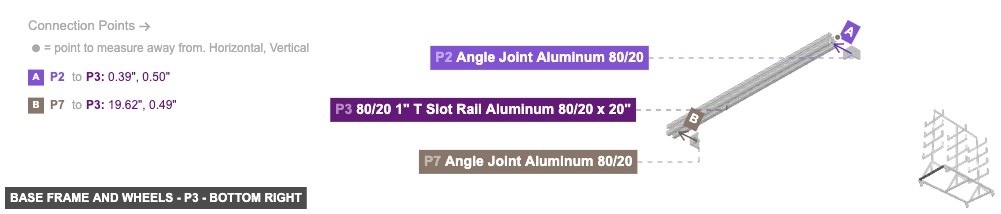
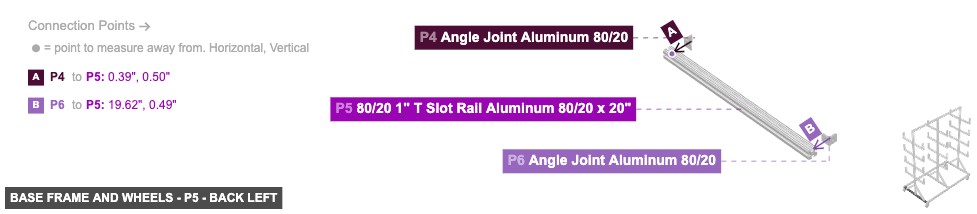
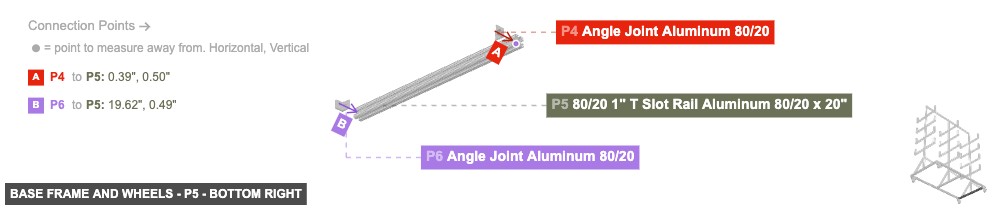
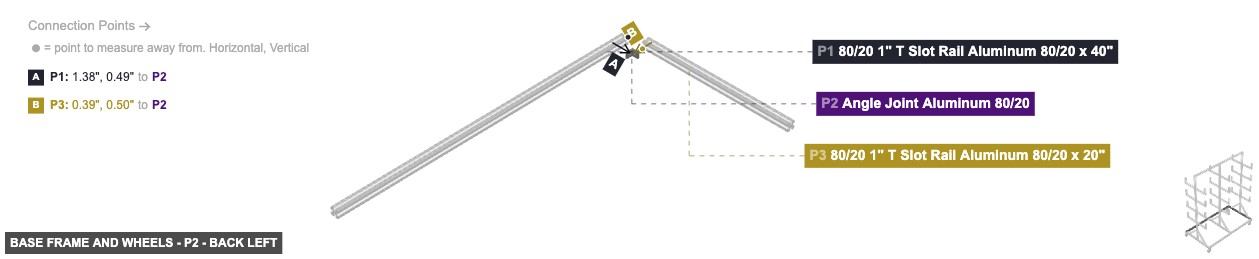
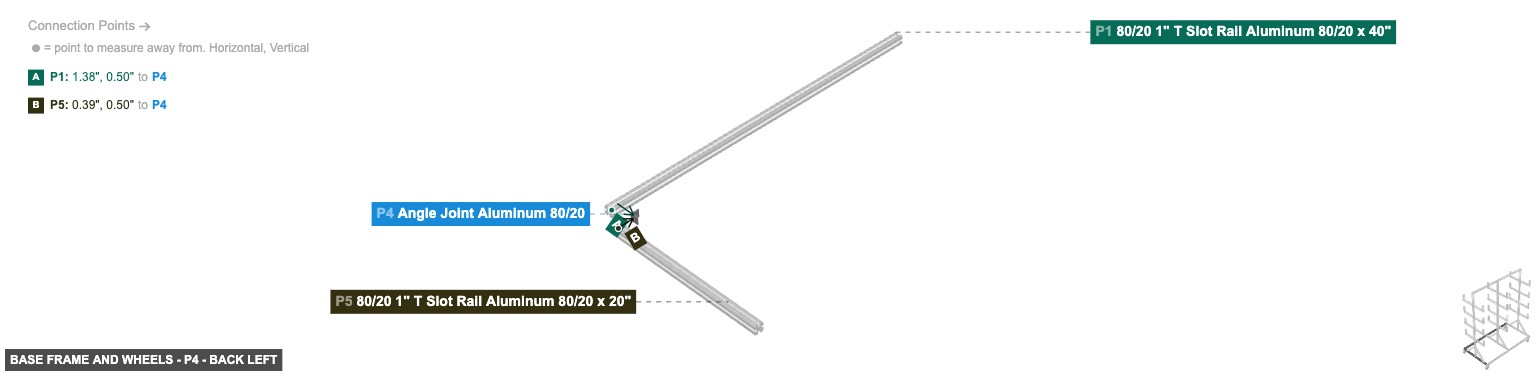
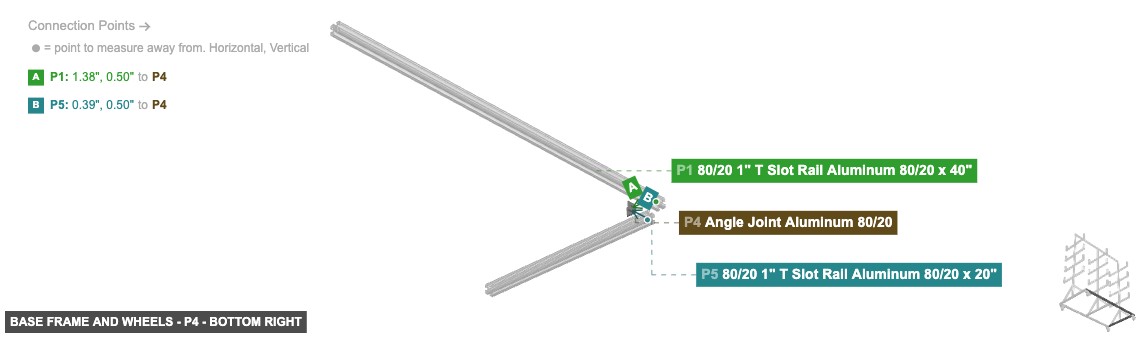
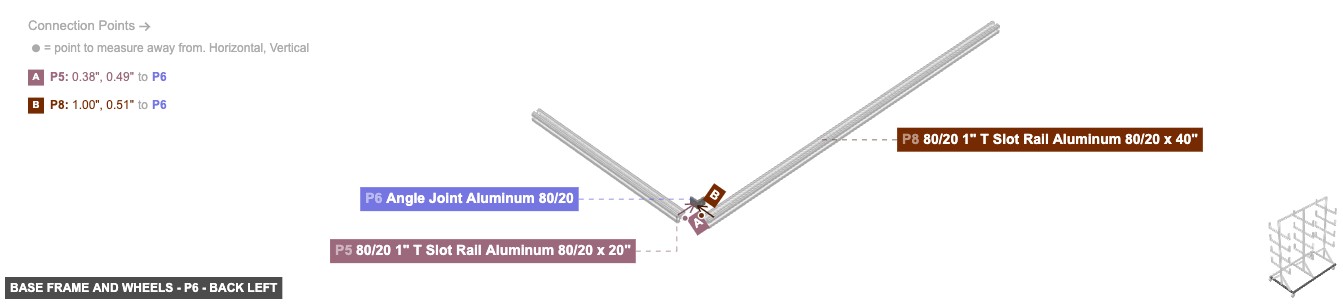
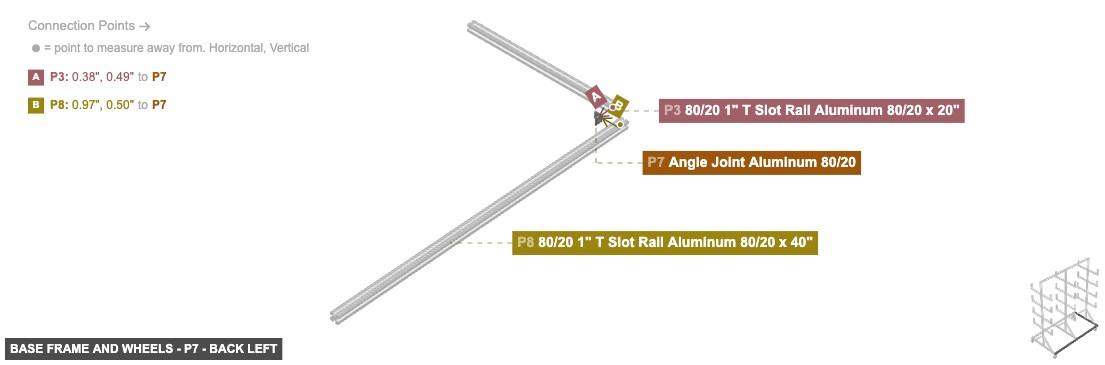
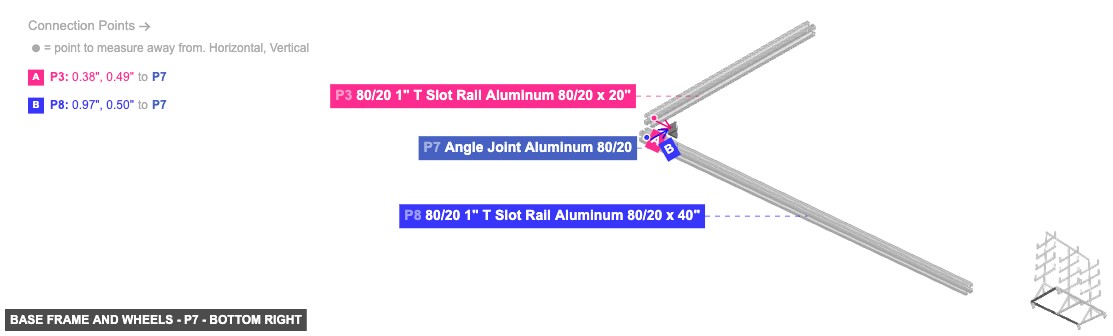
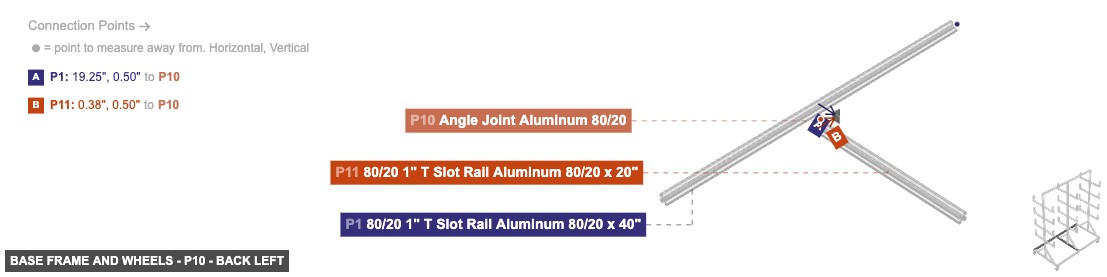
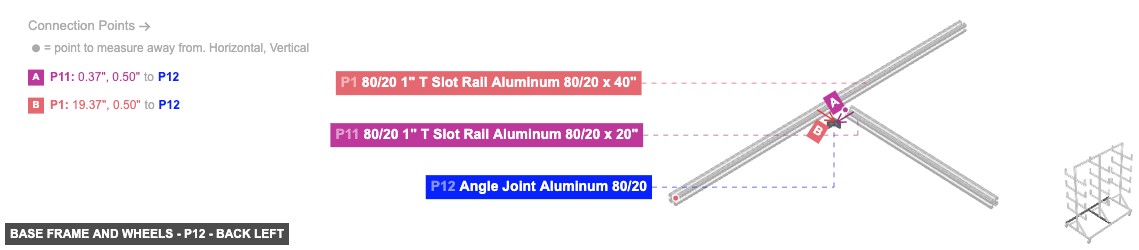
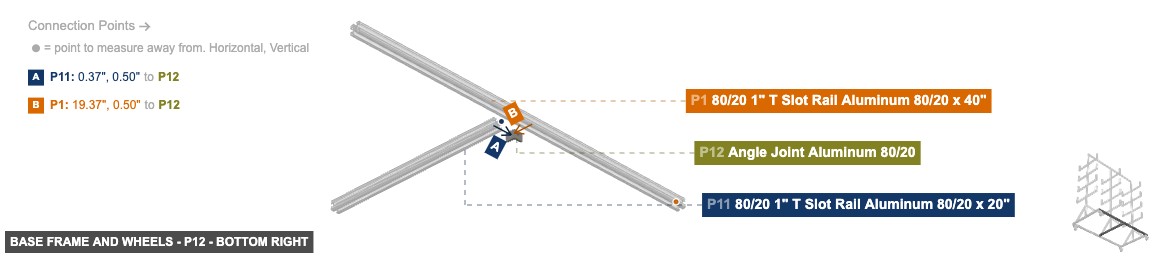
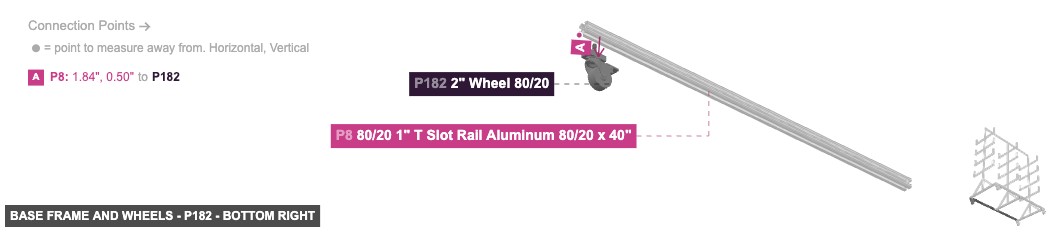
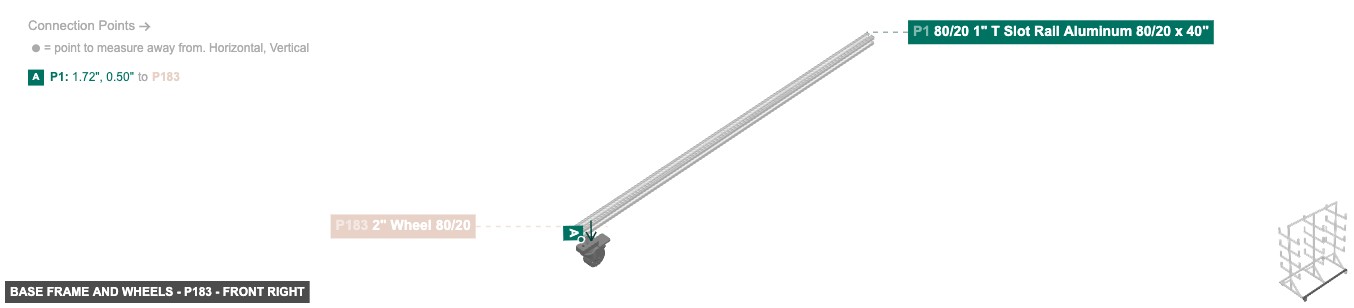
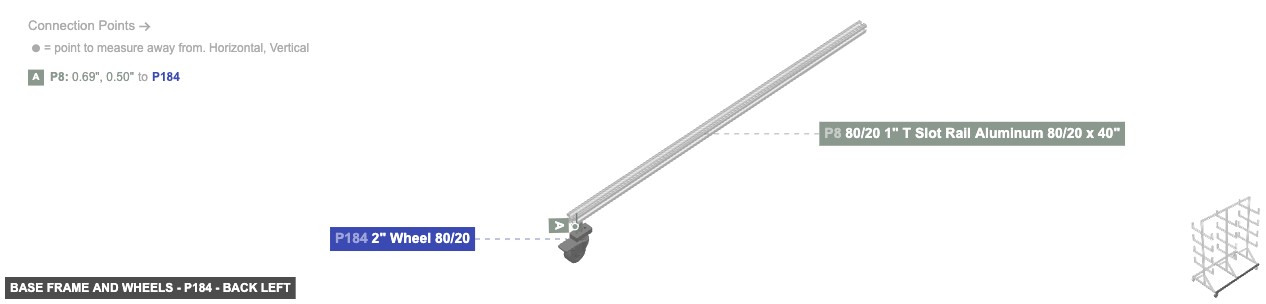
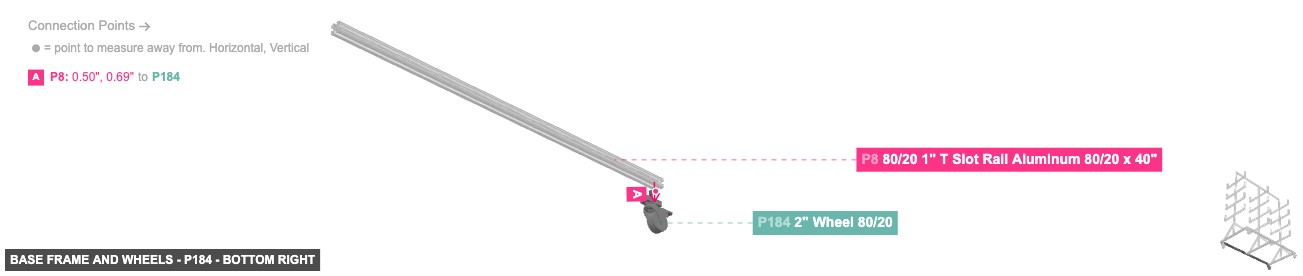
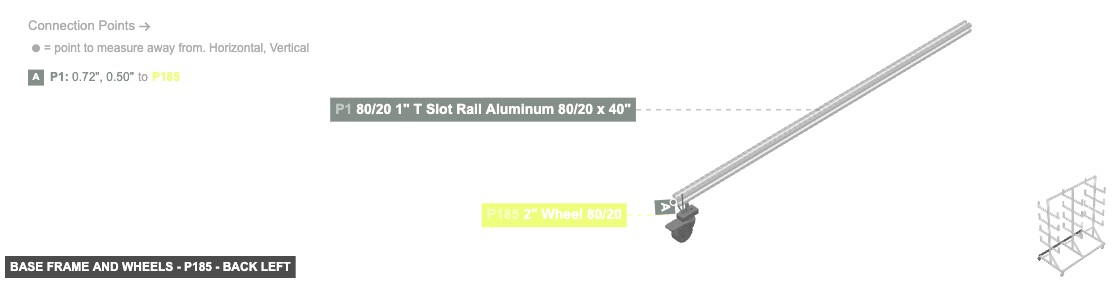
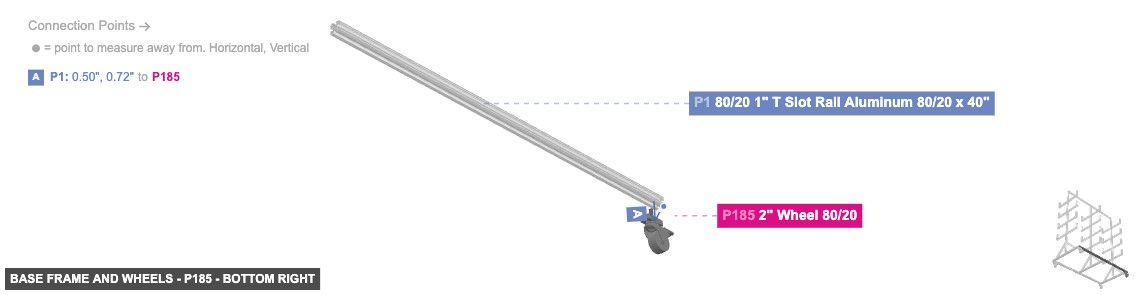
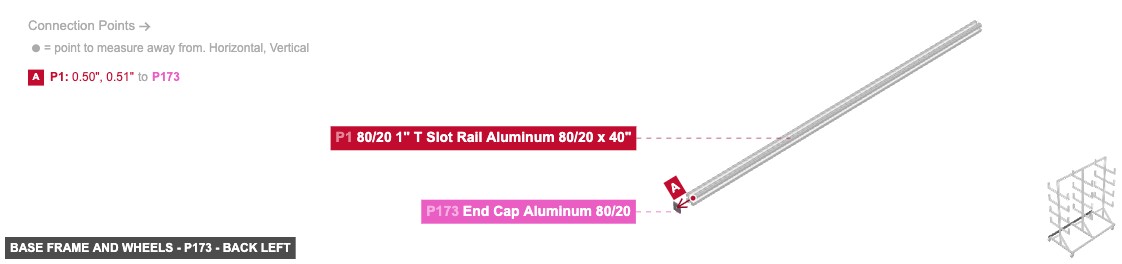
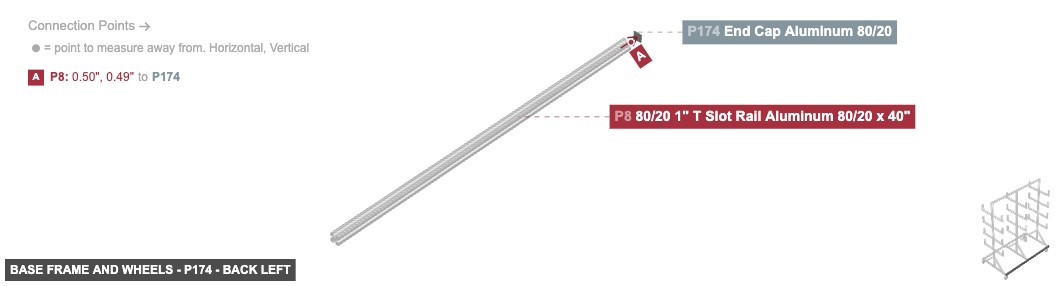
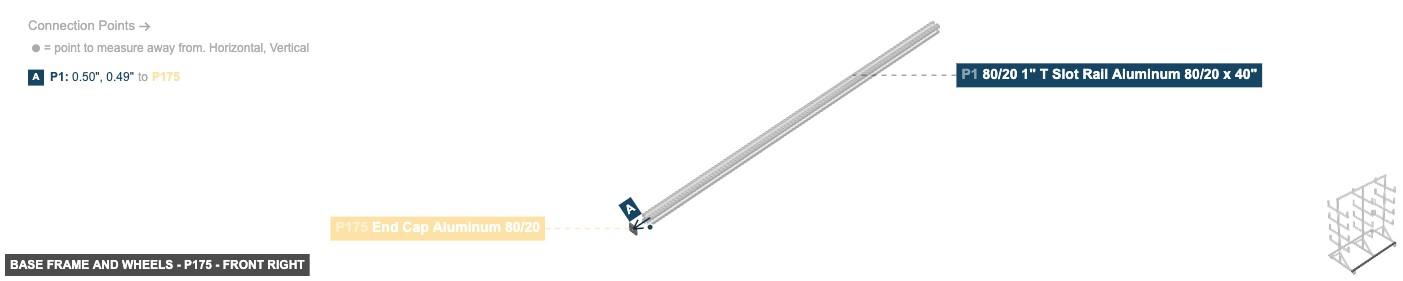
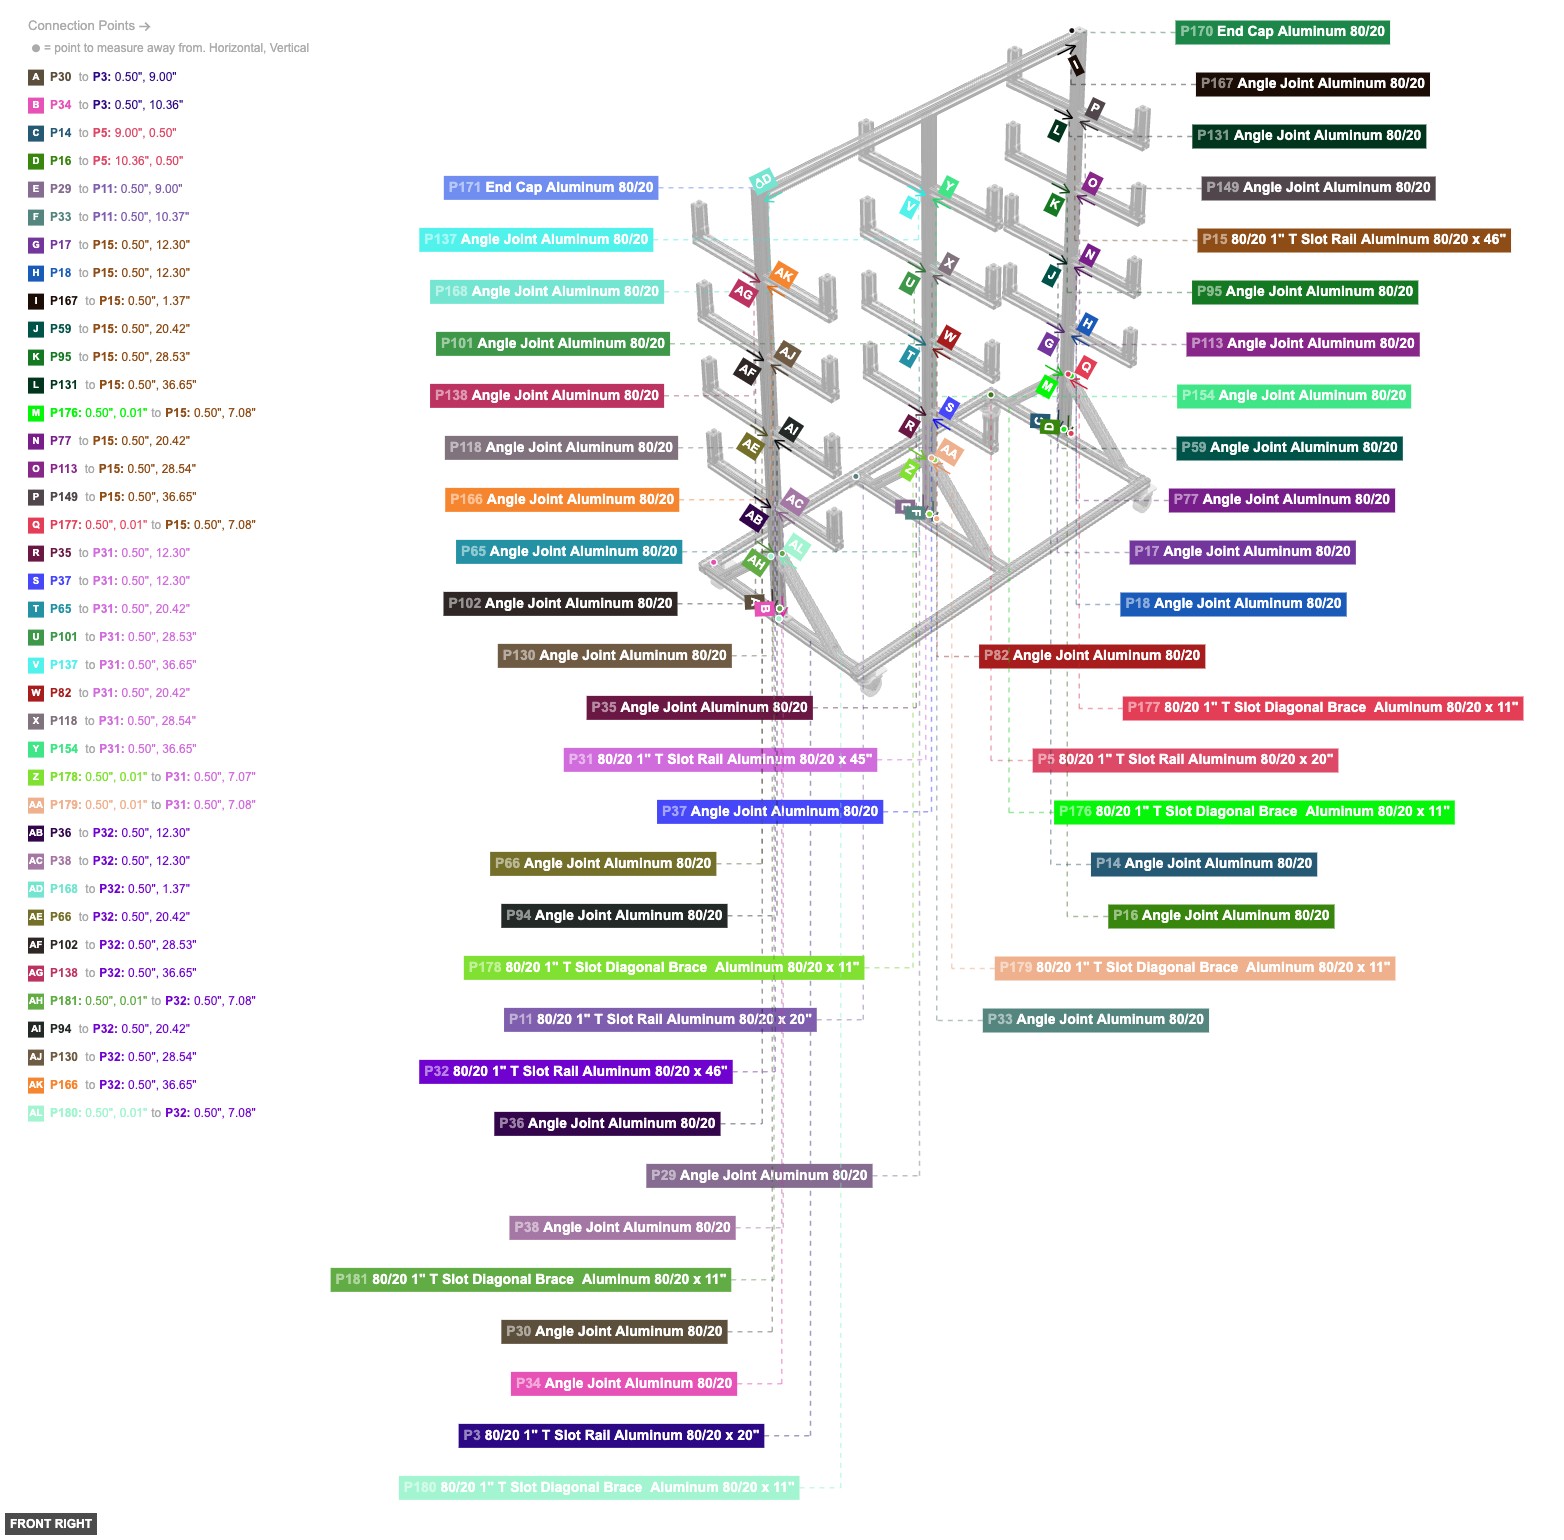
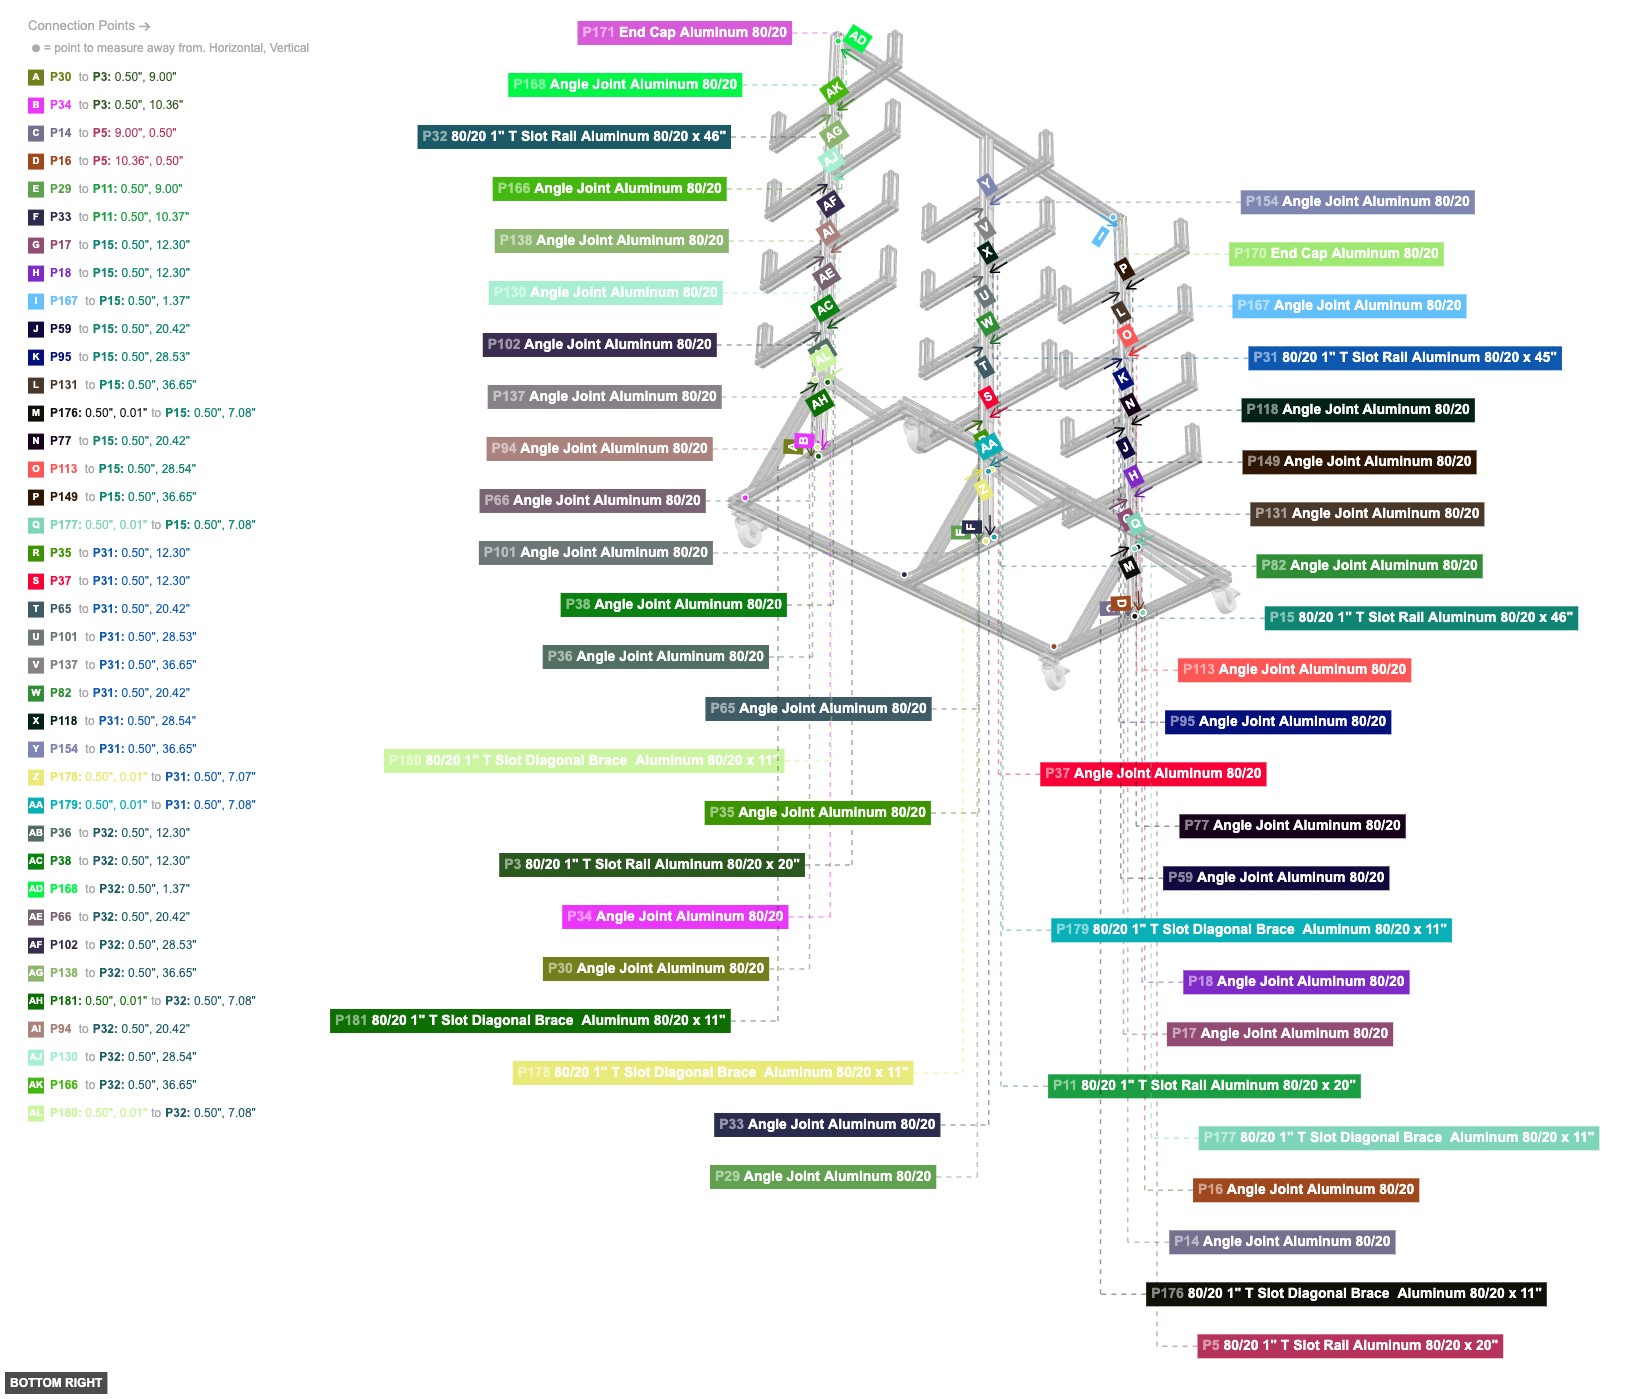
Connect the long bottom rails (P1, P8) to the shorter bottom rails (P3, P5, P11) using Angle Joints (P2, P4, P6, P7, P9, P10, P12, P13) to form a rectangle. Attach the Wheels (P182, P183, P184, P185) to the underside of the long rails (P1, P8) using their 1" Rail 80/20 Male connections. Attach End Caps (P172, P173, P174, P175) to the open 1" 80/20 End Holes of the long rails (P1, P8).


Provides the main vertical structure supporting all the shelves.
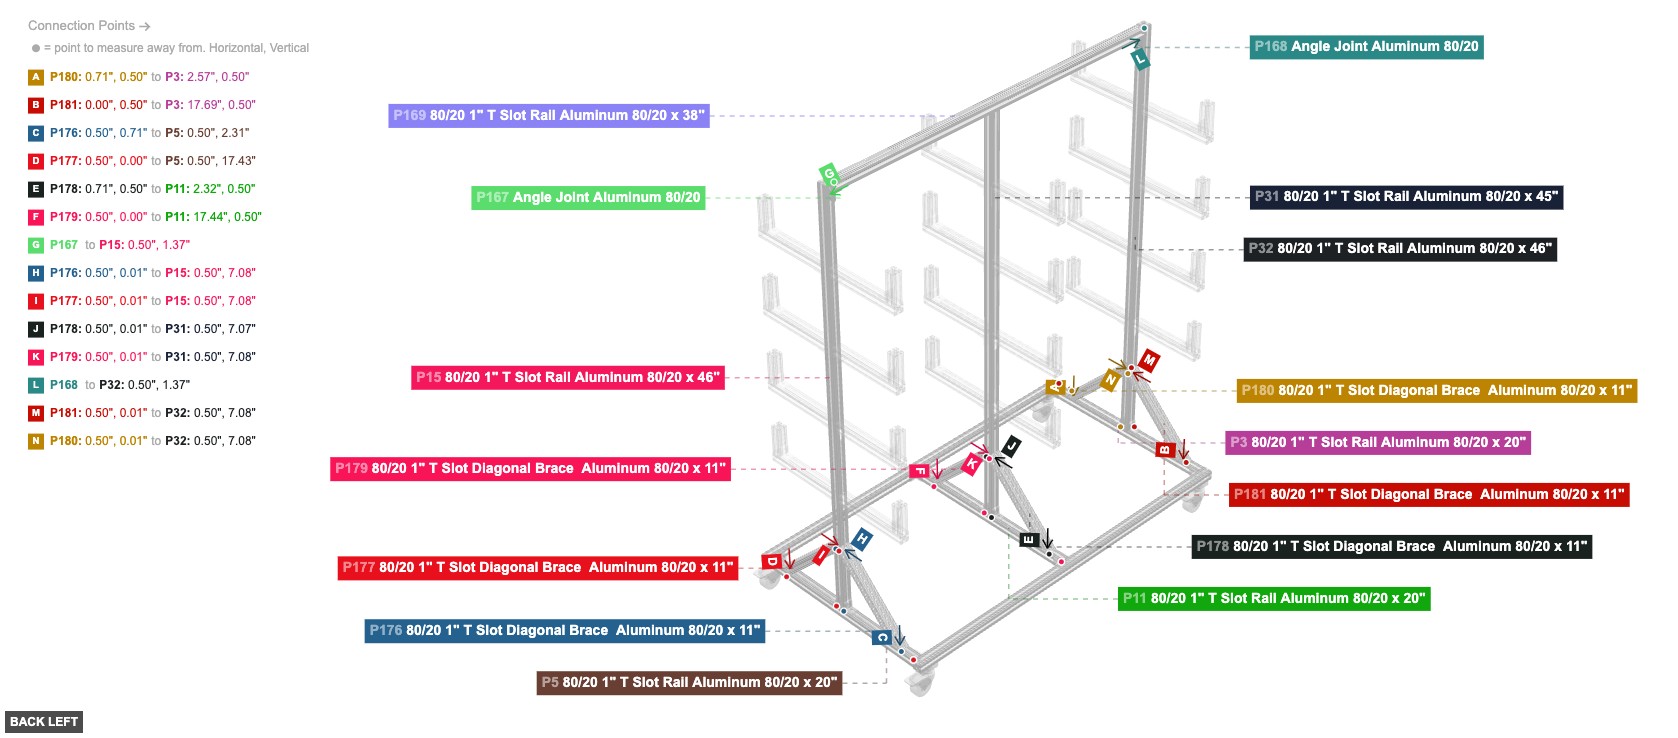
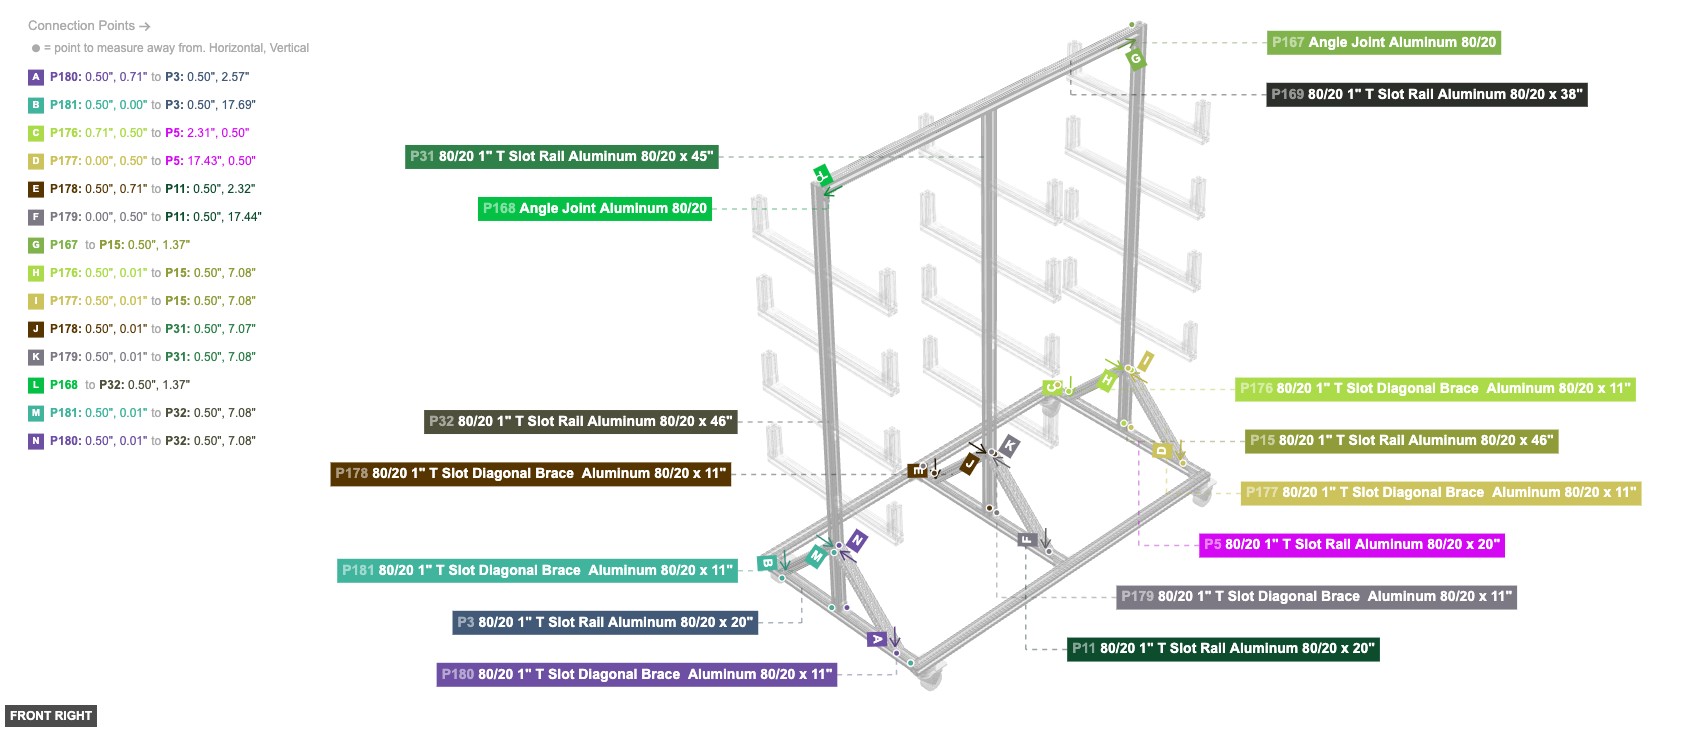
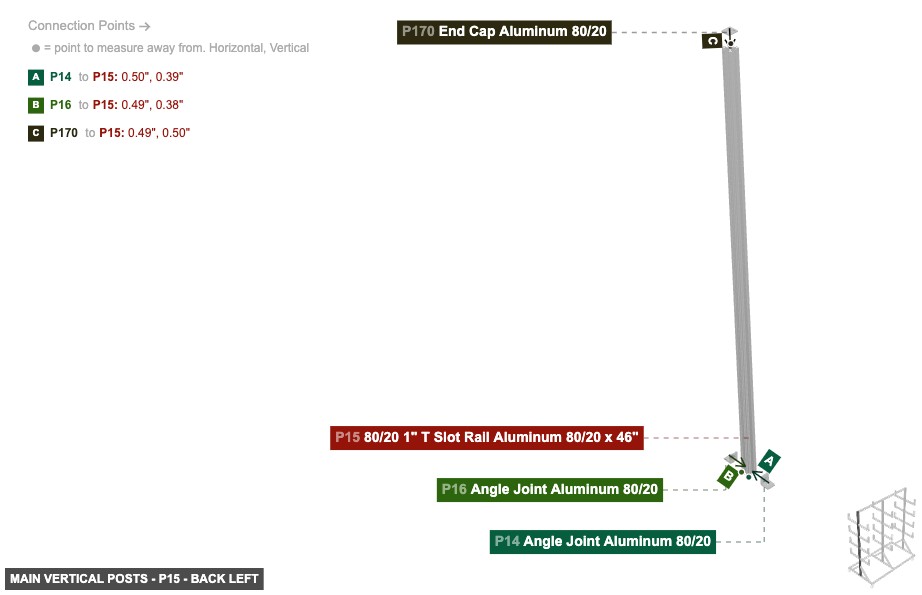
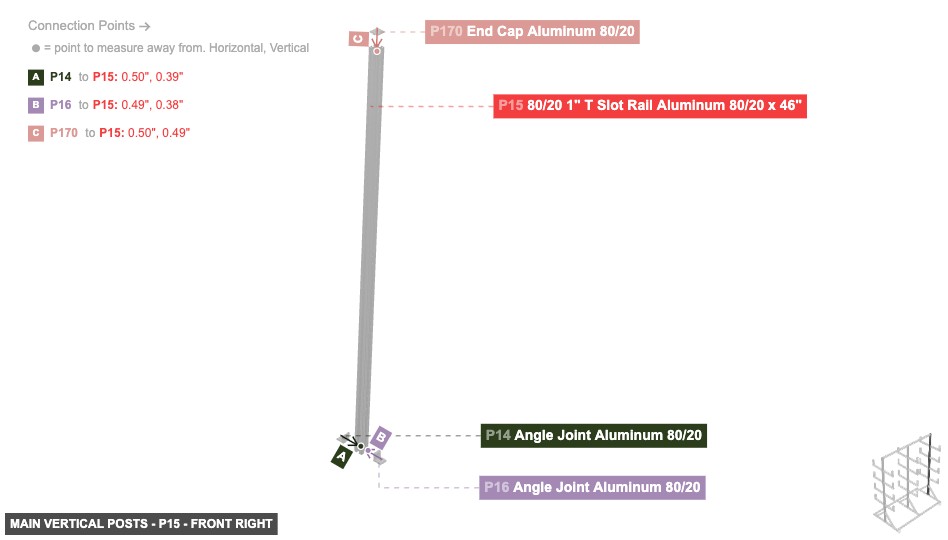
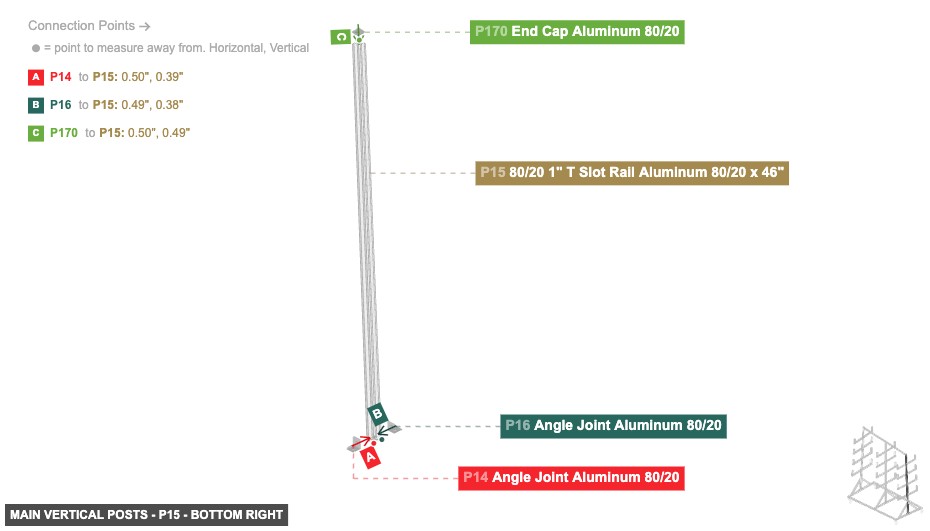
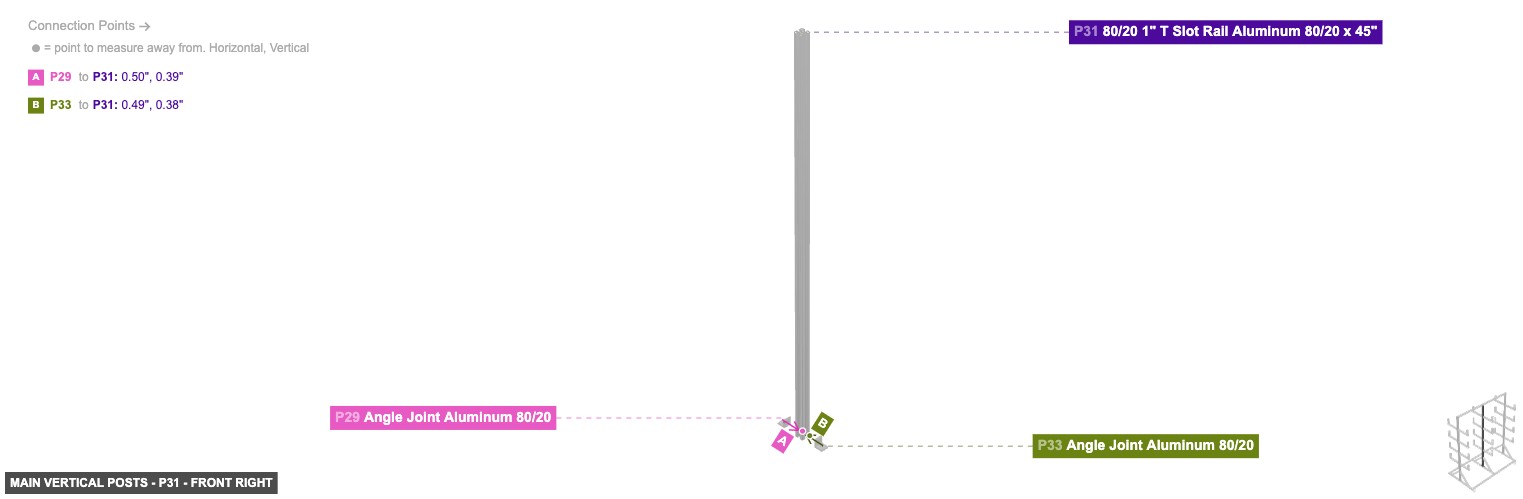
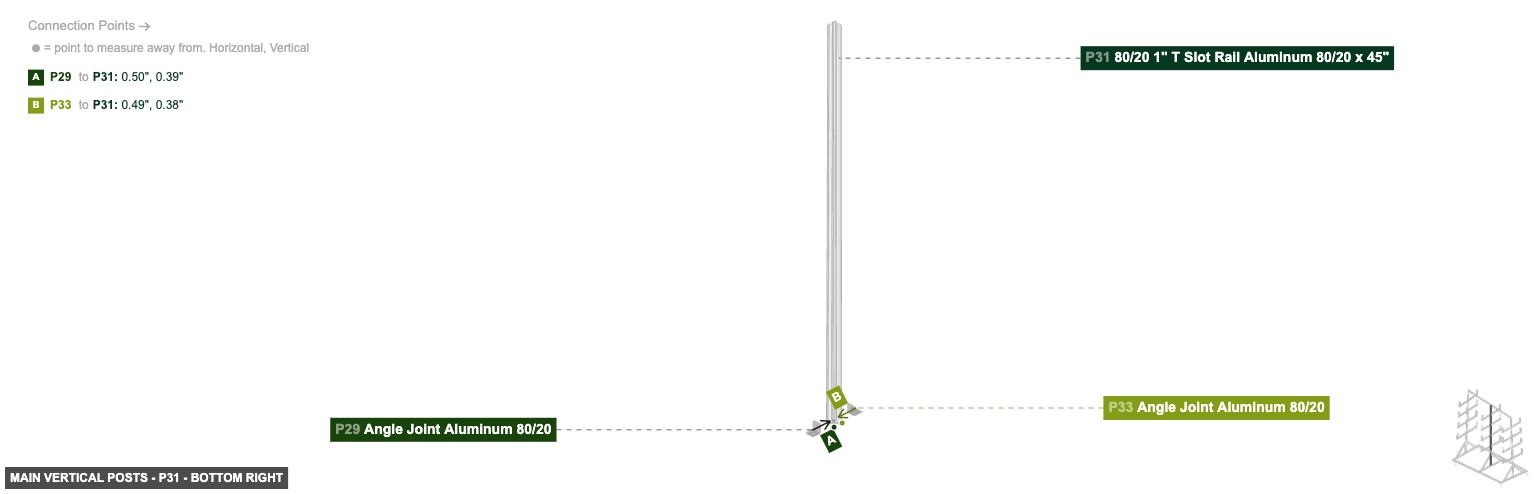
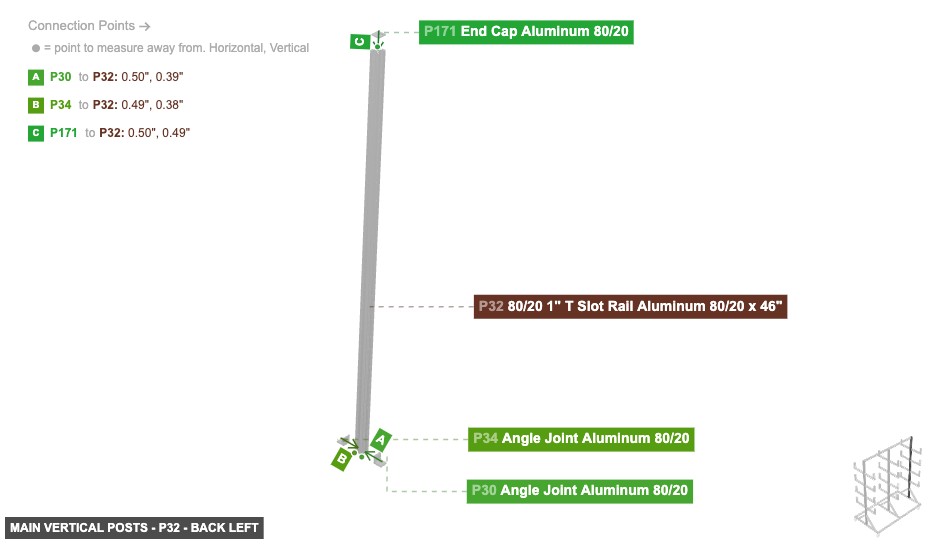
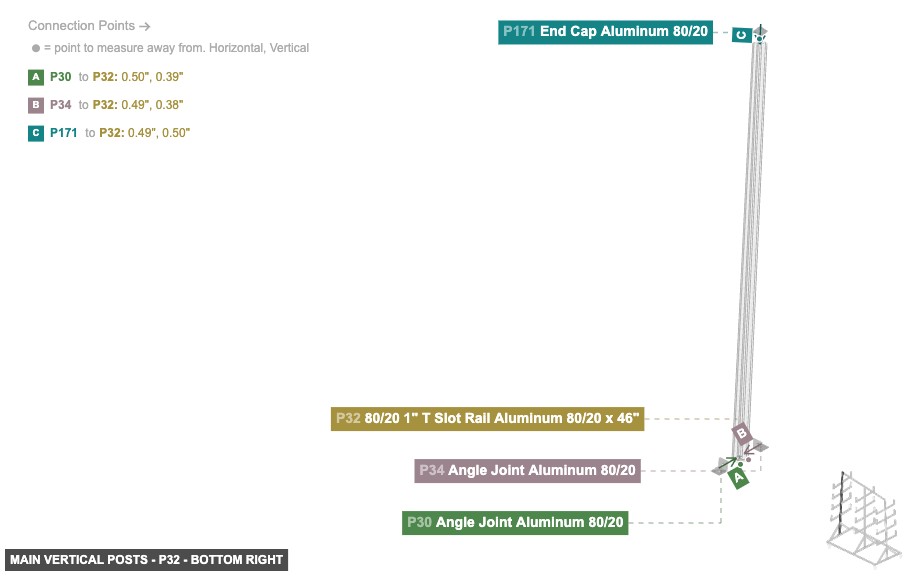
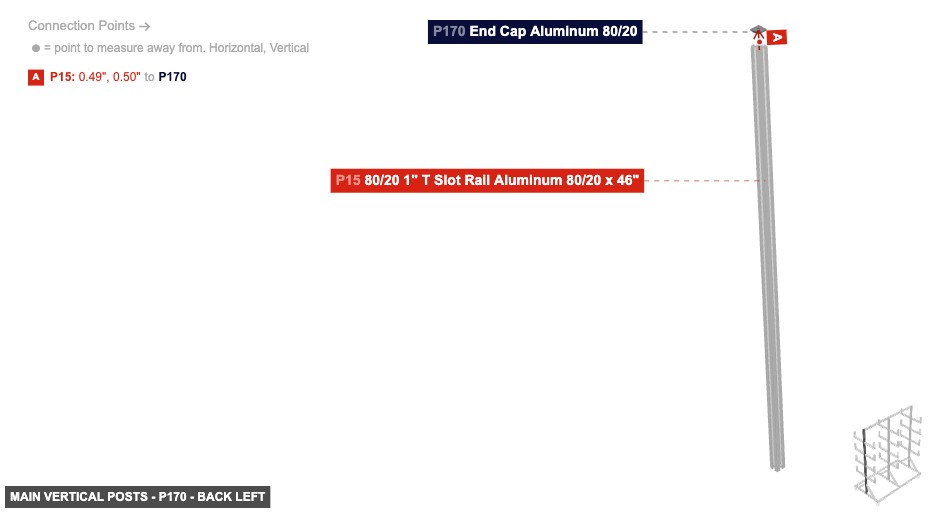
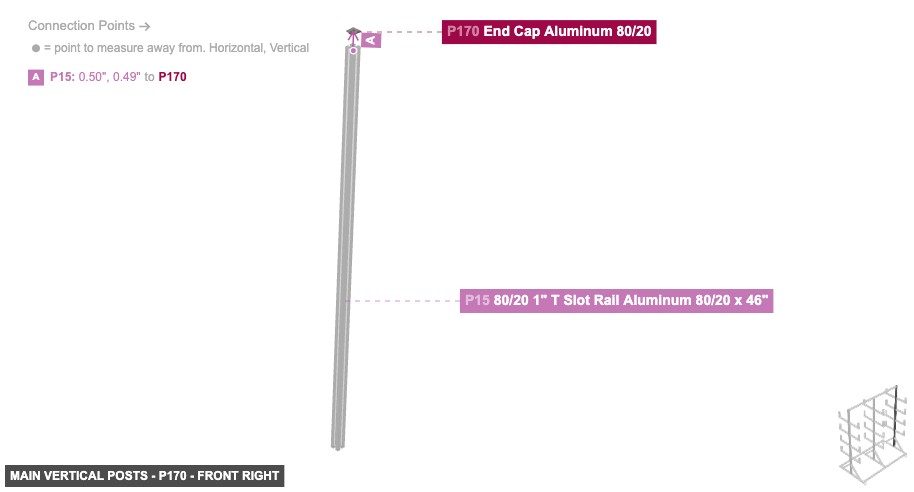
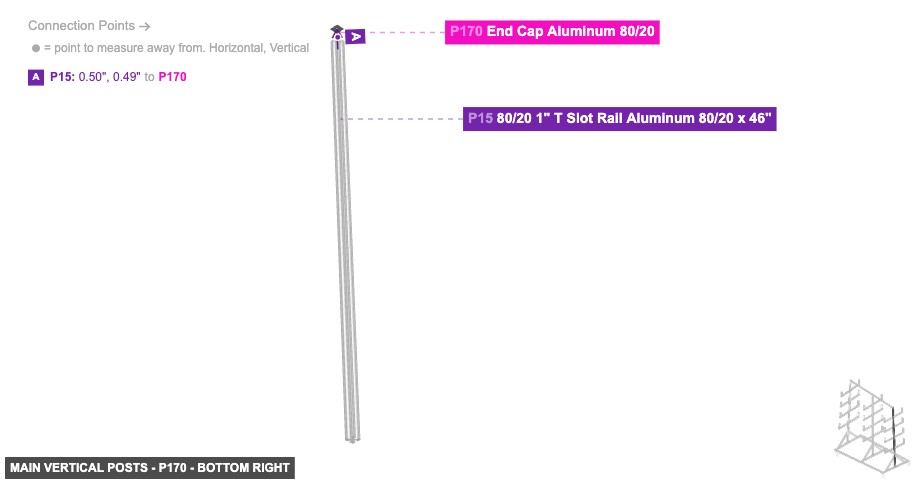
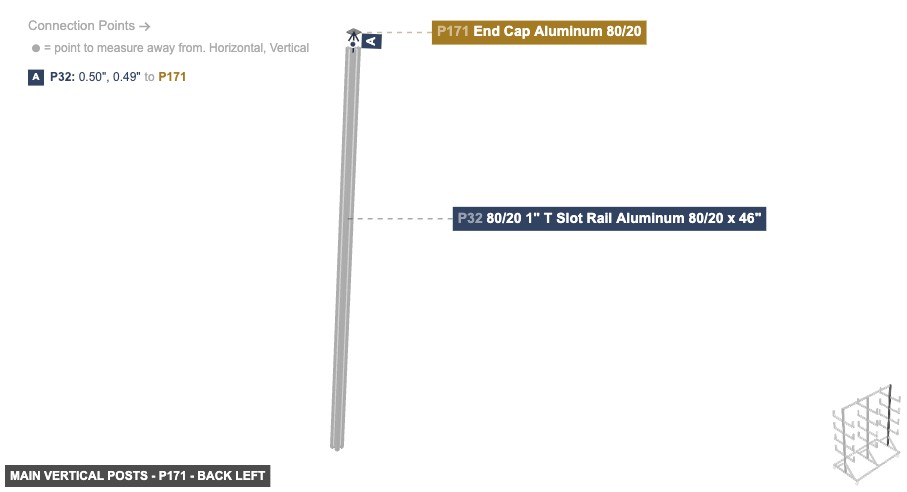
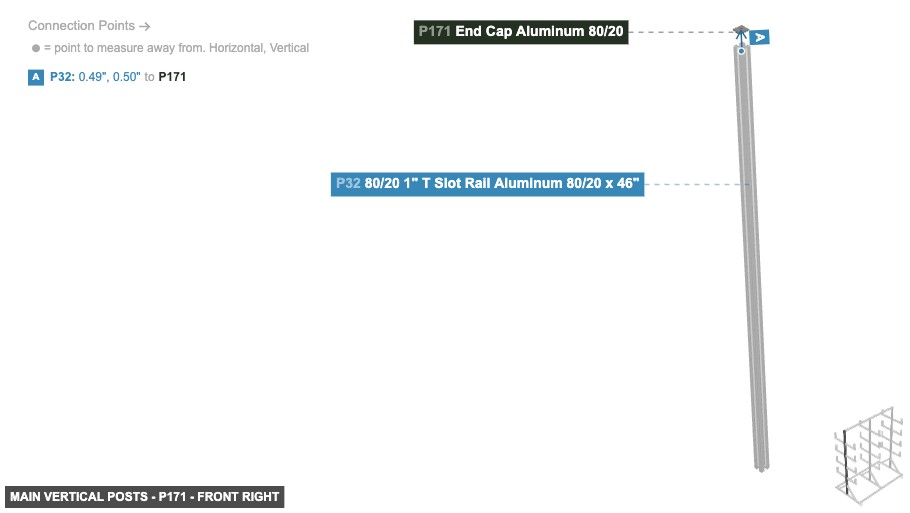
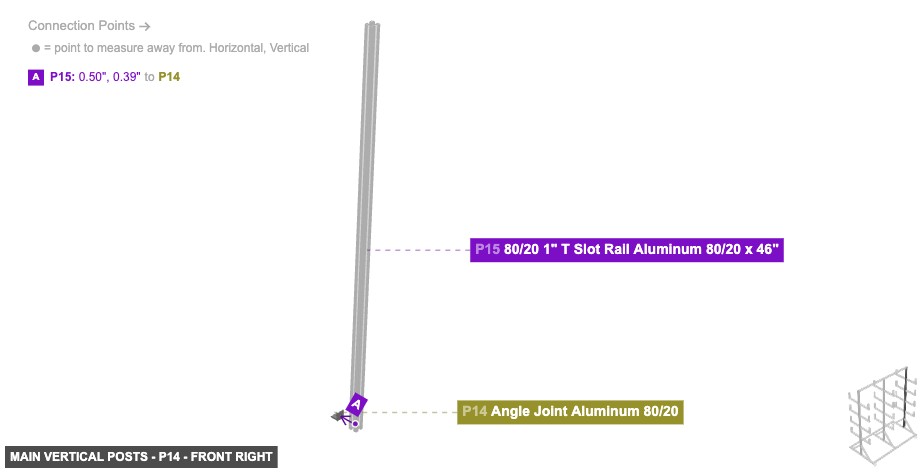
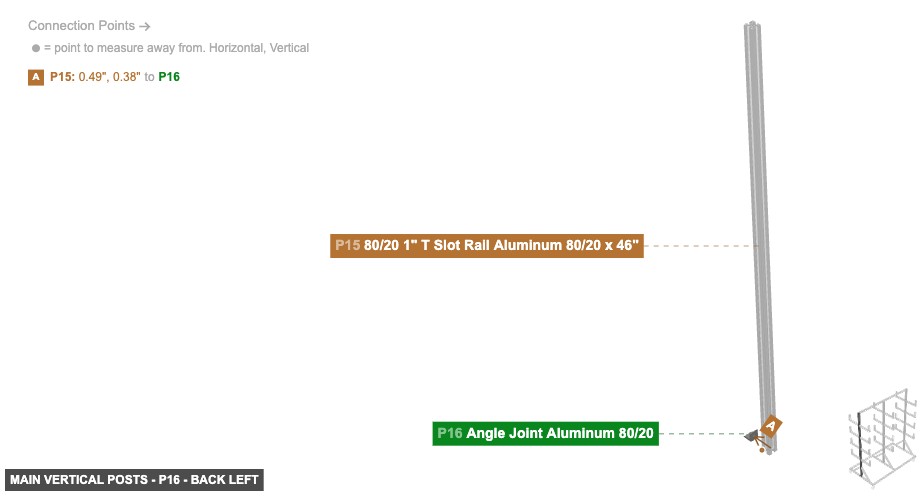
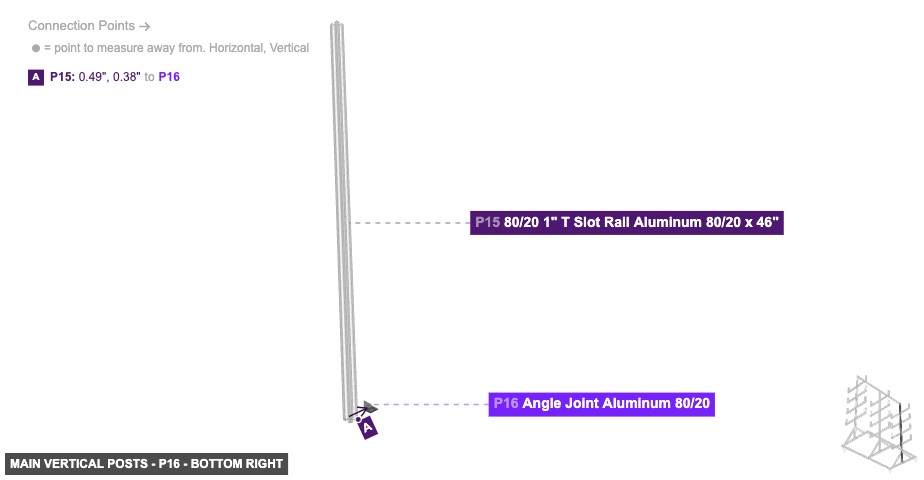
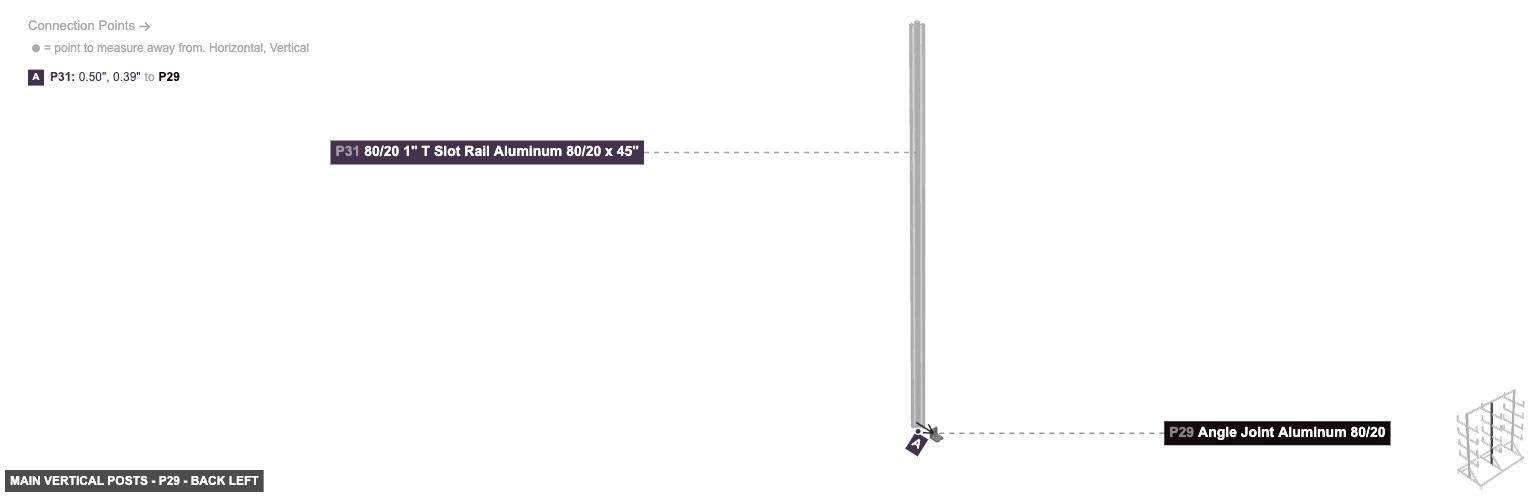
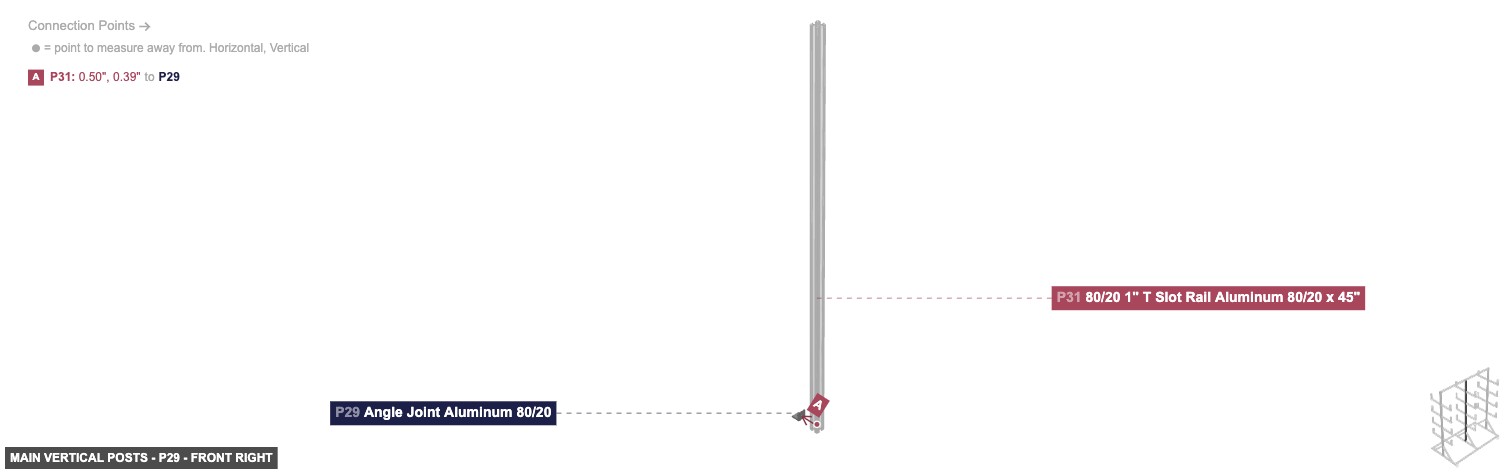
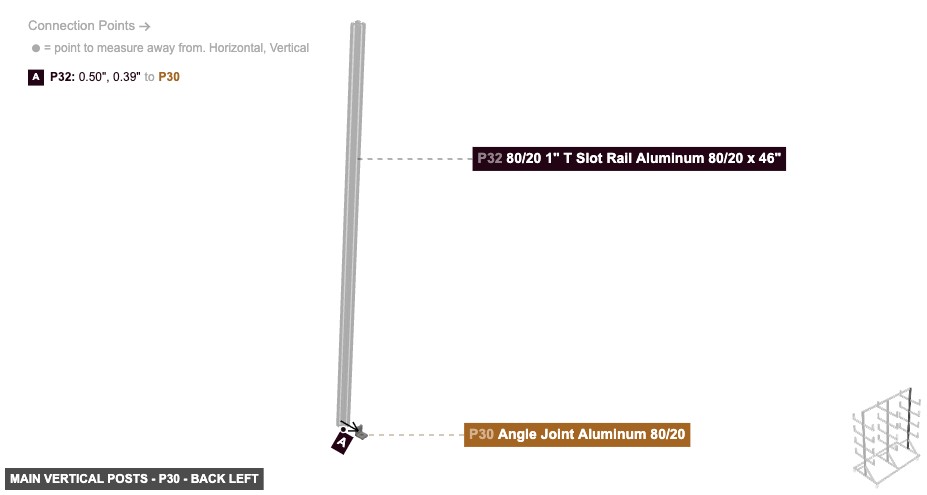
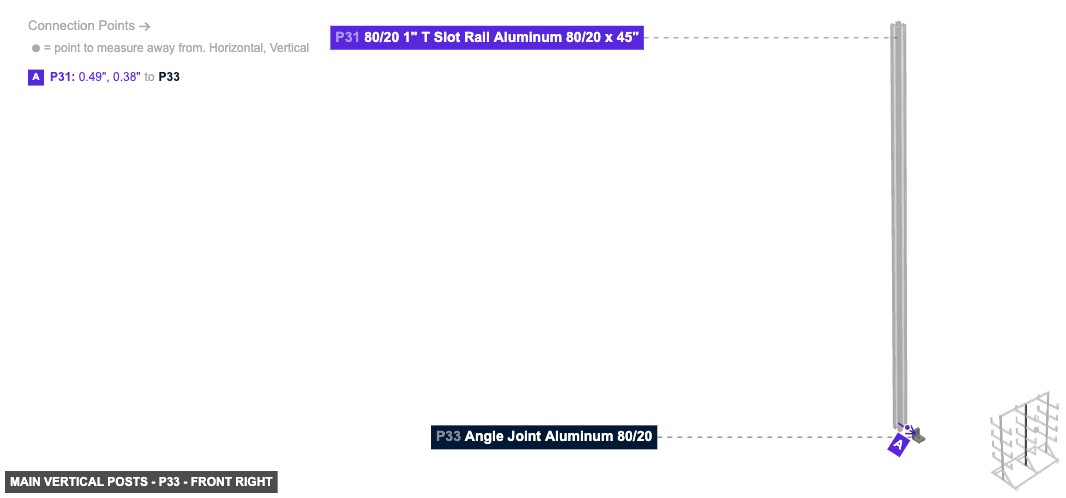
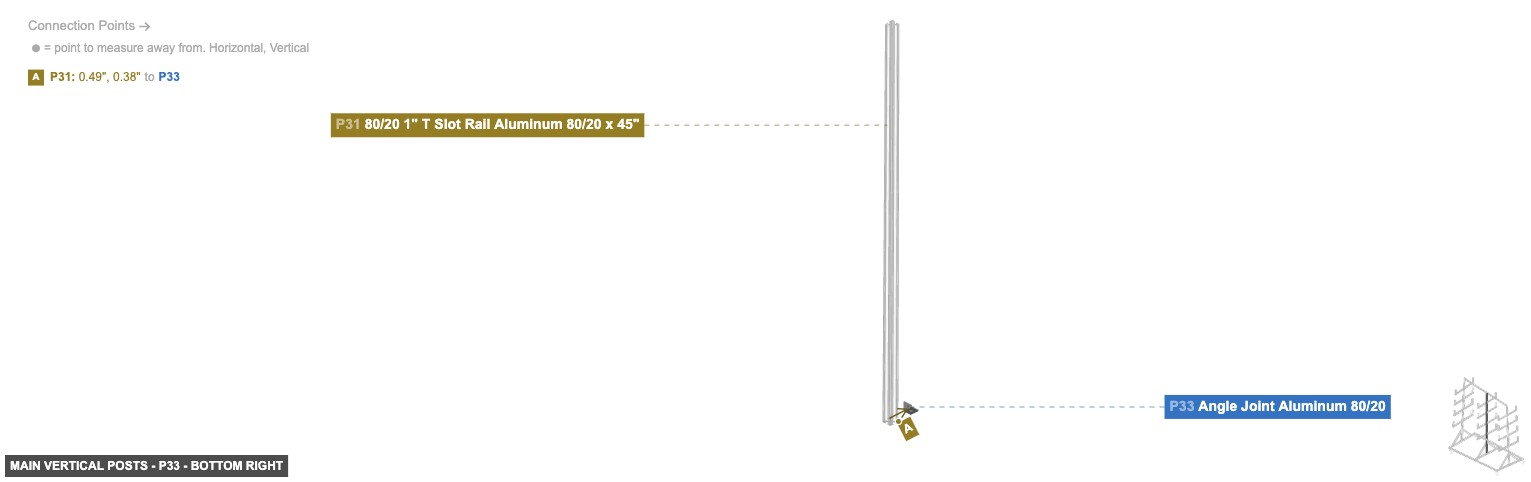
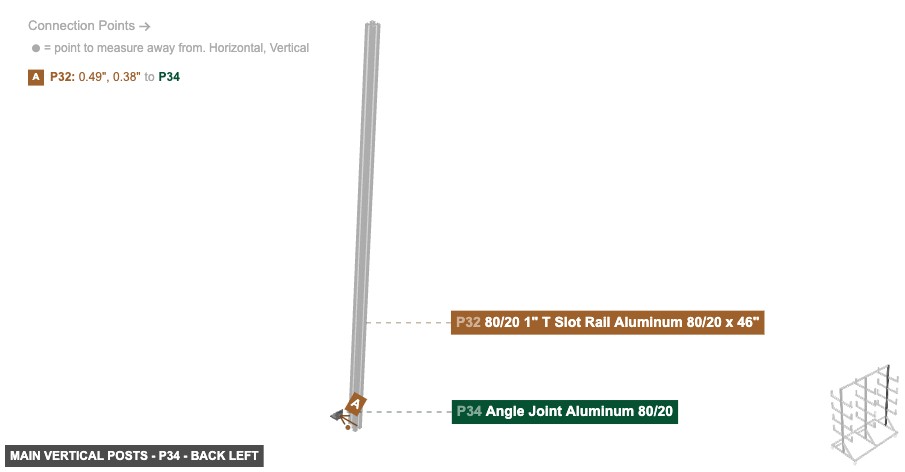
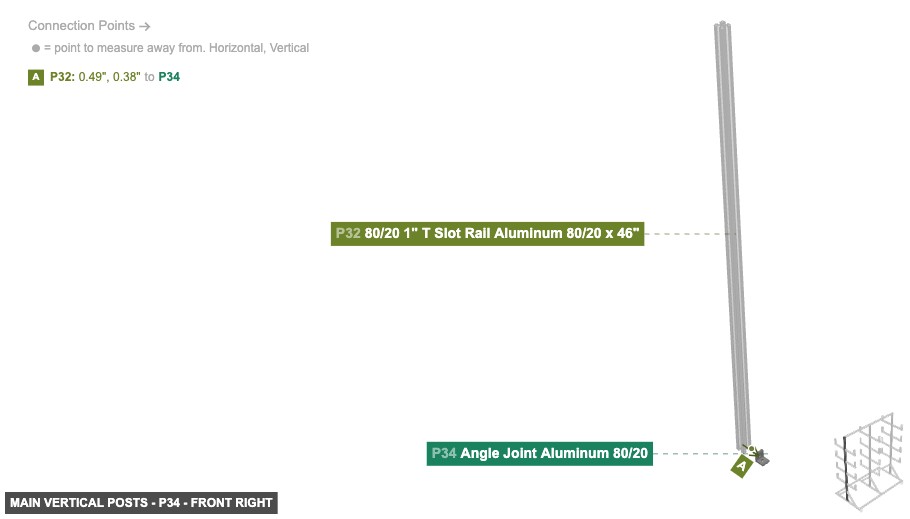
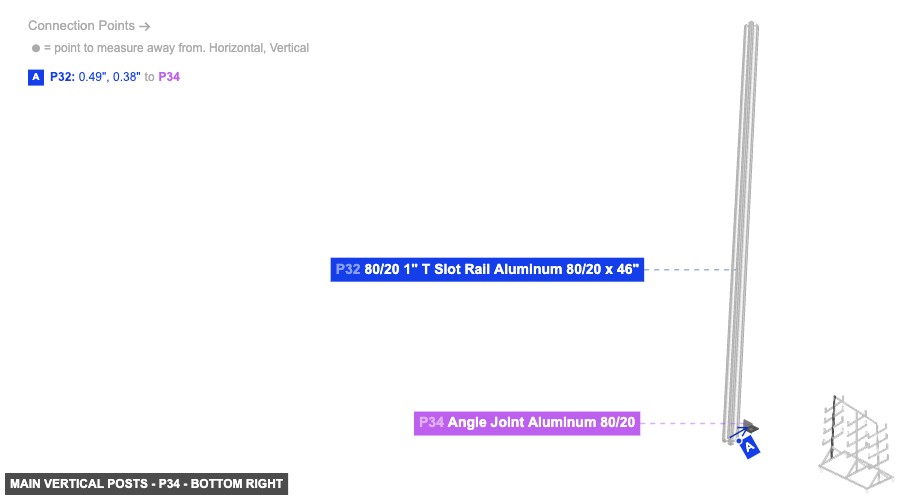
Attach the three long Vertical Posts (P15, P31, P32) to the Base Frame assembled in Group 1. Use Angle Joints (P14, P16) to connect P15 to P5. Use Angle Joints (P29, P33) to connect P31 to P11. Use Angle Joints (P30, P34) to connect P32 to P3. Attach Top End Caps (P170, P171) to the top 1" 80/20 End Holes of P15 and P32.


Creates the lower storage levels of the organizer.
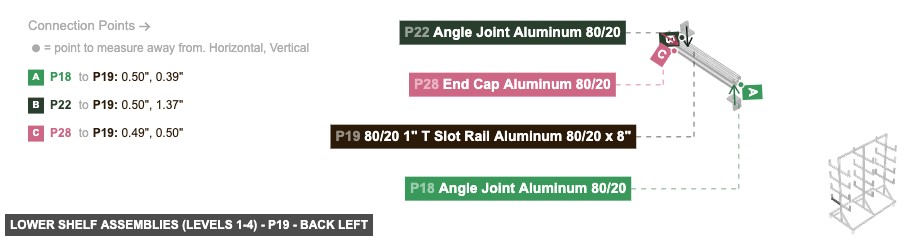
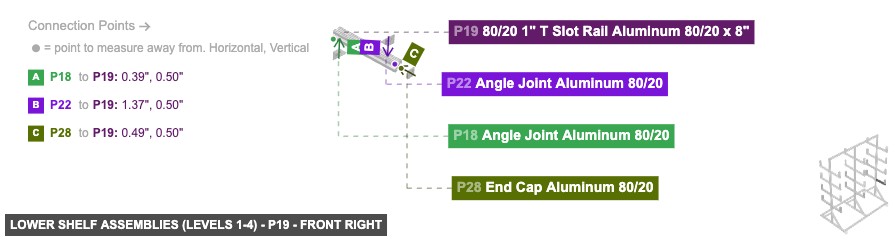
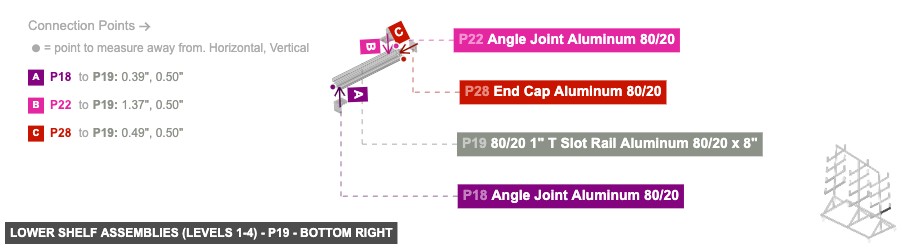
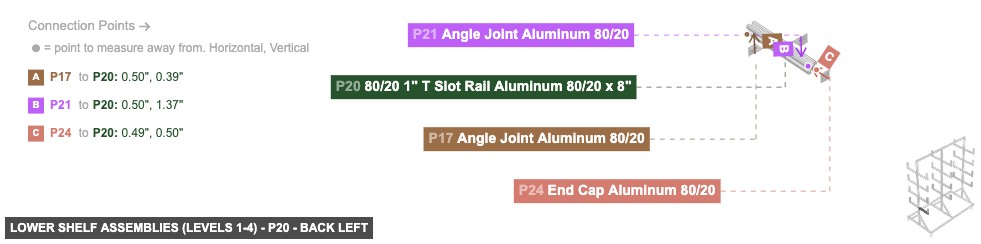
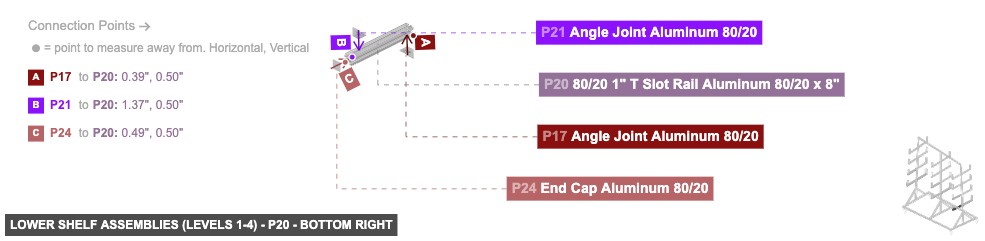
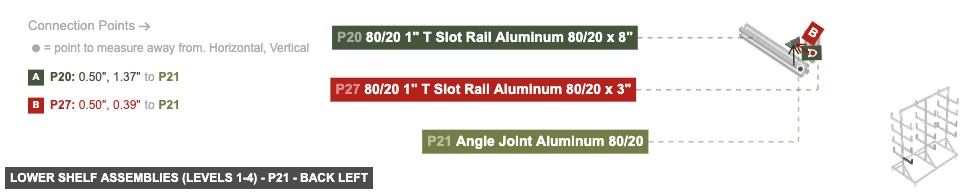
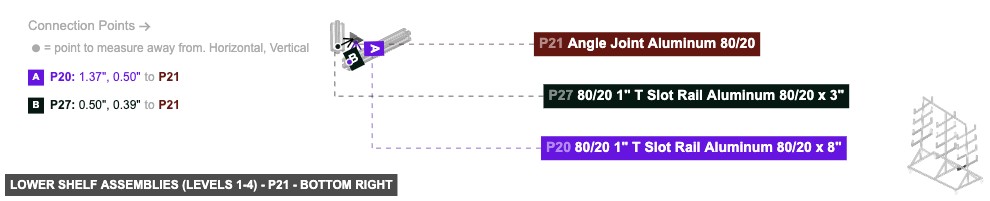
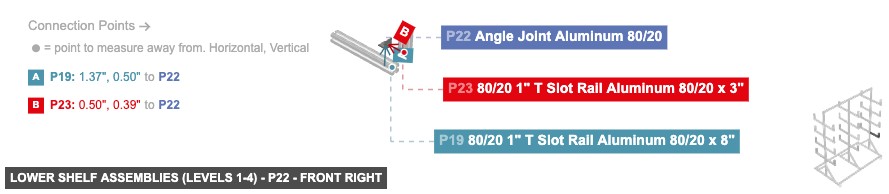
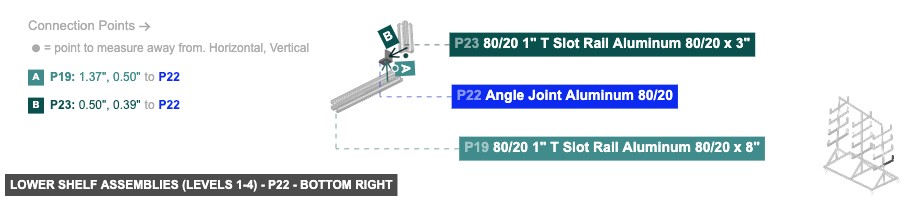
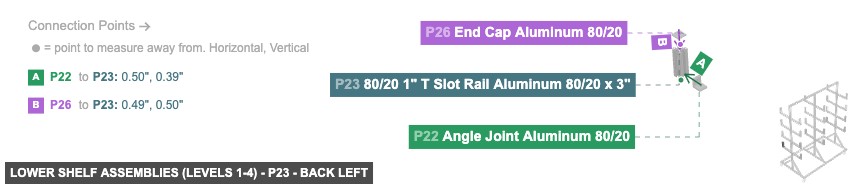
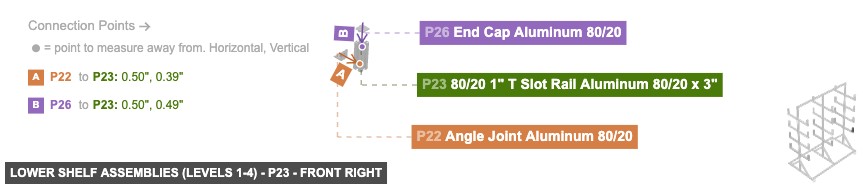
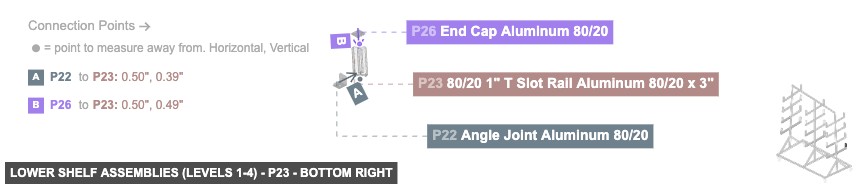
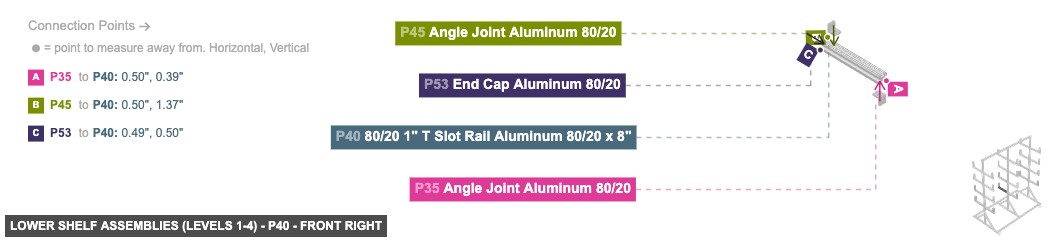
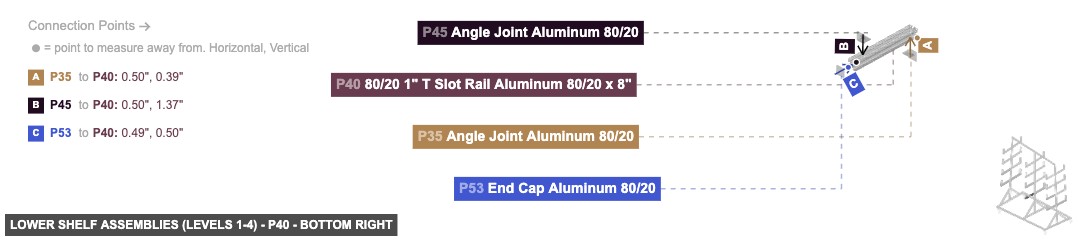
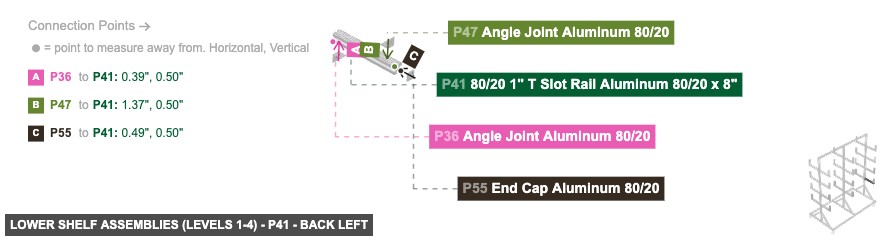
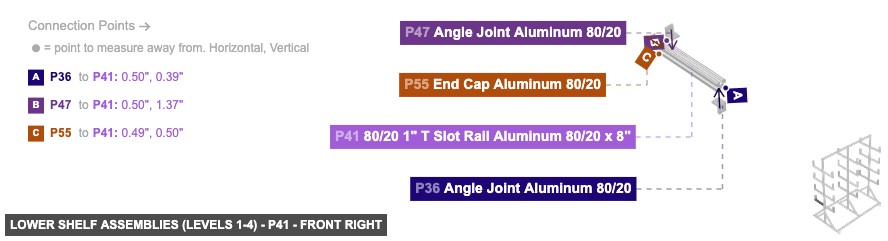
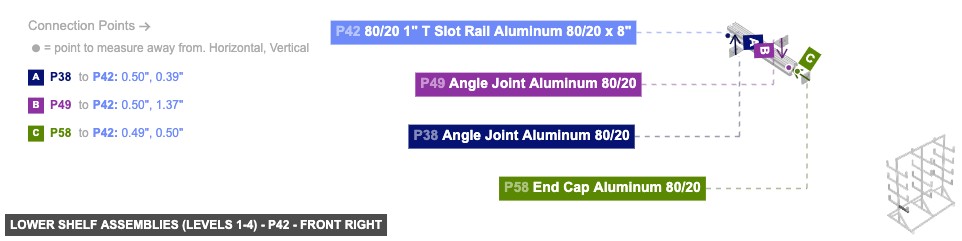
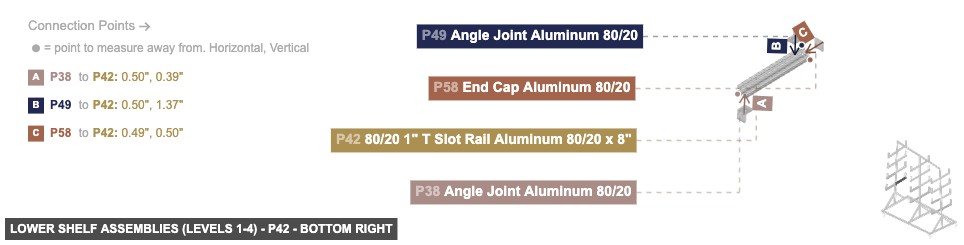
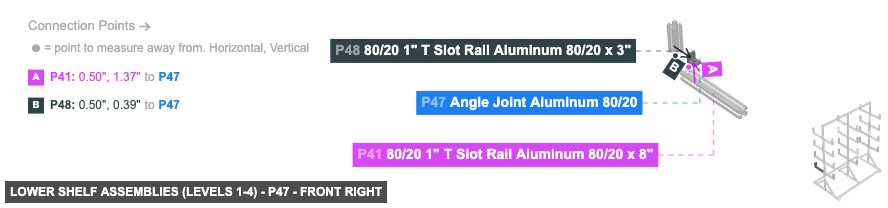
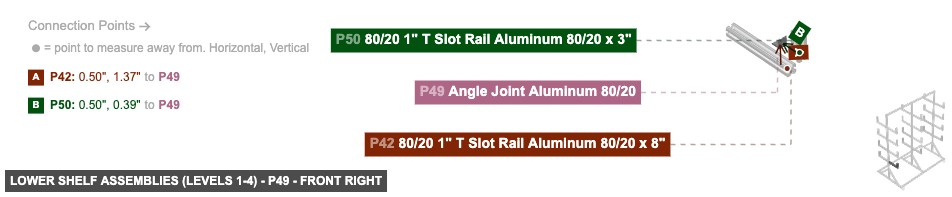
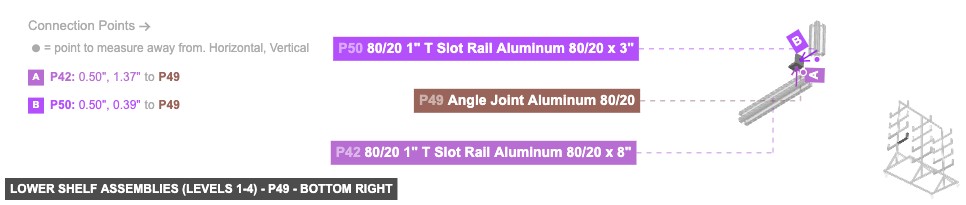
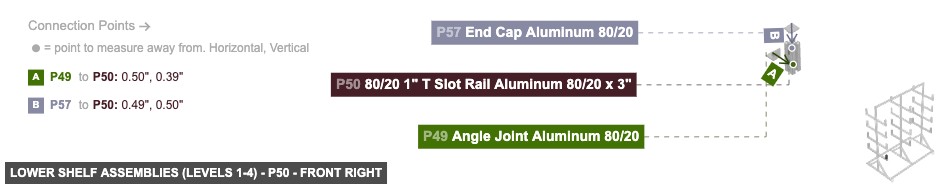
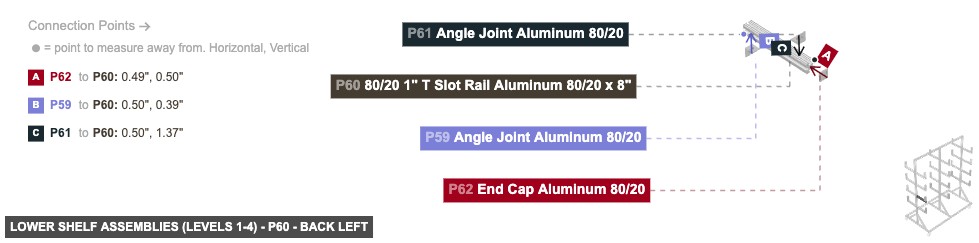
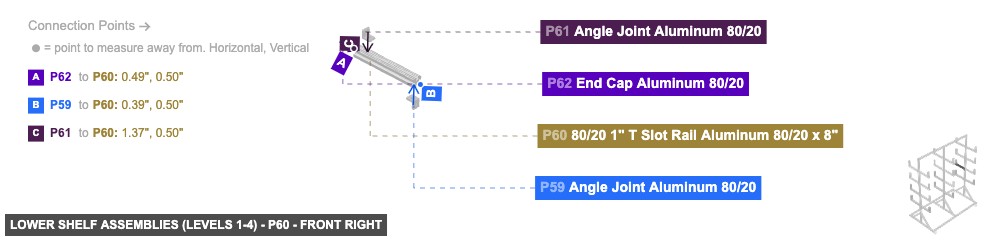
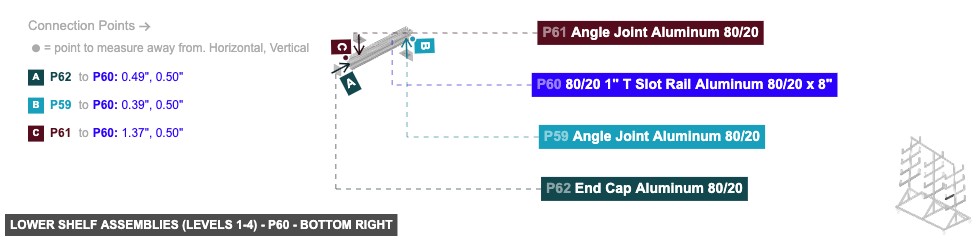
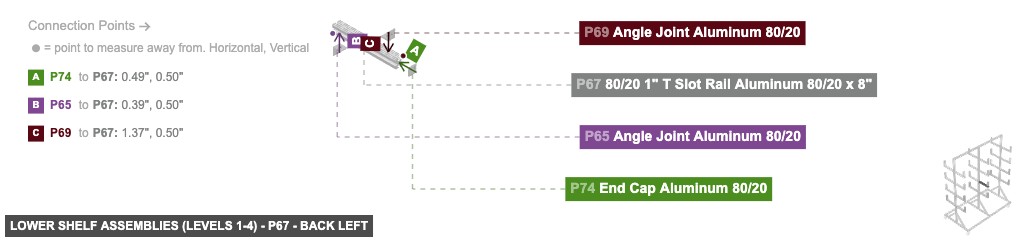
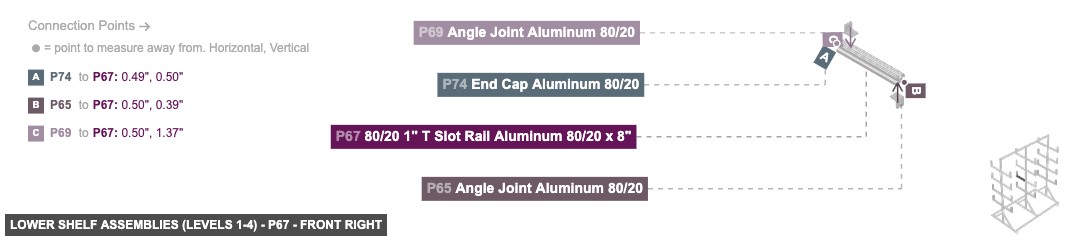
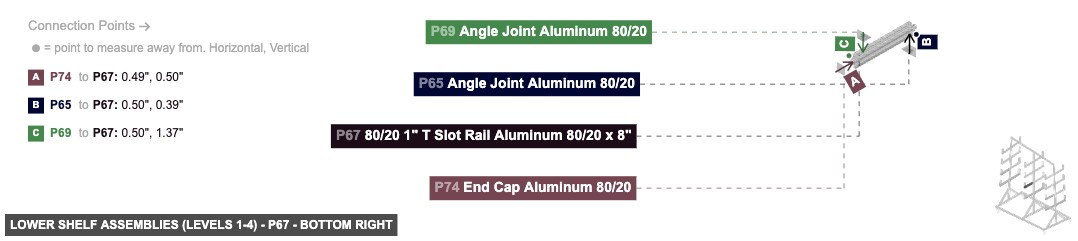
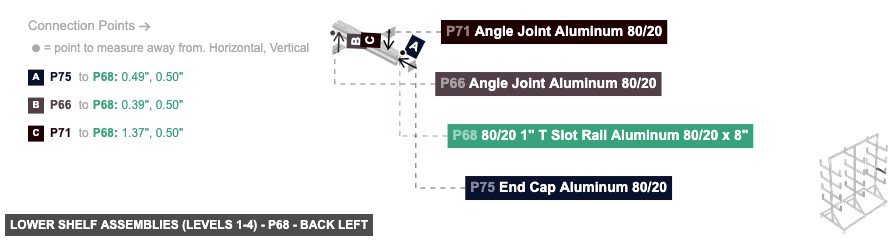
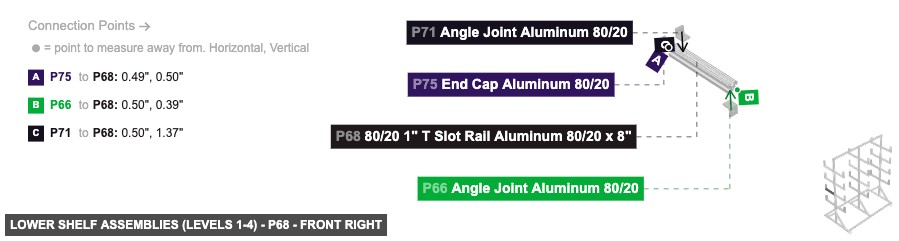
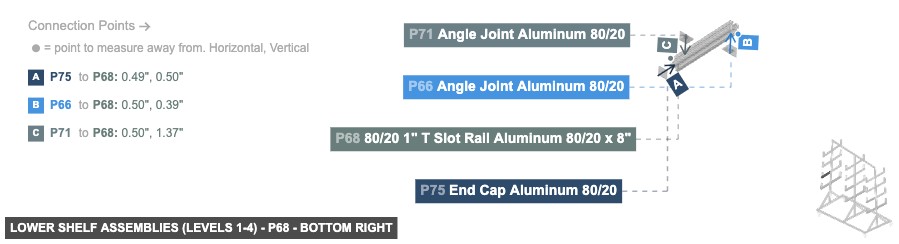
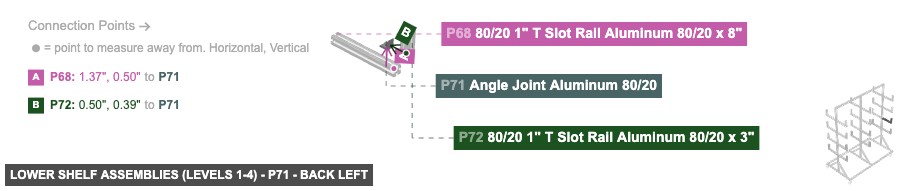
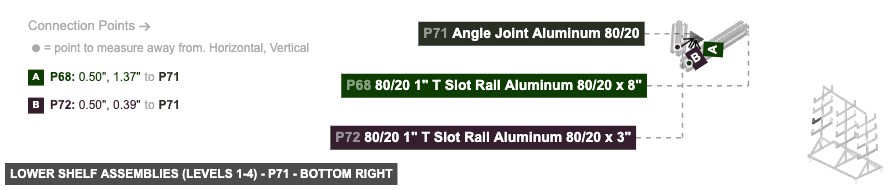
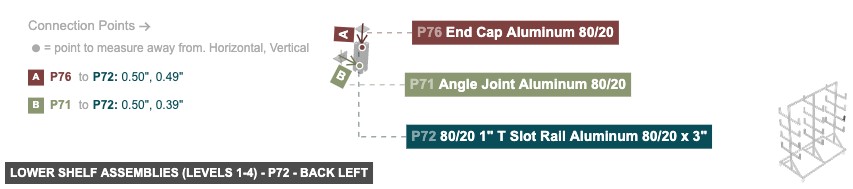
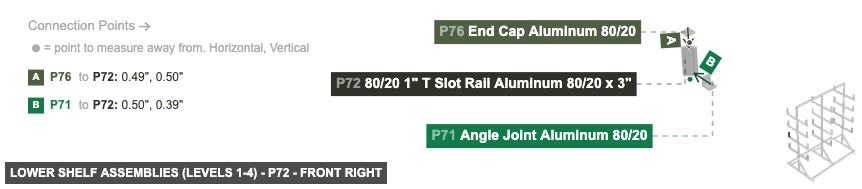
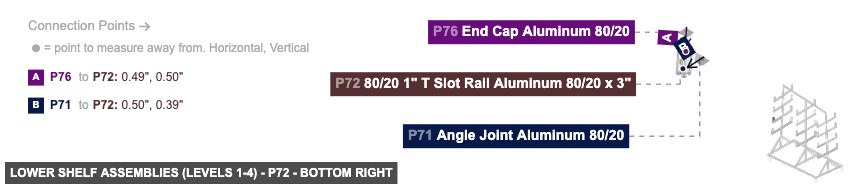
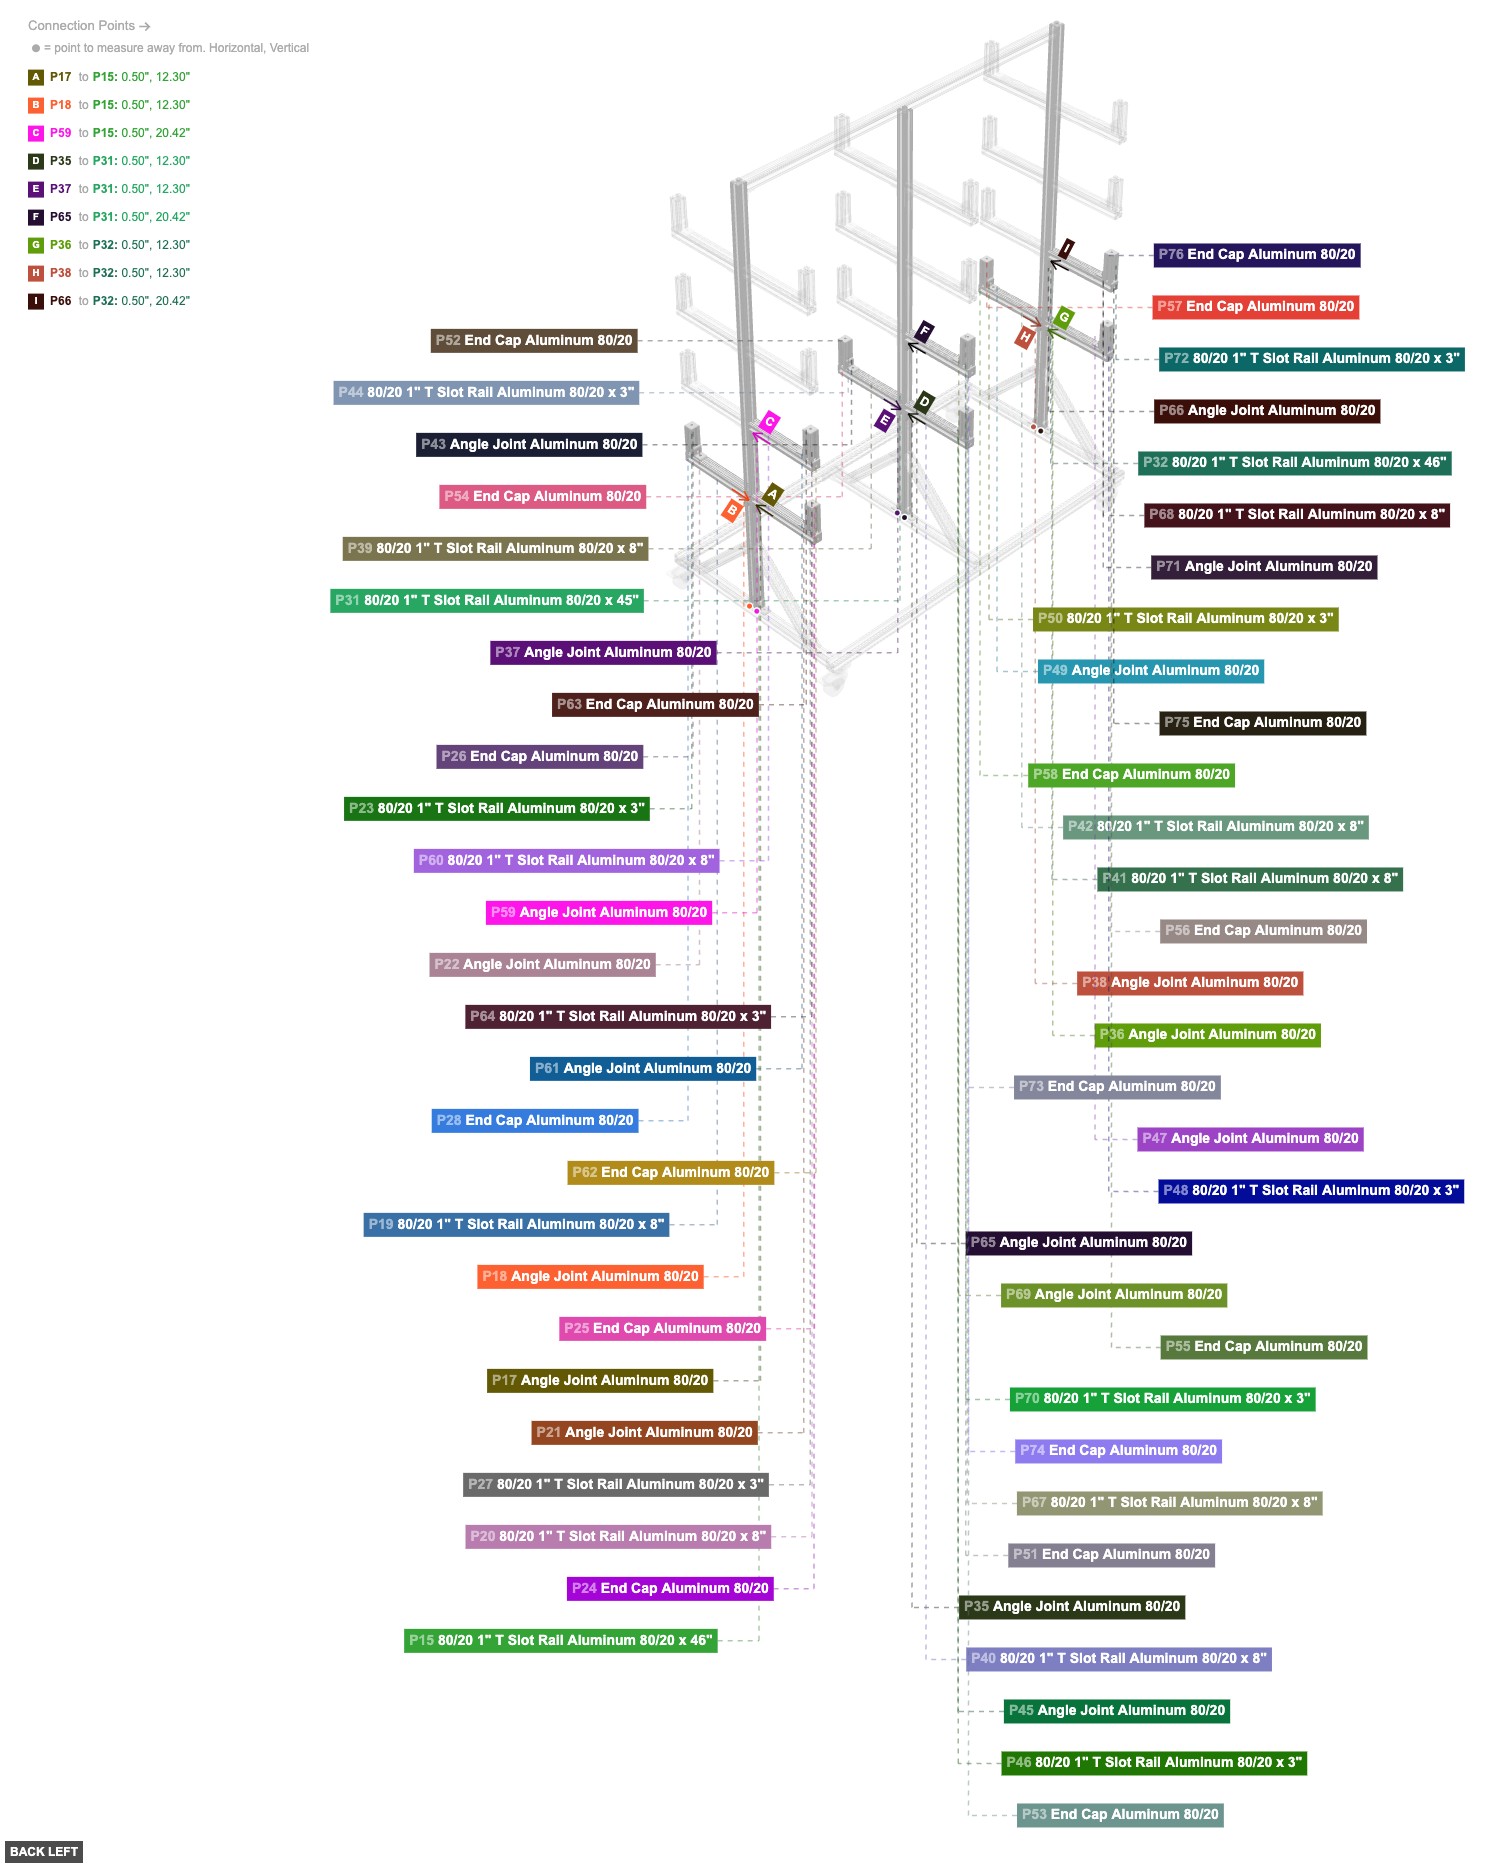
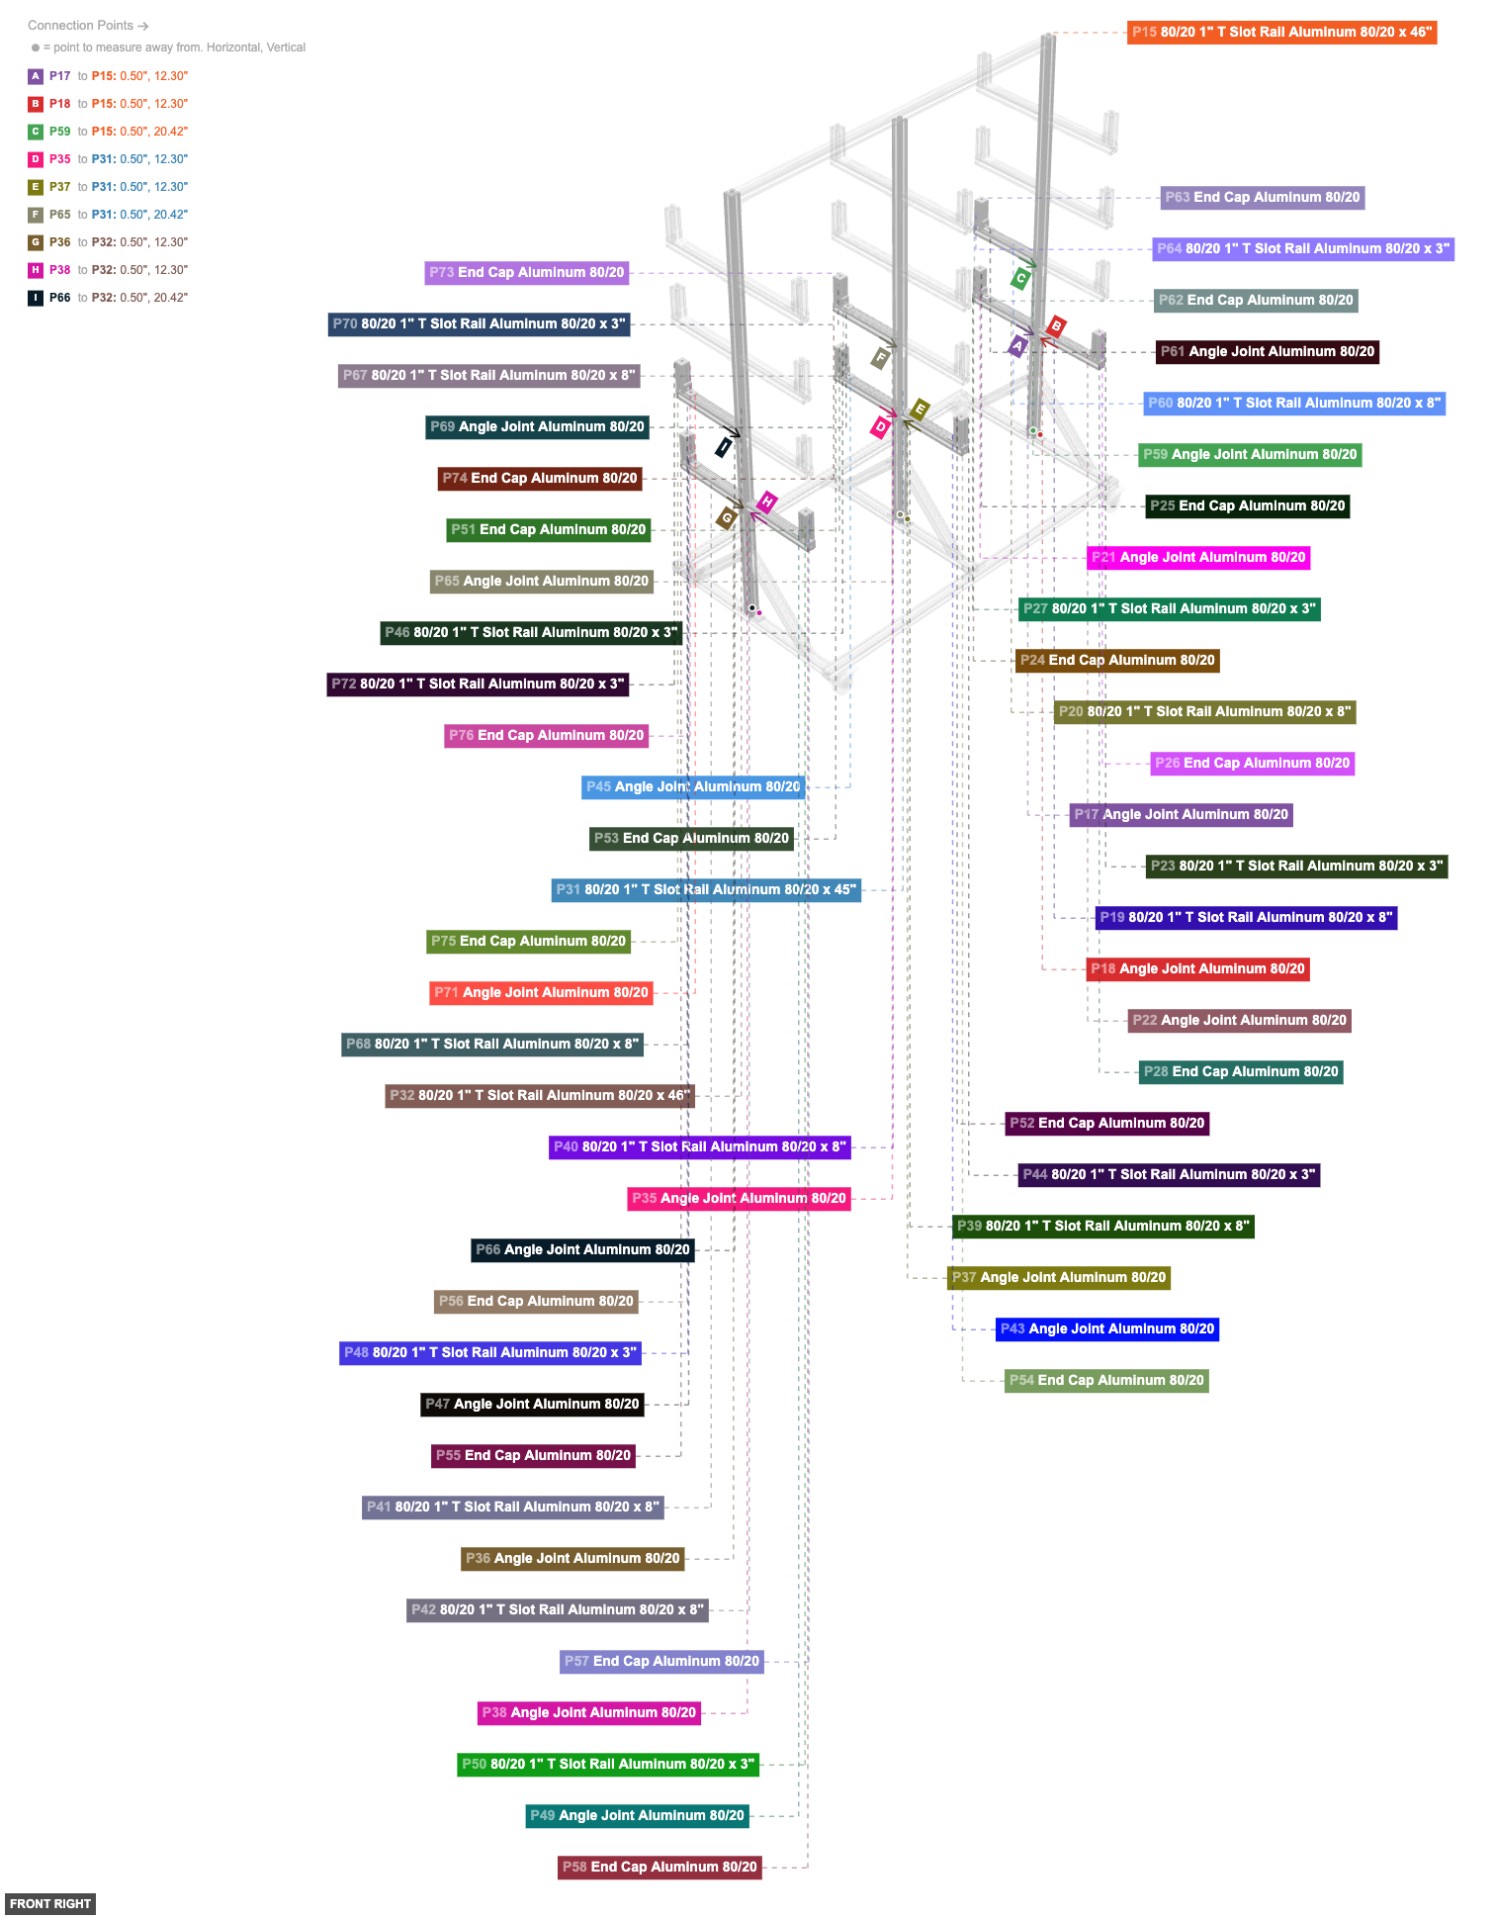
Assemble the four shelf units. Each unit typically consists of 8" T-Slot Rails and 3" T-Slot Rails connected by Angle Joints, with End Caps on open rail ends. (Unit 1: P17-P28; Unit 2: P35-P58; Unit 3: P59-P64; Unit 4: P65-P76). Assemble each unit individually first.


Creates the middle storage levels of the organizer.
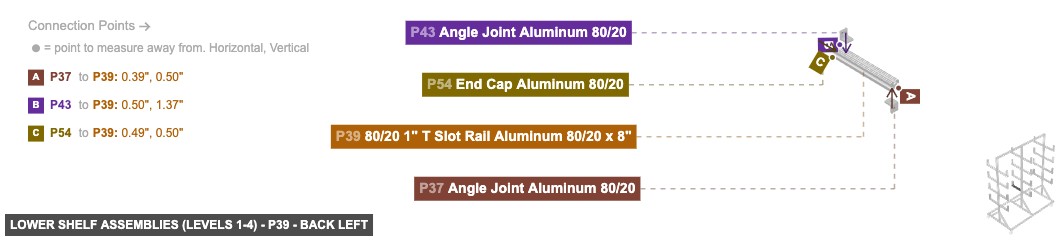
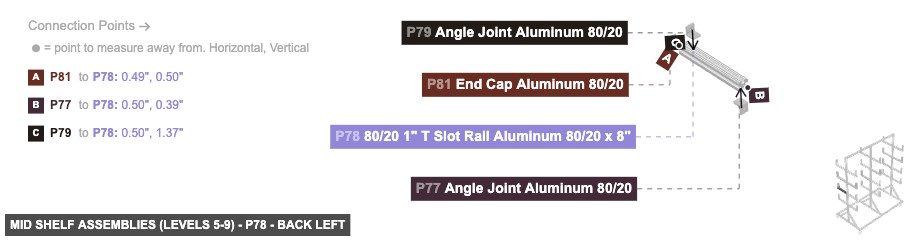
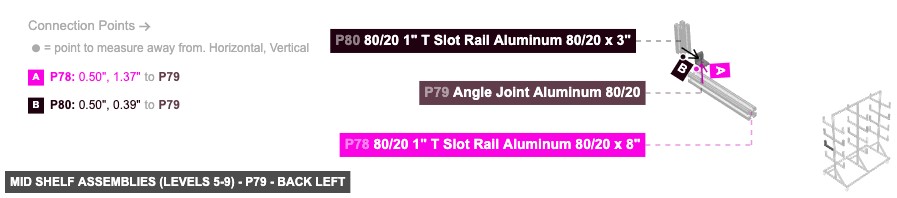
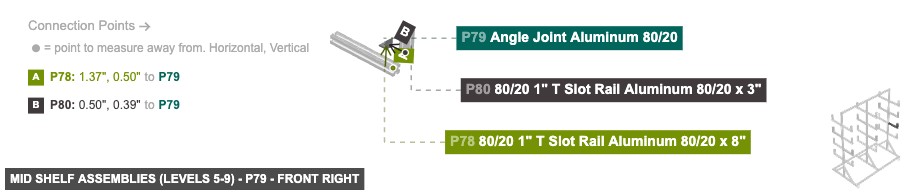
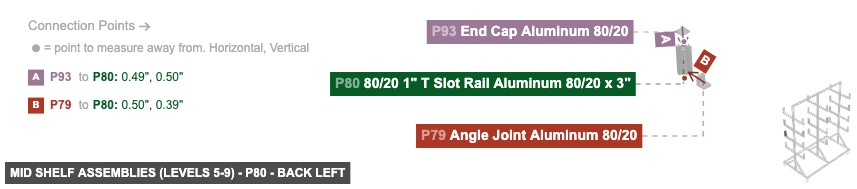
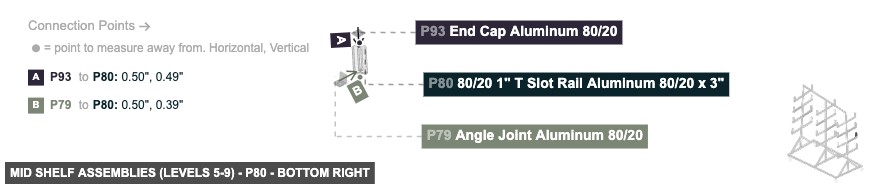
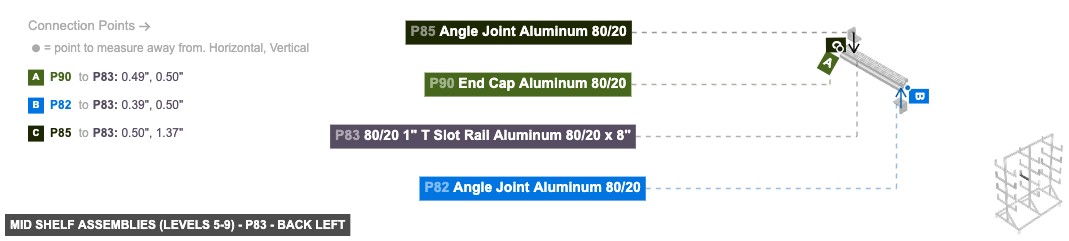
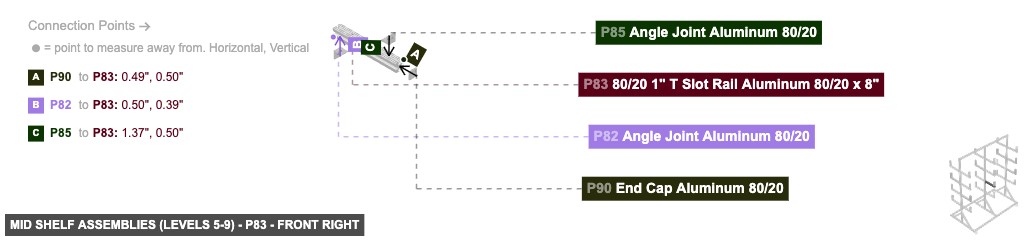
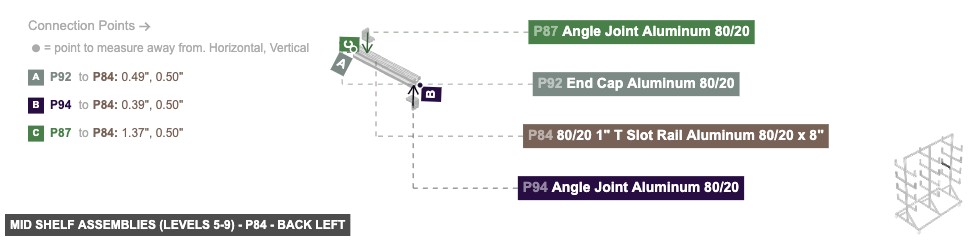
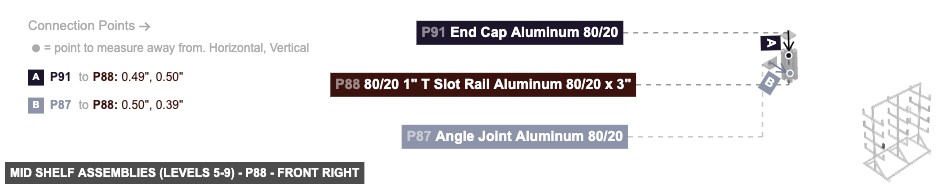
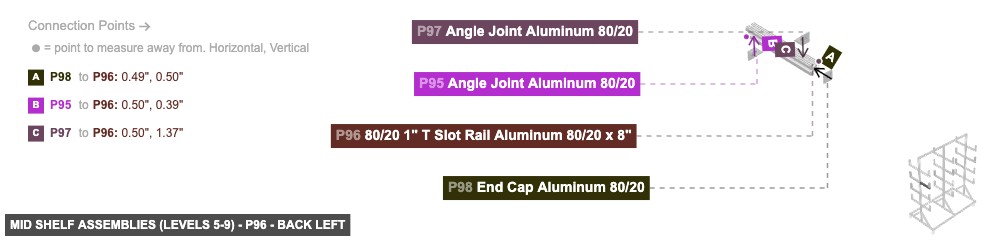
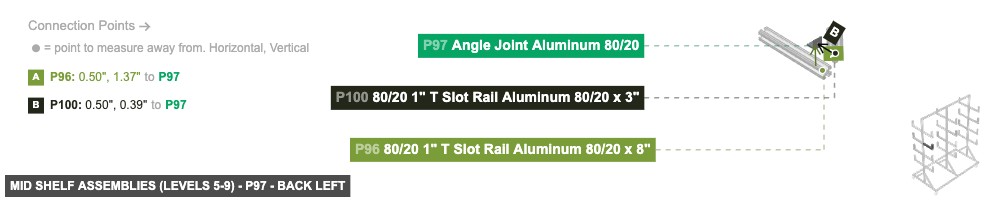
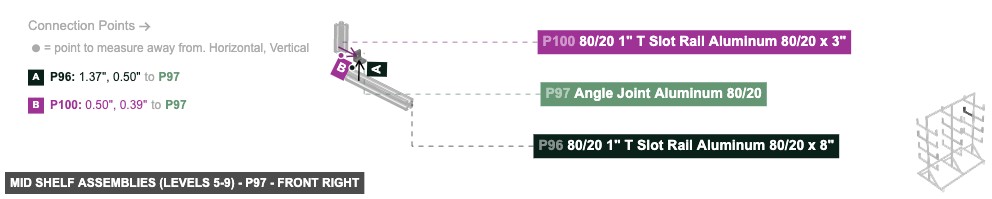
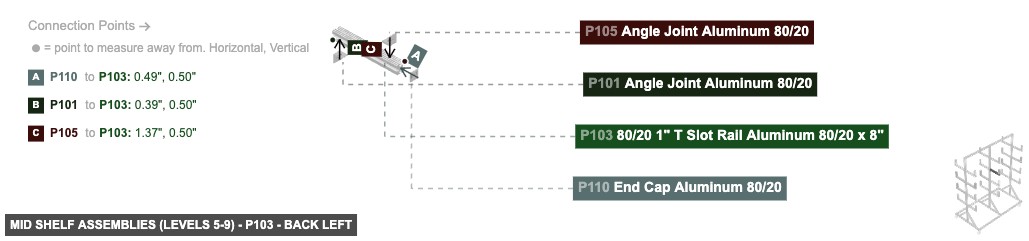
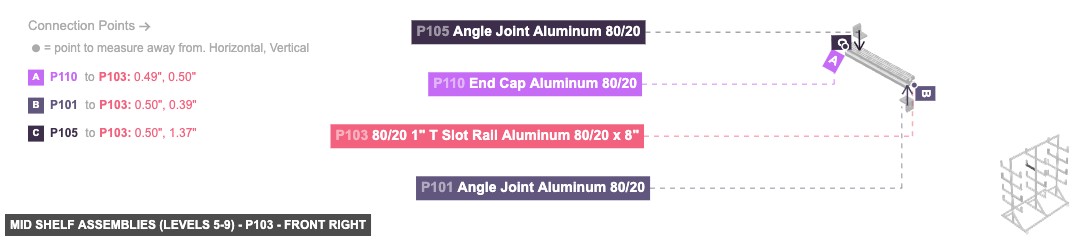
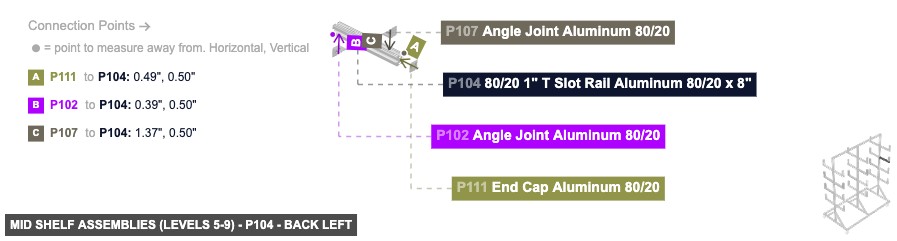
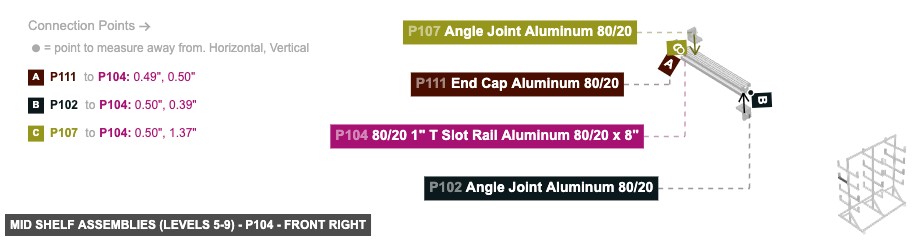
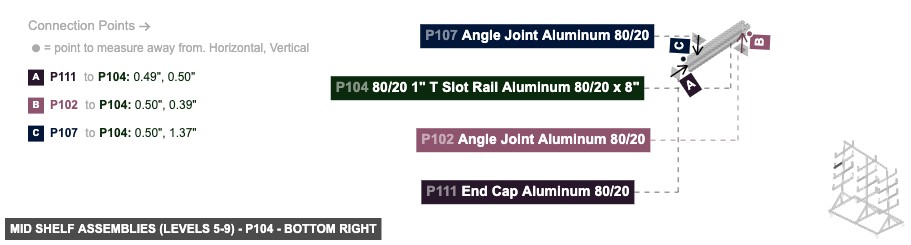
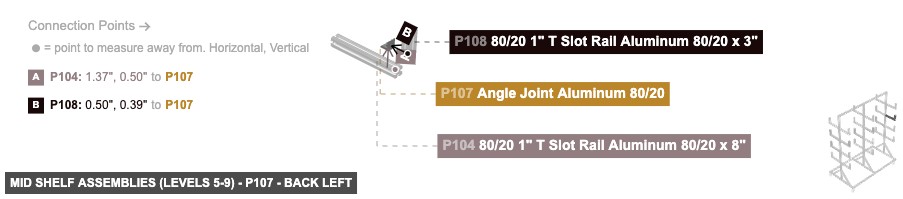
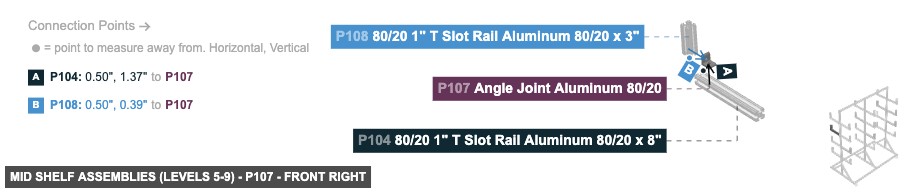
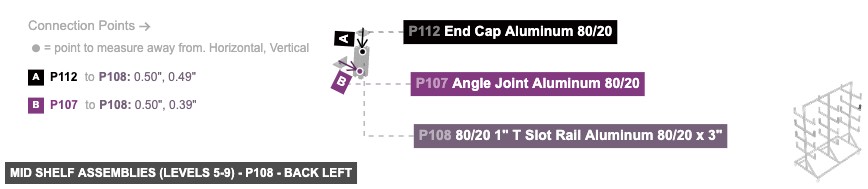
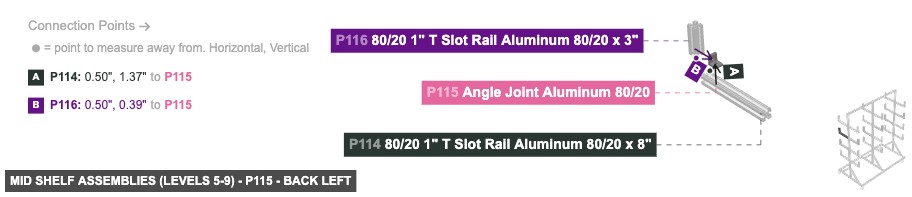
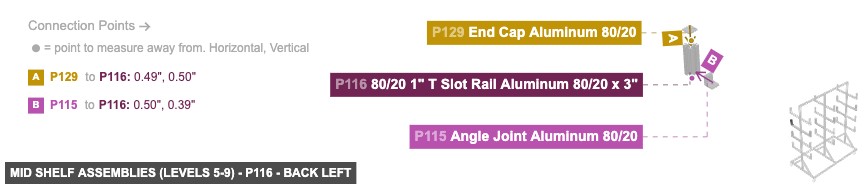
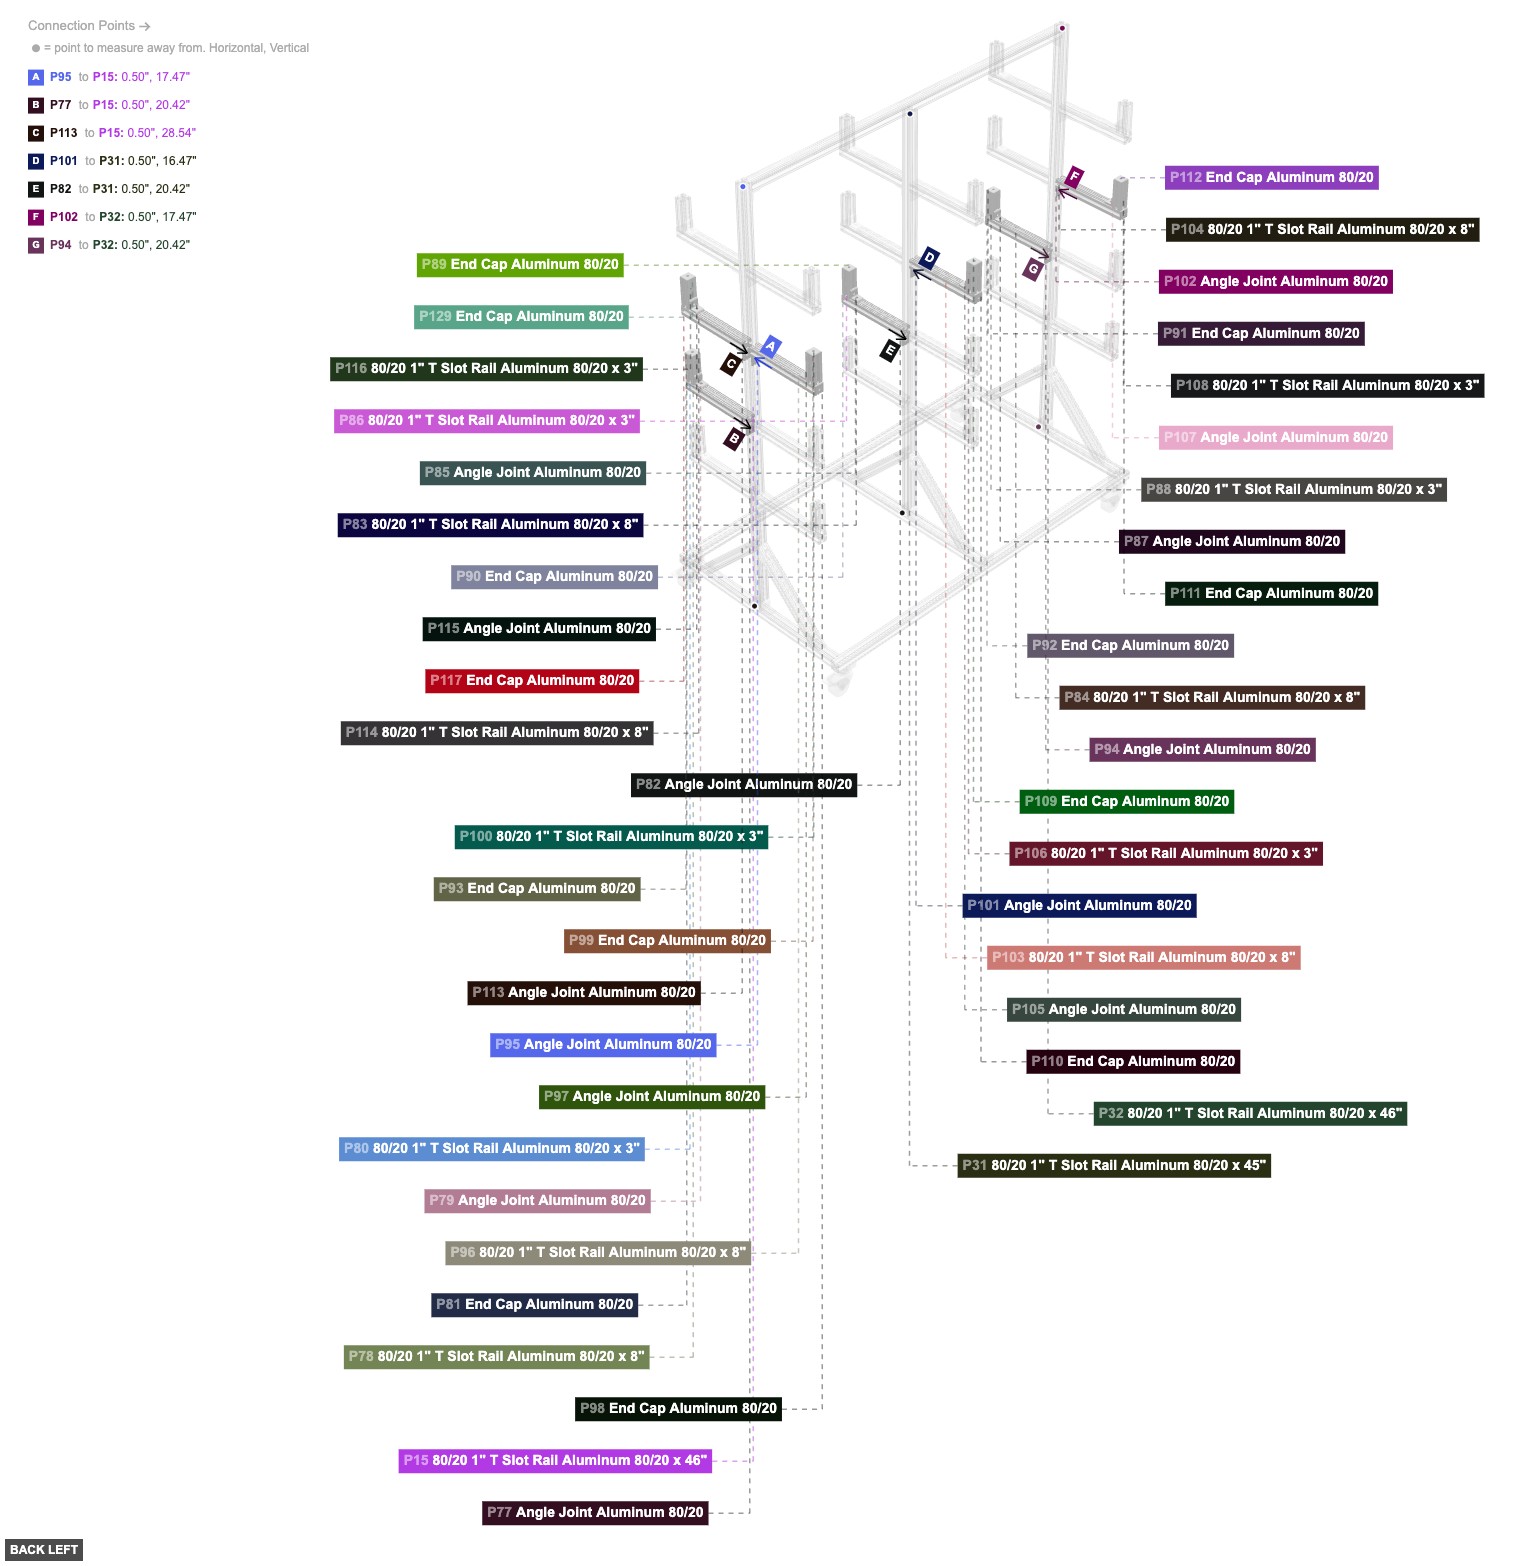
Assemble the five mid-level shelf units similarly to Group 3. Each unit typically consists of 8" T-Slot Rails and 3" T-Slot Rails connected by Angle Joints, with End Caps on open rail ends. (Unit 5: P77-P81, P93; Unit 6: P82-P92, P94; Unit 7: P95-P100; Unit 8: P101-P112; Unit 9: P113-P117, P129). Assemble each unit individually first.


Creates the upper storage levels of the organizer.
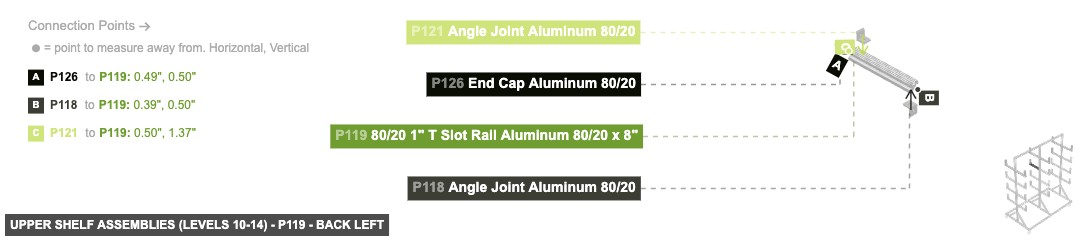
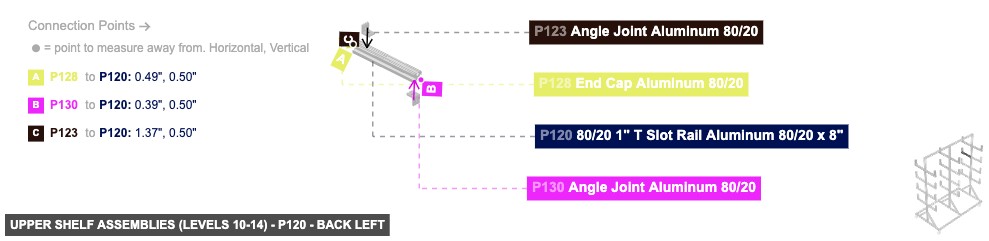
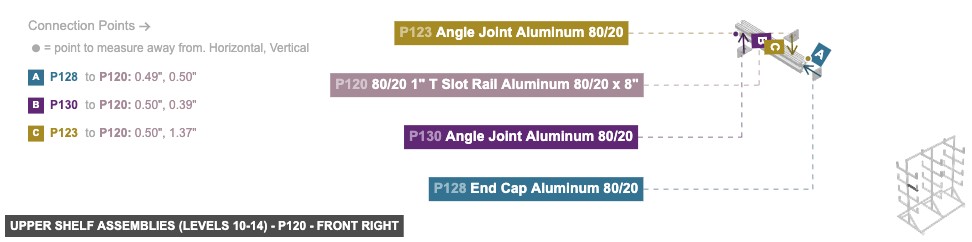
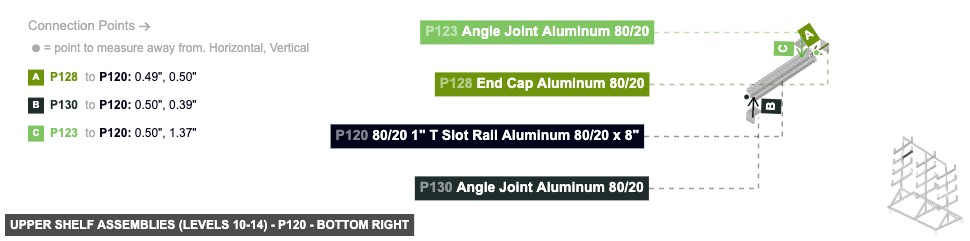
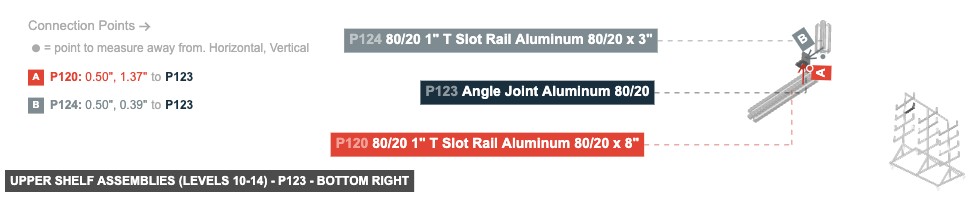
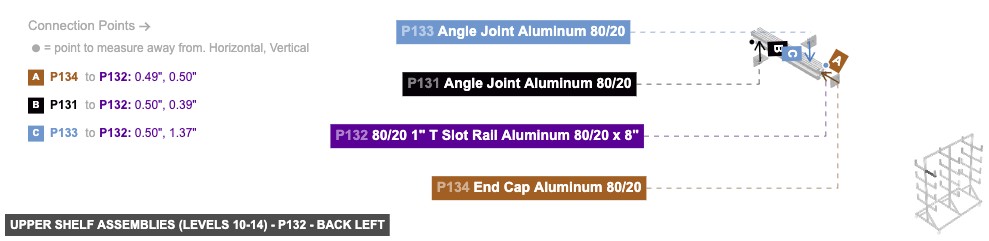
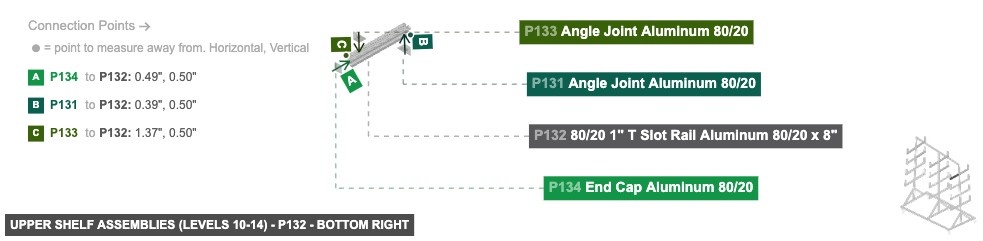
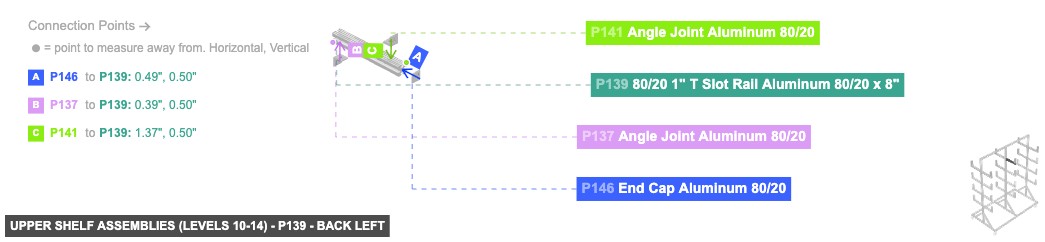
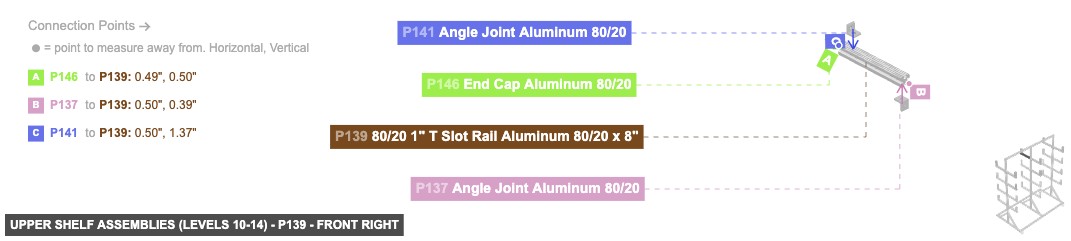
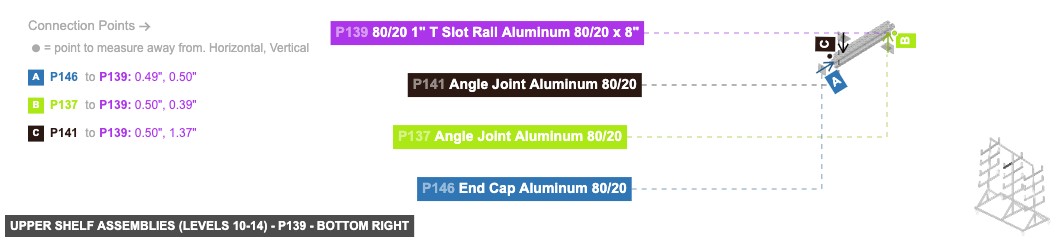
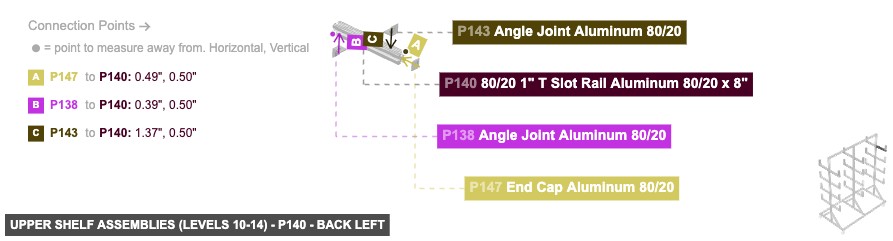
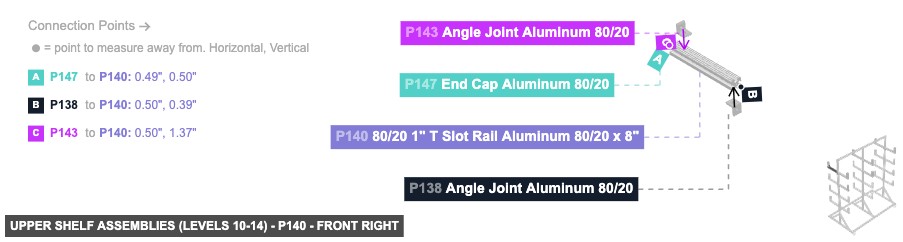
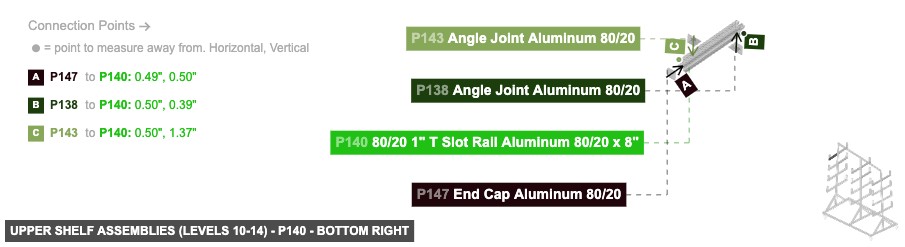
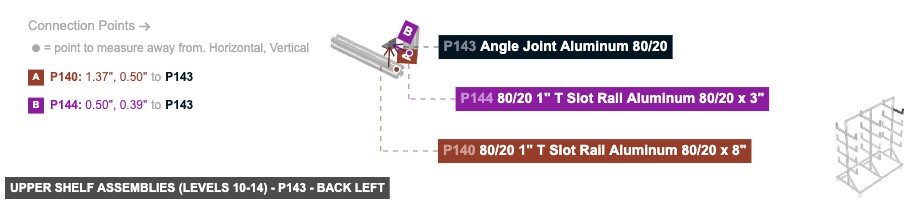
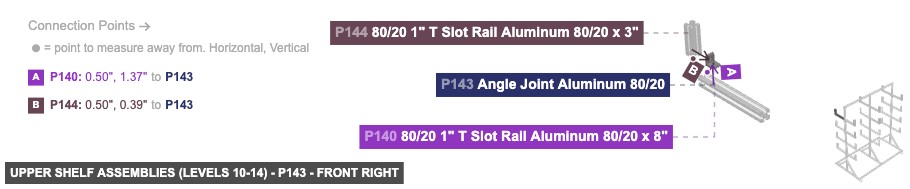
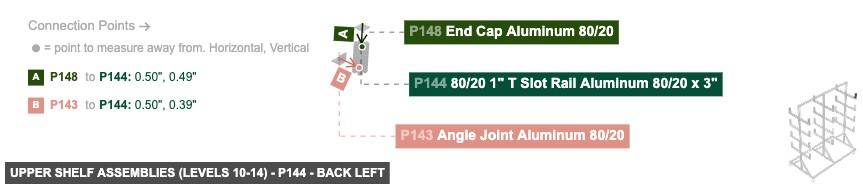
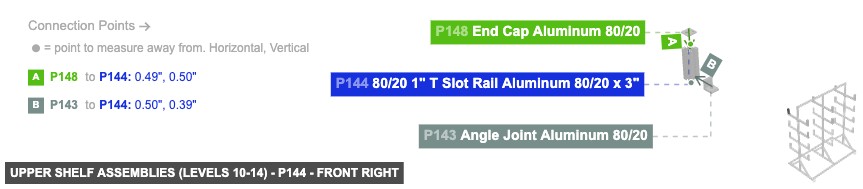
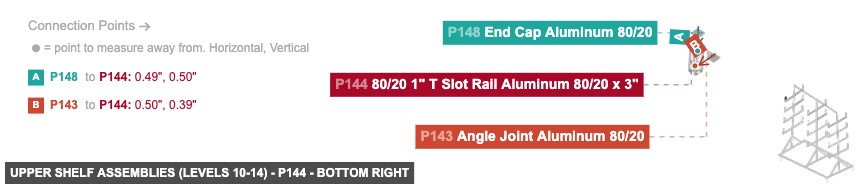
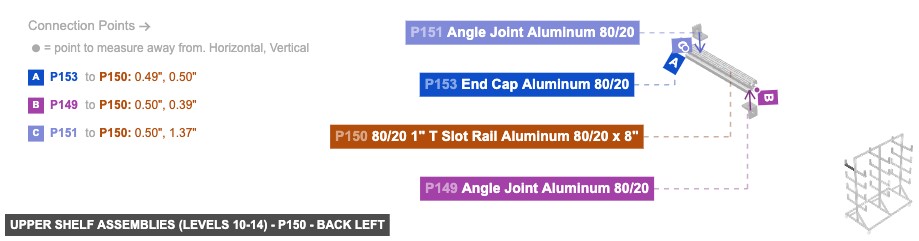
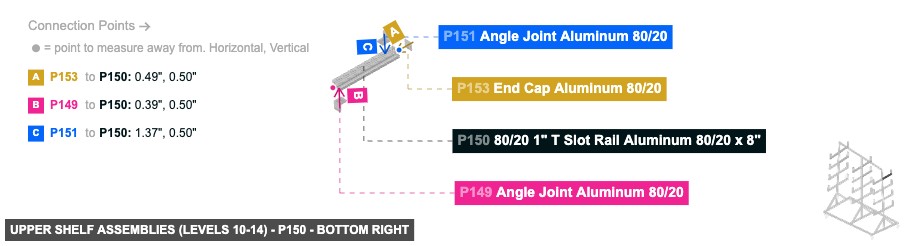
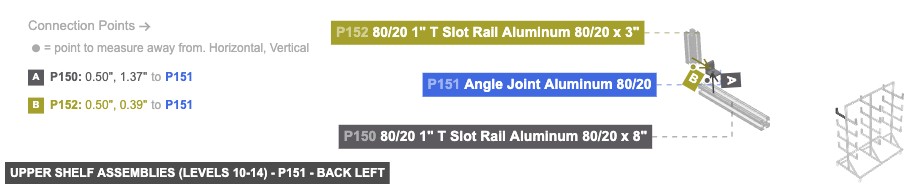
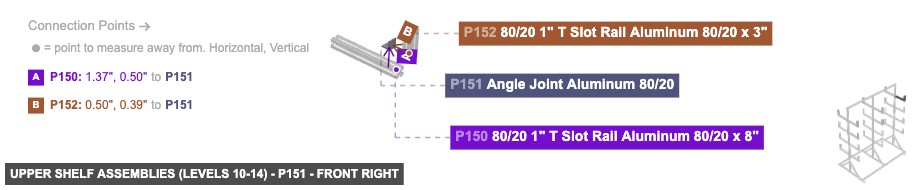
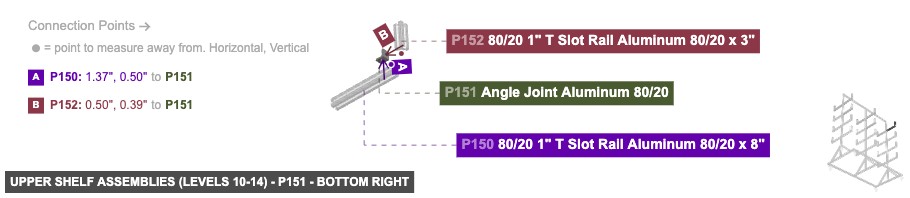
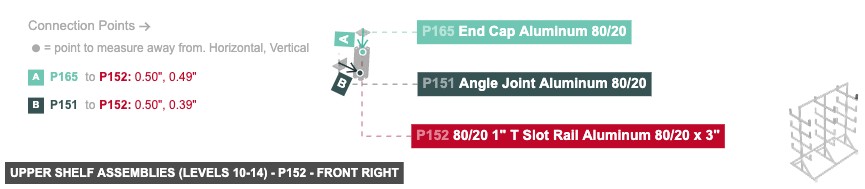
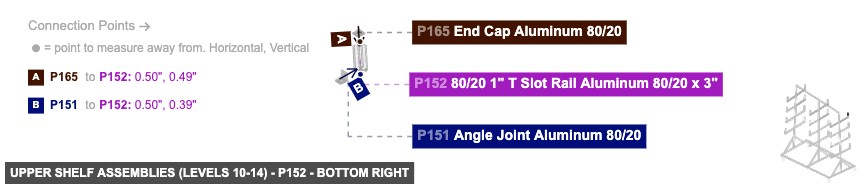
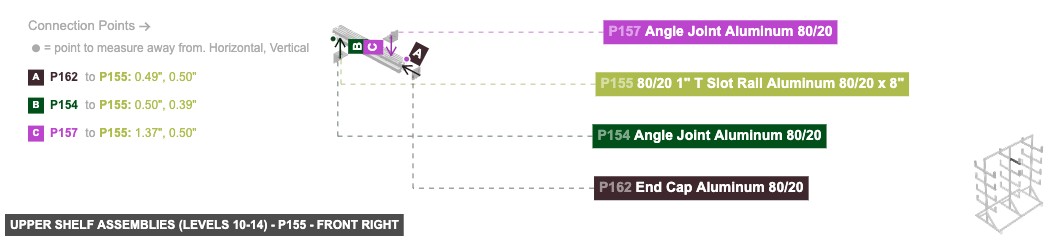
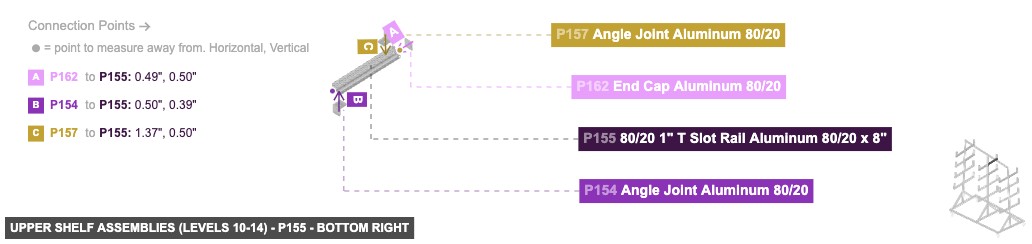
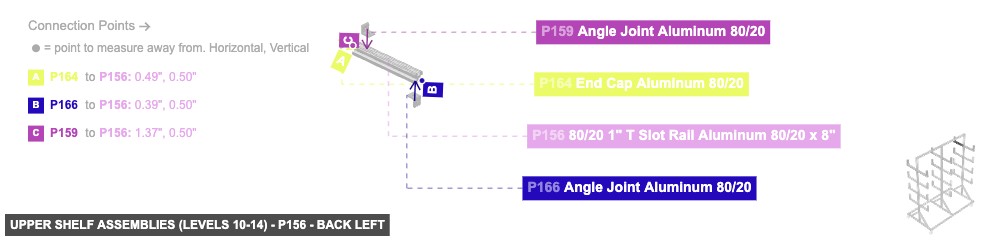
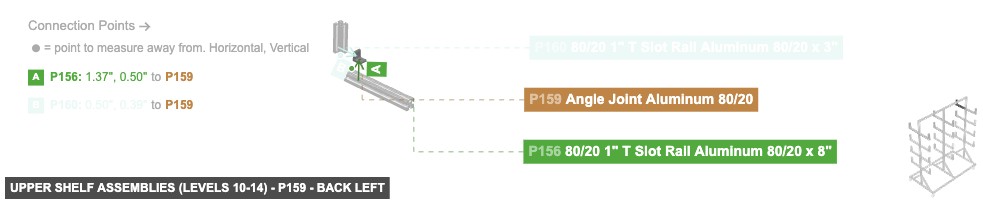
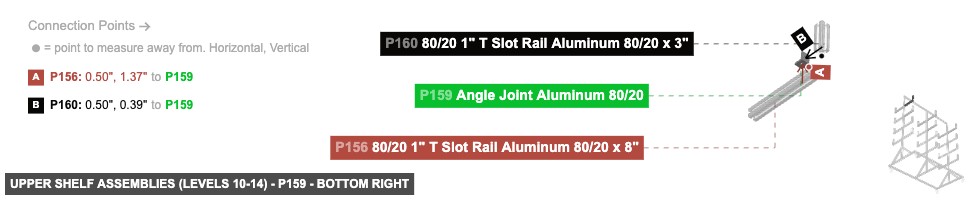
Assemble the five upper shelf units similarly to Group 3 & 4. Each unit typically consists of 8" T-Slot Rails and 3" T-Slot Rails connected by Angle Joints, with End Caps on open rail ends. (Unit 10: P118-P128, P130; Unit 11: P131-P136; Unit 12: P137-P148; Unit 13: P149-P153, P165; Unit 14: P154-P164, P166). Assemble each unit individually first.


Completes the top structure and adds stability with diagonal bracing.
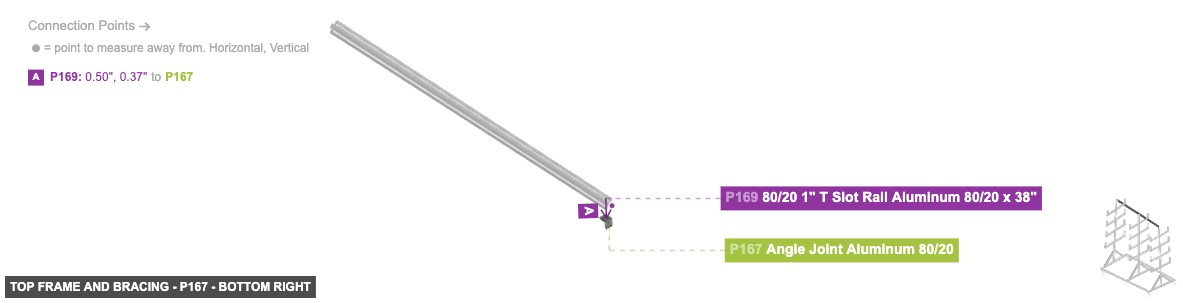
Attach the Top Rail (P169) between Vertical Posts P15 and P32 using Angle Joints (P167, P168). Install the Diagonal Braces (P176-P181).


Forms the bottom foundation of the organizer and provides mobility.
The completed base frame will support the main vertical posts (Group 2).


Provides the main vertical structure supporting all the shelves.
Attach the Vertical Posts securely to the Base Frame (Group 1). These posts will hold the shelf assemblies from Groups 3, 4, and 5.

Creates the lower storage levels of the organizer.
Attach these completed shelf assemblies between the Main Vertical Posts (Group 2) using the appropriate Angle Joints included in this group. Start attaching from the lowest position upwards.

Creates the middle storage levels of the organizer.
Attach these completed shelf assemblies between the Main Vertical Posts (Group 2) above the Group 3 assemblies, using the Angle Joints included in this group.


Creates the upper storage levels of the organizer.
Attach these completed shelf assemblies between the Main Vertical Posts (Group 2) above the Group 4 assemblies, using the Angle Joints included in this group.


Completes the top structure and adds stability with diagonal bracing.
Connect the Top Rail (P169) to the top of the Vertical Posts (Group 2). Attach the Diagonal Braces (P176-P181) between the lower sections of the Vertical Posts (Group 2) and the Base Frame rails (Group 1) to enhance structural rigidity.